Installation Guide
This guide provides step-by-step instructions for installing Uniconnect on a Debian-based Linux distribution (e.g., Debian 12, Ubuntu 22.04). The installation uses an automated script to provision the Docker environment, followed by an interactive web-based setup wizard that walks you through licensing, configuration, and verification.
Recommended System Requirements
Resource Recommended Processor 2 vCPU RAM 4 GB Storage 50 GB For full minimum vs. recommended specs, supported OS versions, and network/port requirements, see the System Requirements page.
1. Run the Installation Script
To begin, execute the following command with root privileges on your server. This script provisions the Docker environment and prepares the system for setup.
curl -fsSL https://get.uniconnect.ai -o /tmp/x && chmod +x /tmp/x && /tmp/x
The script will automatically check system requirements, then prompt you to choose an installation method.
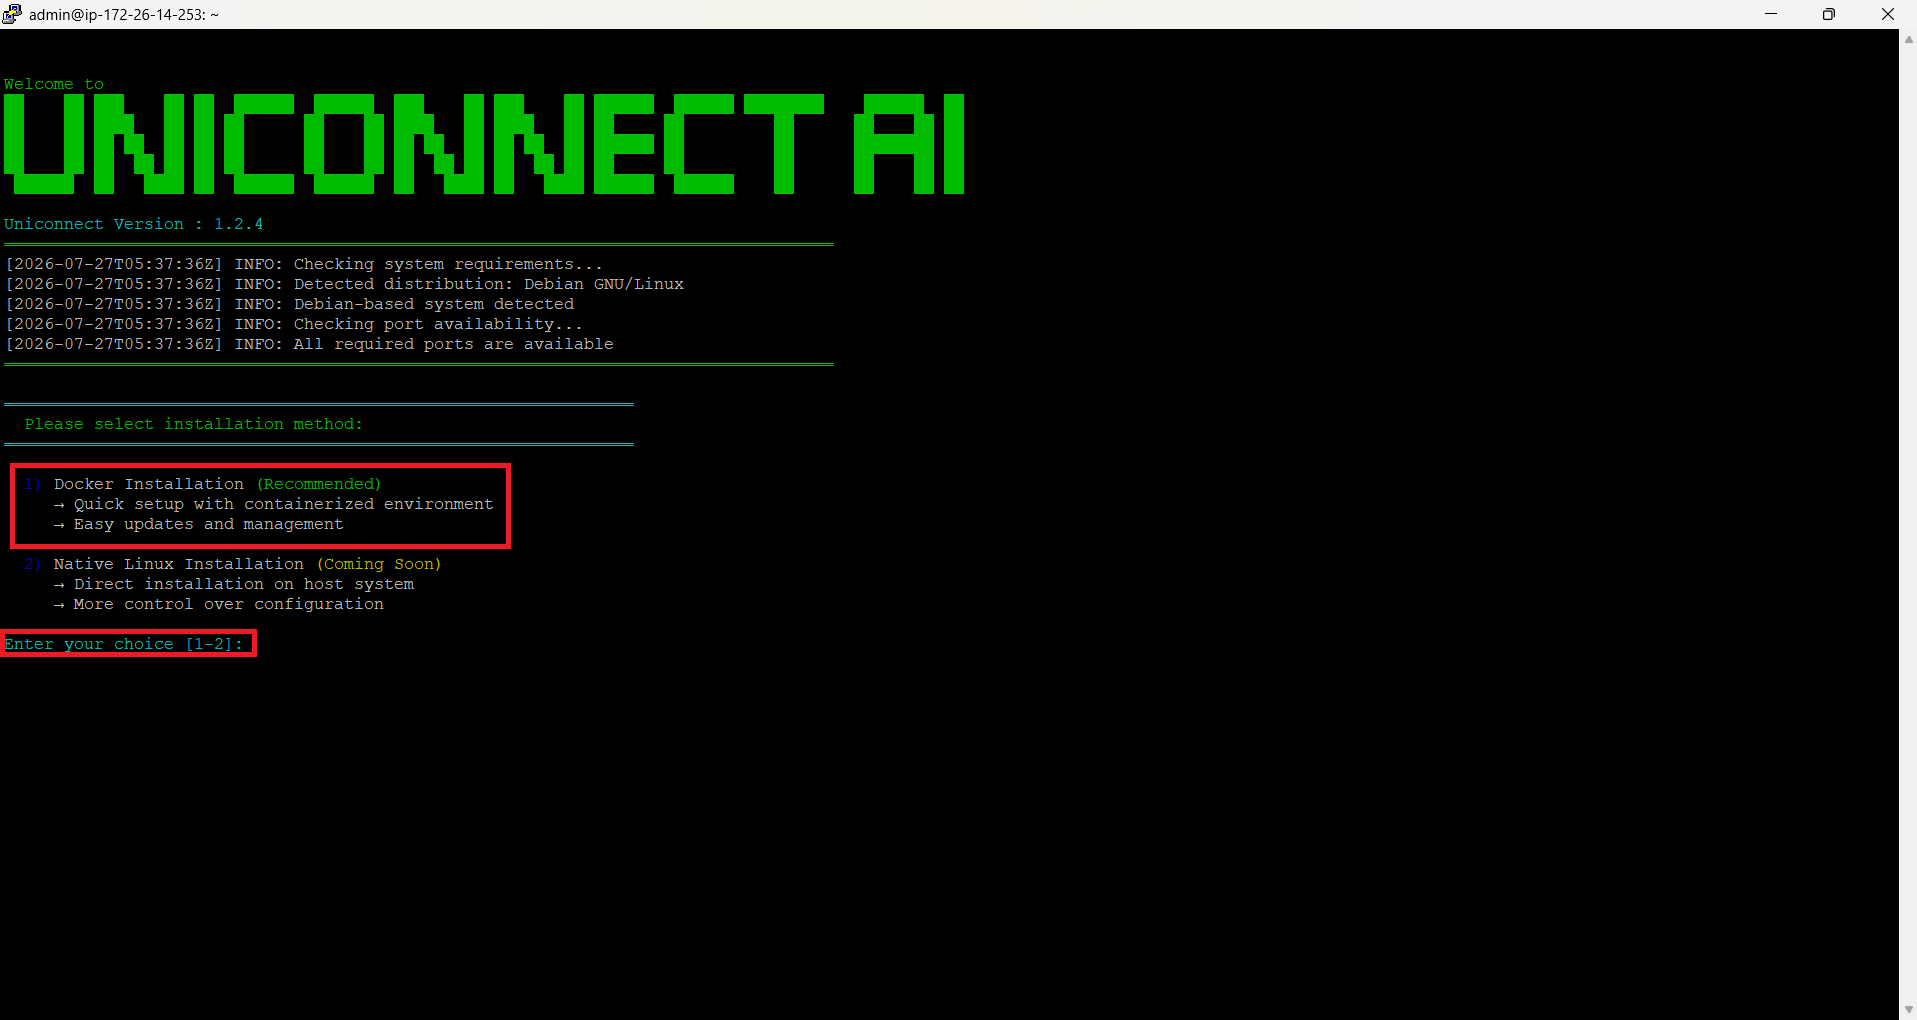
Select 1) Docker Installation (Recommended) to continue.
2. Wait for Background Setup to Complete
Once the installation method is confirmed, the script finishes preparing your environment. On completion, it prints the URLs you'll use to access the Uniconnect web setup wizard.
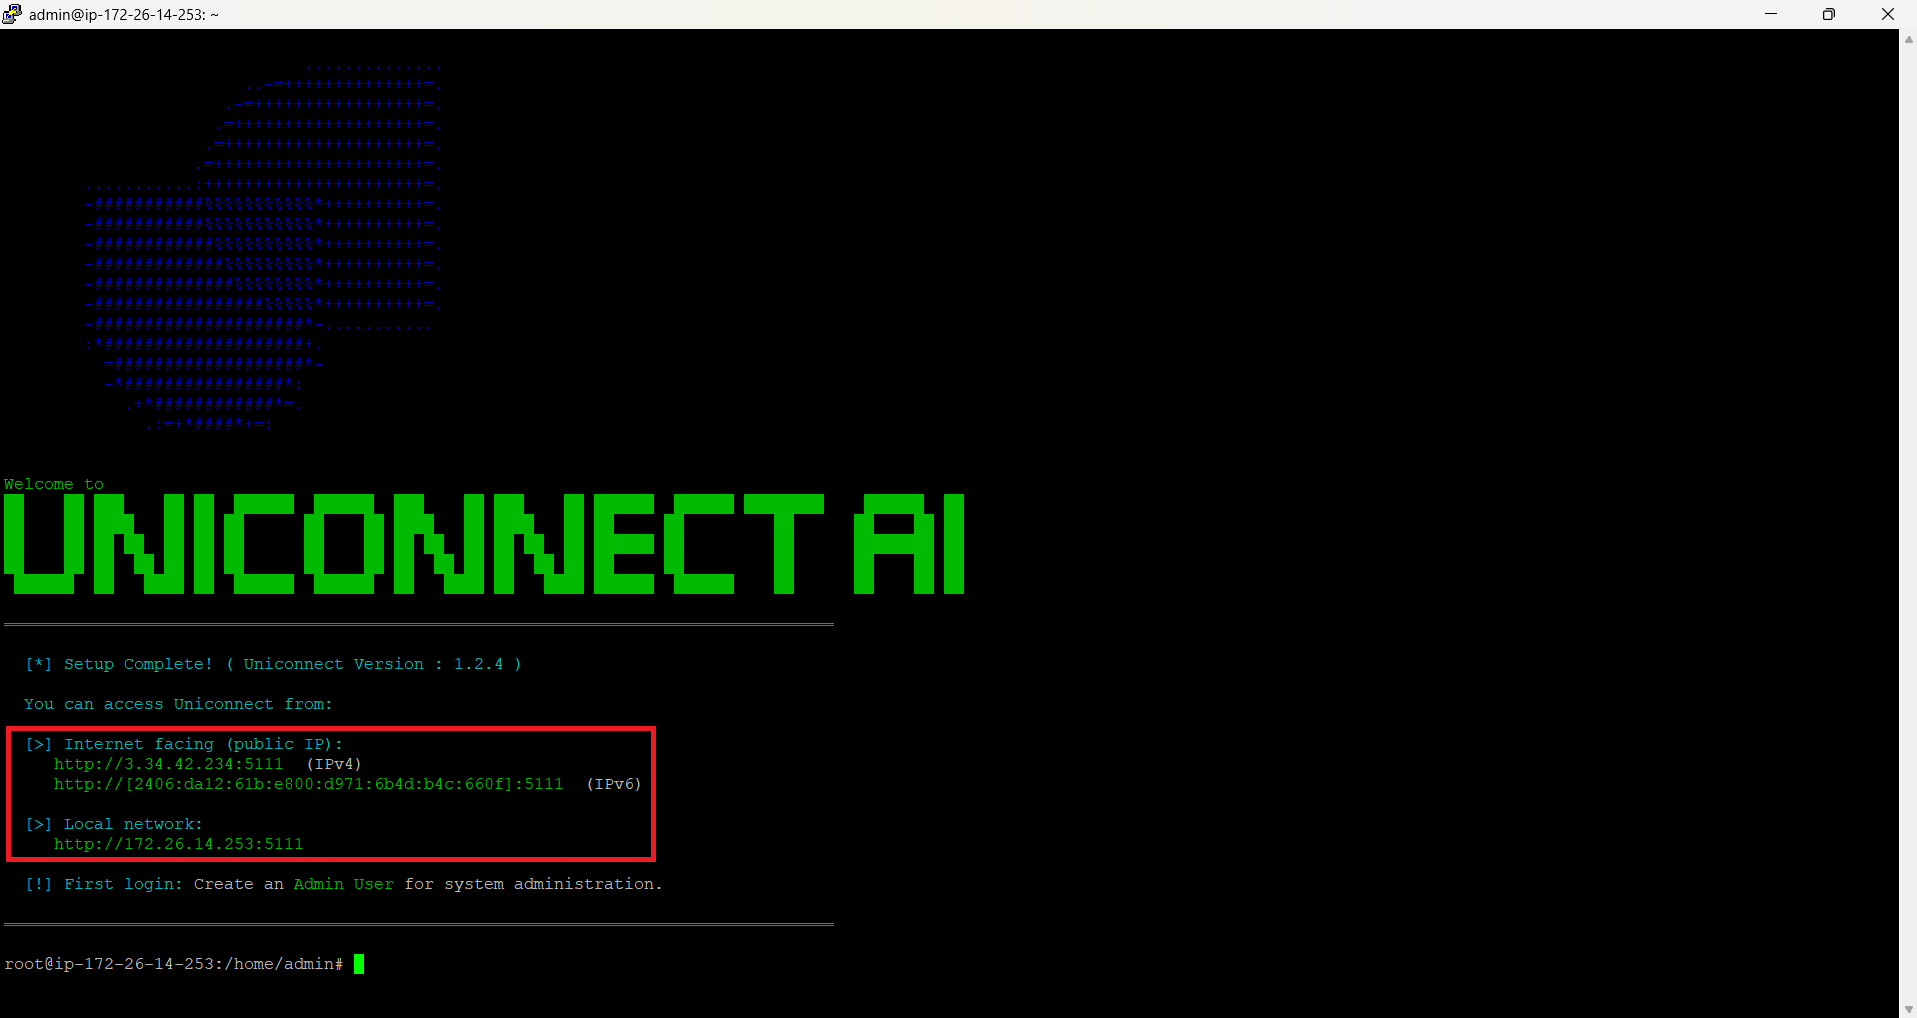
Copy the Internet facing or Local network URL shown in your terminal — you'll open this in a browser to continue setup. Both use port
5111.
3. Begin Installation in the Browser
Open the URL from the previous step in a web browser. You'll land on the Uniconnect setup welcome page.
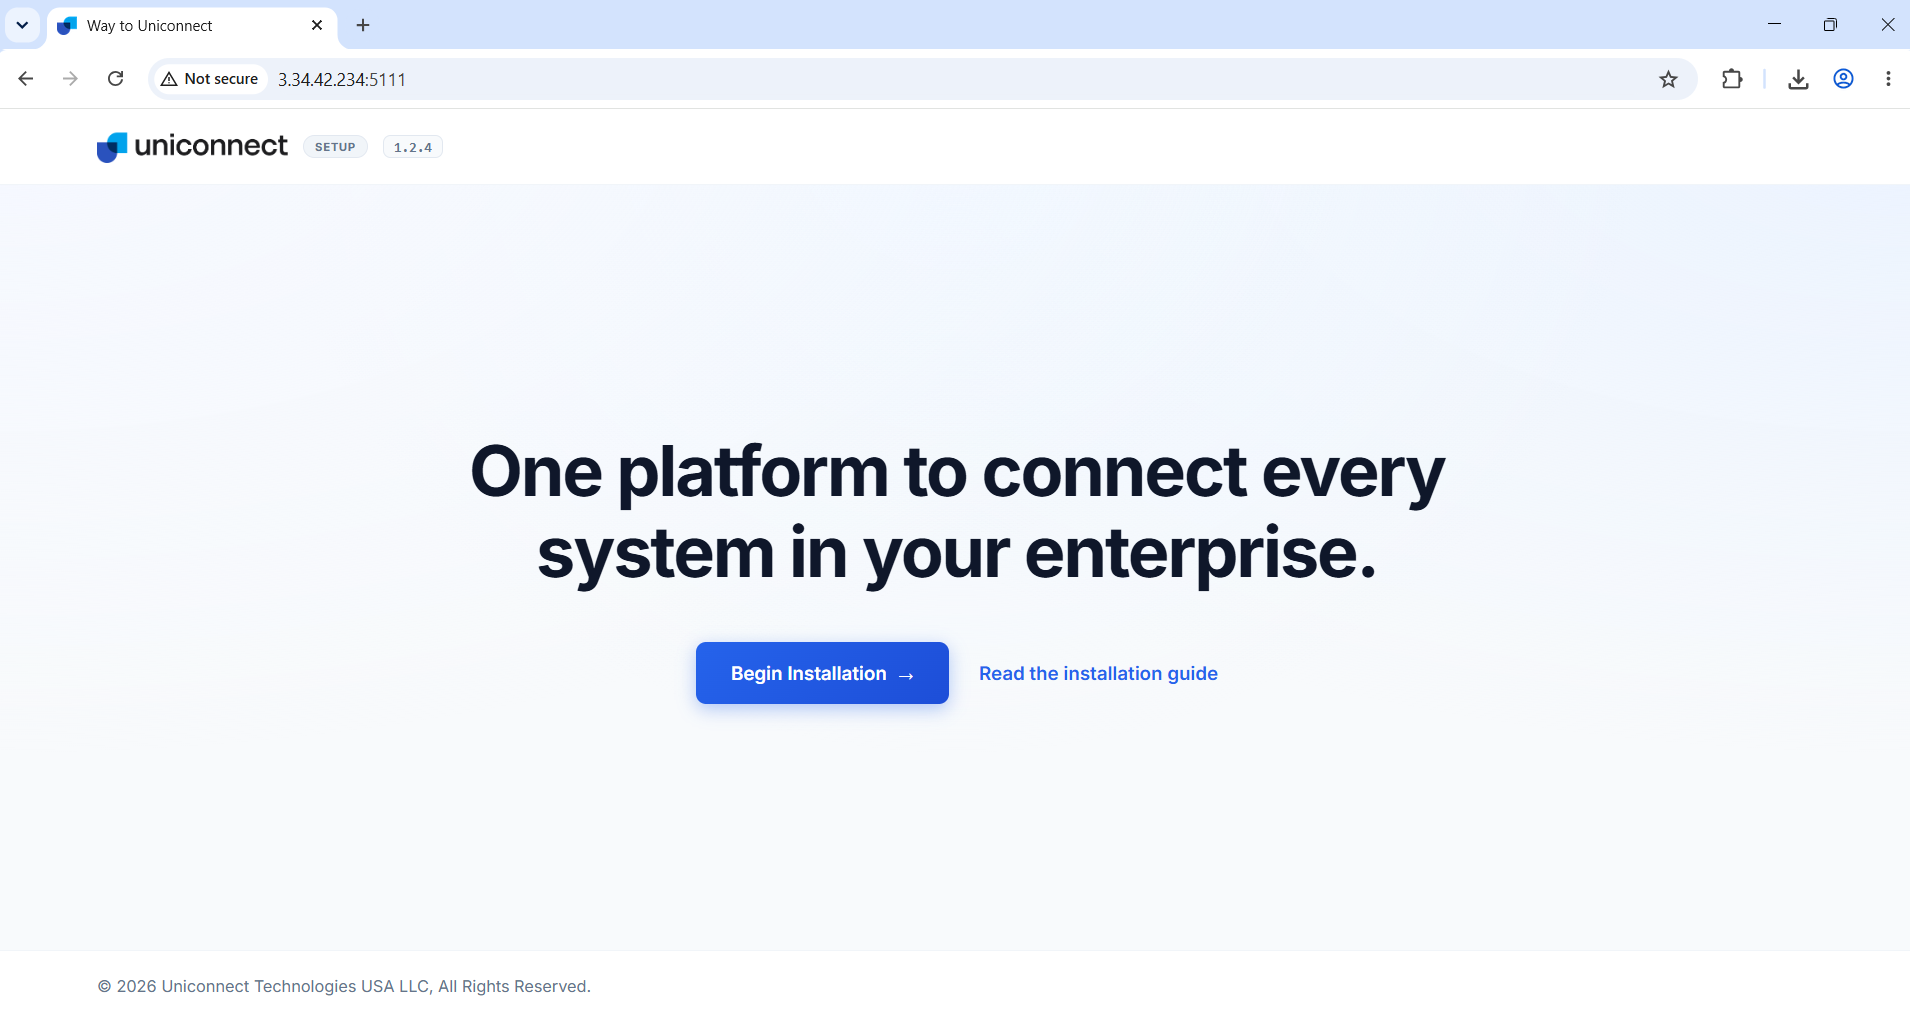
Click Begin Installation to launch the setup wizard. (You can also click Read the installation guide to open this documentation in a new tab at any time.)
4. System Requirements Check (Step 2 of 8)
The wizard automatically verifies that your server meets the requirements for Uniconnect — operating system, processor, memory, disk space, network interfaces, and bandwidth — and reports your hostname, kernel version, and system uptime for reference.
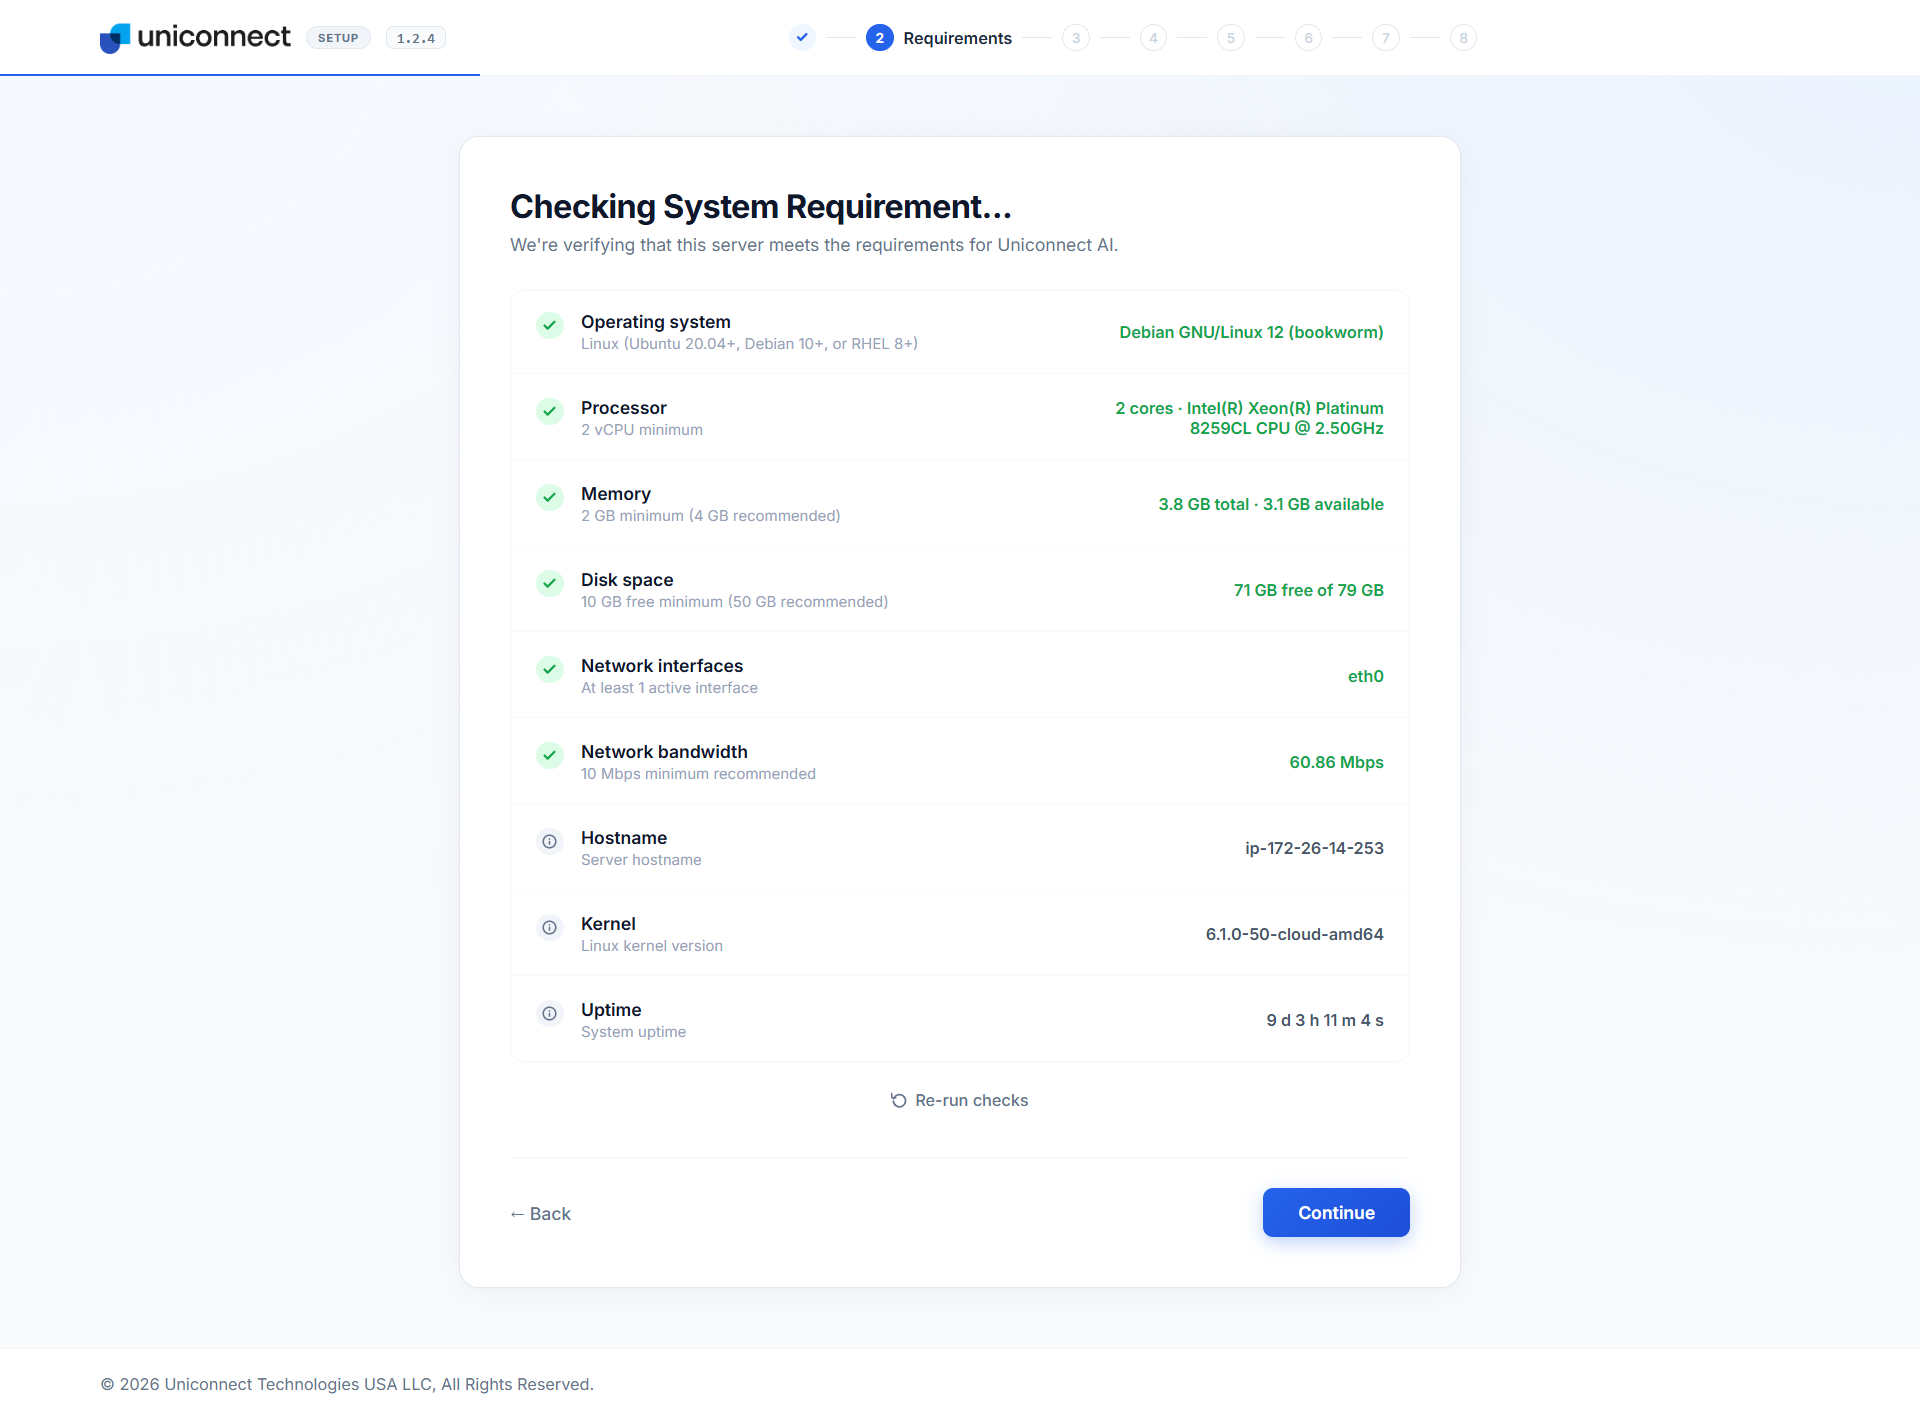
If any check fails, resolve the underlying issue and click Re-run checks. Once all checks pass, click Continue.
Installation cannot proceed if the server has less than 2 GB of RAM or 2 vCPUs. Ensure your server meets at least these minimums before running the installer.
5. License Validation (Step 3 of 8)
Choose New Installation to activate with a license key. Enter your license key — you'll find this in your welcome email or the customer portal.
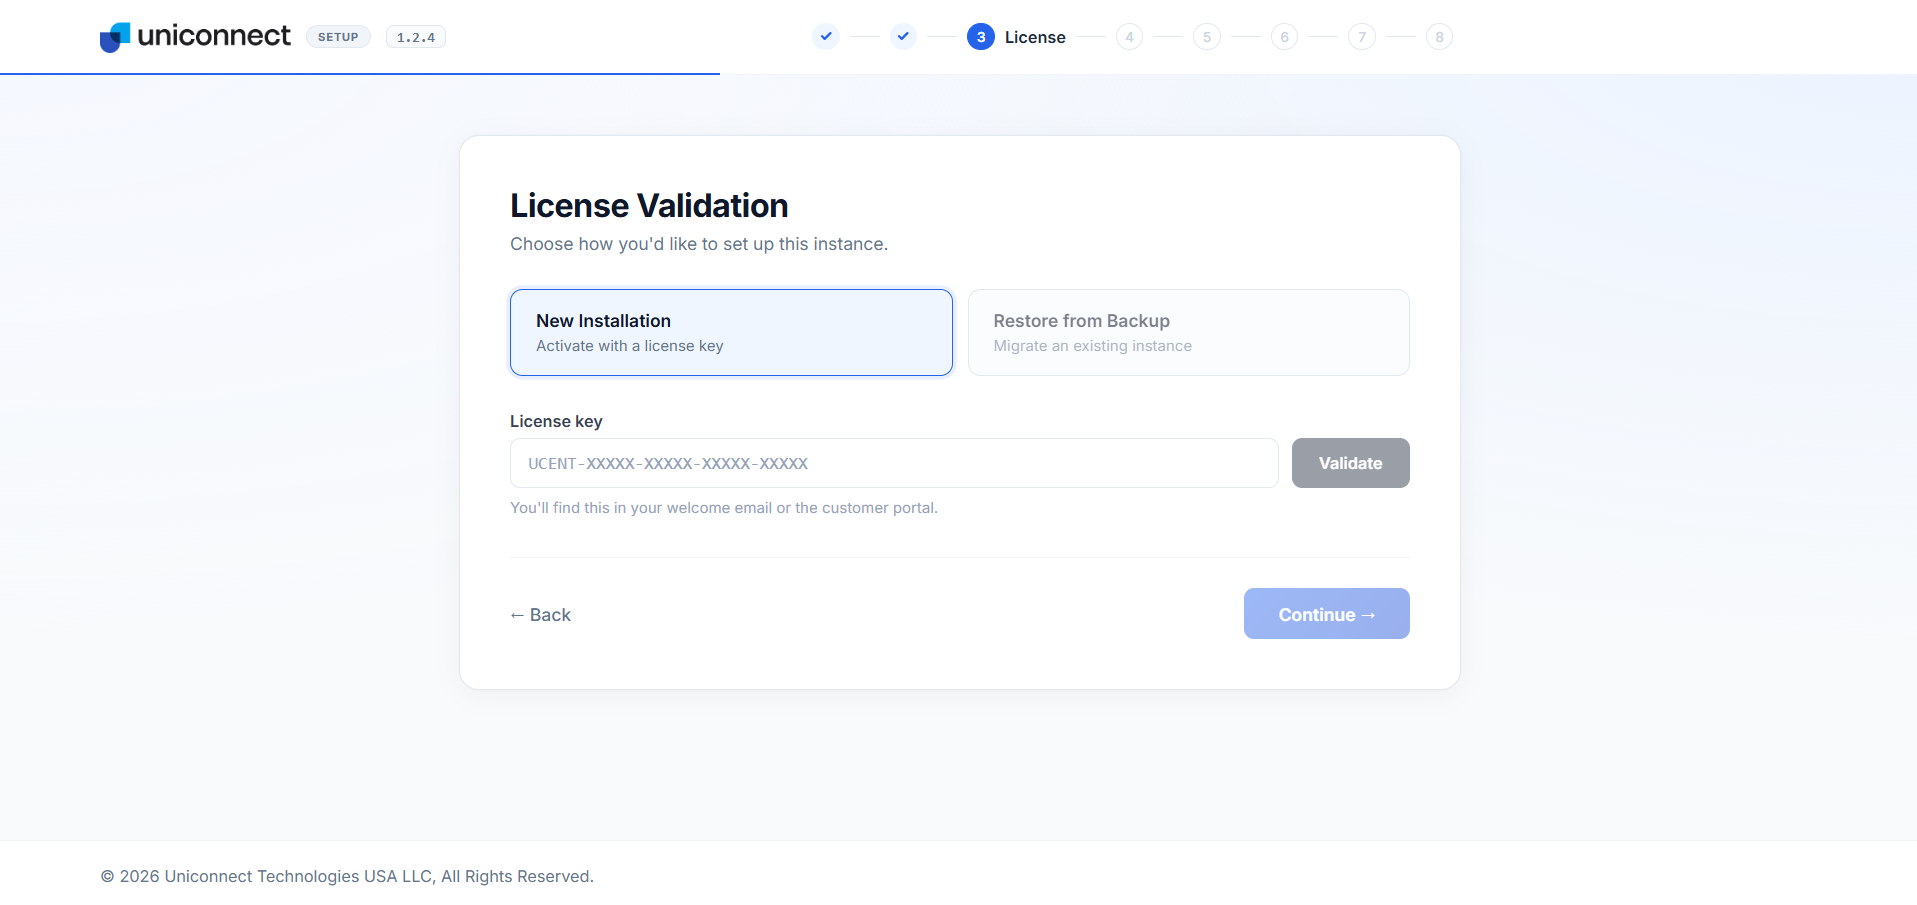 Click Validate. Once verified, the wizard displays the bound FQDN and Plan associated with your license.
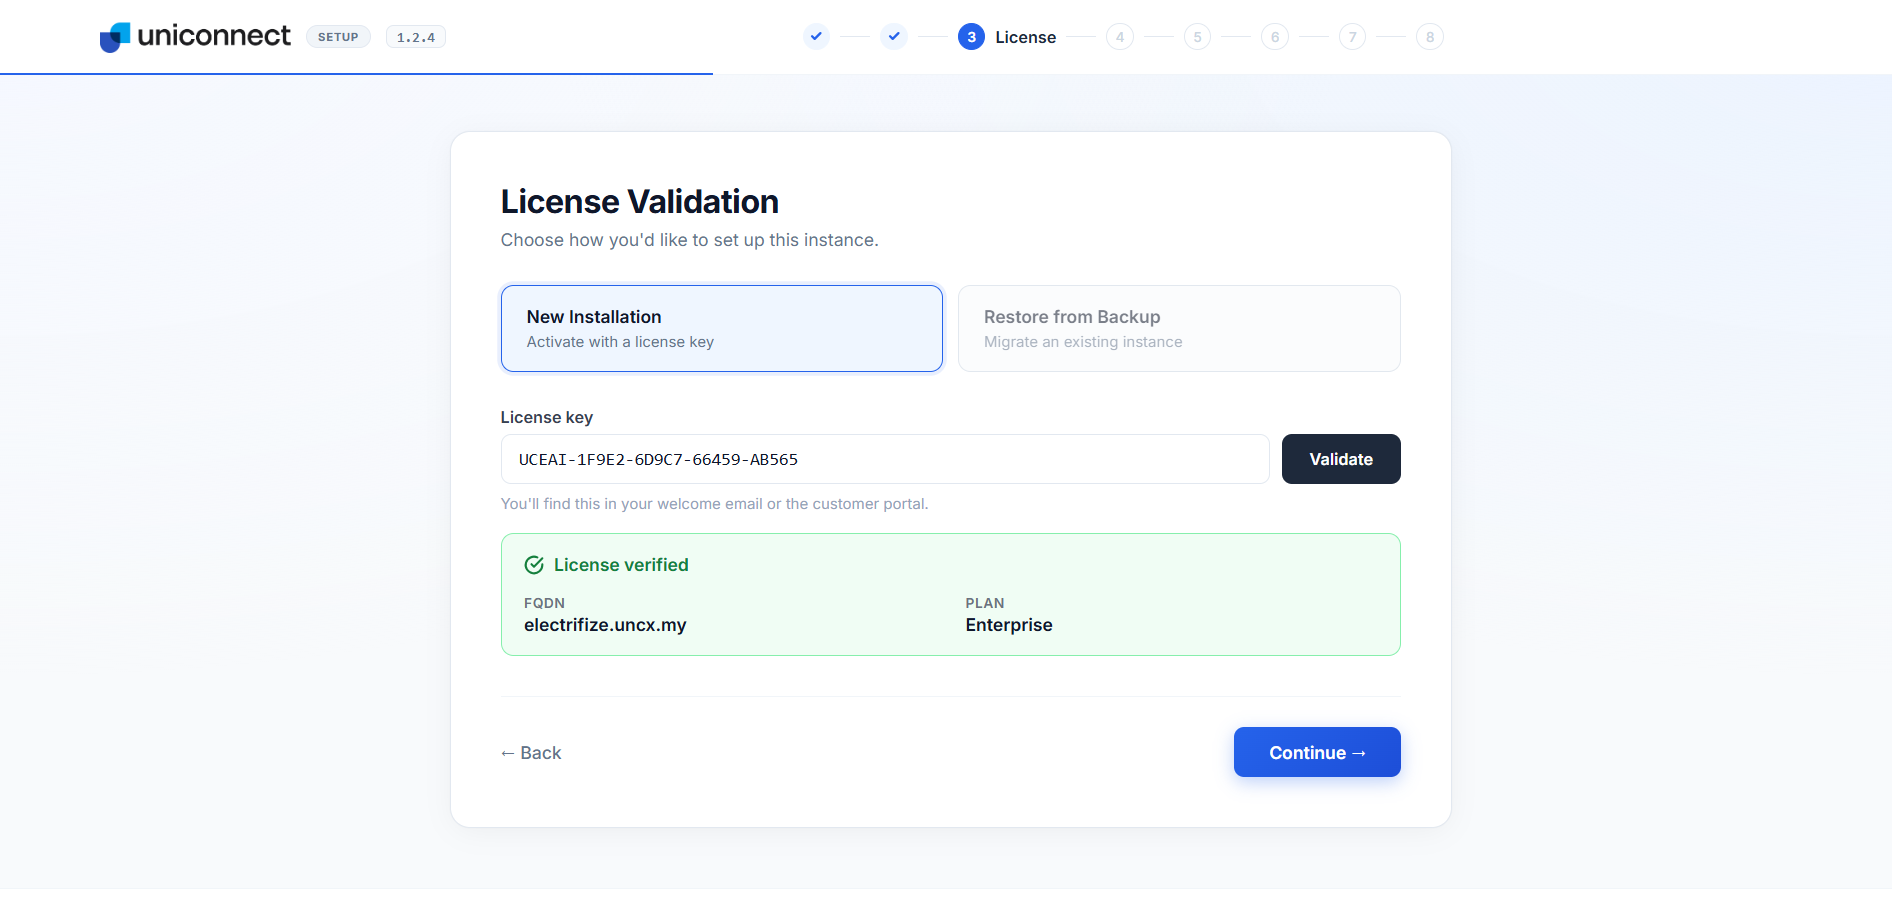
Click Continue.
6. Installation Configuration (Step 4 of 8)
Review the network ports Uniconnect will use — Web console (HTTP), Web console (HTTPS), and Report service. Defaults work for most deployments; adjust only if your environment requires it.
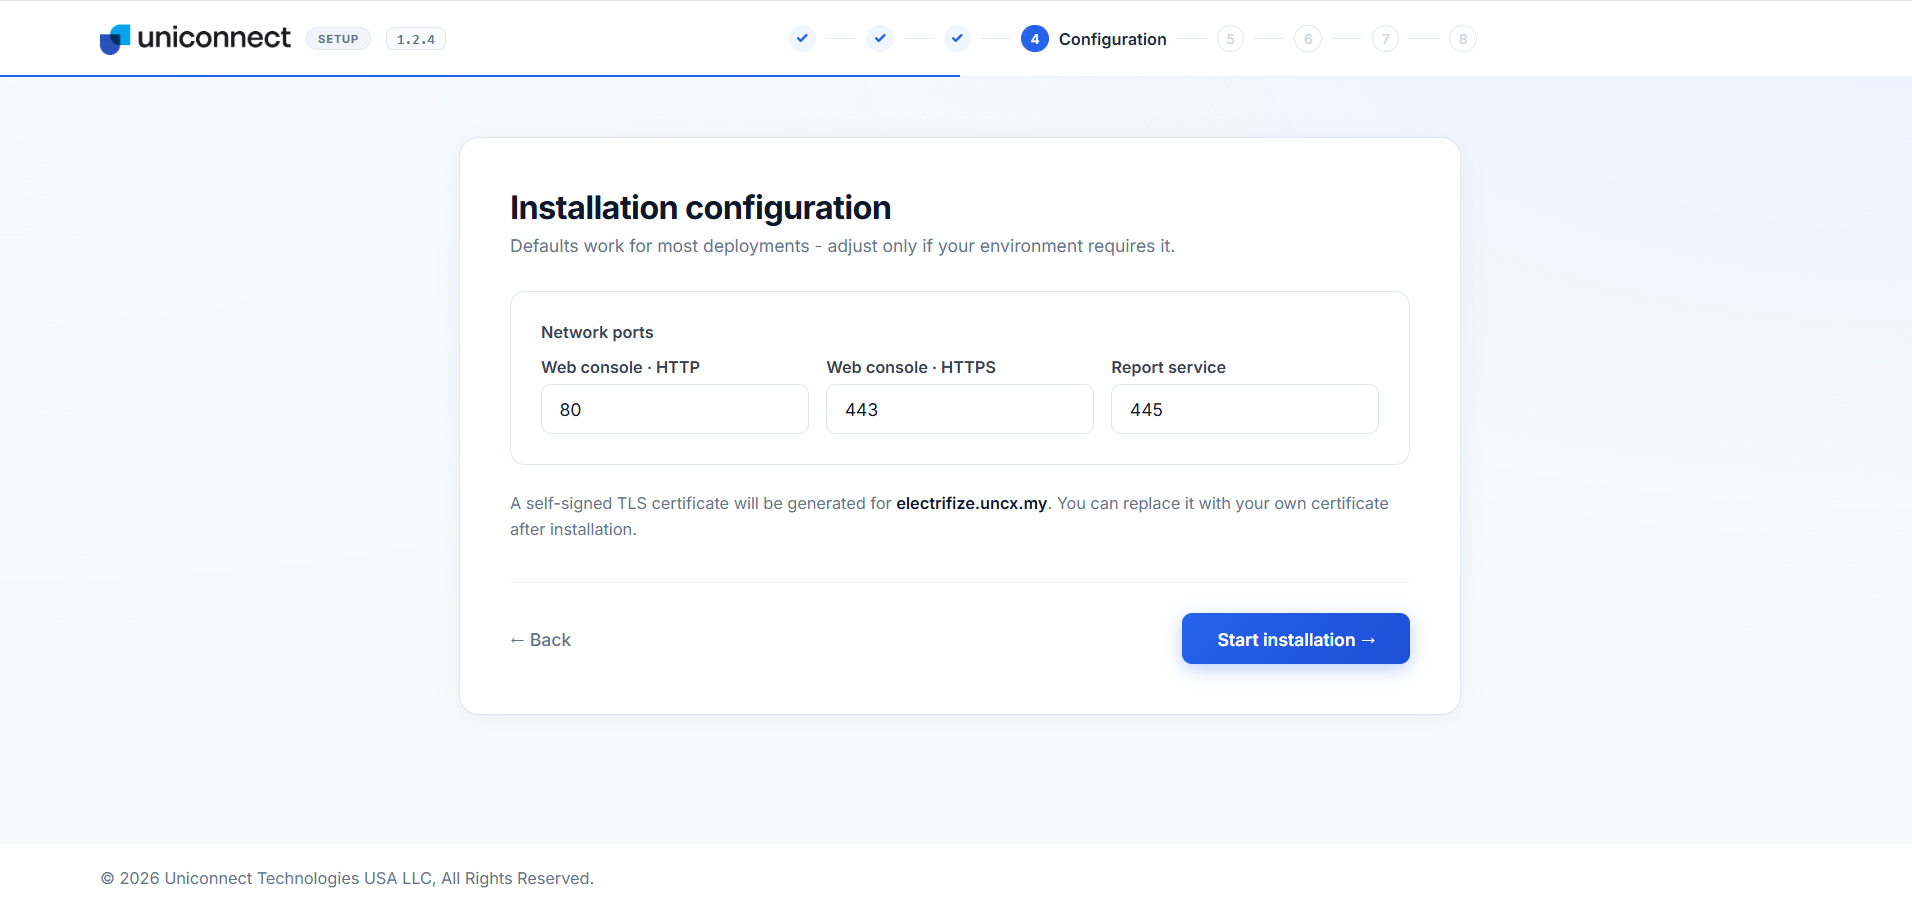
If you're installing on a custom domain, the Installation Configuration screen provides a place to upload your own SSL certificate. If you're using a Uniconnect-associated domain, a self-signed TLS certificate is generated automatically for your domain during installation.
7. Installation in Progress (Step 5 of 8)
The wizard now runs through the installation phases automatically, with a live installation log displayed alongside progress:
- Creating directories
- Configuring system
- Configuring web server
- Setting up SSL certificate
- Downloading services
- Deploying services
- Finalizing
- Activating domain
- Activating license
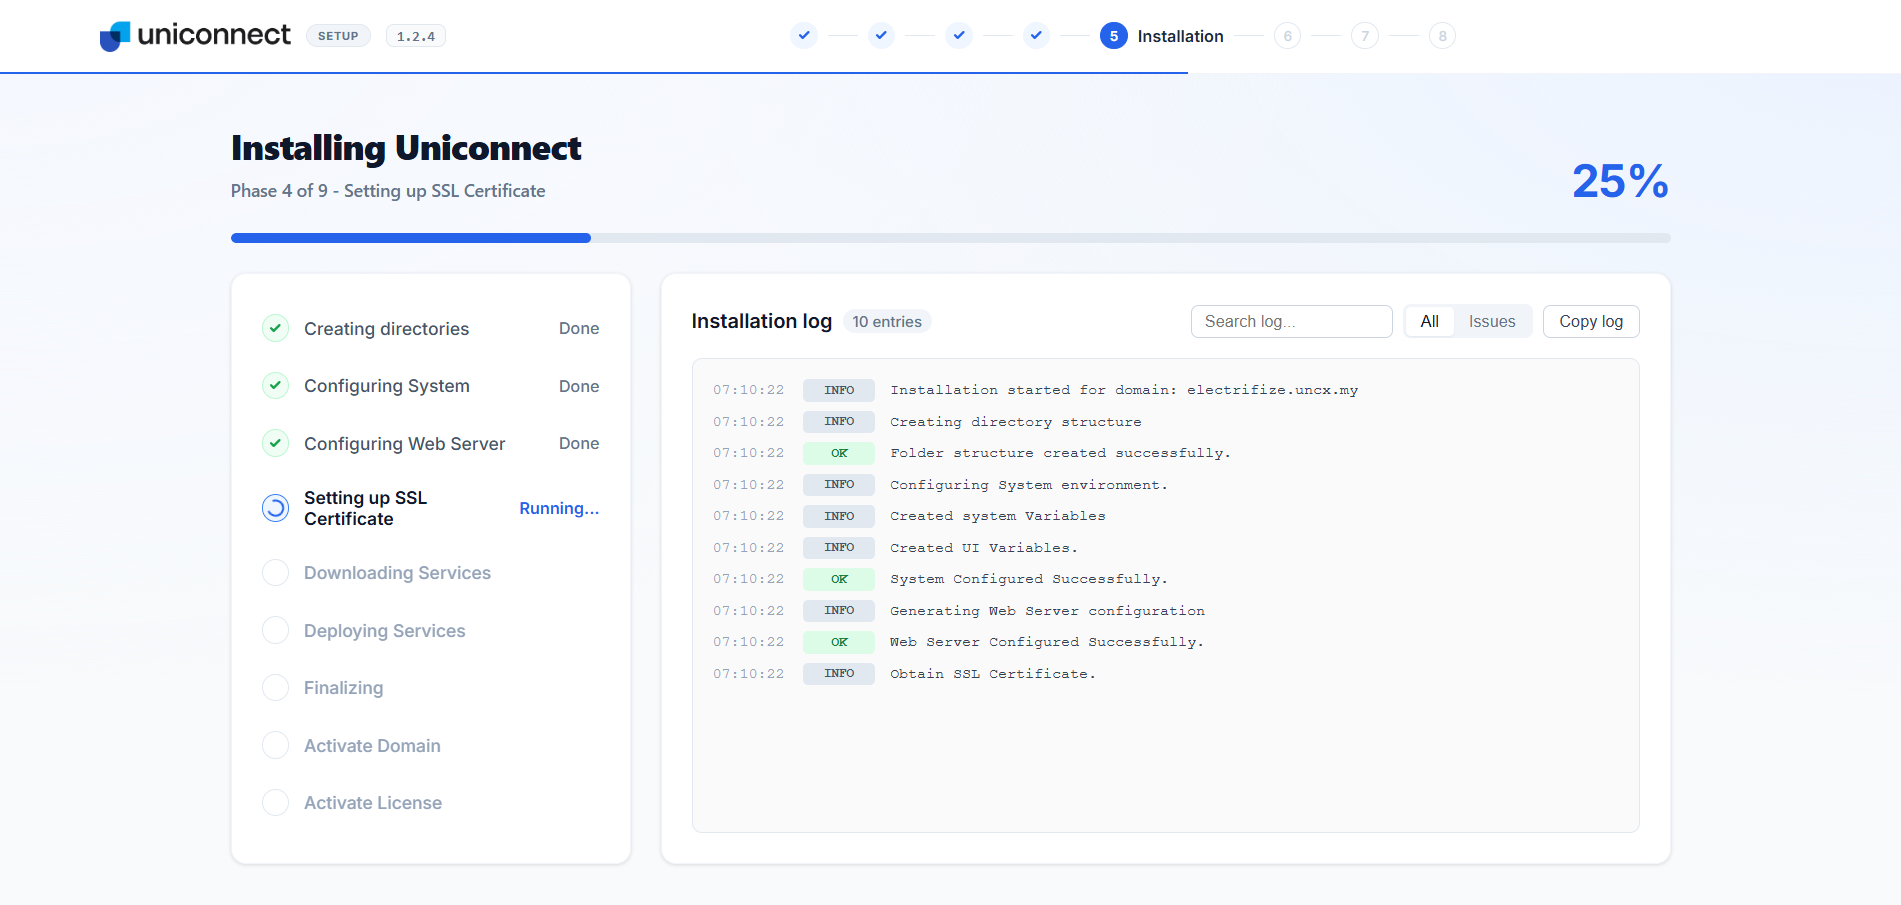
When all phases complete, the progress reaches 100%.
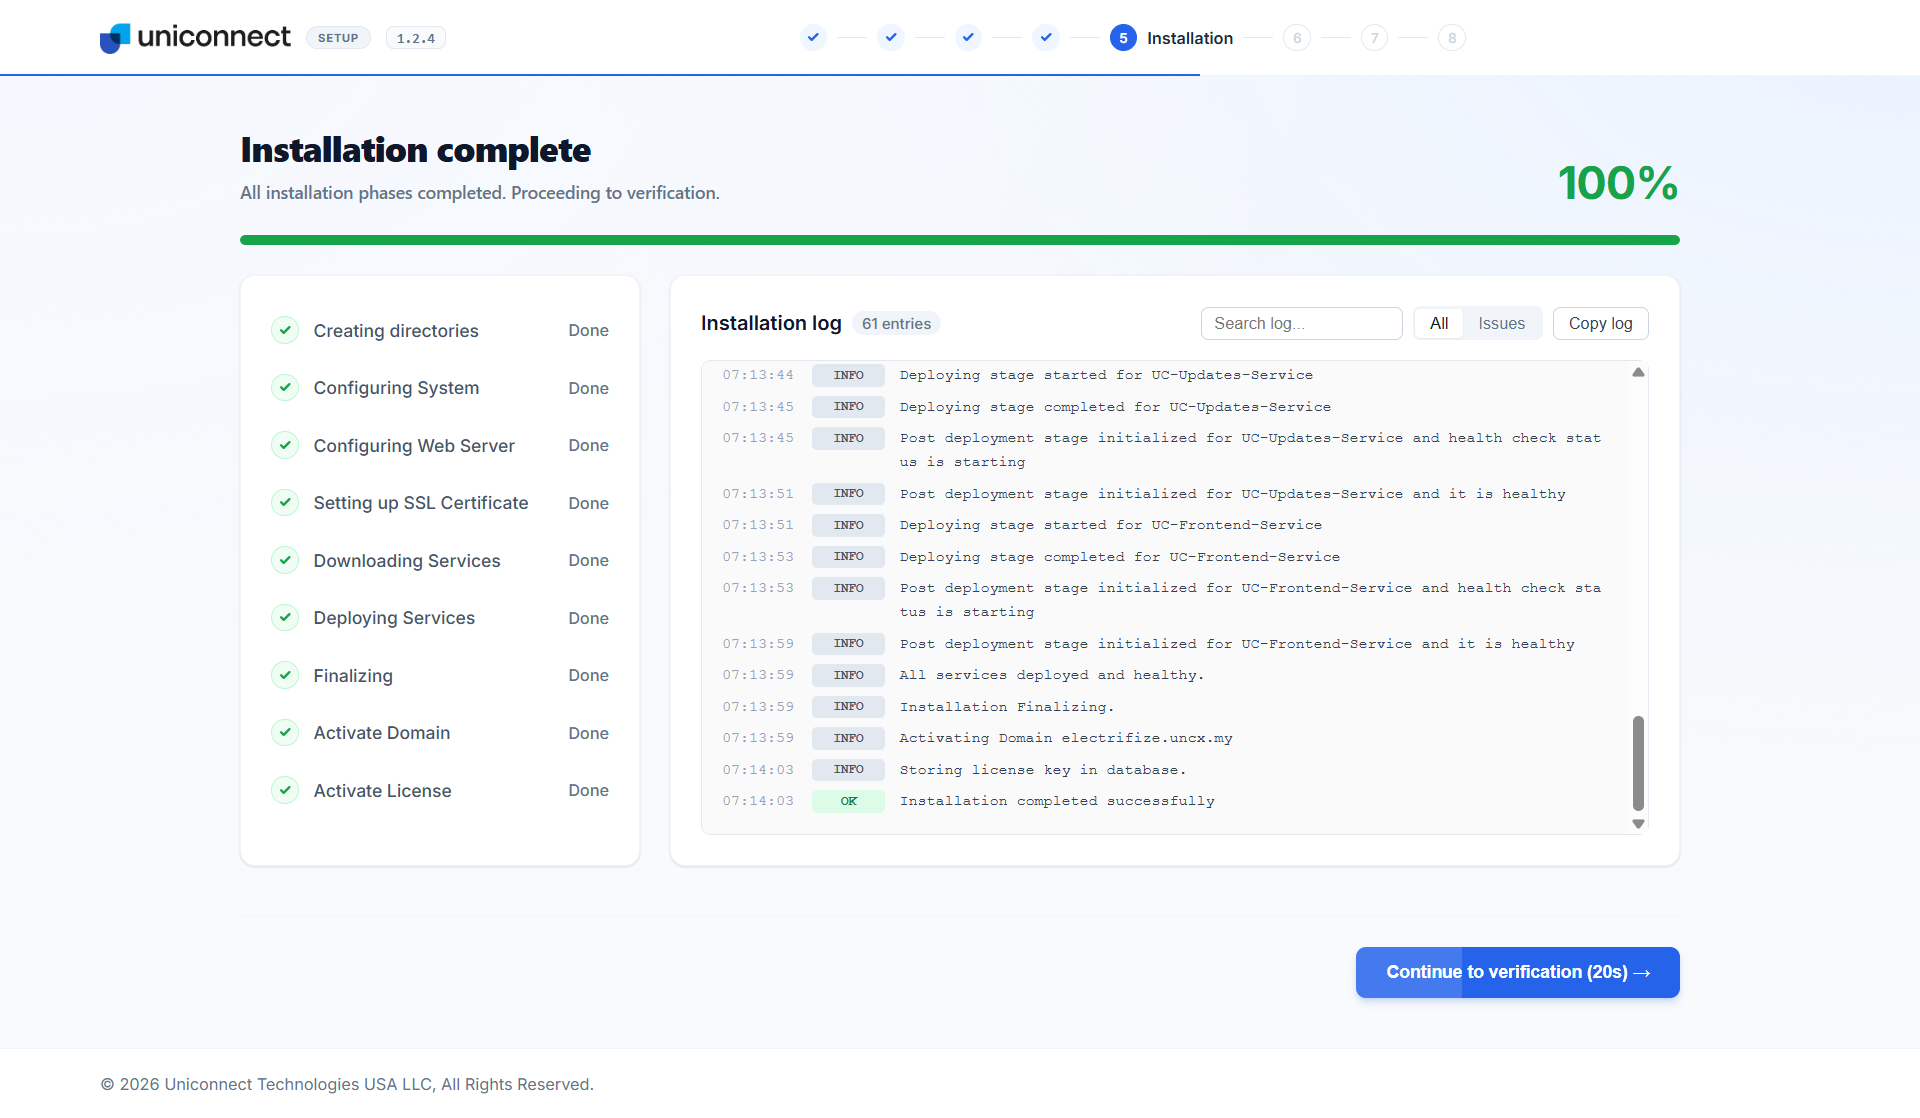
Click Continue to verification.
8. Verification & Health Check (Step 6 of 8)
The wizard confirms that all core services (Frontend, Backend, Report, Cache, Database, and Report Analytics) are healthy, and that installation, SSL, and license activation checks have passed.
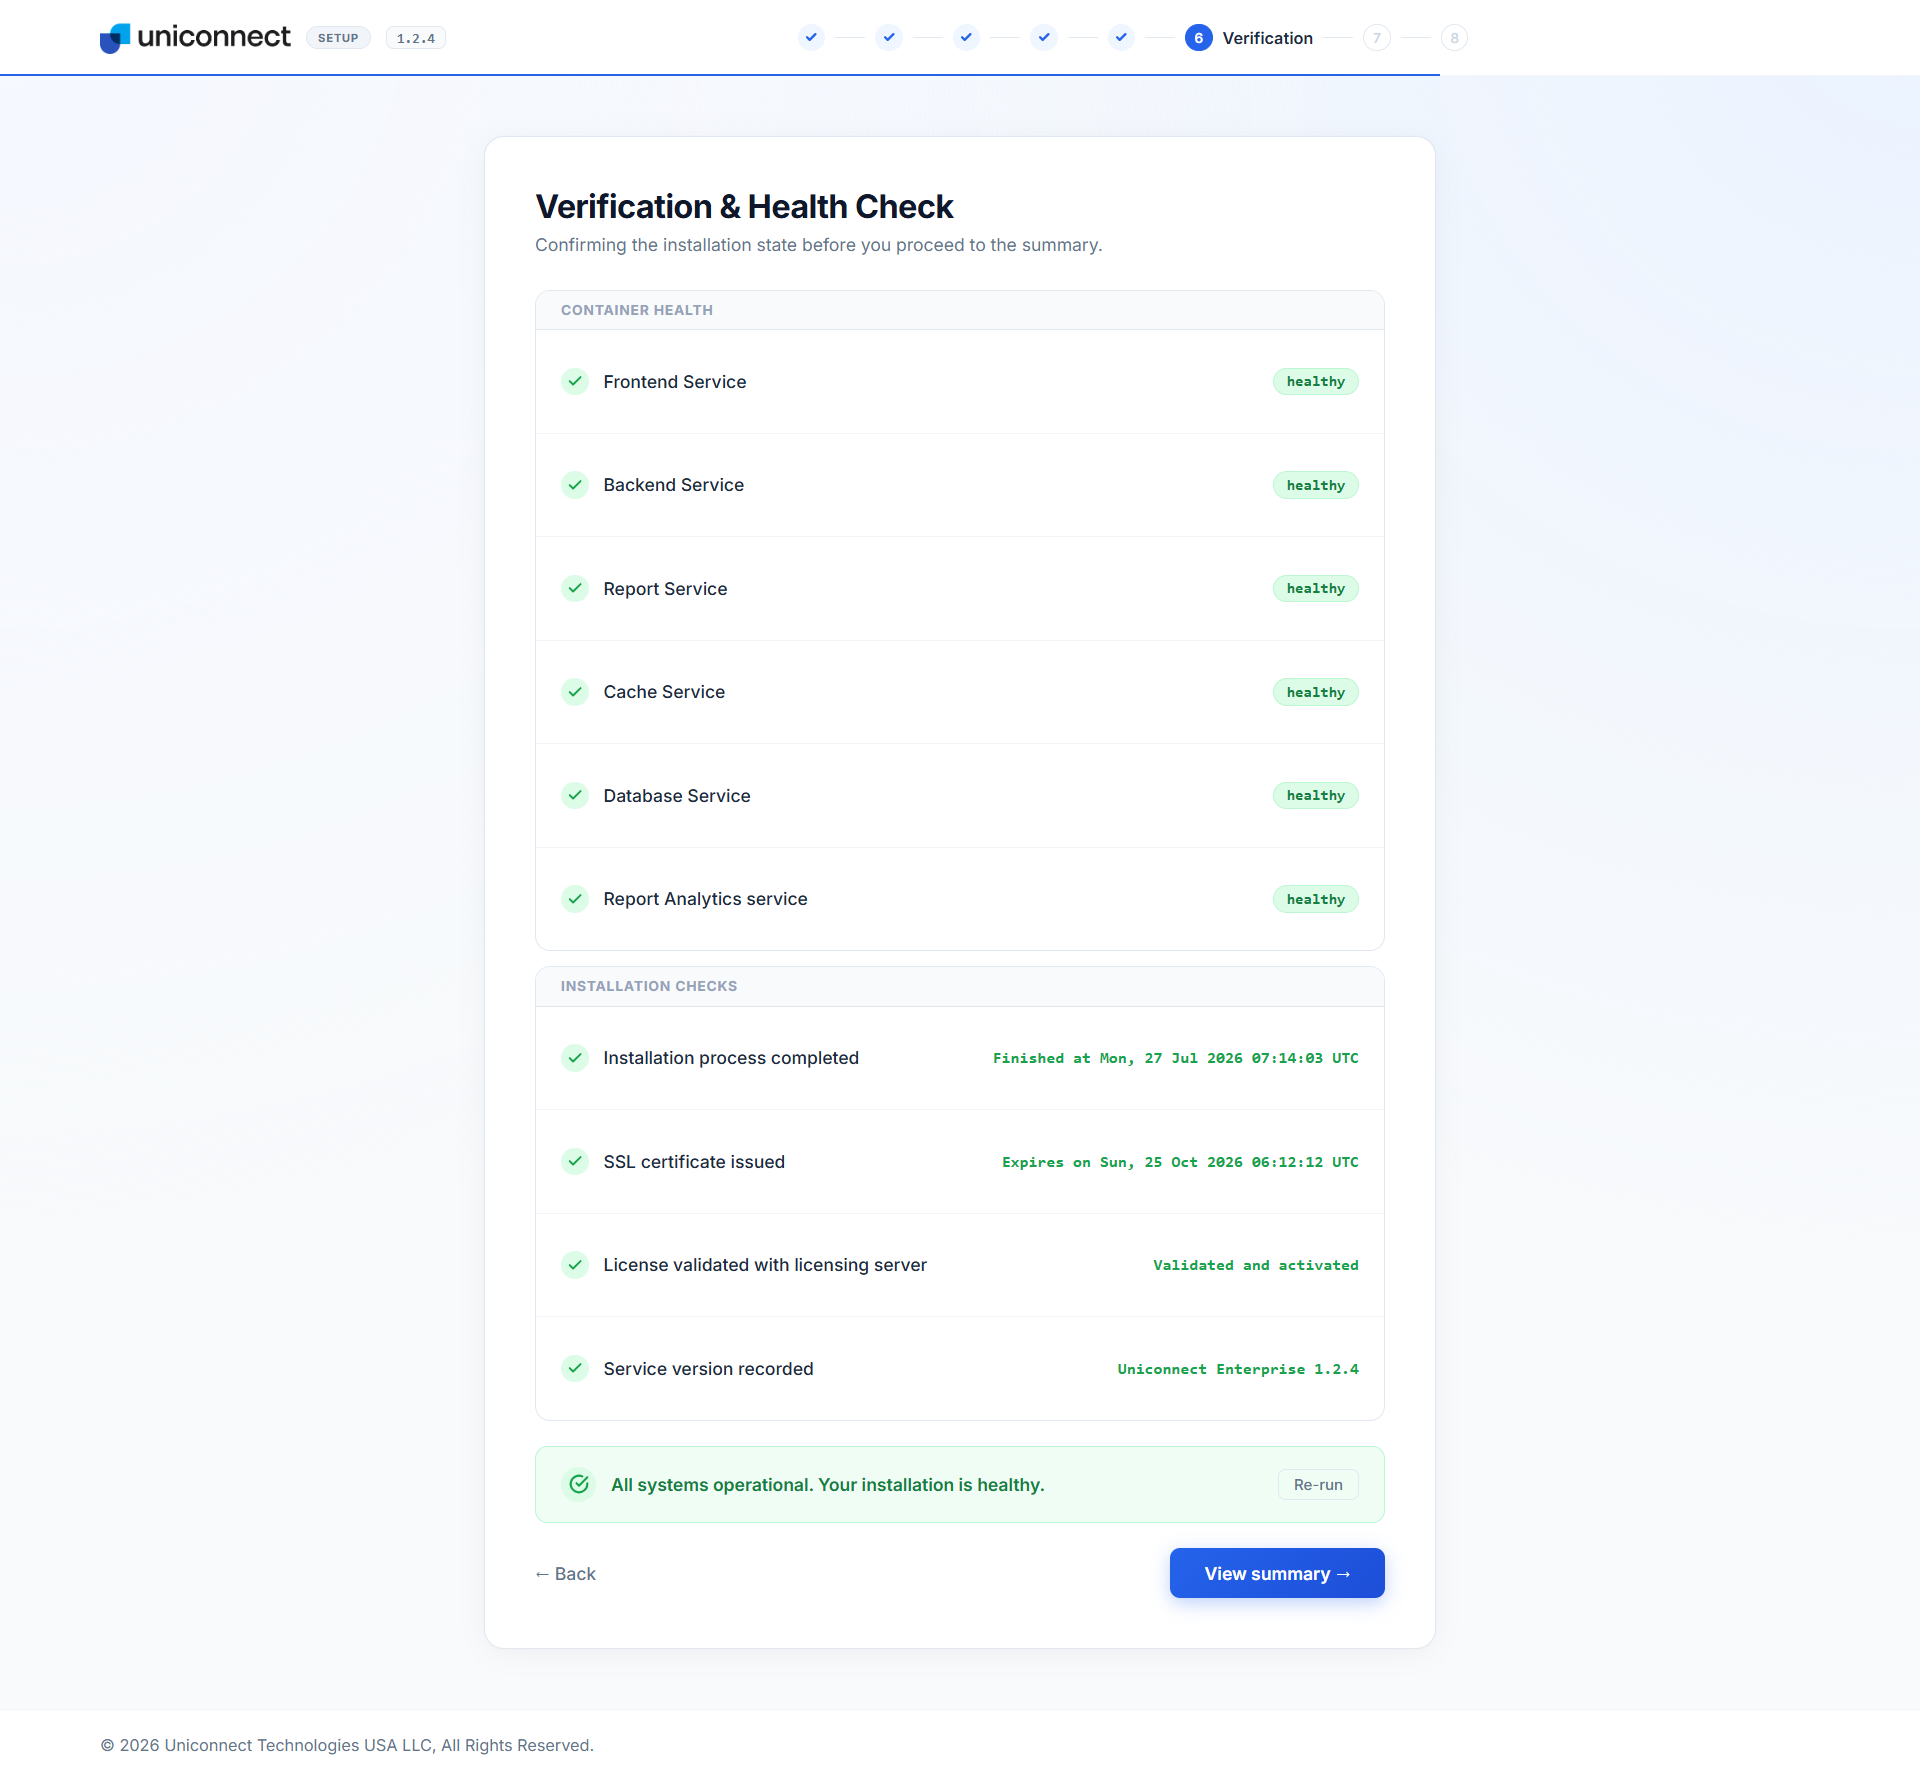
If any item shows an issue, use Re-run to retry. Once you see "All systems operational," click View summary.
9. Installation Summary (Step 7 of 8)
Review your instance details — Web console URL, license key, ports, version, and status — and save them for future reference.
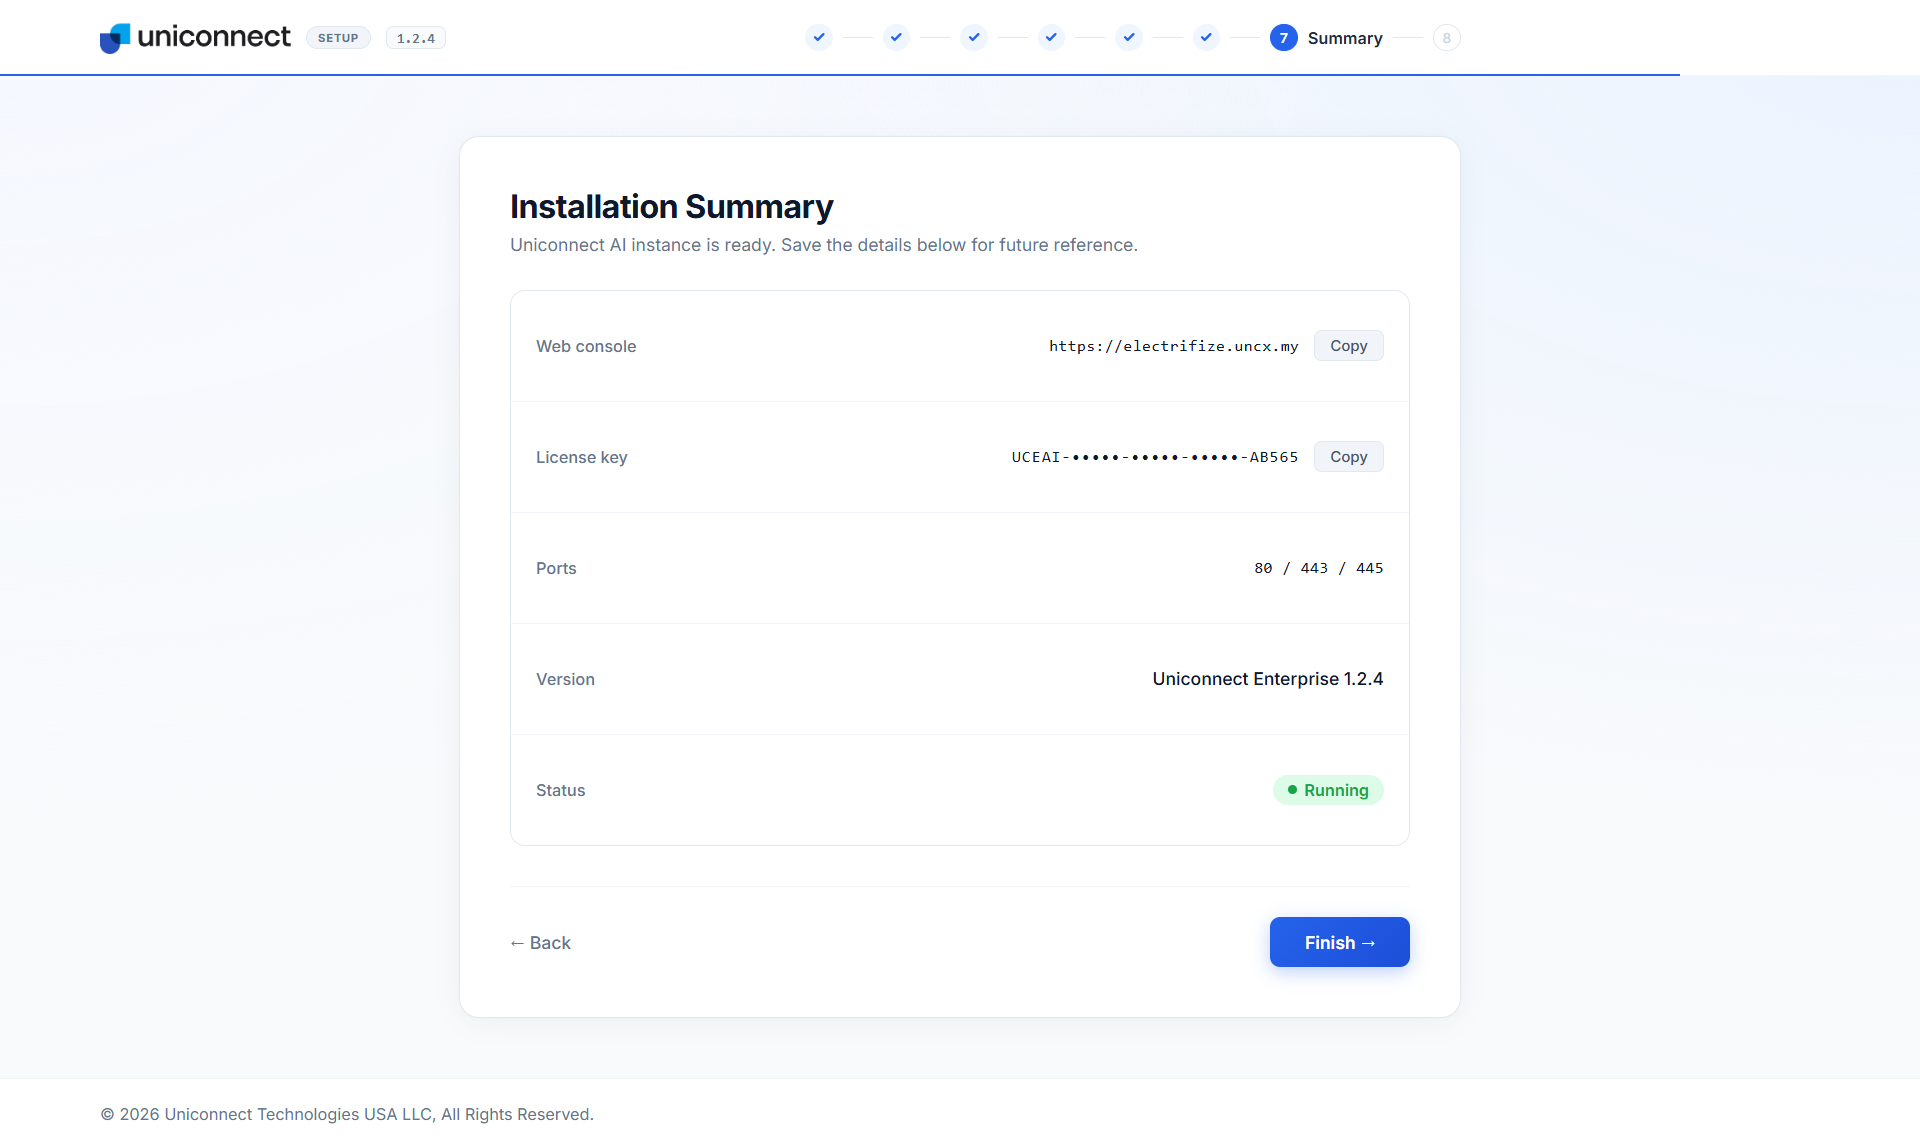
Click Finish.
10. You're All Set (Step 8 of 8)
The final screen confirms your instance is installed and running at your assigned domain.
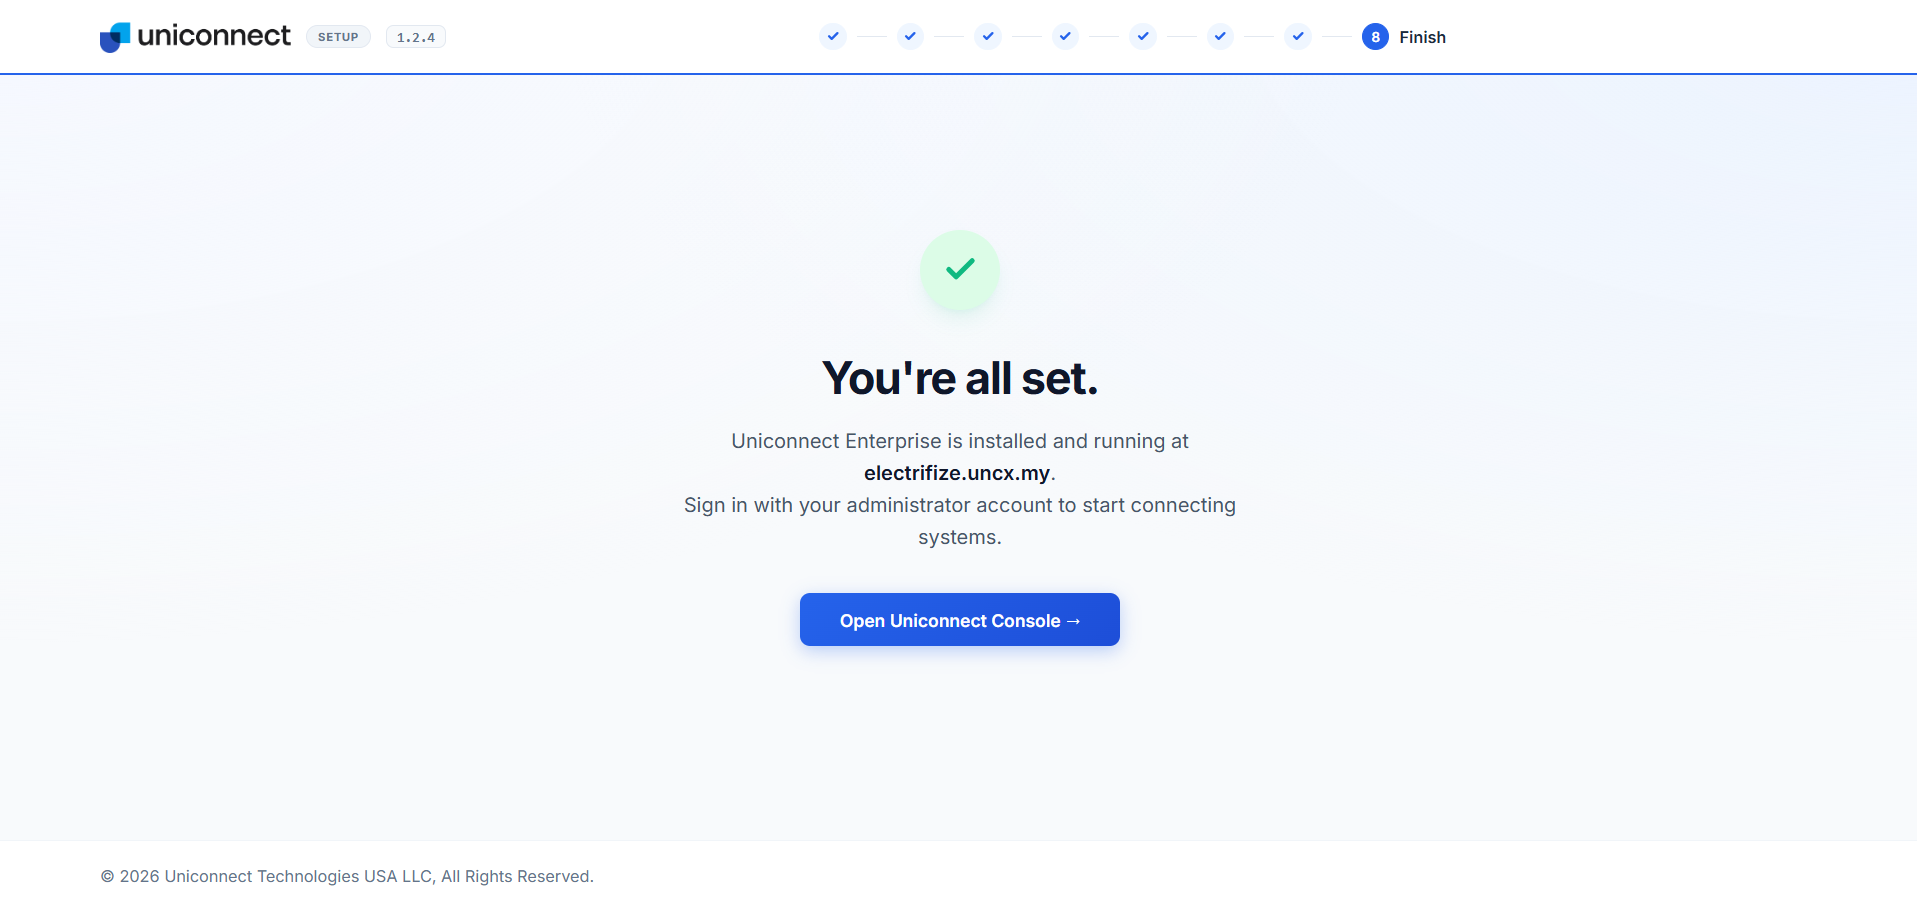
Click Open Uniconnect Console → to continue to your instance.
Installation is now complete. To activate your administrator account and sign in, continue to Getting Started.