Role Management
Roles in Uniconnect
In any organization, users need access to different types of data to perform tasks such as sales, marketing, customer service, and inventory management. The data each user requires depends on their specific job responsibilities. As an Uniconnect system owner, your responsibility is to ensure users can access the customer data necessary for their work while restricting access to information they do not need.
Uniconnect allows you to create and assign roles to users according to their job functions. By default, the system includes System Owner and User roles. These default roles can be used as a foundation to create additional roles and build your organization's role hierarchy.
Who can see this?
Access to Role Management is managed through Role Configurations.
Configuration -> Role Management > Users > Role Configuration (link to Role Configuration)
Navigation Path
- Go to Configuration
- Click Role Management
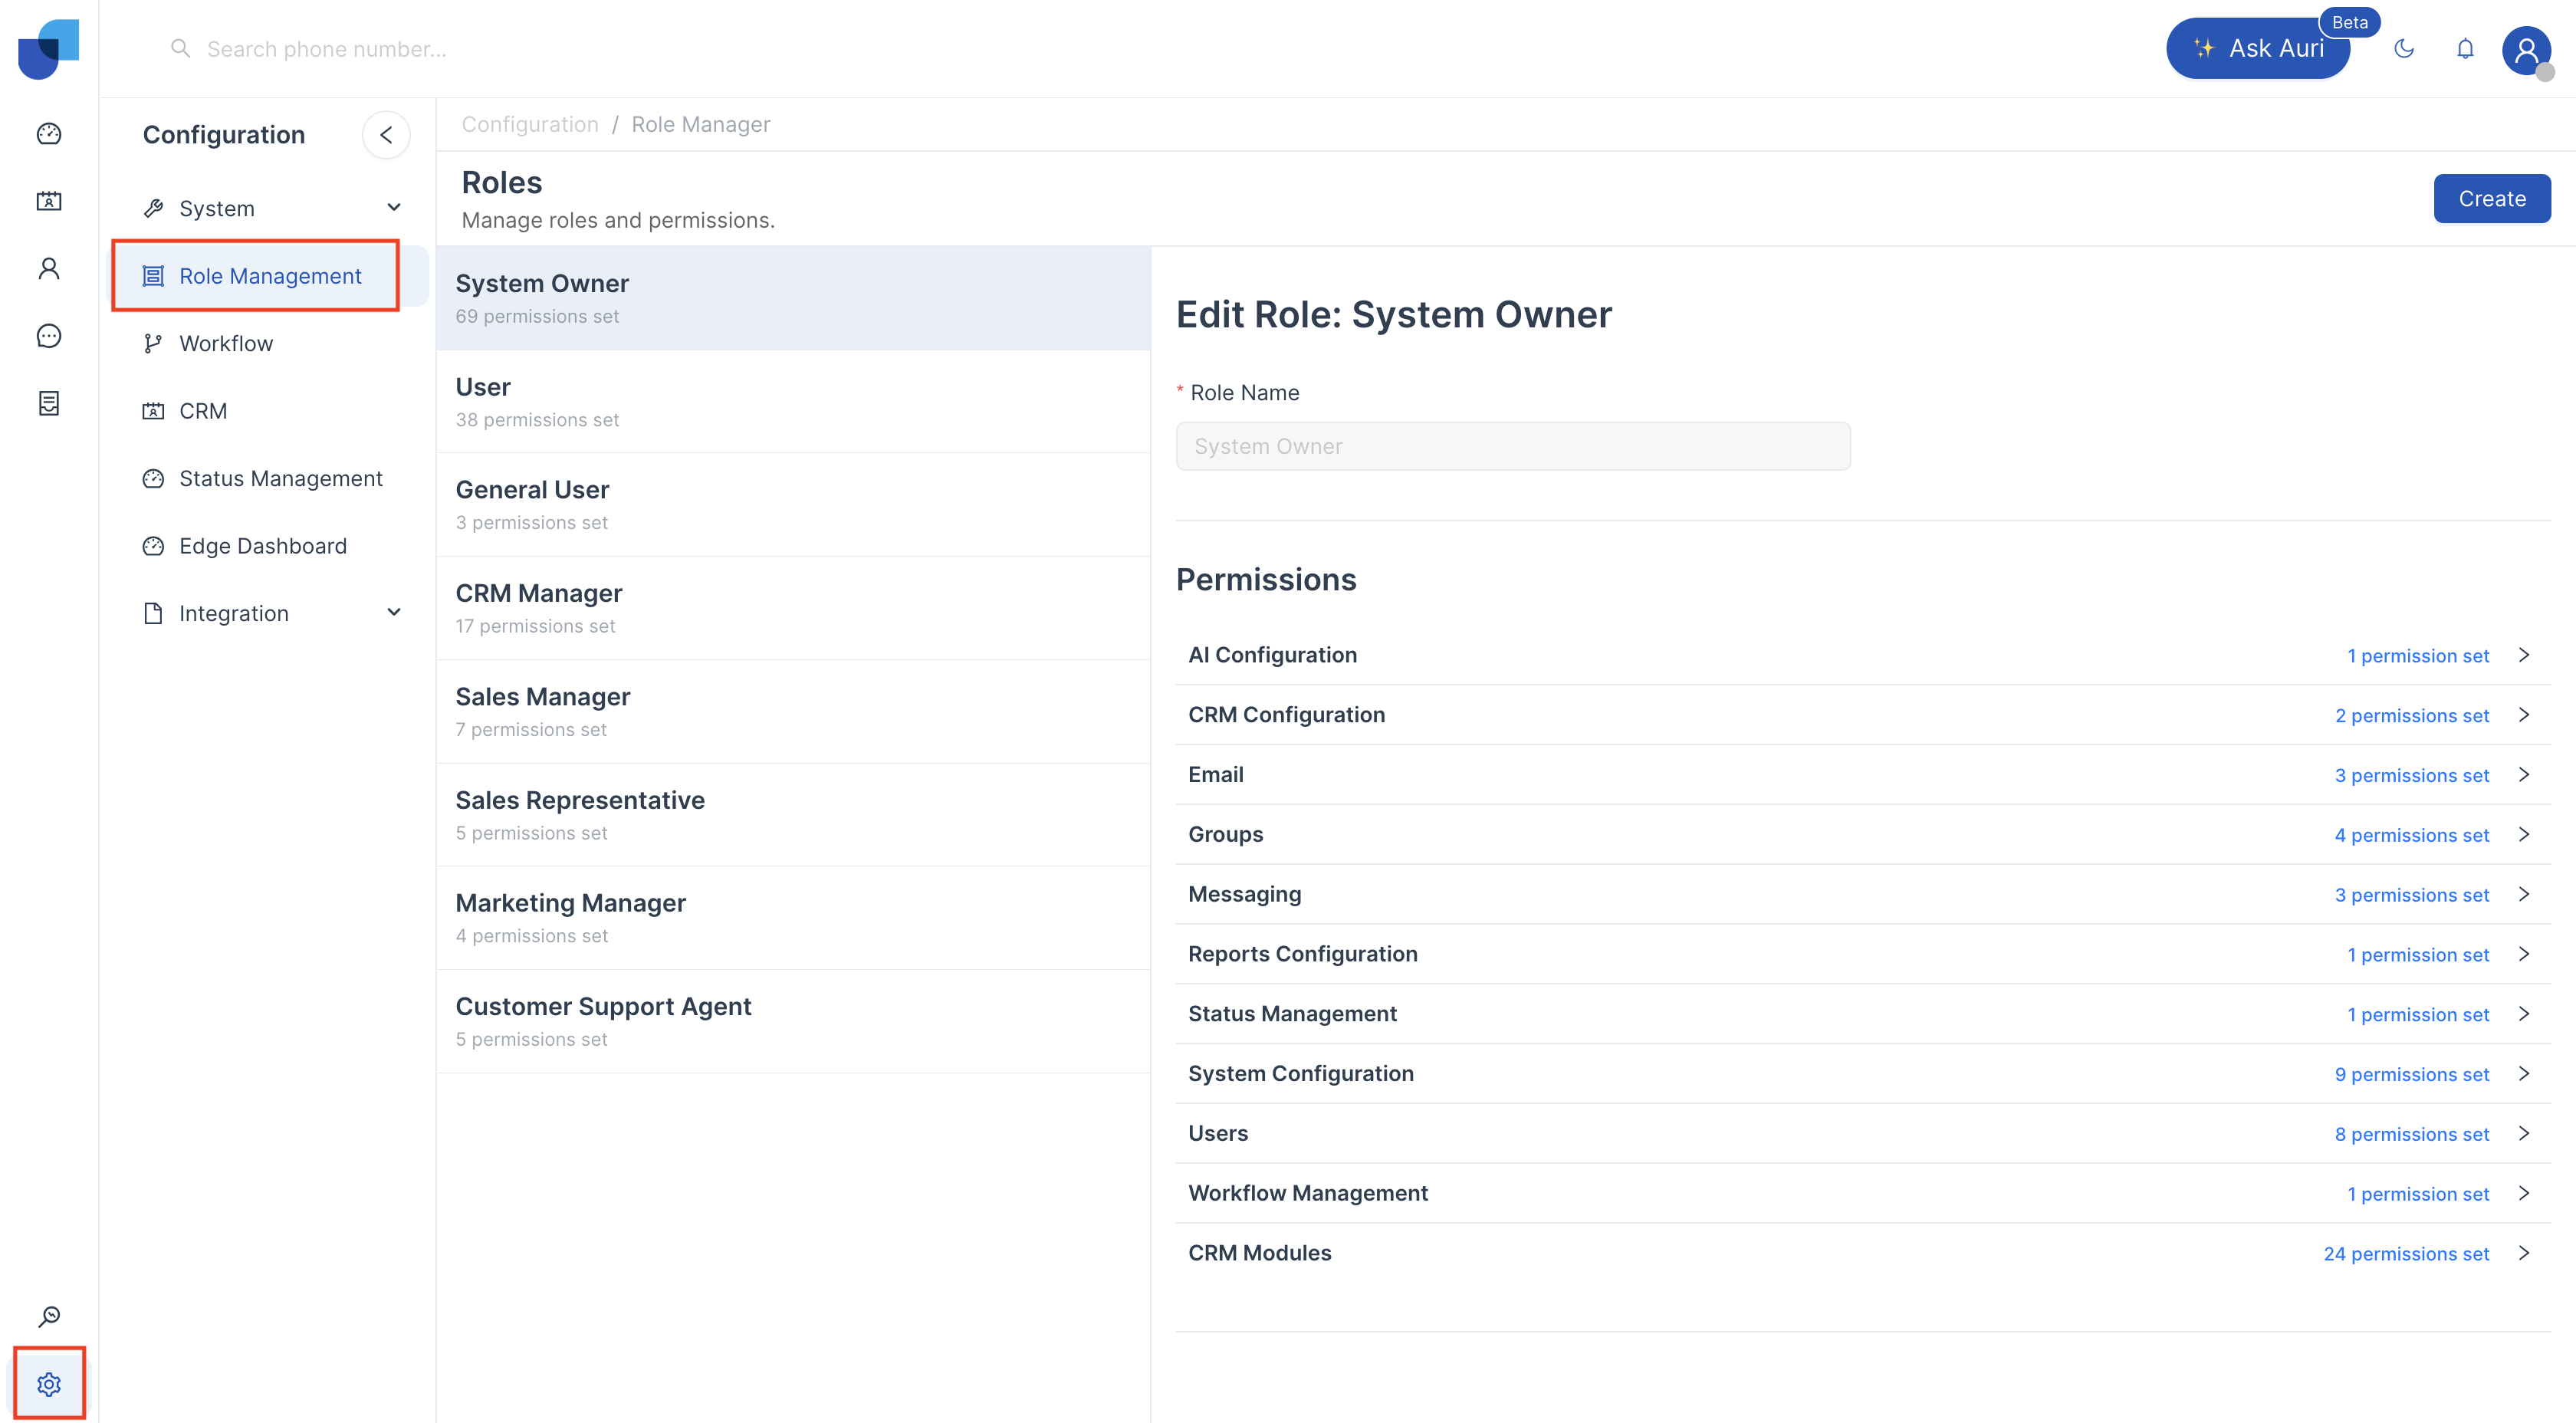
Creating Role
By default, the System Owner and User roles are available in Uniconnect. Additional roles for users can be created based on their position within organization’s hierarchy and the features available in your Uniconnect license.
Note
- Users with an System Owner role have access to all data in the system.
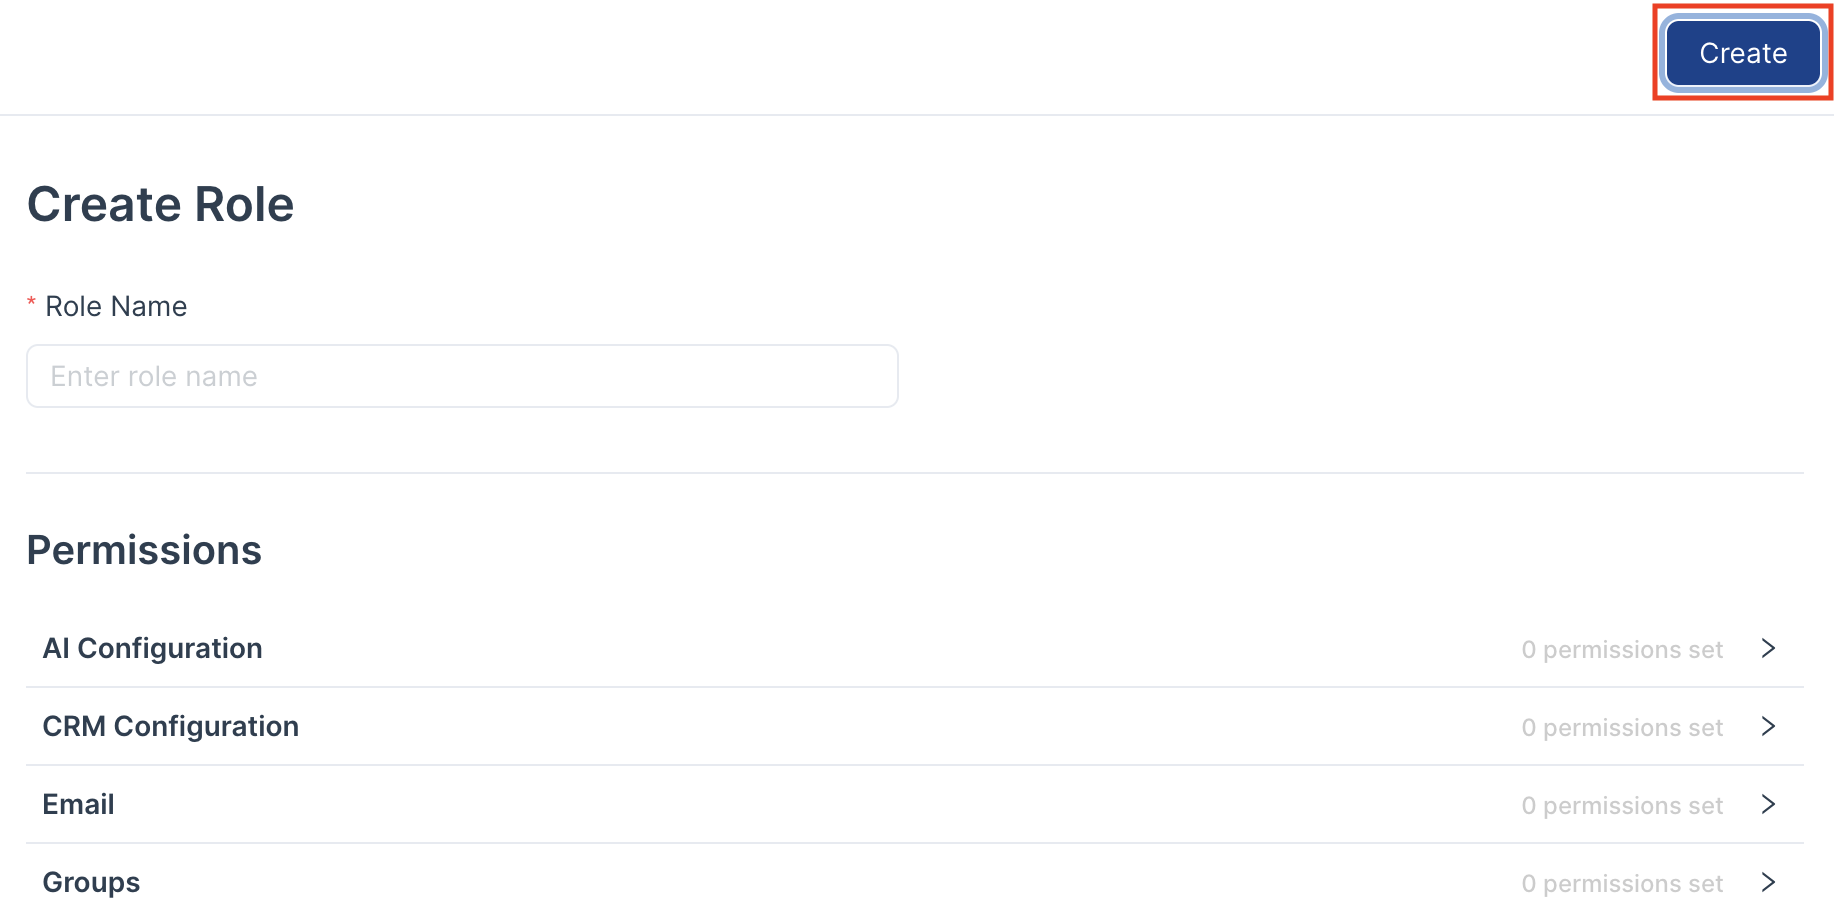
To create new role,
- Go to Configuration -> Role Management.
- Click Create.
- On the New Role page, complete the following:
- Role Name – Enter a unique name for the role. Avoid using duplicate role names.
- Add Permissions
- Click Save.
Assigning Roles to Users
Once roles are created, role can be assigned to user to control their level of data access.
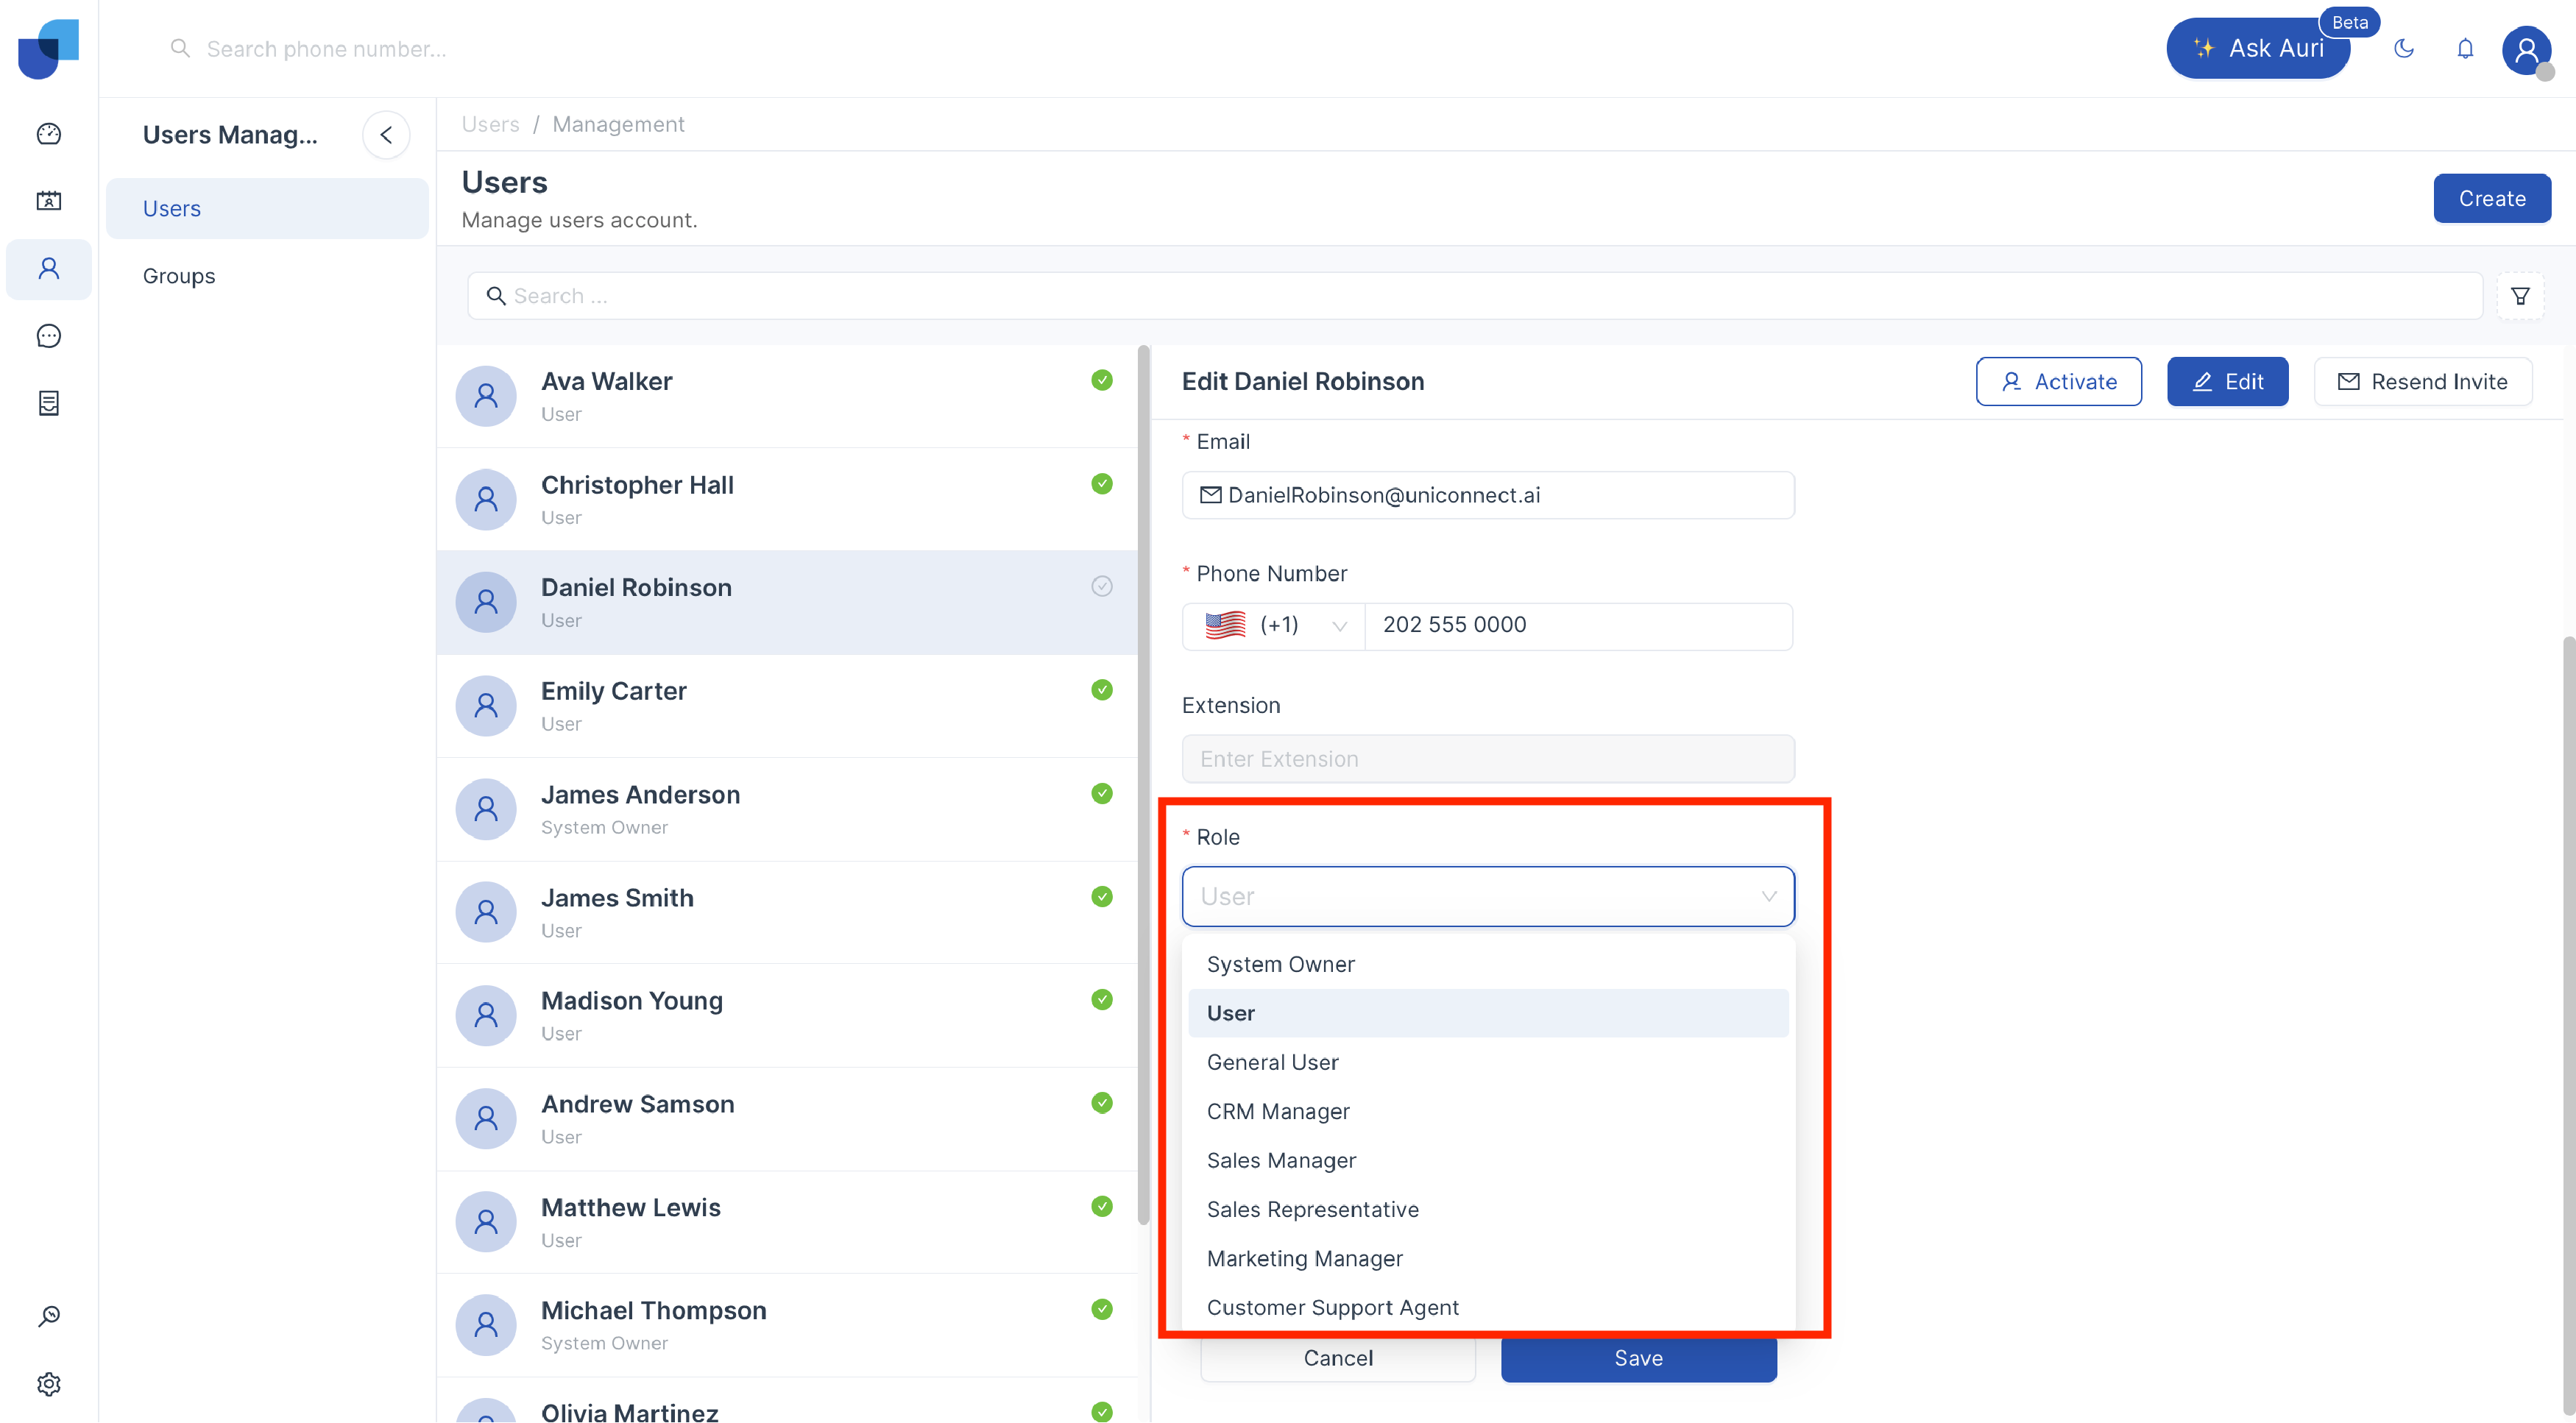
To assign a role to a user,
- Go to Users.
- On the Users page, click the name of the user you want to update.
- In the user’s details page, click the Edit icon.
- On the Edit User page, select the appropriate Role from the dropdown list.
- Click Save.
Editing Role
Existing roles can be updated whenever there are changes in the organization's hierarchy. While editing a role, you can perform the following actions:
- Rename the role
- Change Permission
When a role name is changed, all related data sharing rules are automatically updated. This means you do not need to manually modify data sharing rules or user details.
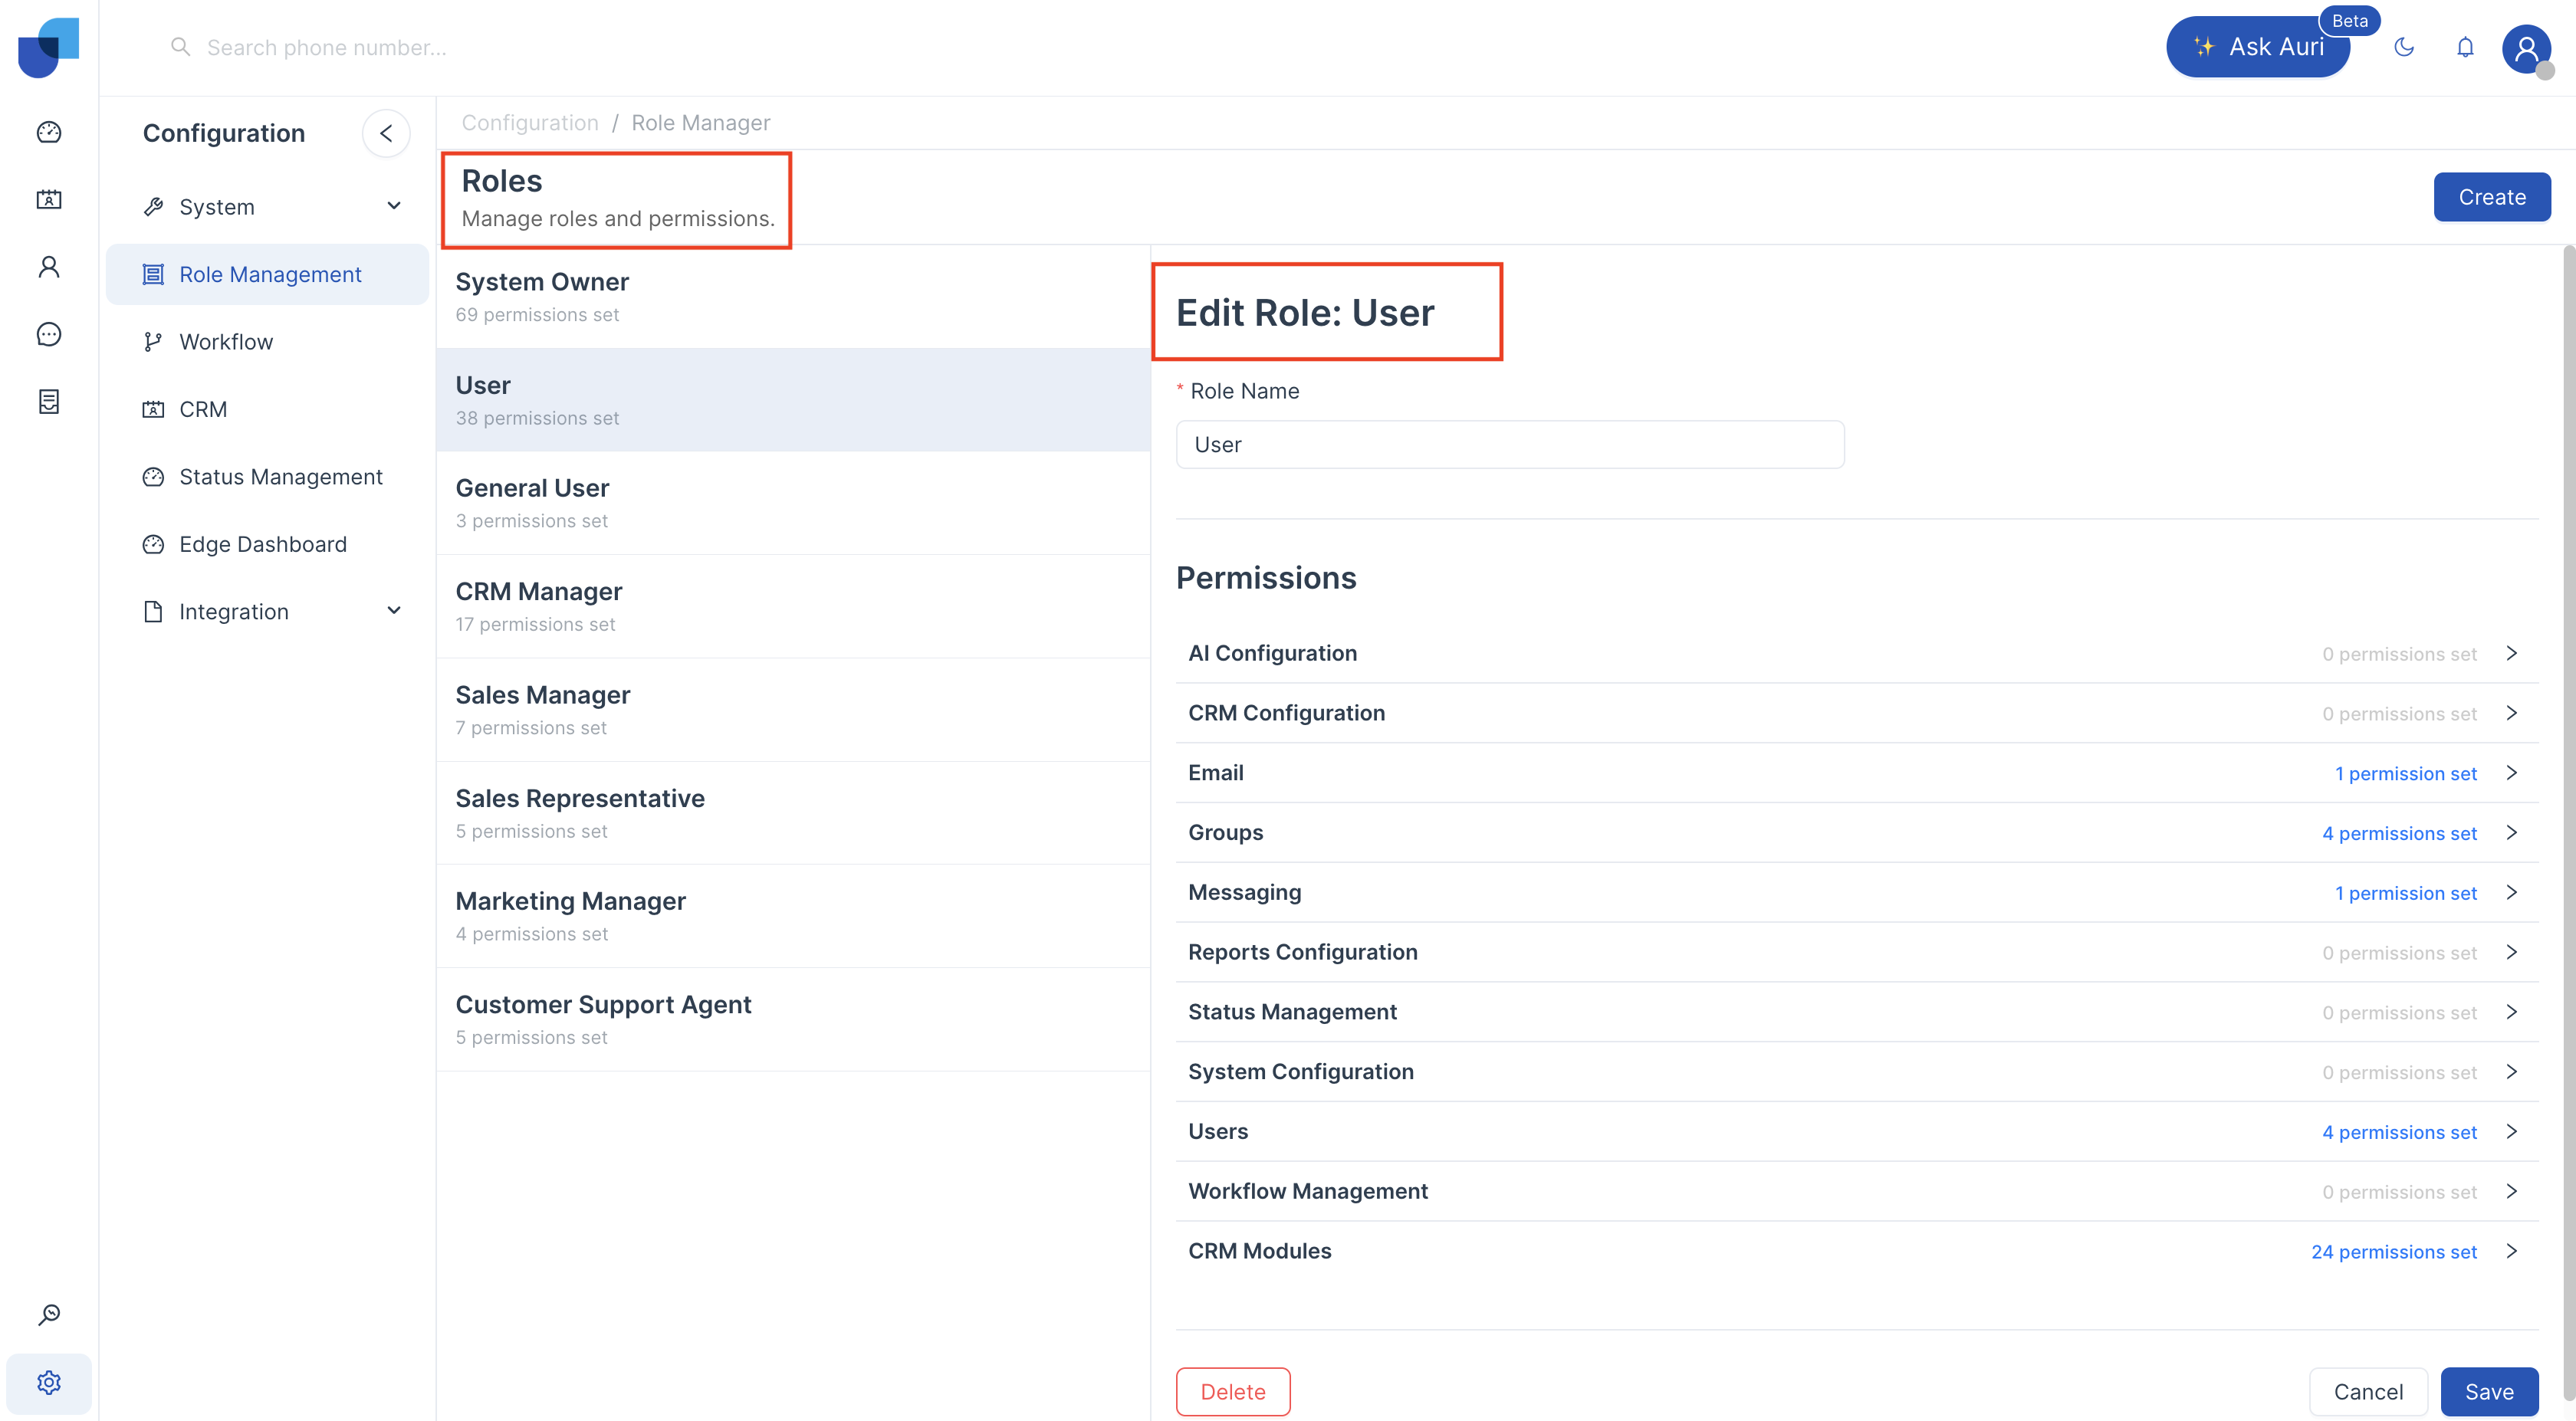
To edit a role,
- Go to Configuration -> Role Management.
- Select the Role.
- Update the necessary role properties.
- Click Save.
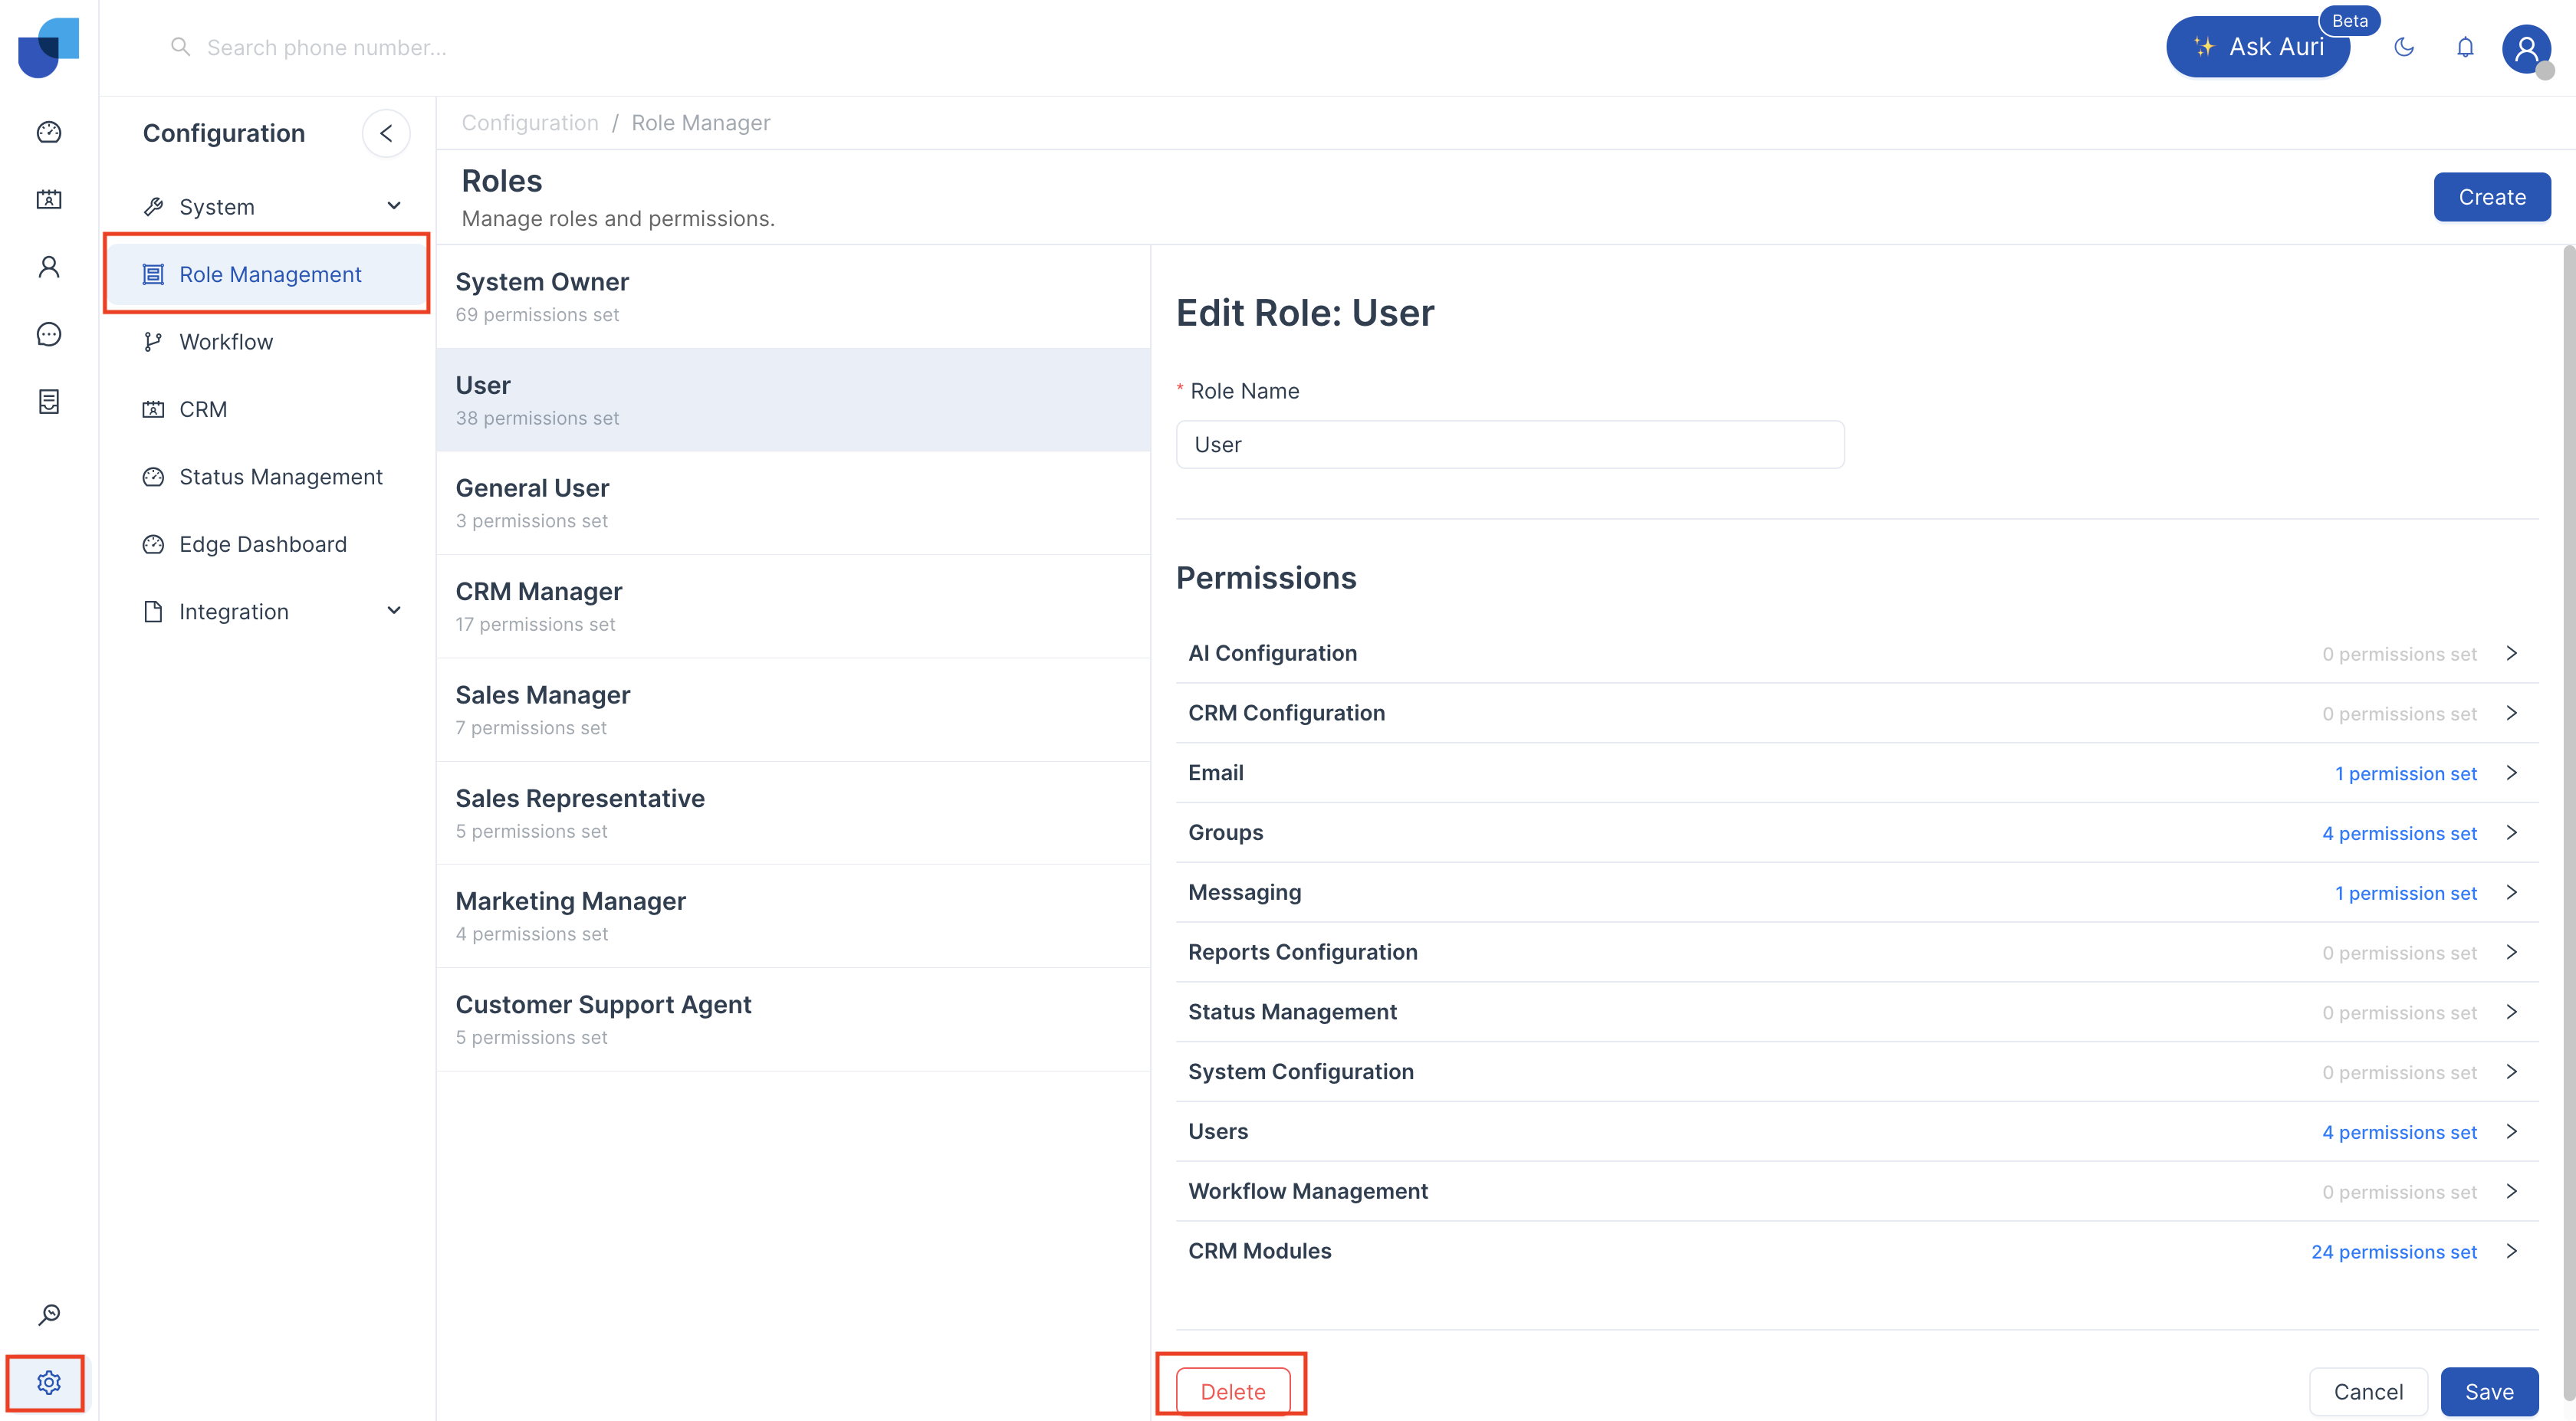
Deleting Role
Existing role cannot be deleted, without transferring the users to a new role.
To delete a role,
- Go to Configuration -> Role Management.
- On the Roles page, click the role you want to delete.
- In the Role Details page, click Delete.
Permissions
| Category | Permission | Purpose |
|---|---|---|
| AI Configuration | Manage Conversations | Manage and control AI-driven conversations |
| Calls | Make Outbound Calls | Place outbound calls from the system |
| Access Call Logs | View call history | |
| Listen Call Recordings | Play back recorded calls | |
| Download Call Recordings | Save call recordings locally | |
| Campaign | View Campaigns | Access campaign details |
| Manage Campaigns | Create and edit campaigns | |
| Execute Campaigns | Run campaigns | |
| Manage Leads | Handle lead records | |
| View Leads | Access lead information | |
| Manage DNC List | Maintain the Do Not Call list | |
| CRM Configuration | CRM Configuration | Create and modify modules and fields |
| CRM Module Delete | Remove CRM modules | |
| Manage Email Templates | Create, edit, and delete email templates | |
| Send E-mail | Send emails from CRM | |
| View Sent Email | View previously sent emails | |
| Groups | View Group | View only groups created by the user, or groups they belong to, or all groups depending on access level |
| Create Group | Create new groups | |
| Update Group | Update only groups created by the user, or groups they belong to, or all groups depending on access level | |
| Delete Group | Delete only groups created by the user, or groups they belong to, or all groups depending on access level | |
| Messaging | Send SMS | Send SMS from CRM |
| View Sent SMS | View previously sent SMS | |
| Manage SMS Templates | Create, edit, and delete SMS templates | |
| Status Management | Manage Status | Create, edit, and delete statuses |
| System Configuration | Global Configuration | Edit global system configuration |
| Module Configuration | Edit module settings | |
| Theme Configuration | Modify application theme | |
| Logs/Task Queues | View logs and task queues | |
| Audit Logs | View only own audit logs, or audit logs of group members, or all audit logs depending on access level | |
| Active Session | View only own active sessions, or sessions of group members, or all sessions depending on access level | |
| System Update | View current and latest updates | |
| API | Manage API integrations | |
| Webhook | Configure and manage webhooks | |
| Log Purge | Purge system logs | |
| Users | View Users | View only own profile and created profiles, or group members, or all users depending on access level |
| Create User | Create new user accounts | |
| Update User | Update only own profile and created users (cannot change own role), or group members, or all users depending on access level | |
| Deactivate User | Deactivate only created users, or group members, or all users except own account depending on access level | |
| Enable Personal 2FA | Enable or disable two-factor authentication under user profile | |
| Role Configuration | Manage roles and define permissions | |
| Auto Answer Mode | Automatically answer incoming calls | |
| Auto Answer Delay | Ring first, then auto-answer after configured delay | |
| Workflow Management | Manage Workflow | Create, edit, and delete workflows |
| Manage System Workflows | Manage system-defined workflows | |
| CRM Modules | View | View only own records, or group members’ records, or all records depending on access level |
| Create | Create CRM records | |
| Update | Update only own records, or group members’ records, or all records depending on access level | |
| Delete | Delete only own records, or group members’ records, or all records depending on access level |