Getting Started
Introduction
This guide helps you quickly set up and start using UNICONNECT.AI™ Edge, the unified agent desktop of the UNICONNECT.AI™ Customer Platform. By following this guide, you will install the application, connect it to your UNICONNECT.AI™ server, configure essential settings, and handle your first customer interaction.
This section is designed for agents, supervisors, and administrators who are using UNICONNECT.AI™ Edge for the first time.
Prerequisites
Before installing and using UNICONNECT.AI™ Edge, ensure that the following requirements are met. These prerequisites guarantee proper system integration, stable performance, and uninterrupted call handling.
1. UNICONNECT.AI™ Platform Installed and Activated
UNICONNECT.AI™ Edge functions as a client application connected to the UNICONNECT.AI™ platform.
Before using the Edge application:
- The UNICONNECT.AI™ platform must be installed.
- The platform must be activated with either a Free Trial or Commercial License.
- The backend services must be running and accessible.
2. Telephony Module Enabled and Configured
The preferred Telephony Module must be:
- Enabled
- Properly configured

3. Valid User Account with Assigned Role
Each user must have:
- A valid UNICONNECT.AI™ account
- Assigned role (Agent or Supervisor)
4. Required Permissions Enabled
User permissions must be properly configured within the UNICONNECT.AI™ platform.
Depending on the role, permissions may include:
- Call handling access
- Dashboard visibility
- CRM module access
5. Stable Internet / Network Connection
6. Headset and Microphone for Call Handling
Agents must use:
- A working headset
- A properly configured microphone
- Functional speakers or headphones
7. Operating System Requirement
UNICONNECT.AI™ Edge supports Windows 10 or later.
8. Microsoft .NET Desktop Runtime
UNICONNECT.AI™ Edge requires the latest supported version of Microsoft .NET Desktop Runtime.
Downloading UNICONNECT.AI™ Edge
This section guides you through the process of downloading and installing UNICONNECT.AI™ Edge from the Microsoft Store. UNICONNECT.AI™ Edge is distributed as a secure desktop application to ensure easy deployment and reliable installation.
01. Accessing the Microsoft Store
UNICONNECT.AI™ Edge is available in the Microsoft Store. Open Microsoft Store.
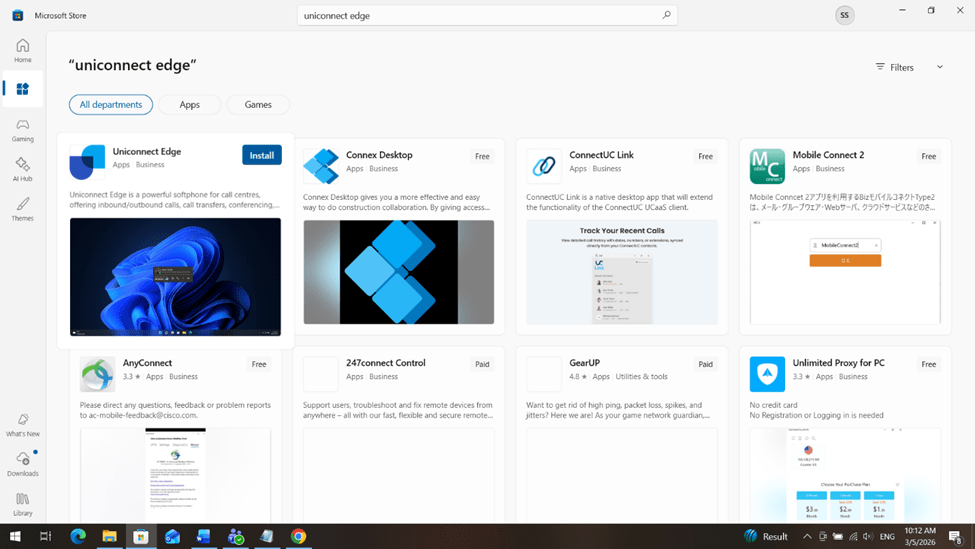
02. Searching for UNICONNECT Edge
Search UNICONNECT Edge and Select the official UNICONNECT.AI™ Edge application from the results list.
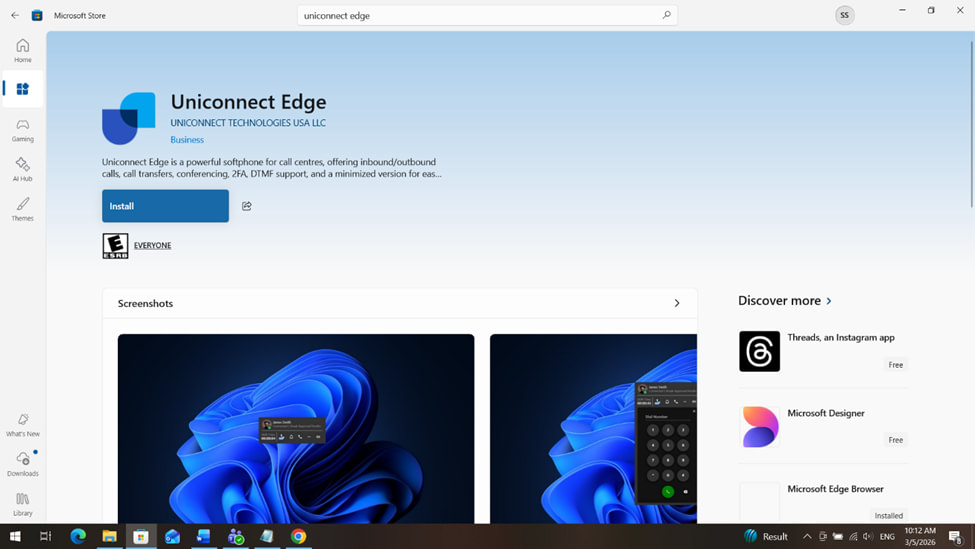
03. Installation Process
Click the Install or Get button. The Microsoft Store will begin downloading the application. Installation will proceed automatically once the download is complete.
First-Time Setup
The first-time setup process connects UNICONNECT.AI™ Edge to Uniconnect platform and verifies your identity. This ensures secure access and proper configuration before handling customer interactions.
Follow the steps below to complete the initial setup.
1. Launching the Application
After successful installation, you can launch Uniconnect Edge from your Windows system.
Upon launch, the application will display the interface for entering Uniconnect Server URL. This is where you connect the app to Uniconnect environment.
2. Entering the UNICONNECT.AI™ Server URL
Enter Uniconnect Server URL and click 'Next' to proceed.
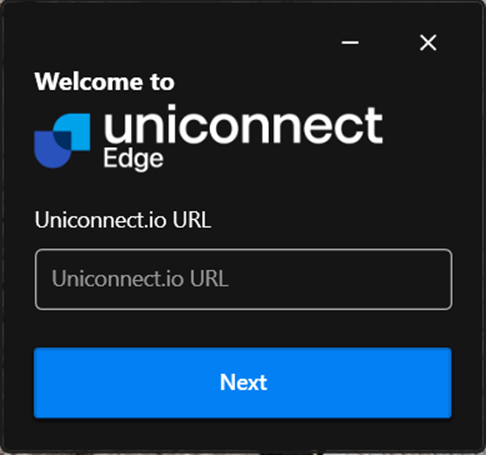
The application will attempt to establish a secure connection with the UNICONNECT.AI™ platform.
A successful connection will redirect you to the Uniconnect Edge login interface.
3. Entering User Credentials
Once the server connection is established, you will be prompted to log in. Uniconnect Edge provides flexible authentication methods to support organizational configurations and telephony integrations.
Option 1: Login Using Email which is registered in Uniconnect platform and Password
Users may log in using:
- The email address registered in Uniconnect platform
- The associated account password
This method is typically used when authentication is managed directly through the Uniconnect platform. Enter Uniconnect Credentials to login.
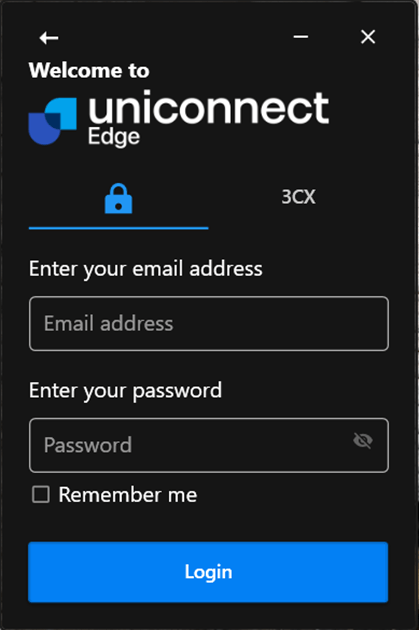
Option 2: Login Using Telephony Credentials
If the user has a registered Telephony account integrated with Uniconnect Platform, they may log in using:
- Extension number
- Password
This method ensures direct alignment between the agent’s telephony identity and the Uniconnect Edge application.
This method can be used when the telephony module is enabled and configured.
After successful authentication, the system links the user session with the assigned telephony extension for call handling.

A successful login will redirect you to the Uniconnect Edge shift start interface, but if Multi-Factor Authentication is enabled, you have to enter verification code to proceed.
Multi-Factor Authentication (If Enabled)
If Multi-Factor Authentication is enabled for user accounts, the SMS Module must be enabled and properly configured within the UNICONNECT.AI™ platform. If Multi factor authentication is activated:
- After entering your credentials, you will be prompted to enter a four digits verification code which should be entered within 2 minutes and 55 seconds.
- The code may be sent to:
- Your registered email address
- SMS to your mobile (depending on system configuration)
- Enter the verification code in the provided field and Click Confirm.
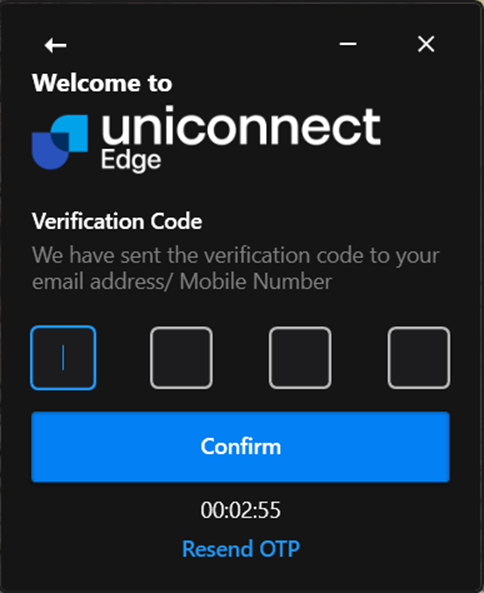
Once verified, you will gain access to the Uniconnect Edge application.
After completing these steps successfully, you are ready to:
- Set up audio devices
- Start your shift
- Begin handling customer interactions
Configuring Basic Settings
After completing the first-time setup and logging into Uniconnect Edge, agents should configure essential working settings before handling customer interactions.
Proper configuration ensures smooth call handling and accurate workforce tracking.
Audio Device Configuration (Microphone & Speaker Selection)
Proper audio configuration is essential for clear communication during calls.
To Configure Audio Devices:
- Navigate to Settings of Uniconnect Edge application.
- Select your preferred microphone, speaker or headset under device
- Save your settings
Start the Shift
Before receiving or making calls, agents must officially start their working session by clicking 'Start Shift' button.

Once the shift is started:
- Your working session begins.
- The system records your shift time and begins calculating the time.
Making Your First Call with Uniconnect Edge
After completing installation, login, and basic configuration, it is important to verify that Uniconnect Edge is properly connected to your telephony platform.
This call ensures:
- The application is successfully integrated with the telephony system
- Your audio devices are correctly configured
- You are ready to handle live customer interactions
Follow the steps below to complete your first test call.
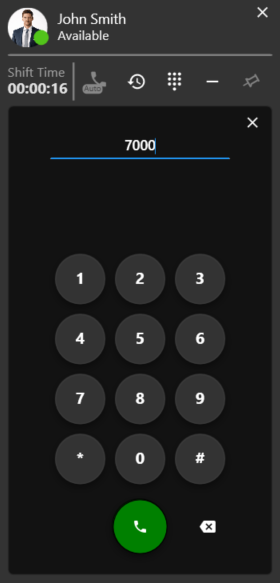
Open the Dial Pad
The Dial Pad allows you to manually enter extension numbers or phone numbers for outbound calls.
Dial 7000 – Telephony Connection Test
- Enter 7000 using the Dial Pad.
- Click the Call button.
The extension 7000 is typically configured as a test endpoint within the telephony platform.
If it is successful once the call is placed:
- You should hear an automated audio playback or system tone.
- The call interface should display an active call status.