User Interfaces Overview
Introduction
Uniconnect Edge is designed with a smart, clean, intuitive, and productivity-focused user interface. The application provides a unified workspace where agents can manage customer interactions, access CRM data, monitor performance, and control their availability all from a single desktop screen. The interface is structured to minimize navigation time and reduce system switching, enabling agents to work faster and more efficiently.
Uniconnect Server Connection Interface
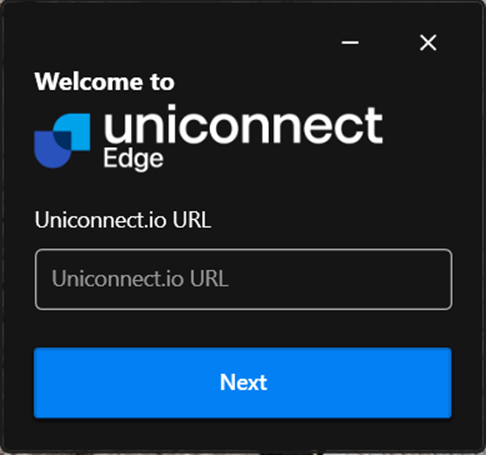
The Uniconnect Server Connection Interface appears when the user launches Uniconnect Edge application.
URL Input Field
The URL input field allows user to enter Uniconnect server URL. If user has been already login to the application, user can select the relevant URL from the dropdown list appearing from the input field by clicking on it.
Next Button
Once the correct Uniconnect server URL is entered, clicking the Next button establishes the server connection and redirects the user to the login interface.
Login Interface
The Login Interface allows users to securely access the Uniconnect Edge application after establishing a successful connection to the server. This interface provides flexible authentication options, enabling users to log in using either their Uniconnect credentials or telephony credentials.
Login Options
Login using Uniconnect Credentials
Users can log in using the email address registered with the Uniconnect platform along with the associated password.
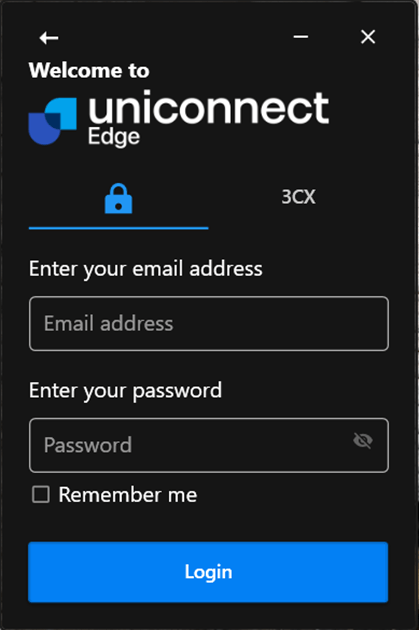
Login using Telephony Credentials
Users who have a configured telephony account may log in entering their telephony extension number and password by clicking the telephony name in the login screen (Eg:3CX).

Remember Me Option
The login interface includes a 'Remember Me' checkbox that allows users to save their login details on the device.When this option is selected the user does not need to re-enter the login details during future sessions on the same device.
Login Button
Login button is available to authenticate and access the application after entering the required credentials.
Back Navigation
At the top-left corner of the login interface, a Back Arrow icon is available. This option allows users to return to the Server Connection Interface if they need to change the Uniconnect server URL and connect to a different Uniconnect server
Multi-Factor Authentication Interface
If Multi-factor authentication is enabled for a user account, the system requires a second verification step after clicking login button.
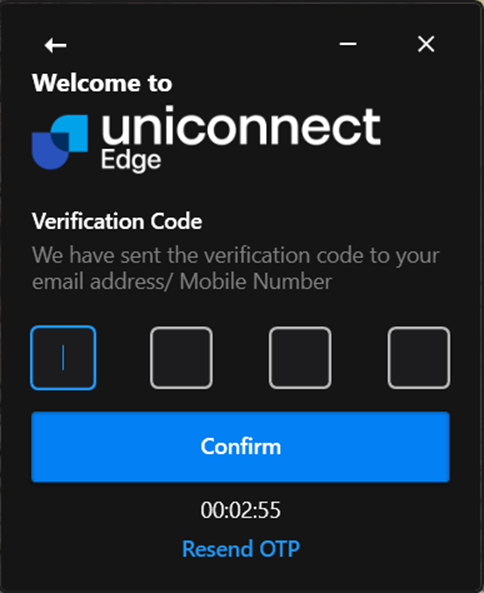
Verification Code Input
Four input fields are displayed for entering the verification code. Each field represents one digit of the OTP. The user should enter the 4-digit code received through the selected verification method (email or SMS). Once the correct code is entered, the user can proceed with verification.
Confirm Button
Below the input fields, the Confirm button is available. After entering the verification code, the user must click Confirm to validate the code and complete the authentication process.
OTP Countdown Timer
A countdown timer is displayed below the confirm button. This timer indicates the remaining time before the current verification code expires.
Resend OTP Option
The 'Resend OTP' option allows the user to request a new verification code if the previous code has expired the user did not receive the code. When the user clicks Resend OTP, a new verification code will be sent to the registered email address or mobile number.
Back Navigation
A Back Arrow icon is displayed in the top-left corner of the interface. This option allows the user to return to the Login Interface if they need change the login method.
The following interface appears if the Remember Me option has been enabled during earlier login attempts.
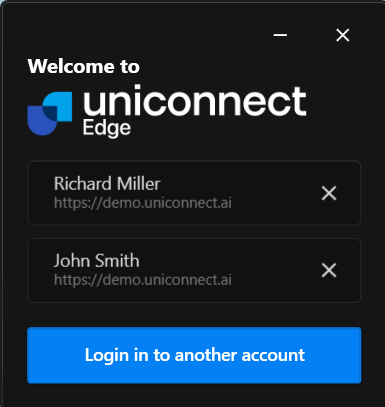
This interface allows users to quickly access the Uniconnect Edge application using previously saved login sessions.
Saved Agents Account List
The main section of the interface displays a list of previously saved user accounts. Each saved entry contains:
- User Name – The name associated with the account.
- Server URL – The Uniconnect server connected to that account.
Users can simply select one of the saved accounts to proceed with login, eliminating the need to manually enter email, extension, or password again.
Remove Saved Account
Each saved account entry includes a Remove (X) icon on the right side. This option allows users to remove a stored account from the saved list if it is no longer required or if they wish to clear stored login details.
Login Using Another Account
At the bottom of the interface, the "Login in to another account" button is available. This option allows users to log in with a different account that is not currently saved. When selected, the system redirects the user to the standard login interface, where new credentials can be entered.
Start Shift Interface

The Start Shift Interface appears after a user successfully logs into the Uniconnect Edge application. This interface allows agents to begin their working session by starting their shift.
The Start Shift interface displays the user profile information, including Profile Avatar, User Name, and Extension Number.
Start Shift Button
On the right side of the interface, the Start Shift button is displayed. The user must click this button to begin their working shift.
Softphone Main Interface
The Edge Softphone Main Interface serves as the central control panel for the application. It provides quick access to user status information, call management tools, and real-time operational statistics through an intuitive and compact layout.
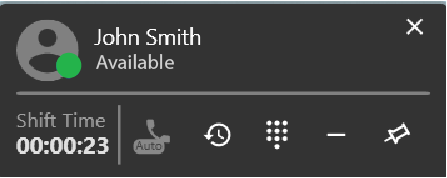
User Information and Status
At the top of the interface, the User Information section displays the currently logged-in user's details. This includes the user avatar, username, and availability status. The status indicator visually represents the user's current state (e.g., Available, Busy, or Offline), enabling quick identification of the agent's readiness to handle calls.
Shift Time Display
The Shift Time counter shows the duration of the current active session or working shift. This timer continuously updates.
Call Control Toolbar
The Call Control Toolbar provides quick access to essential call handling and application management features. These controls allow users to efficiently manage telephony operations without navigating away from the main interface.
The toolbar includes the following functions:
- Auto Call Answer – Enables or disables automatic answering of incoming calls.
- Call History – Provides access to previously handled calls and call records.
- Dial Pad – Opens the dial pad interface for manual number entry and call initiation.
- Minimize Application – Minimizes the softphone interface while keeping the application active.
- Dock Mode – Allows the interface to be pinned or docked for persistent visibility on the screen.
Dashboard Statistics Widgets
The lower section of the interface contains Dashboard Statistic Widgets with widget name and data, which provide real-time operational insights. These widgets display key performance and activity metrics. Each widget presents summarized data in a visually accessible format, enabling users to quickly assess current workload and operational status.
Refer Unified Agent Dekstop Document for detailed overview.
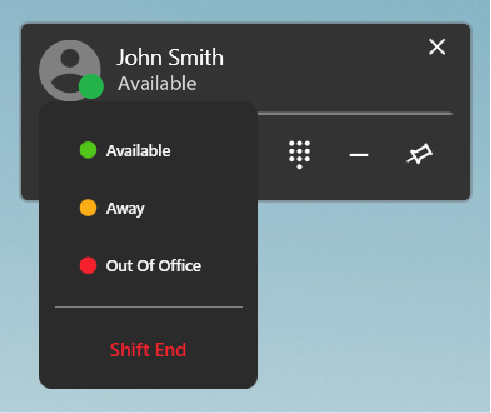
Status Selection Shift End Interface
When the avatar icon is clicked, a status list panel is displayed. This panel contains a list of predefined availability statuses that users can select to indicate their current working state.
Shift End Option
At the bottom of the status list, a Shift End button is available. This option allows users to end their active working shift within the softphone application.
Call History
The Call History Interface of the UniConnect Edge Softphone provides users with a comprehensive view of previously handled calls. It allows agents to quickly review past interactions, identify missed calls, and conveniently initiate return calls when necessary. The interface is designed to support efficient call tracking and quick access to contact information.
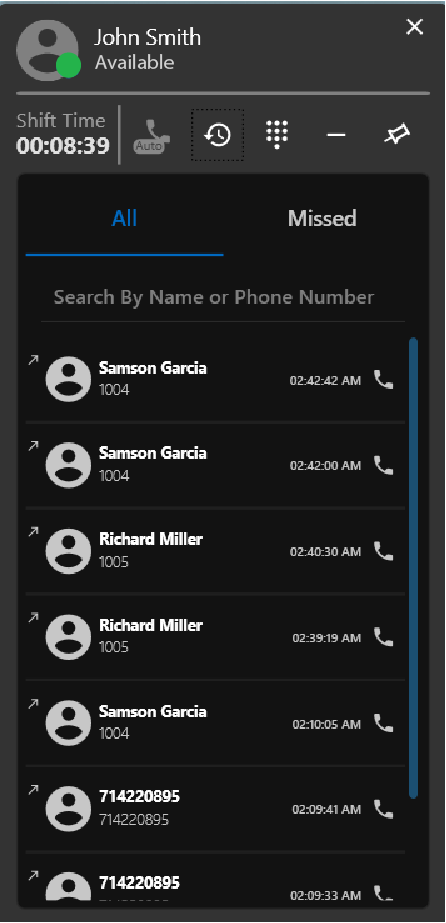
Call History Tabs
At the top of the call history panel, the interface provides filtering options through two tabs:
All – Displays a complete list of all recent call activities, including incoming, outgoing, missed calls and conference calls.
Missed – Displays only calls that were not answered, enabling users to quickly identify and respond to unattended calls.
Search Function
Below the tabs, a Search Bar is available to help users quickly locate specific call records. Users can search using contact name or phone number.
Call Record List
The central section of the interface displays the list of call records. Each entry in the list contains key information related to a specific call, including:
- Caller or contact name
- Associated phone number
- Call timestamp
- Call direction indicator (incoming, outgoing, or missed)
- Contact avatar icon
Quick Call Back Action
Each call record includes a Call Action icon that allows users to immediately initiate a call to the selected contact or number. This enables agents to quickly return calls without manually entering phone numbers.
Dial Pad
At the top of the dial pad interface, the Number Display Area shows the phone number currently being entered. As users press the keypad buttons, the digits appear in this display field in real time, allowing them to verify the number before initiating the call.
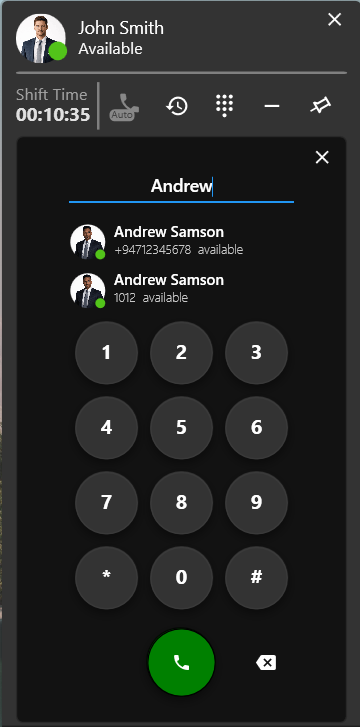
Contact and User Search
The dial pad interface also supports contact search functionality, enabling users to quickly find contacts or internal users by typing their name or phone number. As the user enters text or digits, matching results are displayed dynamically.
Each search result includes the following details:
- User avatar
- Contact name
- Phone number
- Availability status
The availability status helps users determine whether a contact or internal user is currently available before initiating a call.
Keypad Layout
The central section of the interface contains a standard numeric keypad arranged in a 3 × 4 grid layout. The keypad includes:
- Numeric digits 0–9
- Special characters * (asterisk) and # (hash)
Users can click or tap these buttons to manually enter a phone number when placing an outbound call.
Call Action Button
Below the keypad, a Call Button is provided to initiate the outbound call. Once a phone number is entered or a contact is selected, pressing this button begins the dialing process.
Clear Input Option
A Delete/Clear option is available next to the call button, allowing users to remove the last entered digit from the number display field.
Interface Controls
The dial pad interface also includes a close control that allows users to collapse the dial pad panel and return to the main softphone interface without initiating a call.
Incoming Call
The Incoming Call Interface appears when the agent receives an inbound call through the Uniconnect Edge application.
The Incoming Call Interface includes the following controls:
Caller Information Display – Shows the caller’s contact name or phone number along with the avatar, helping the agent quickly identify who is calling.
Answer Button – Allows the agent to accept the incoming call and begin the conversation.
Decline (Cut) Button – Enables the agent to reject the incoming call.
When an outbound call is initiated, the interface displays the target contact information, including Contact Name, Dialed Phone Number and End Call Button
Active Call
This interface provides agents with real-time visibility of the ongoing call and a set of controls required to manage the conversation effectively.The softphone displays the contact details of the connected party, including the contact name and the associated phone number. A call duration timer is also presented, allowing the agent to monitor the length of the conversation from the moment the call is established. The interface clearly indicates the agent’s current state as “On Call.”
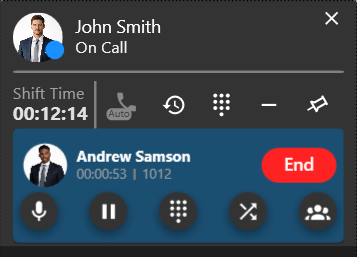
The Active Call Interface provides several controls that allow the agent to manage the call efficiently:
Mute Control – Temporarily disables the agent’s microphone, allowing the agent to listen without transmitting audio to the other party.
Hold Control – Places the caller on hold while the agent performs other tasks or consults additional resources.
Dial Pad Access – Opens the keypad to enter digits during the call.
Blind Transfer – Allows the agent to transfer the ongoing call to another user or extension when the caller needs to be redirected to the appropriate resource.
Conference Control – Enables the agent to add additional participants to the current call, creating a multi-party conversation for collaborative discussion or issue resolution.
End Call Button – A clearly visible control used to terminate the active call.
Conference Call
The interface presents a structured list of all participants currently involved in the conference call. Each participant entry includes:
- Contact Name (If contact is saved in CRM) – Displays the name associated with the connected user.
- Contact Number – Shows the phone number linked to the participant.
- Individual Call Duration – Indicates how long each participant has been connected to the conference.

The Conference Interface provides several controls that allow the agent to manage each participant separately.
Mute Control – Allows the agent to mute their microphone so that other participants in the conference cannot hear the agent temporarily.
Hold Control – Enables the agent to place a participant on hold while continuing the discussion with others or performing necessary actions.
Participant Controls – Provides individual controls for each participant, allowing the agent to manage or remove specific participants from the conference when required.
End Call Button – Ends the call for the selected participant.
End All Button – Terminates the entire conference session and disconnects all participants simultaneously.
Rejoin Button – Allows agent to re-dial to a left participant to join the conference again.
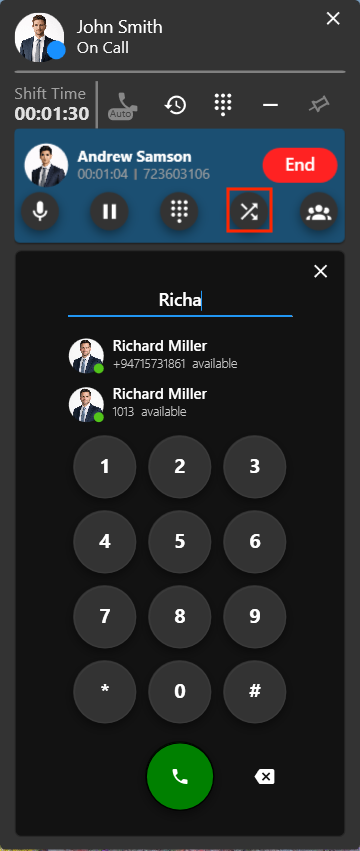
Blind Transfer
This interface appears when the agent wants to perform a blind transfer from the control panel during an active call. Dial pad is opend when user clicks on transfer button to dial a number. In the call interface:
Hold / Resume Button – Allows the agent to place one participant on hold while speaking with the other, enabling private consultation when necessary.
Merge / Transfer Button – Enables the agent to merge the two calls, completing the attended transfer so the caller can continue the conversation directly with the second party.
Conference Button – Allows the agent to merge both participants with the agent into a conference call when collaborative discussion is required.
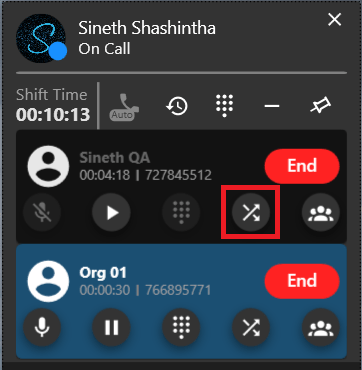
Attended Transfer
This interface appears when the agent initiates an attended transfer from the call control panel during an active call. The interface displays both connected participants, allowing the agent to manage each call before completing the transfer. This enables the agent to introduce the caller, explain the situation, or confirm the availability of the receiving party before transferring the call.
Connected Parties – Displays both connected parties, allowing the agent to clearly identify the original caller and the second party.
Hold / Resume Button – Allows the agent to place one participant on hold while speaking with the other, enabling private consultation when necessary.
Merge / Transfer Button – Enables the agent to merge the two calls, completing the attended transfer so the caller can continue the conversation directly with the second party.
Conference Button – Allows the agent to merge both participants with the agent into a conference call when collaborative discussion is required.
Dock Mode
The docked interface displays essential information such as the agent profile details, availability status, extension number, shift time, and statistics widgets. It also provides quick access to important controls including call-related functions, and interface options.
When Dock Mode is enabled, the softphone is minimized into a compact bar that stays fixed at the top of the screen.
Configuration Interfaces
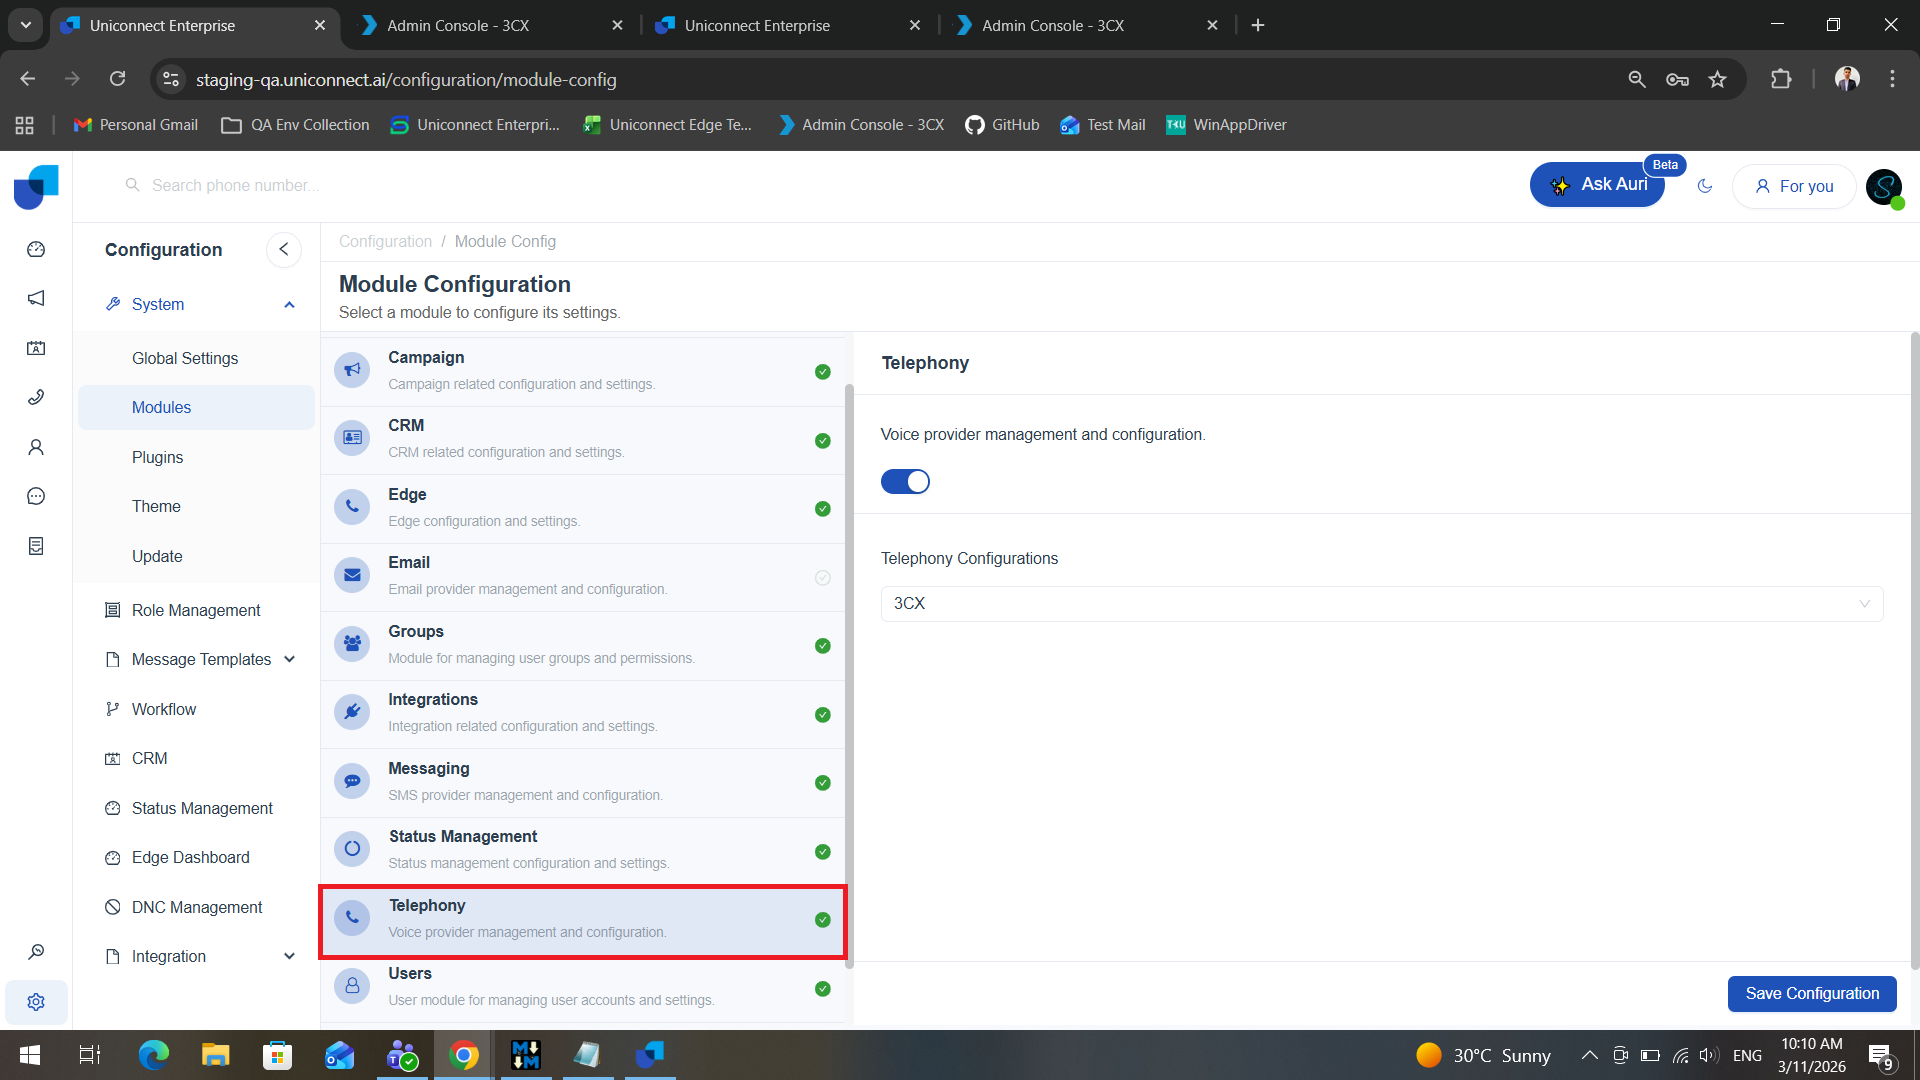
Telephony Module Configuration
The Telephony Module must be enabled to allow agents to make and receive calls through the Edge application.
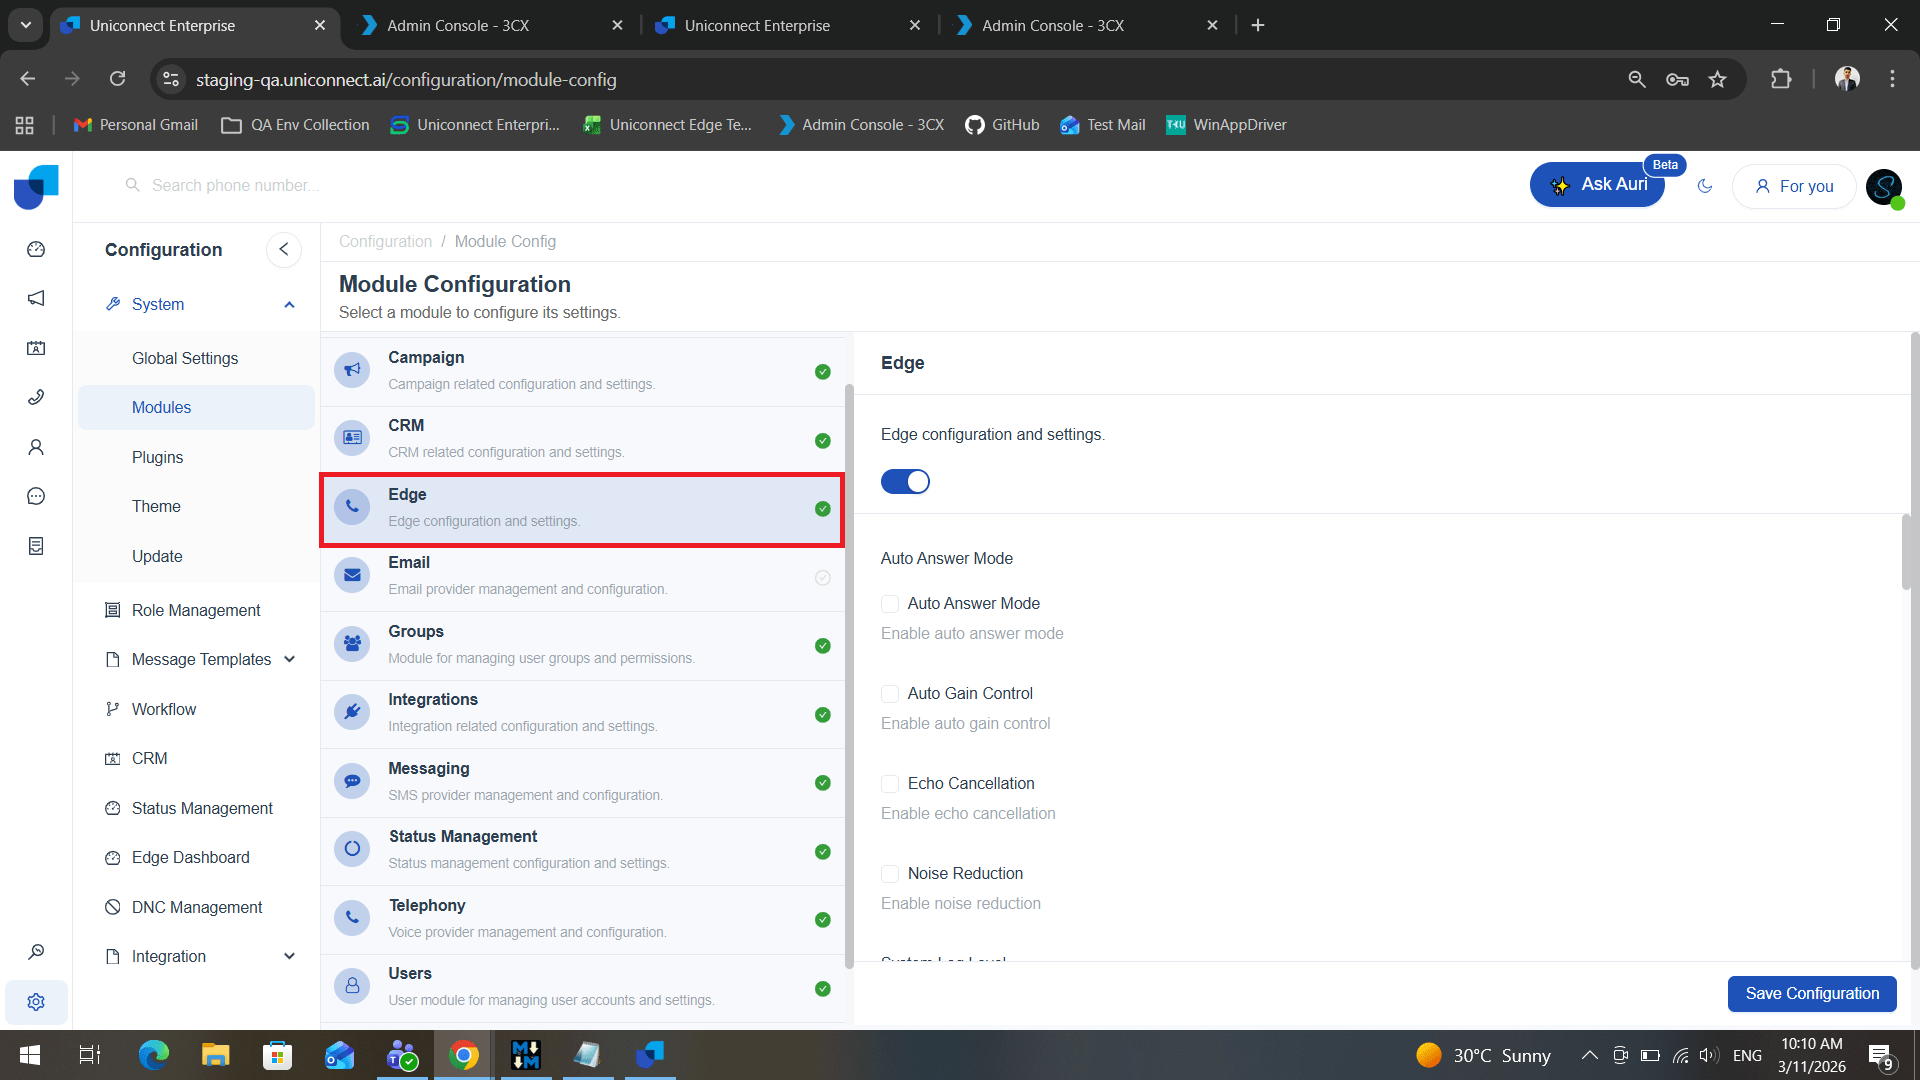
Edge Module Configuration
The Edge Module must also be enabled to activate the core functionalities of the Uniconnect Edge application.
For detailed configuration steps and additional information, please refer to the Module Configurations document.
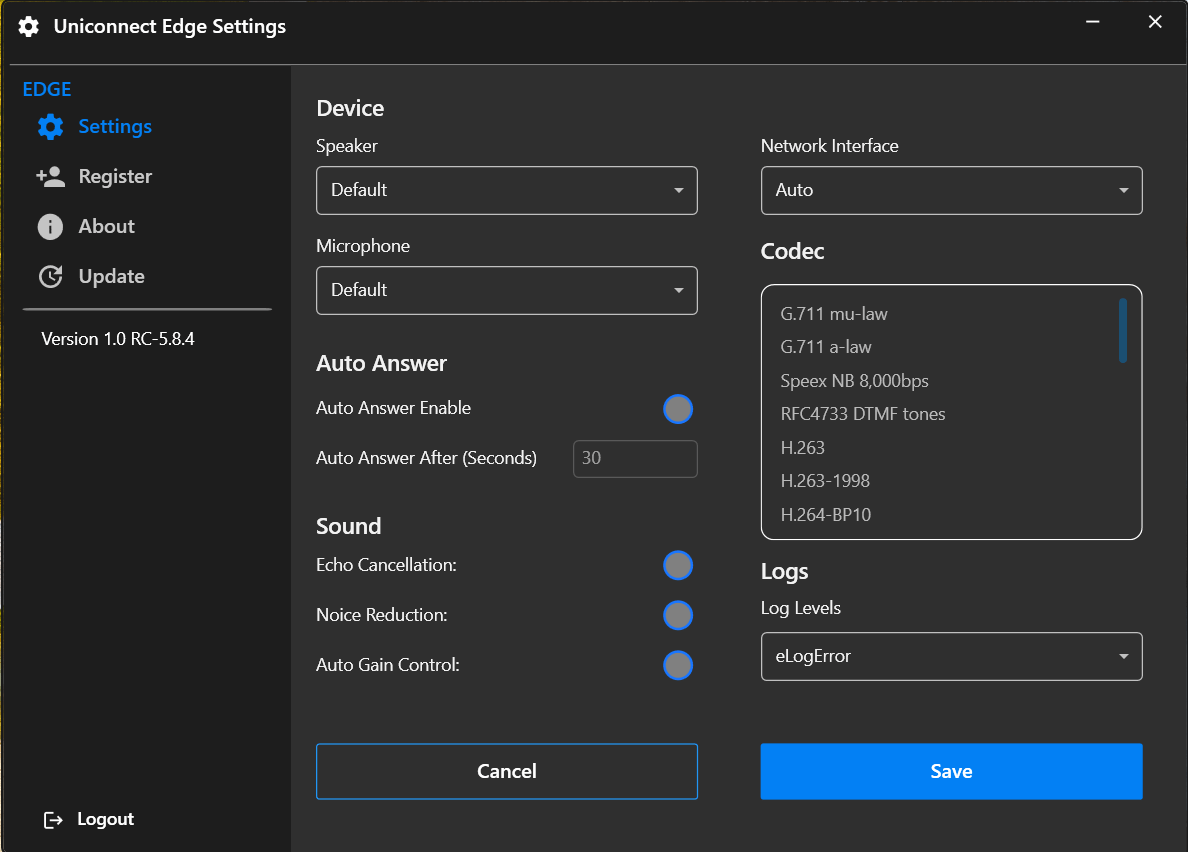
Edge Settings
The settings interface is organized into a navigation panel and a configuration panel, allowing users to easily access and manage different configuration categories.
- Navigation Panel
The left-side navigation panel provides access to different Edge-related configuration sections:
- Settings
- Register
- About
- Update
- Logout
The current version of the application is also displayed within the navigation panel.
Device Configuration
The Device section allows users to configure audio input and output devices used during calls.
- Speaker
- Microphone
- Network Interface
Auto Answer Settings
The Auto Answer feature allows incoming calls to be automatically answered after a specified time interval.
- Auto Answer Enable
- Auto Answer After (Seconds)
Sound Settings
- Echo Cancellation
- Noise Reduction
- Auto Gain Control
Codec Configuration
Available codec options may include:
- G.711 mu-law
- G.711 a-law
- Speex NB
- RFC4733 DTMF tones
- Other supported codecs depending on the telephony configuration.
Logging Configuration
Log Levels – Users can select the level of system logging
Control Buttons At the bottom of the interface, users are provided with control options:
- Save
- Cancel