Power Campaign Create
1. Introduction
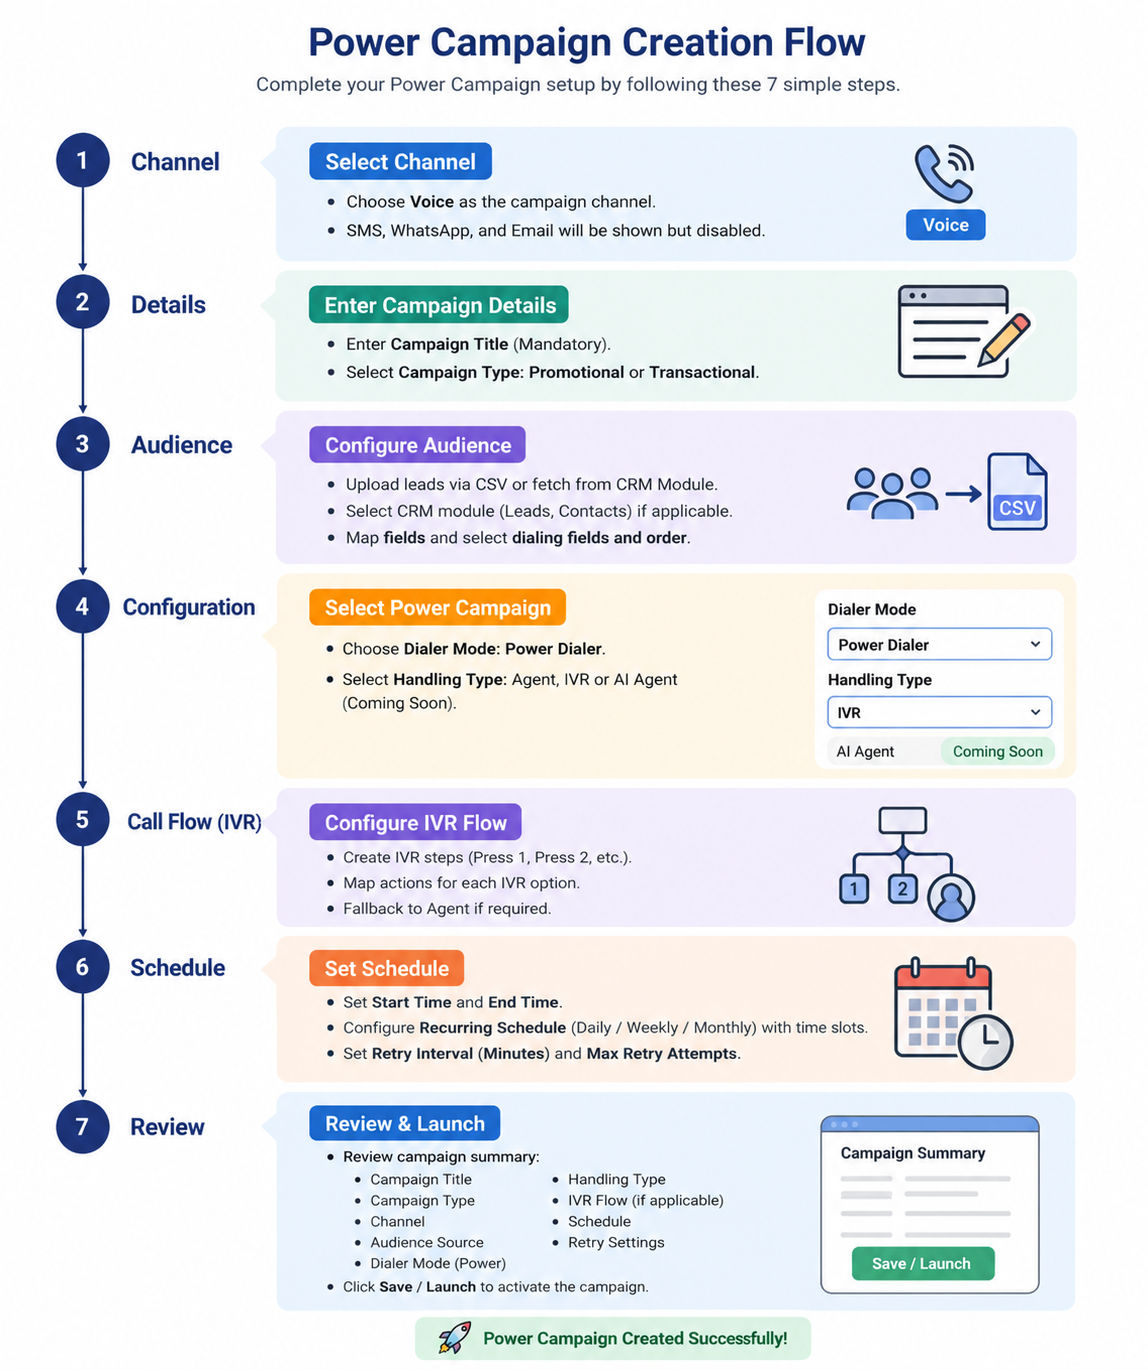
The Power Campaign is designed for high-speed outbound calling where the system directly dials the customer first and then connects the call to an agent, IVR, or AI (coming soon). This approach ensures faster campaign execution, maximum customer reach, and reduced waiting time for agents. Unlike Preview Campaign, there is no agent confirmation before dialing. The system automatically manages the call flow.
2. Configuration Overview
3. Create Campaign
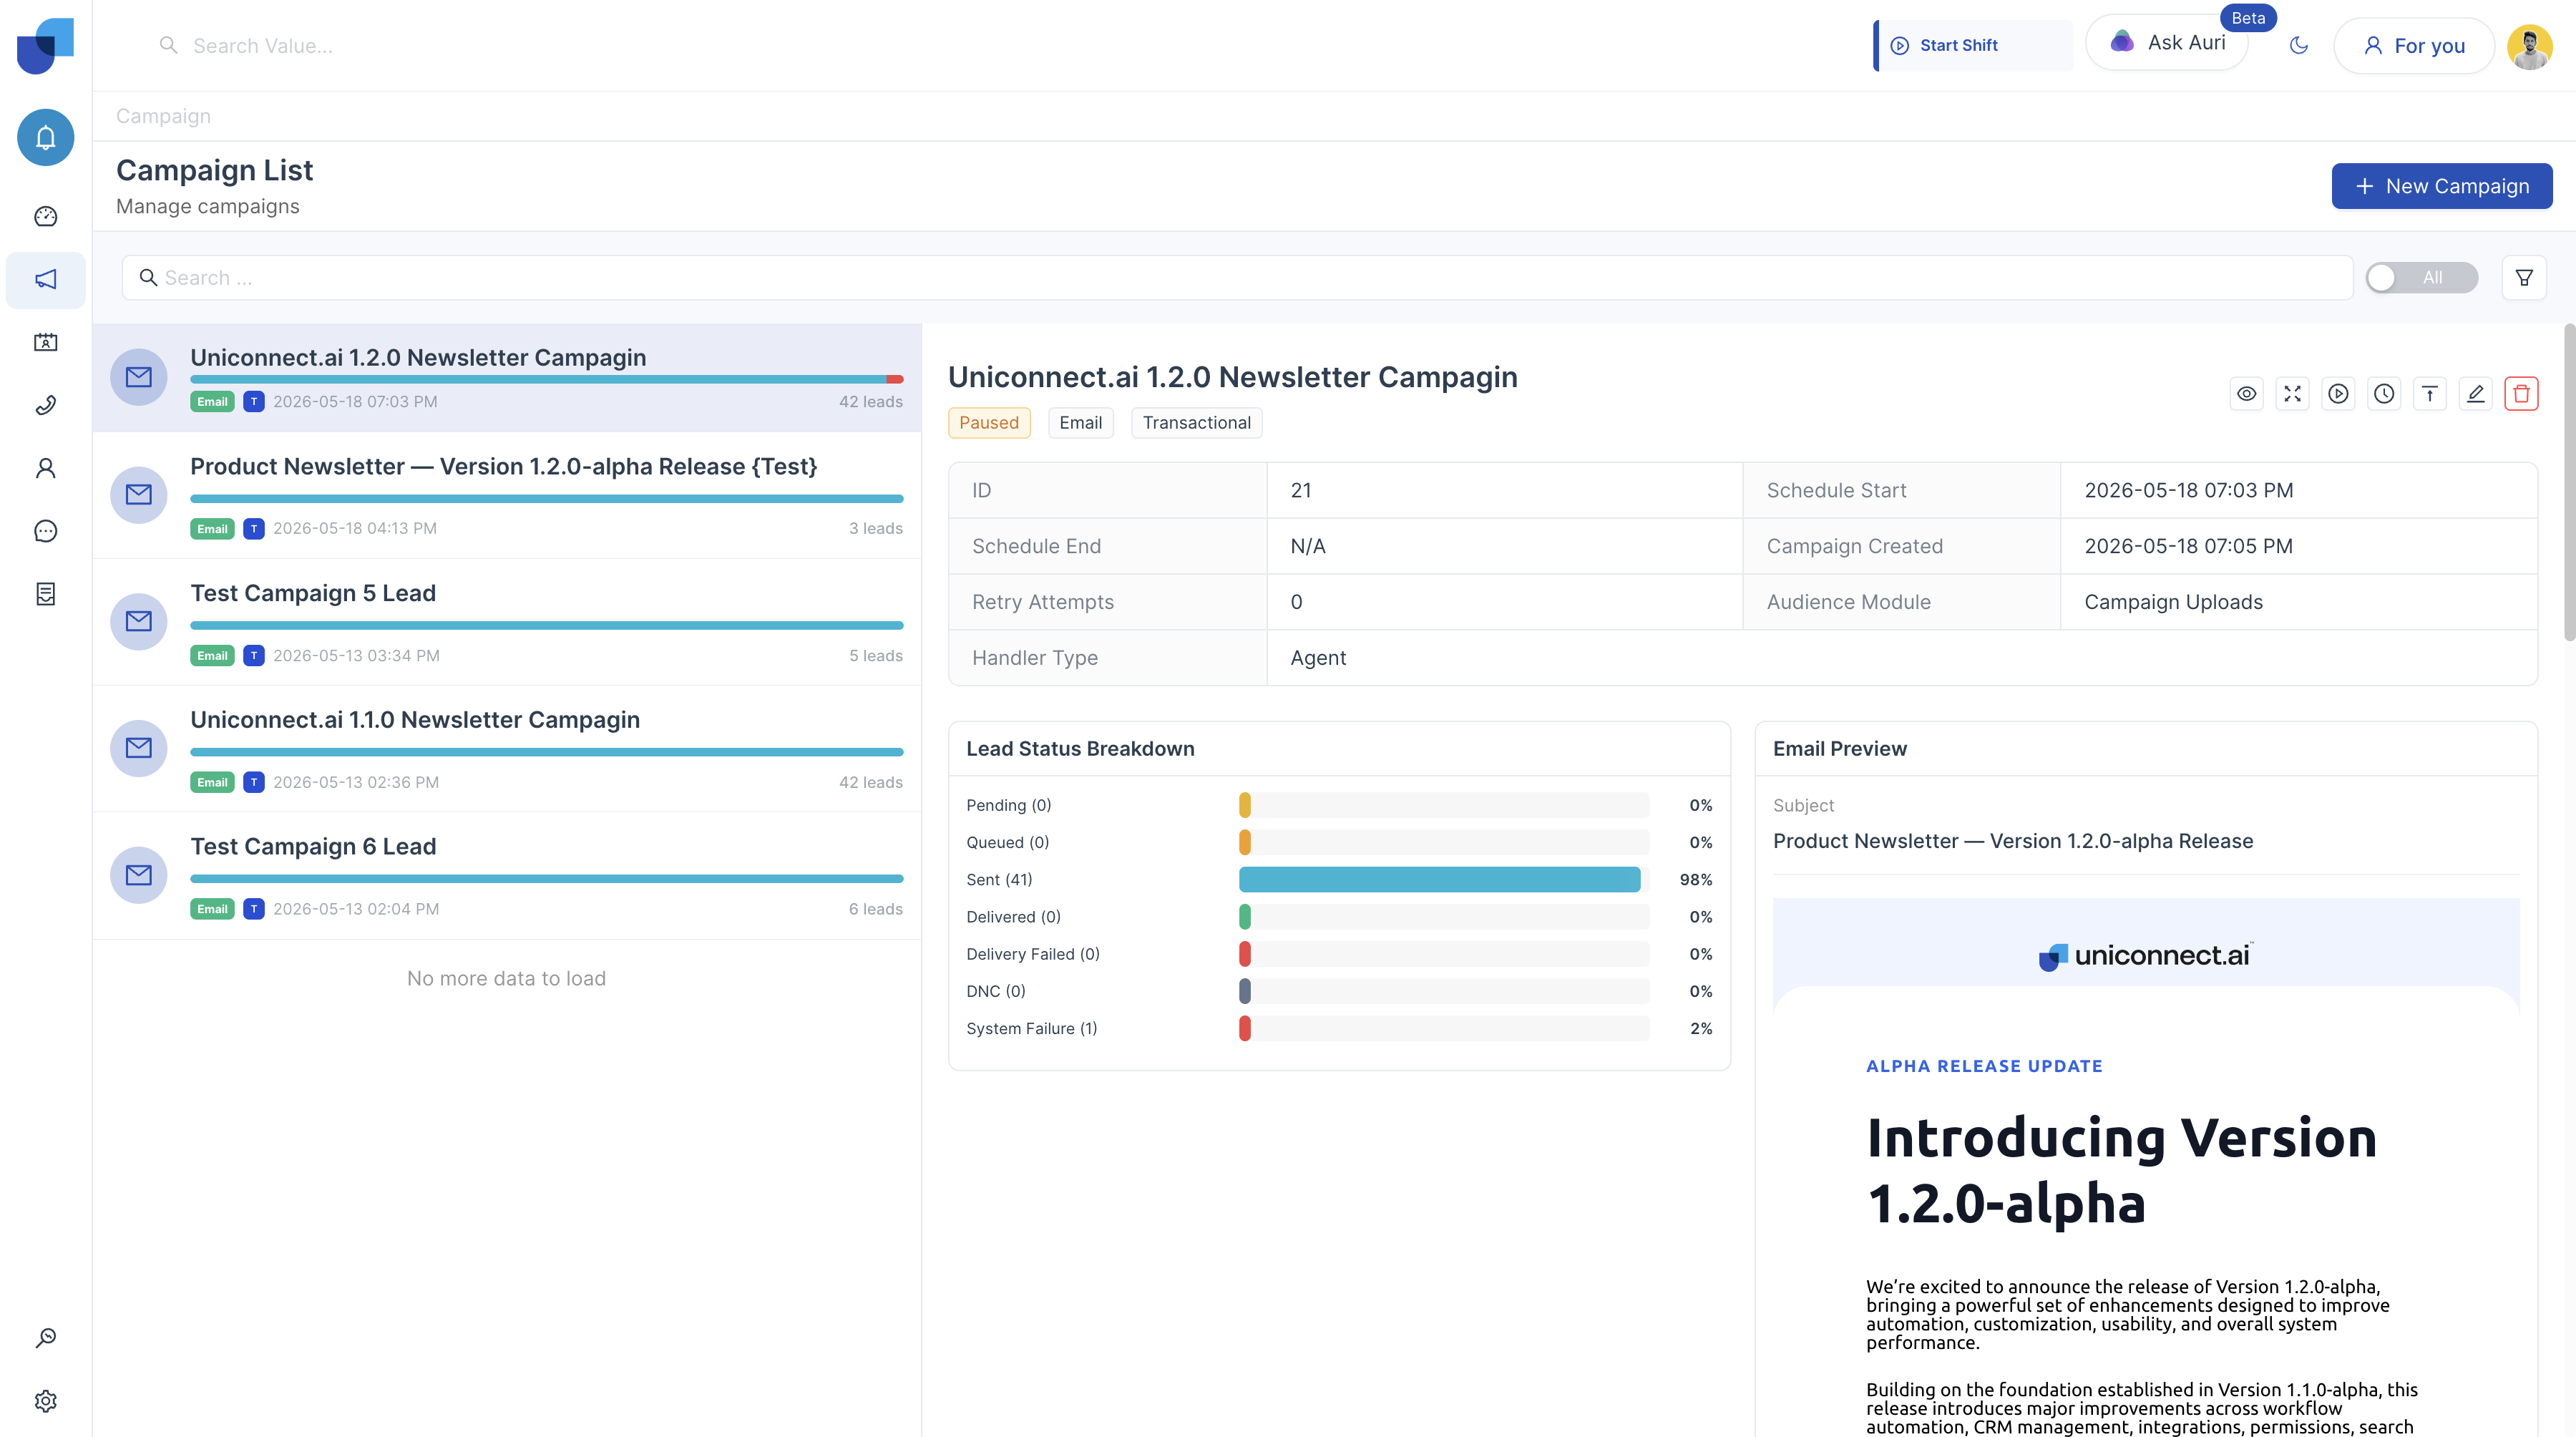 Navigation: Campaign → Create Campaign
Required Actions: Select Channel → Voice (SMS, WhatsApp, Email are visible but only enabled channels can be used)
Enter Campaign Details:
- Campaign Title (Mandatory)
- Campaign Type → Promotional / Transactional
Promotional Campaign A promotional campaign is used to advertise products, services, or offers to a group of customers. The main goal is to attract attention, increase sales, or promote something. Example: “Get 20% discount on all items this weekend. Visit now!”
Transactional Campaign A transactional campaign is used to send important information related to a specific action or service. The main goal is to inform the customer about something relevant. Example: “Payment of LKR 5,000 has been successfully completed.”
4. Audience Upload Configuration
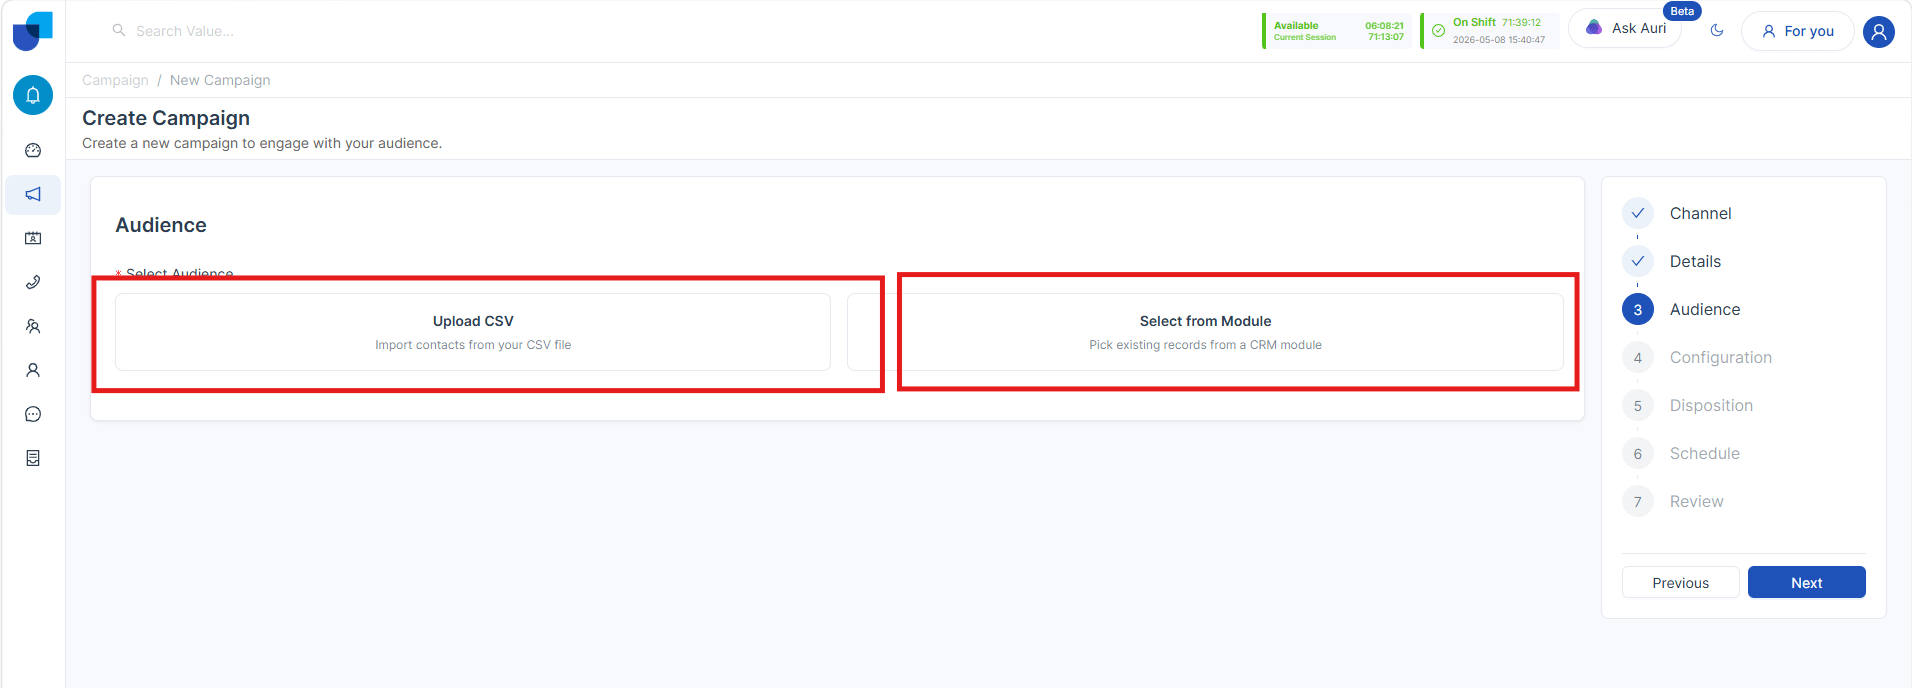 This section explains how to add leads to a campaign using two methods: CSV Upload and CRM Module Import.
1. CSV Upload
Leads can be uploaded into the campaign using a CSV file. This method is useful for bulk importing external data.
Upload Methods: Drag and drop CSV file into the upload area or select file manually using file picker.
File Validation: Only CSV format is supported. System validates file structure before processing. Invalid formats will show an error message.
Field Mapping: After uploading the CSV file, a field-mapping interface is displayed.
Mandatory Mapping: Phone Number must be mapped (required for dialing).
Pre-configured Fields: First Name, Last Name, Email.
Custom Fields: Additional fields can be mapped. Custom fields are based on Lead Module configuration.
2. CRM Module Import
Leads can be directly imported from an existing CRM module, eliminating the need for manual CSV uploads.
Module Selection: Select a CRM module such as Leads or Contacts.
Data Selection Options: Import all records or apply filters such as Status, Tags, and Created Date.
Import Behavior: Selected leads are imported into the campaign and automatically linked to the campaign.
Common Configuration (Applicable to Both Methods)
Dialing Fields: Multiple phone number fields can exist in the same dataset. A dropdown is provided to select dialing fields and only phone number fields are displayed.
Dialing Order: Dialing sequence is based on the selected dialing field order. System follows the defined order when attempting calls. For CRM module, dialing order can be based on any field in the selected CRM module.
Additional Lead Management: Users can add new leads even after campaign creation using CSV Upload or CRM Import.
5. Campaign Configuration
5.1 Select Handling Type

Agent: Calls are handled by live agents. User must select an agent group or queue. Calls will be routed to available agents.
IVR: Calls are handled using menu prompts such as “Press 1 for Sales, Press 2 for Support.”
AI Agent (Coming Soon): Calls will be handled by AI-based conversation system. UI should display a “Coming Soon” icon.
5.2 Select Dialer Mode

Configuration: Select Power Dialer.
System Behavior: System directly calls the customer first. Once the customer answers, the call is connected to Agent, IVR, or AI.
Important Conditions: If IVR is selected, Power Dialer is automatically selected and locked. The UI must clearly indicate that this is a Power Campaign.
6. Link CRM Module for Disposition
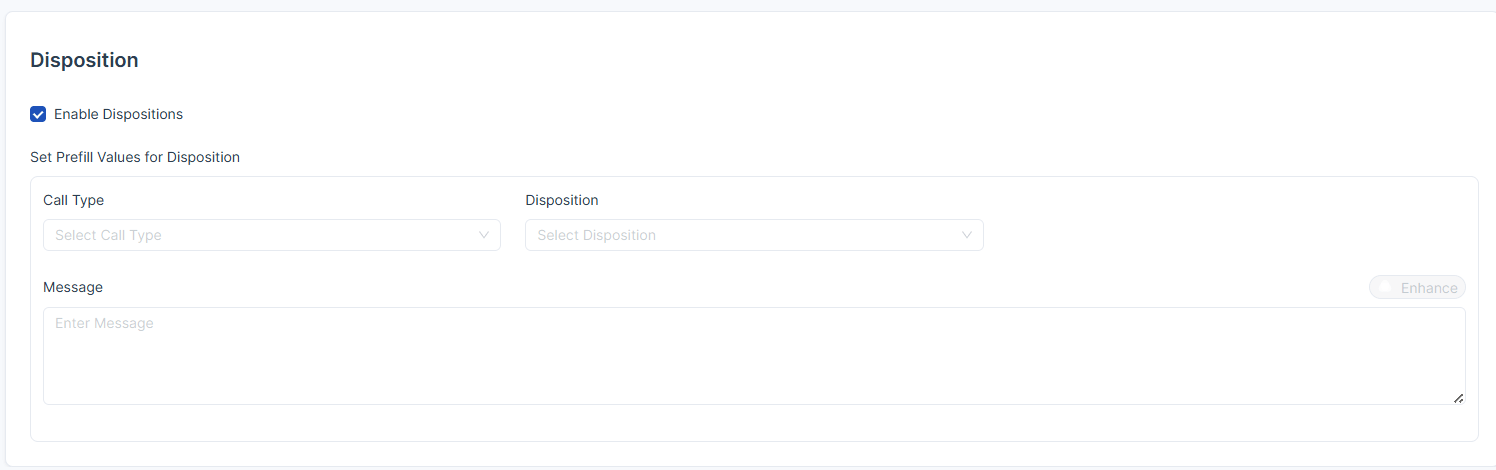
Disposition Note Module enables capturing call outcomes.
Purpose: Record result of each call and track customer responses.
Examples of Dispositions: Answered, Not Answered, Interested, Call Back Later.
Configuration: Custom fields can be configured from CRM Module Configurations. Fields are dynamic based on CRM setup.
7. Schedule Configuration
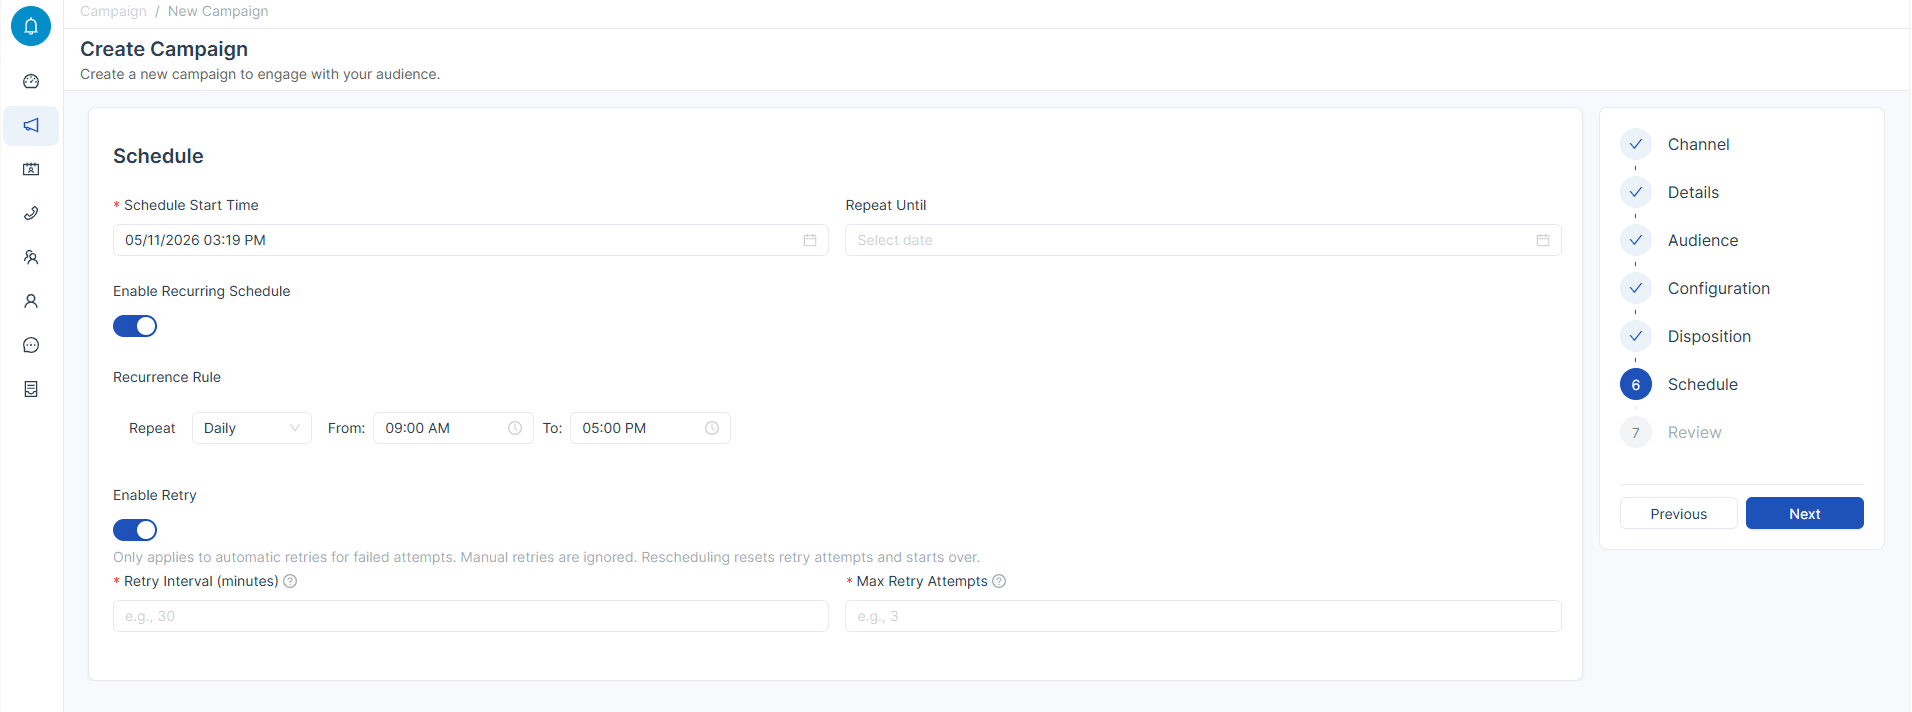
Fields: Start Time defines campaign start time and End Time defines campaign end time.
Recurring Schedule
Recurring schedule allows the campaign to run automatically at predefined intervals instead of running only once.
Options: Daily (runs every day), Weekly (runs on selected days), Monthly (runs on selected dates).
Time Slots
Specific time ranges can be defined and the campaign will only execute within those time periods.
Example: Daily campaign from 9:00 AM to 6:00 PM or Weekly campaign on Monday and Friday between 10:00 AM – 2:00 PM.
Retry Configuration
Retry configuration controls how the system re-attempts calls when a call fails or is not connected.
Retry Interval (Minutes): Defines the waiting time before attempting the next call to the same lead. Example: If Retry Interval = 10 minutes, the system waits 10 minutes before retrying.
Max Retry Attempts: Defines the maximum number of retry attempts. Example: If set to 3 → 1st call failed, 2nd retry, 3rd final attempt, after that no further calls.
8. Review
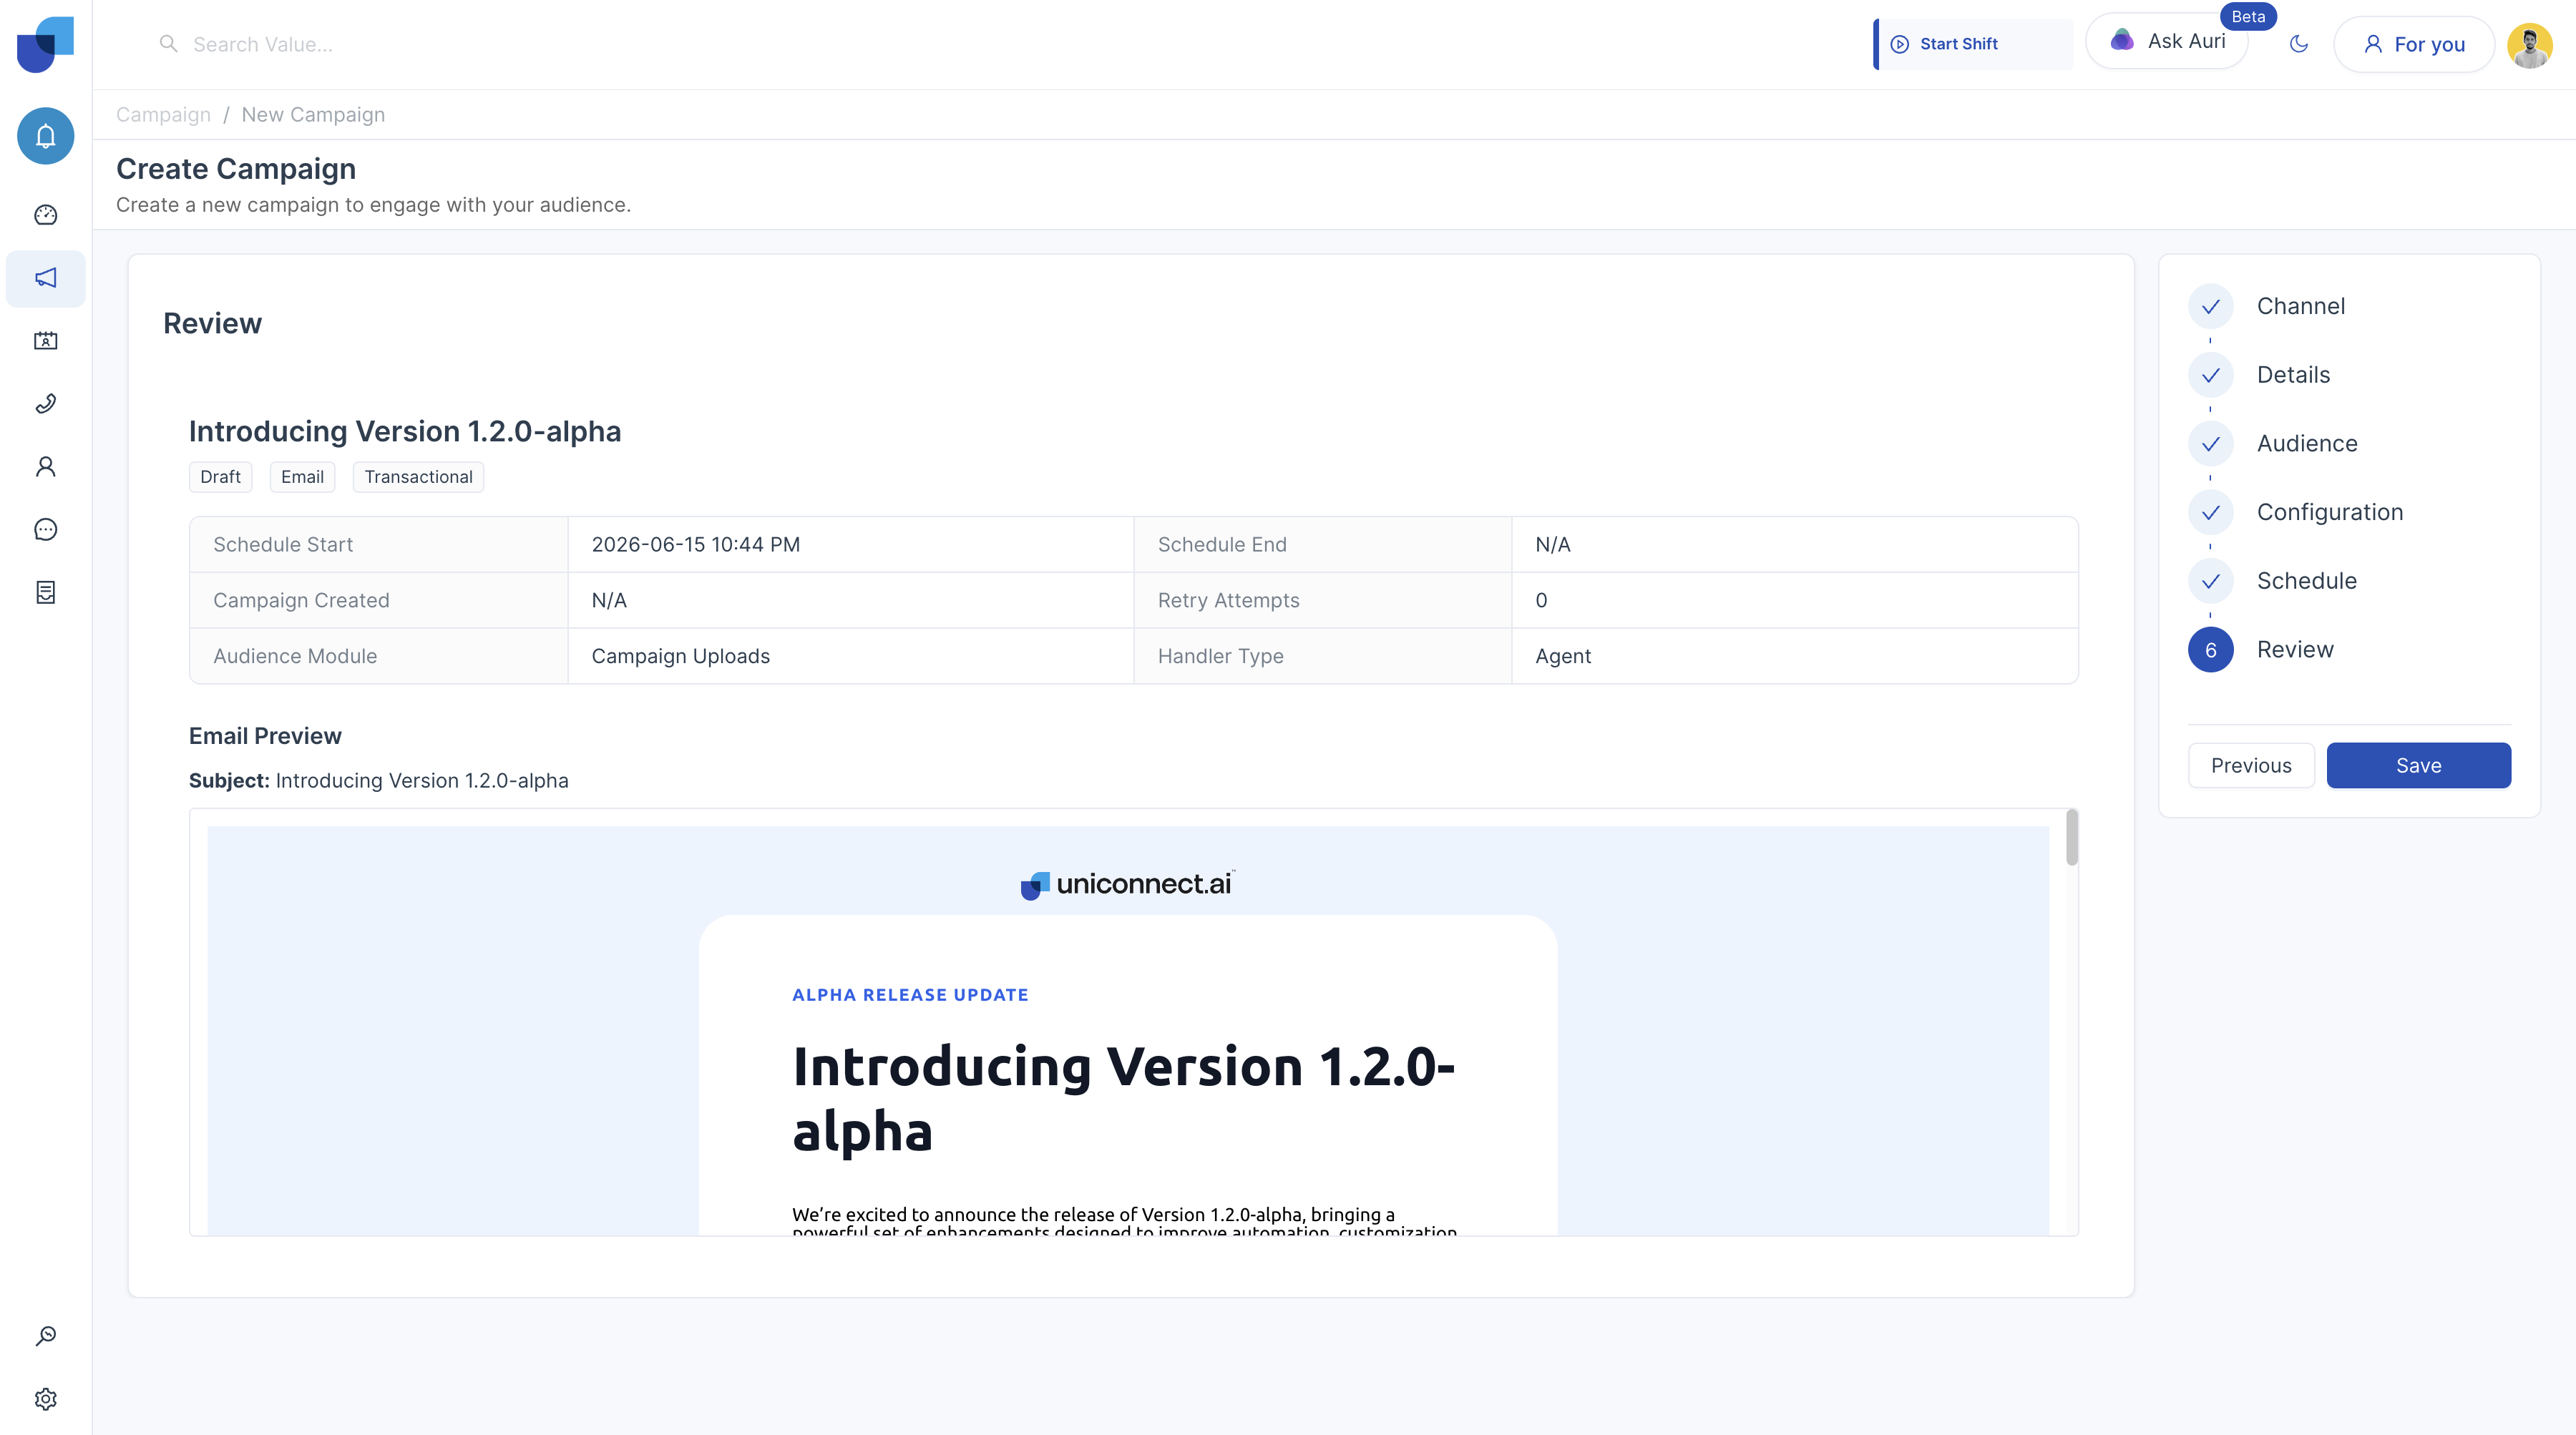
Summary Includes: Campaign Title, Campaign Type, Channel, Audience Source, Dialer Mode (Power), Handling Type, Linked CRM Module.
Action: Verify all details and click Save / Launch.
09. Launch (Power Campaign)
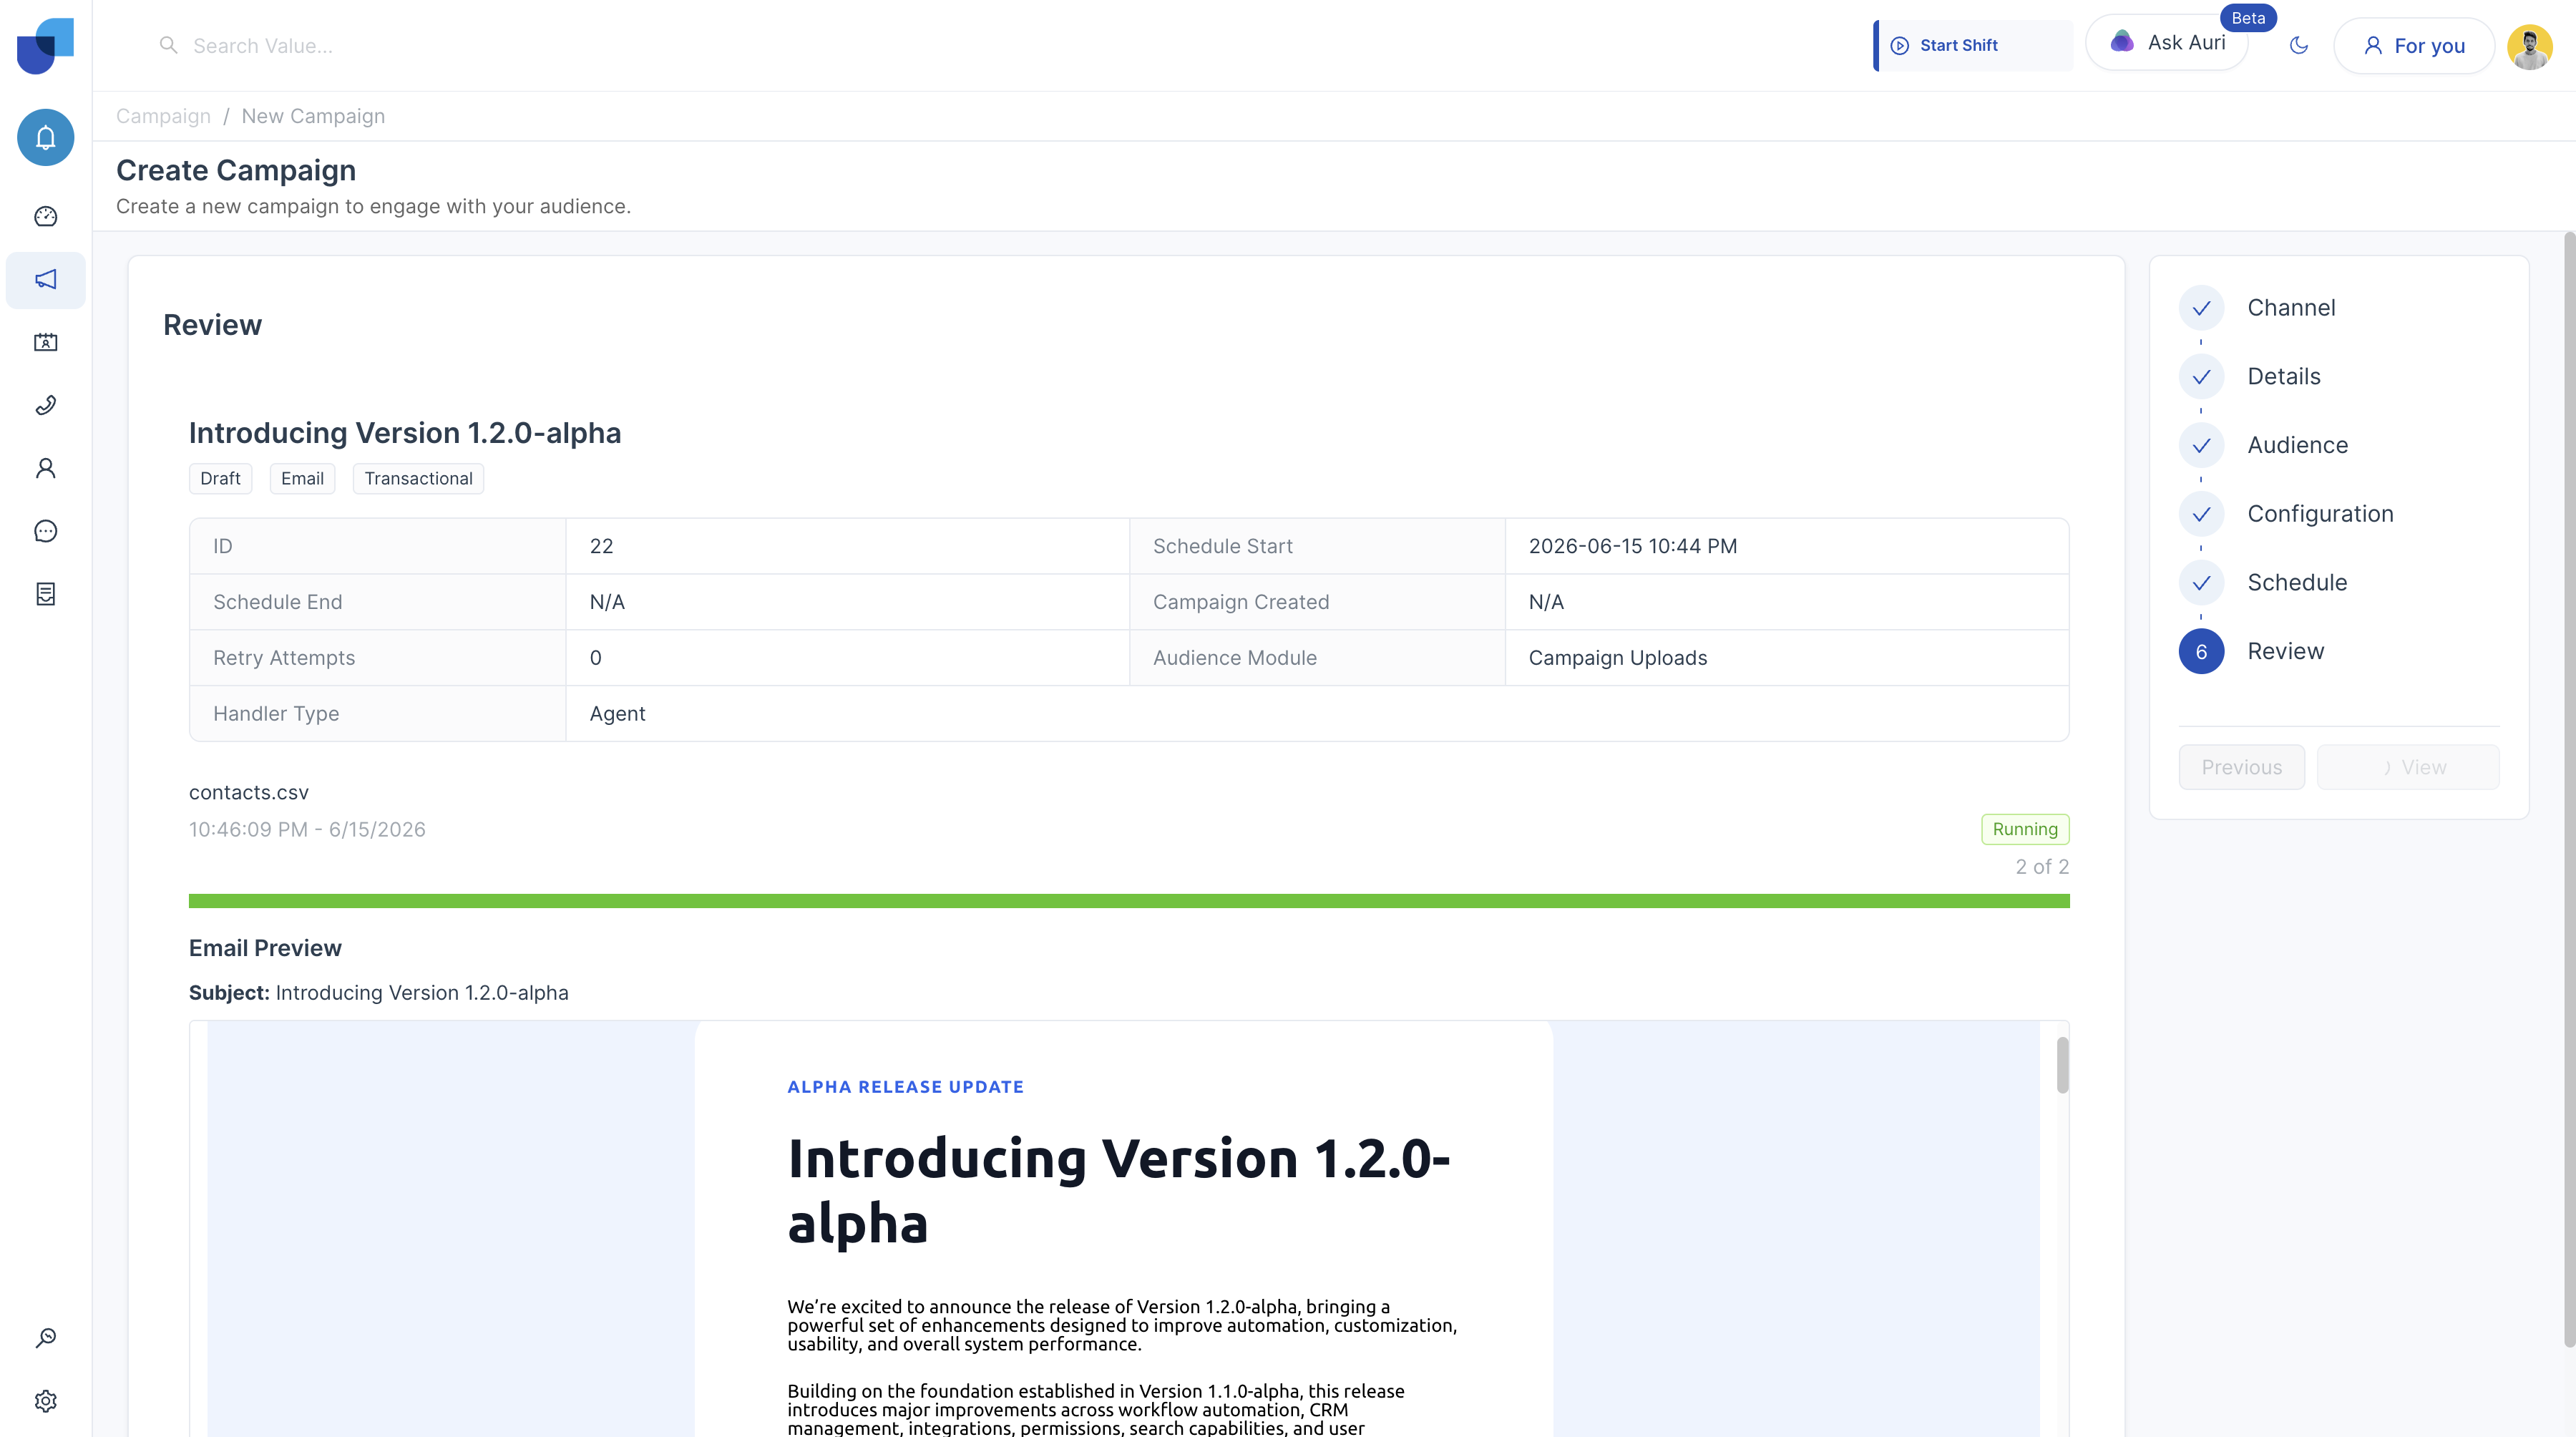 Description: The Review step allows verification of all campaign details before launching to ensure correctness and avoid execution errors.
Edit Option: An Edit icon is available in the review screen. Clicking it navigates back to the respective configuration step and allows changes before launching.
Behavior After Launch: Campaign is activated, leads are processed based on Power Dialer logic, system calls customers directly without agent confirmation, and calls are routed to Agent, IVR, or AI (future).