How to Configure Dependencies
Configuration › CRM › Dependencies
Dependencies link the values of one field to another, either to narrow a dropdown's choices or to filter which related records show up. A module's Dependencies tab covers two separate kinds: Dropdown and Relationship, each on its own sub-tab.
Dependencies are part of the Custom CRM Modules capability, available from Starter and above.
Dropdown Dependencies
Chains two or more Enumeration fields so the value picked in one narrows the choices available in the next, e.g. picking a Category filters which Subcategory values make sense.
- Open the Dependencies tab. On the module's own configuration page, the Dependencies tab opens straight into the Dropdown sub-tab by default. A Fields selector is located on the left; whatever's already saved lists on the right.
- Pick the fields, in order, from the Fields dropdown.
Lists every Enumeration field on the module as a multi-select; checking
CategorythenSubcategorysets the chain direction, Category controls Subcategory, not the other way around.
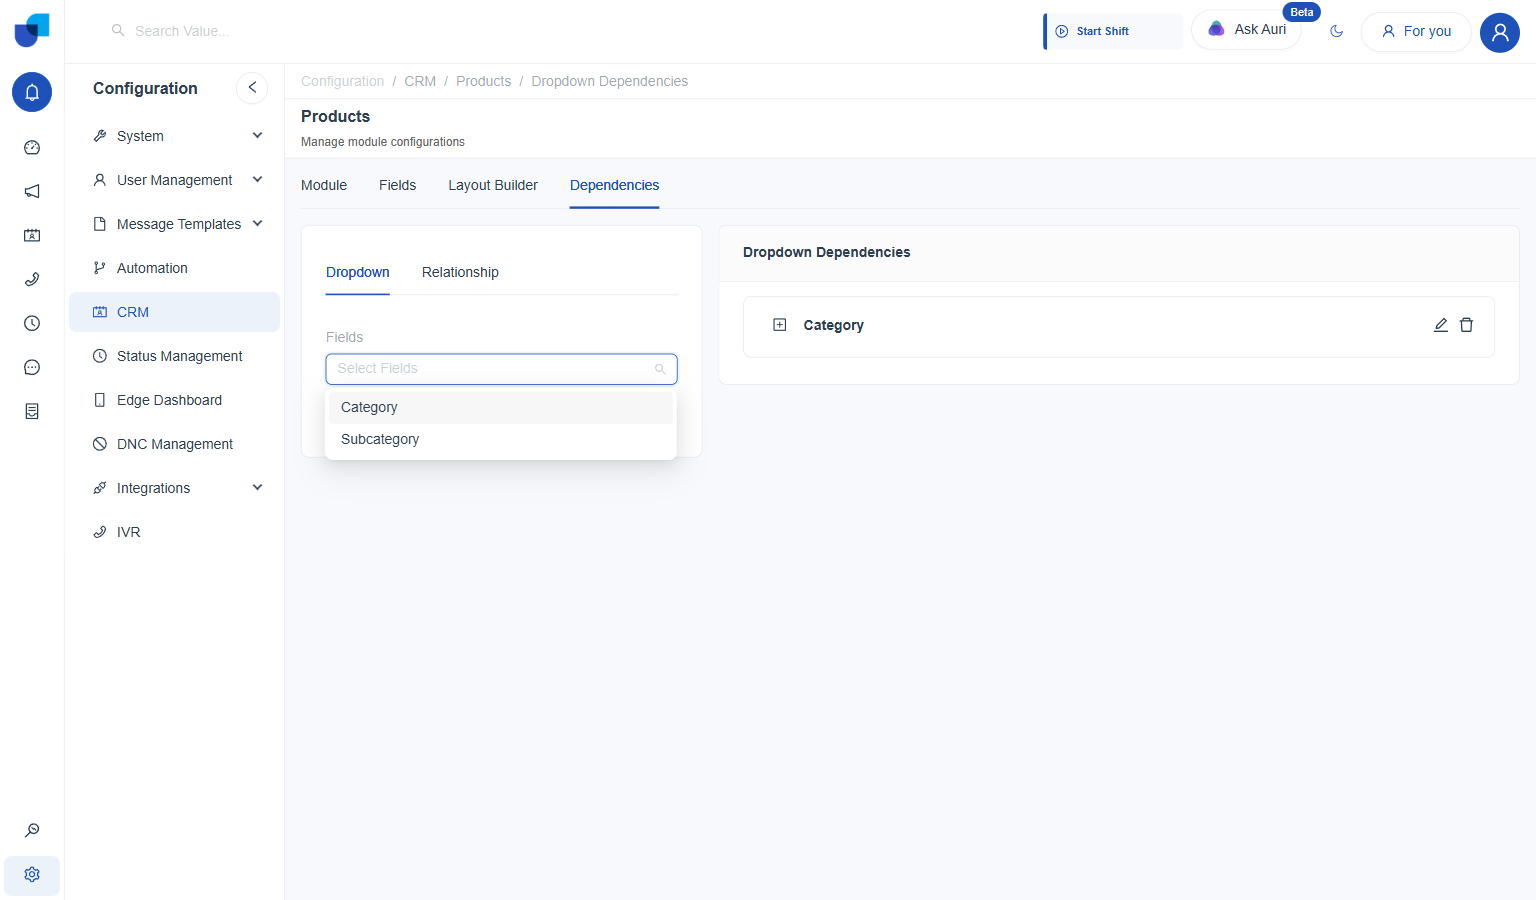
- Click Add Fields to Order. Disabled until at least one field is picked. Clicking it locks in the chain and reveals the Value Selection panel below it.
- Map a parent value to its child value. Pick a Category value, e.g. Electronics, then a Subcategory value that belongs under it, e.g. Laptops.
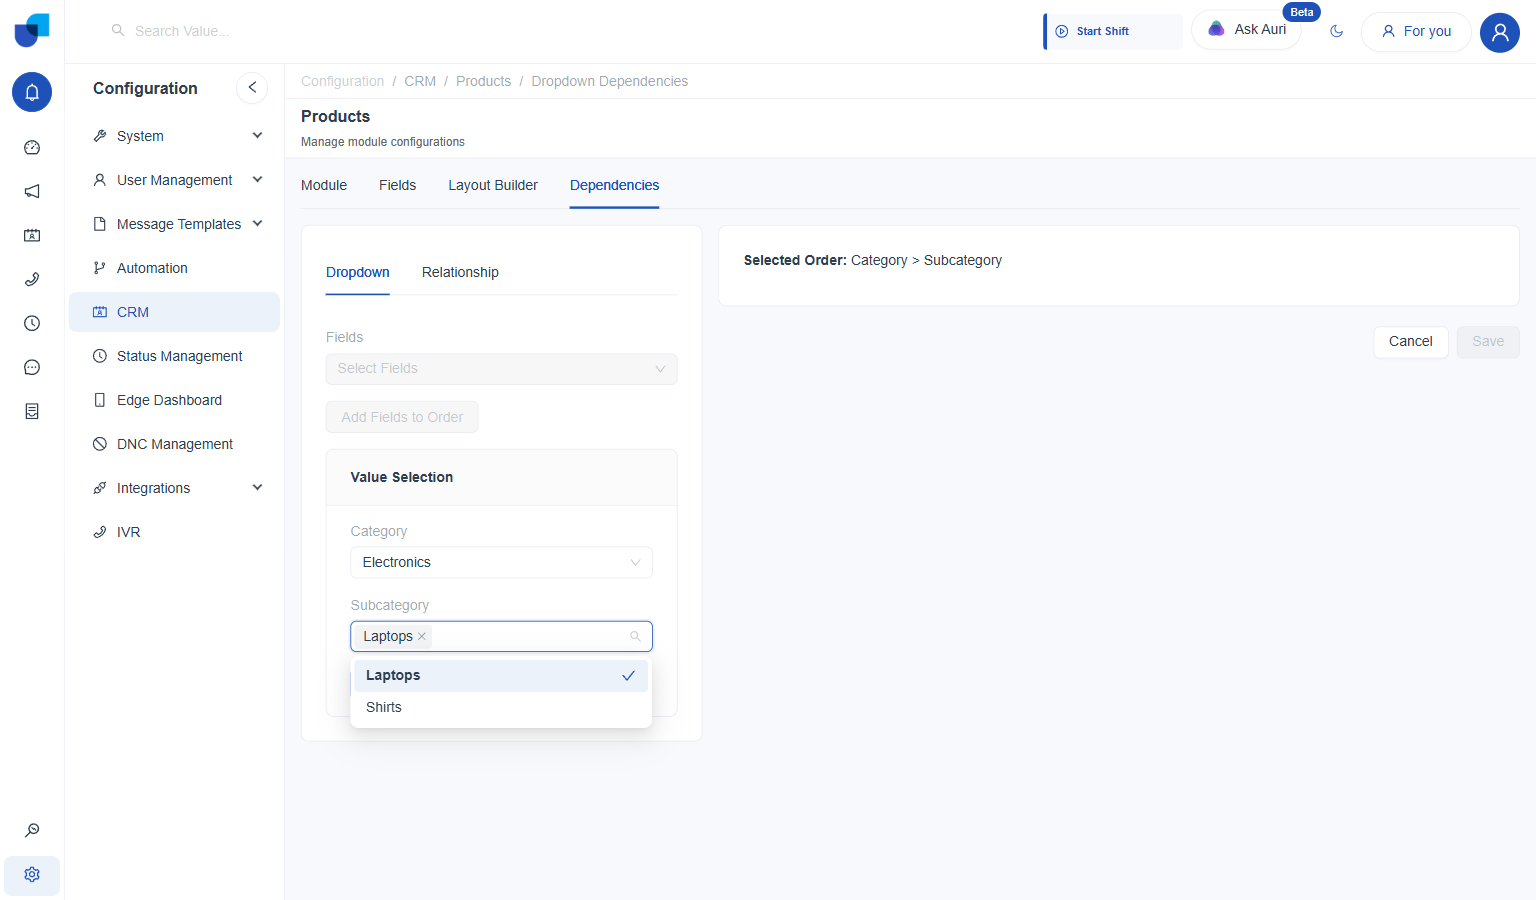
- Click Add to Schema. Adds that one mapping as a branch in the tree on the right.
- Repeat for every mapping needed. Each Add to Schema click adds its own branch. A second mapping, Apparel to Shirts, appears as its own top-level branch alongside Category.
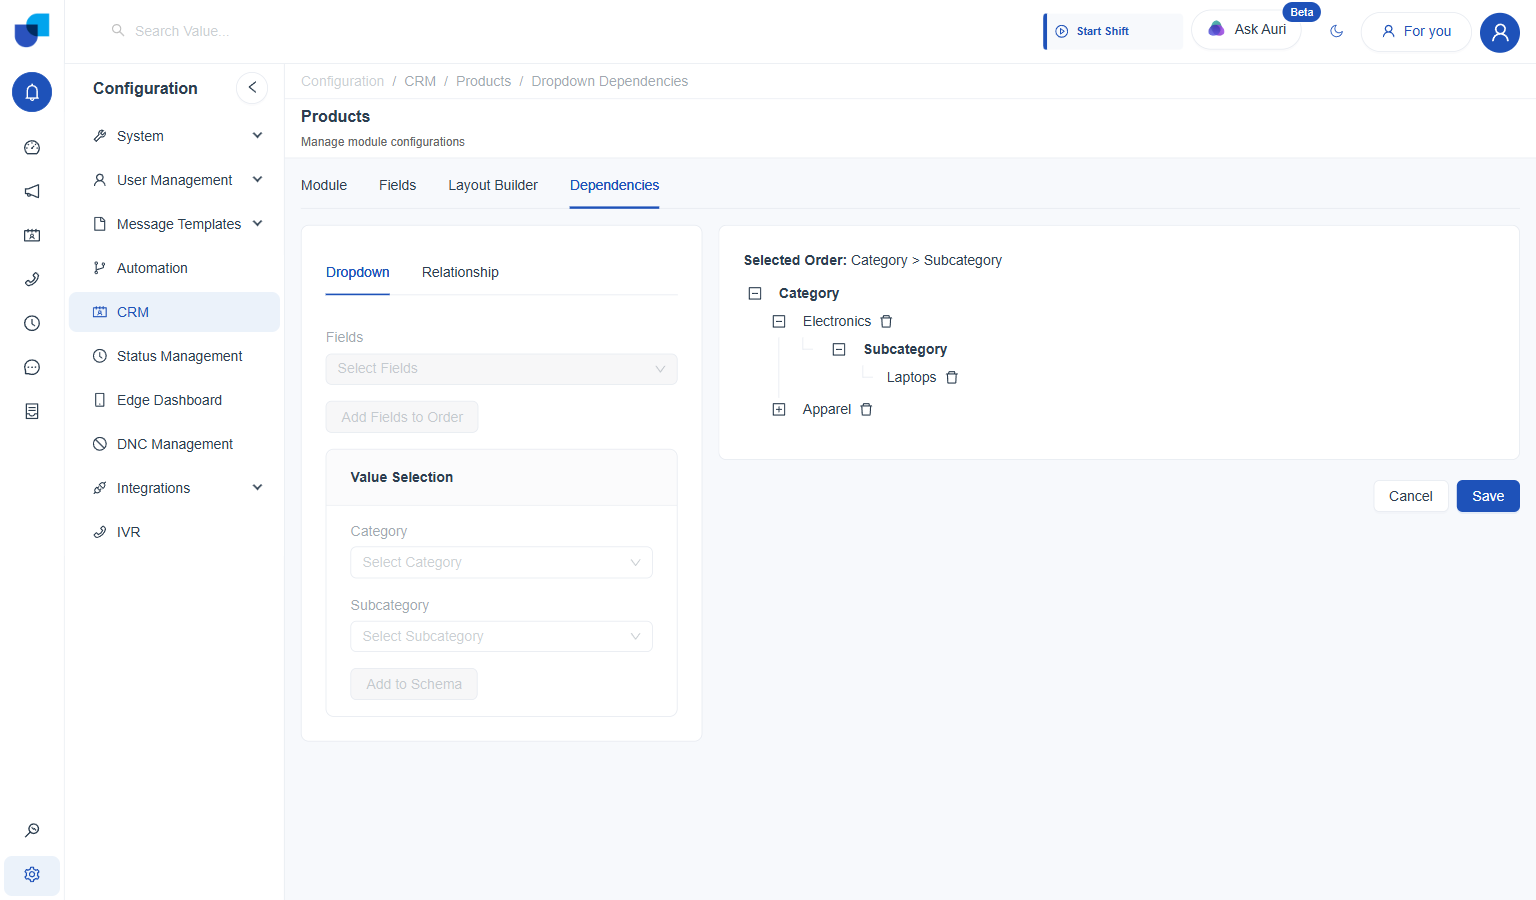
Category → Electronics → Subcategory → Laptops, with a second Apparel branch collapsed below it.
- Click Save. Commits every mapping built in the tree. The panel then collapses to a single entry per top-level field, with its own edit and delete icons.
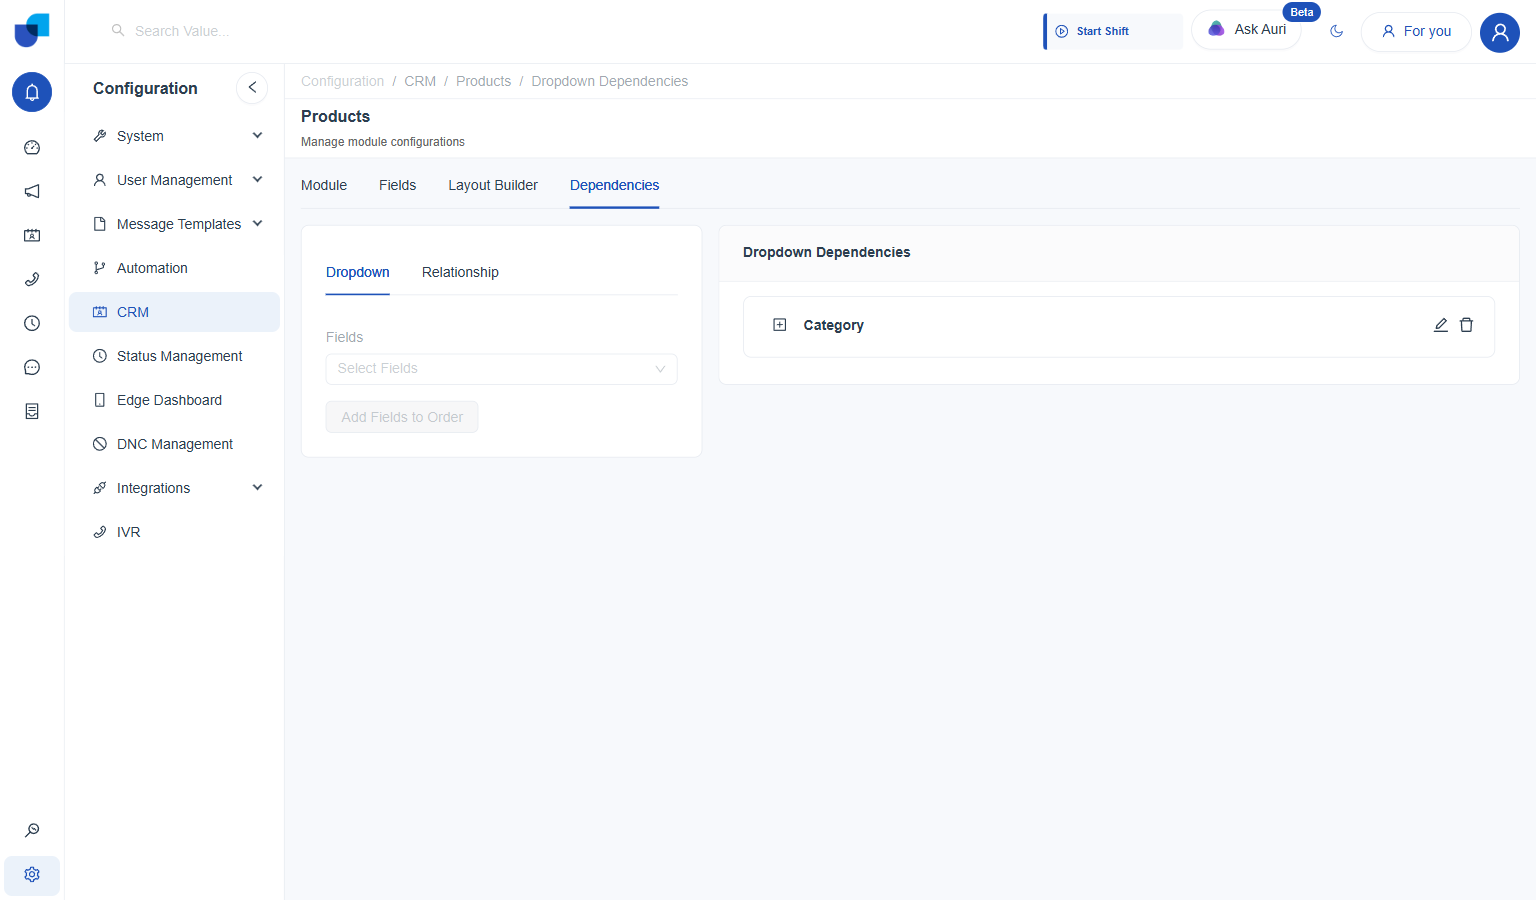
Once saved, the dependency shows up as a single collapsed entry, with its own edit and delete icons.
Editing or Removing a Saved Dependency
- Click the edit (pencil) icon. Reopens the full builder: the Value Selection panel comes back, and the tree expands to show every mapping already saved, each node carrying its own small delete icon.
- Remove a single mapping, if needed. Clicking a node's own delete icon removes just that branch, e.g. only Apparel → Shirts, leaving the rest of the tree intact.
- Add more mappings, if needed. Value Selection and Add to Schema work exactly as they did when first building the dependency.
- Click Save to commit the changes, or Cancel to discard them.
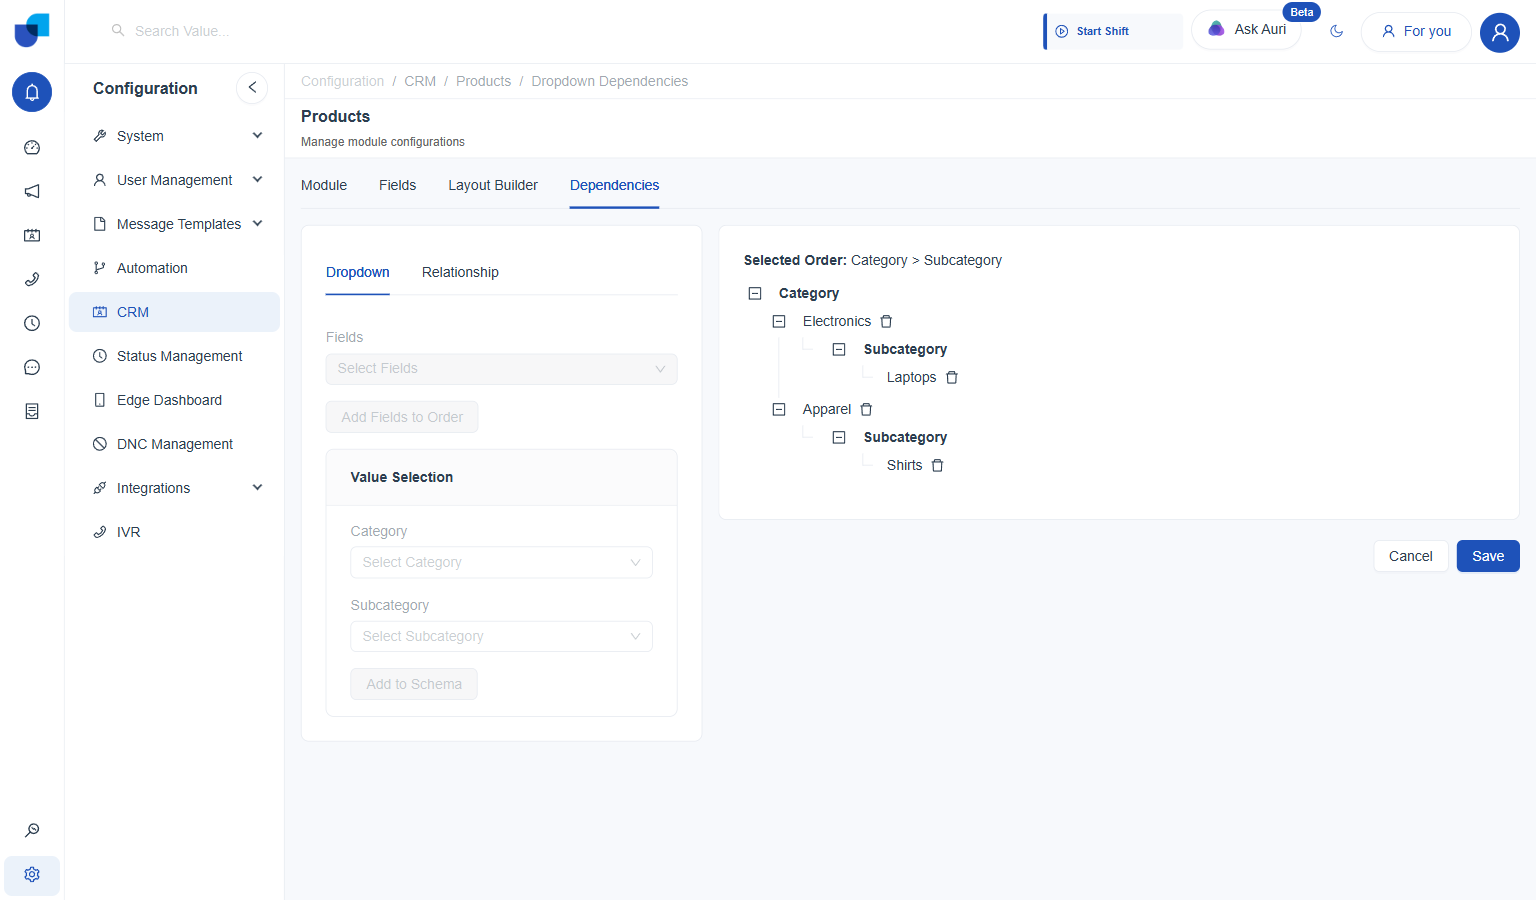
Editing reopens the entire builder, tree and all, rather than a narrower edit form.
The top-level delete icon, next to edit on the saved entry, removes the entire dependency immediately: there is no "Are you sure?" prompt first, unlike deleting a record or a layout block elsewhere in this system. Use the edit icon's own per-node delete instead when only one mapping needs to go.
How Configured Dropdown Dependencies Work
Both mappings saved above show up the moment Category is picked on the real New Products form, with no extra setup needed anywhere else.
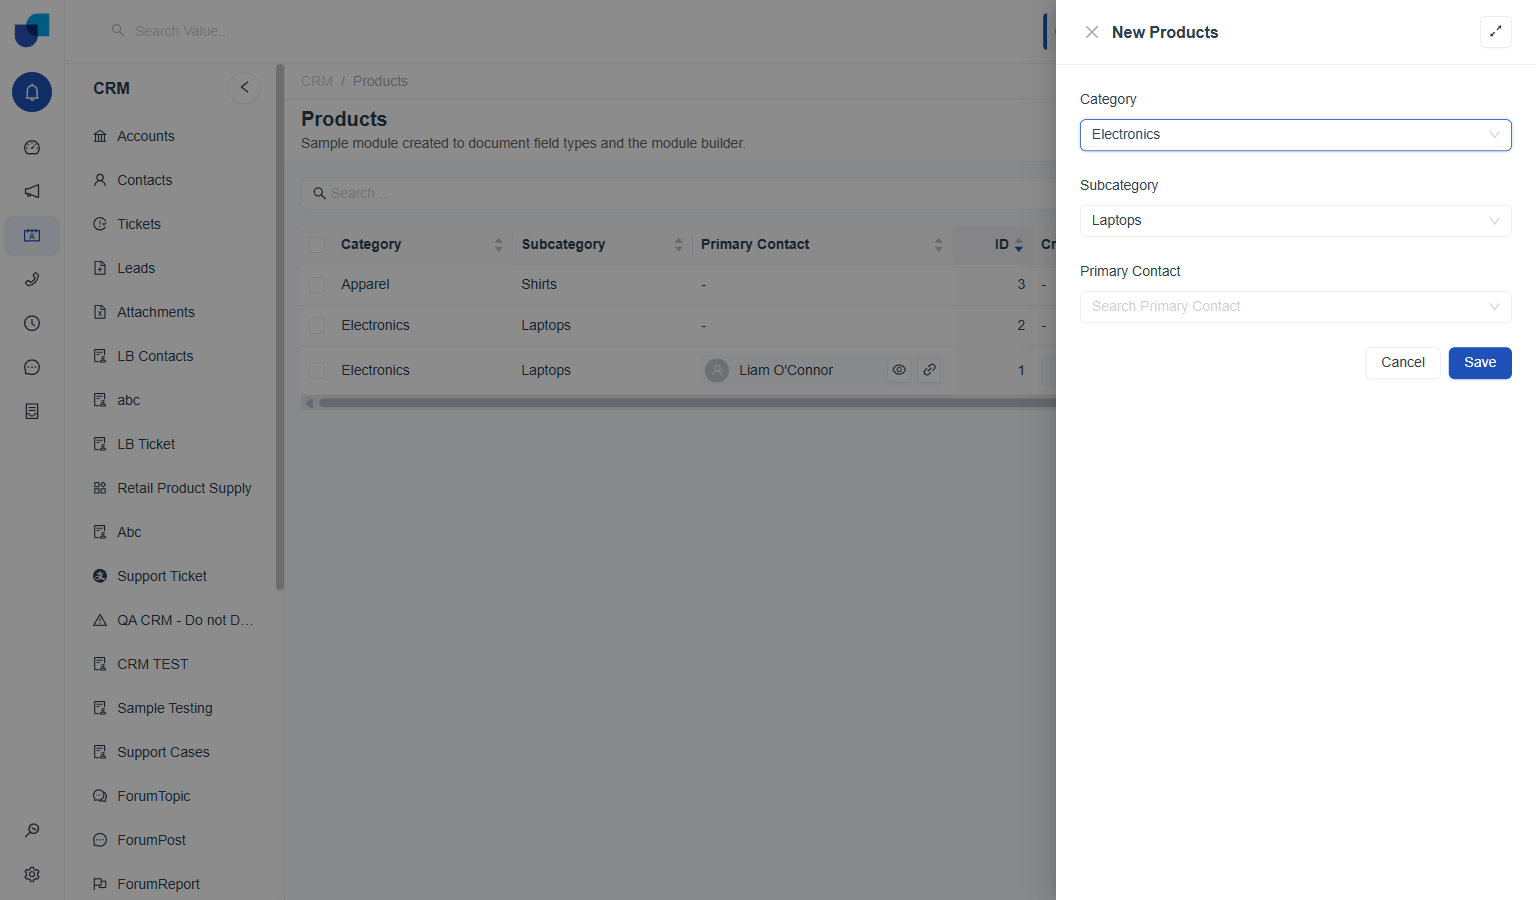
Electronics picked: Subcategory fills itself in as Laptops.
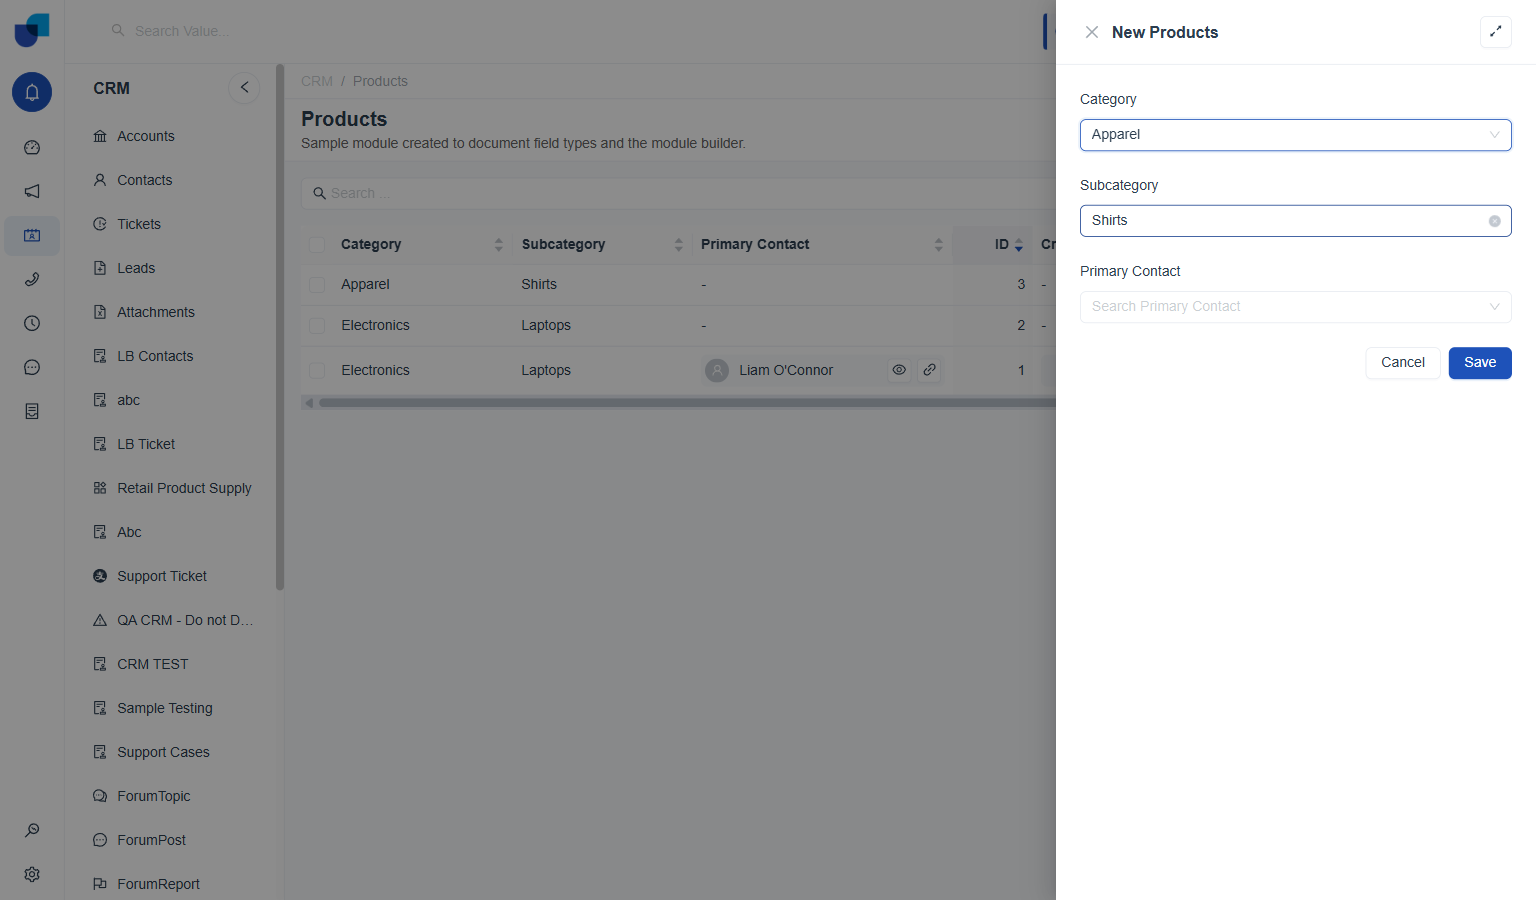
Switching Category to Apparel updates Subcategory to Shirts just as immediately.
Relationship Dependencies
Filters which records show up in a Relationship field's picker, based on matching a value between the current record and the related module.
- Target Field: the Relationship field being filtered, e.g.
Primary Contactpointing at Contacts. - Source Field: a field on this module whose value needs to match.
- Matching Field: the field on the related module it needs to match against.
- Required: whether the match is mandatory before a record can be picked at all.
- Click the Relationship sub-tab. Located next to Dropdown, at the top of the same Dependencies tab. A tracking table on the right reads "No relationship dependencies" until the first rule is added.
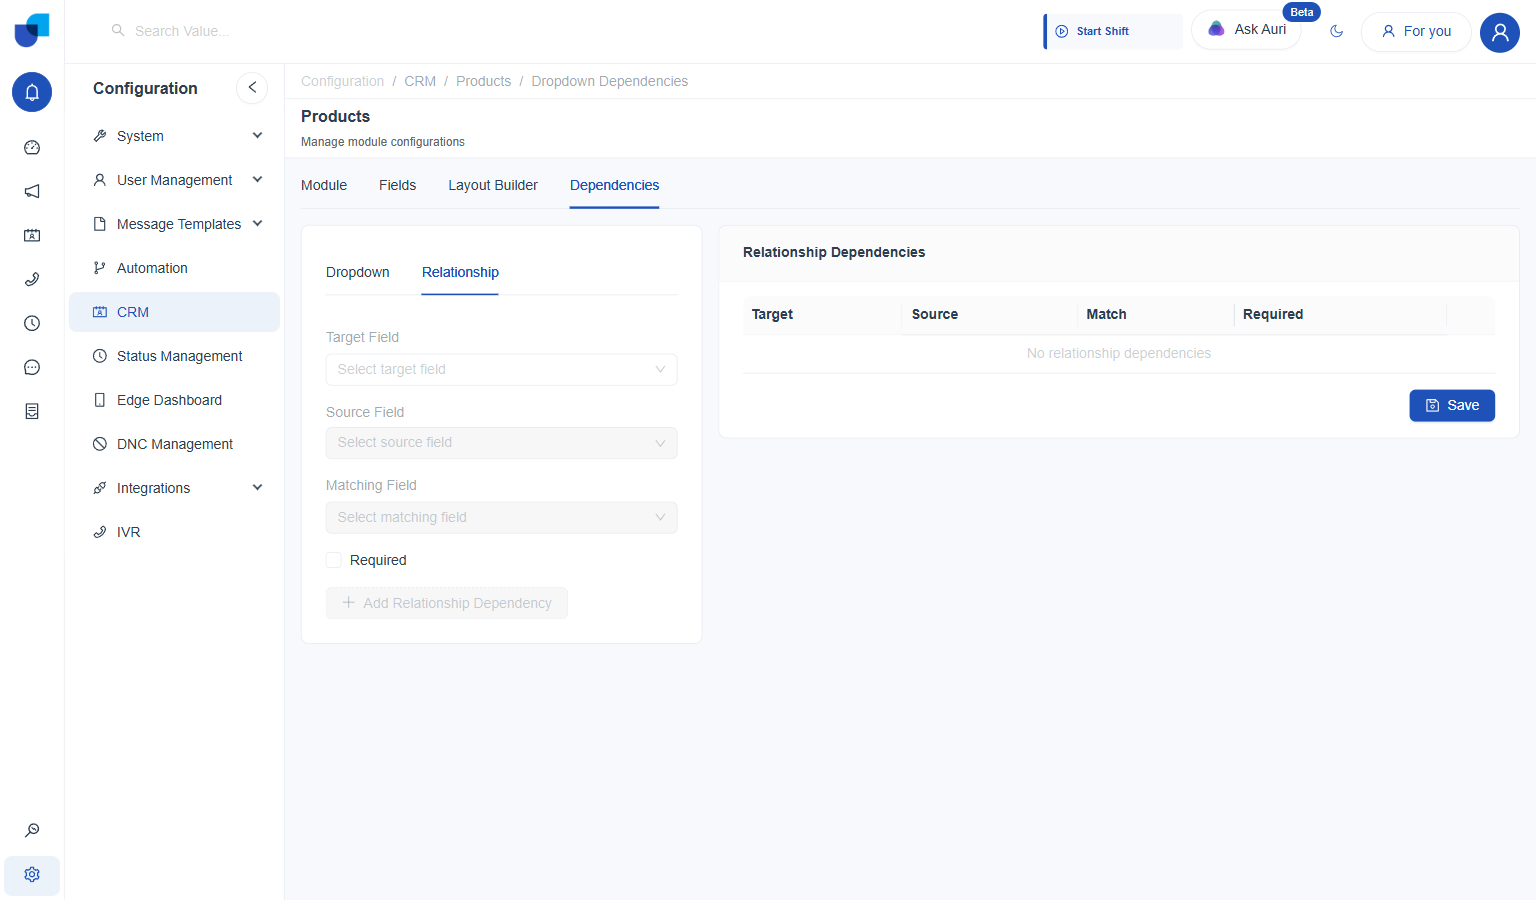
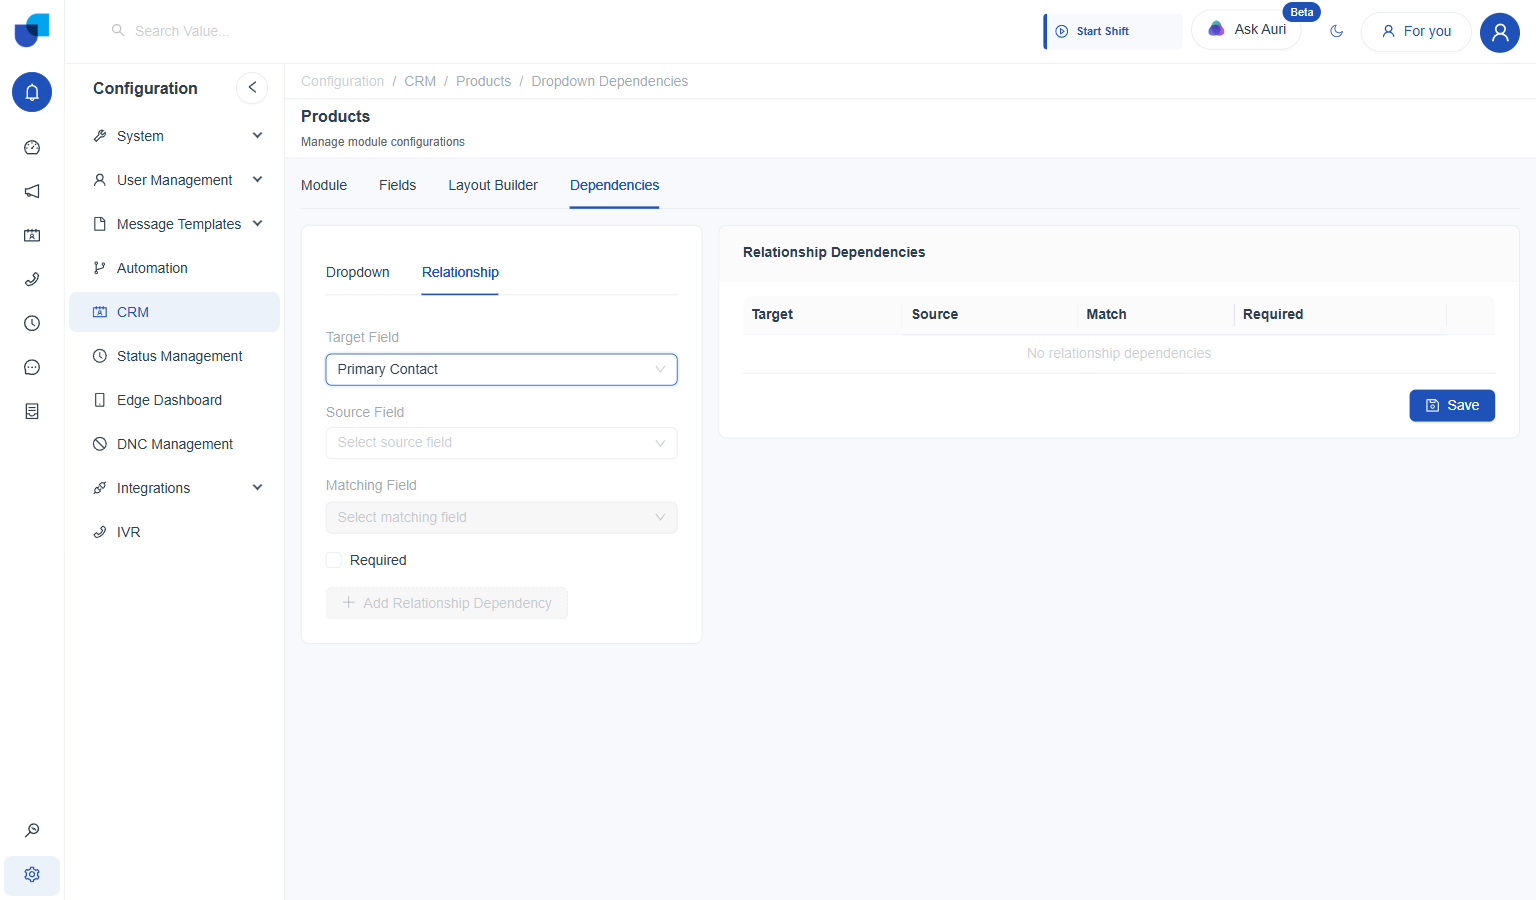
Source Field, Matching Field, and Add Relationship Dependency all stay disabled until Target Field is picked first.
- Pick the Target Field.
Lists every Relationship field on the module; picking
Primary Contactunlocks Source Field.
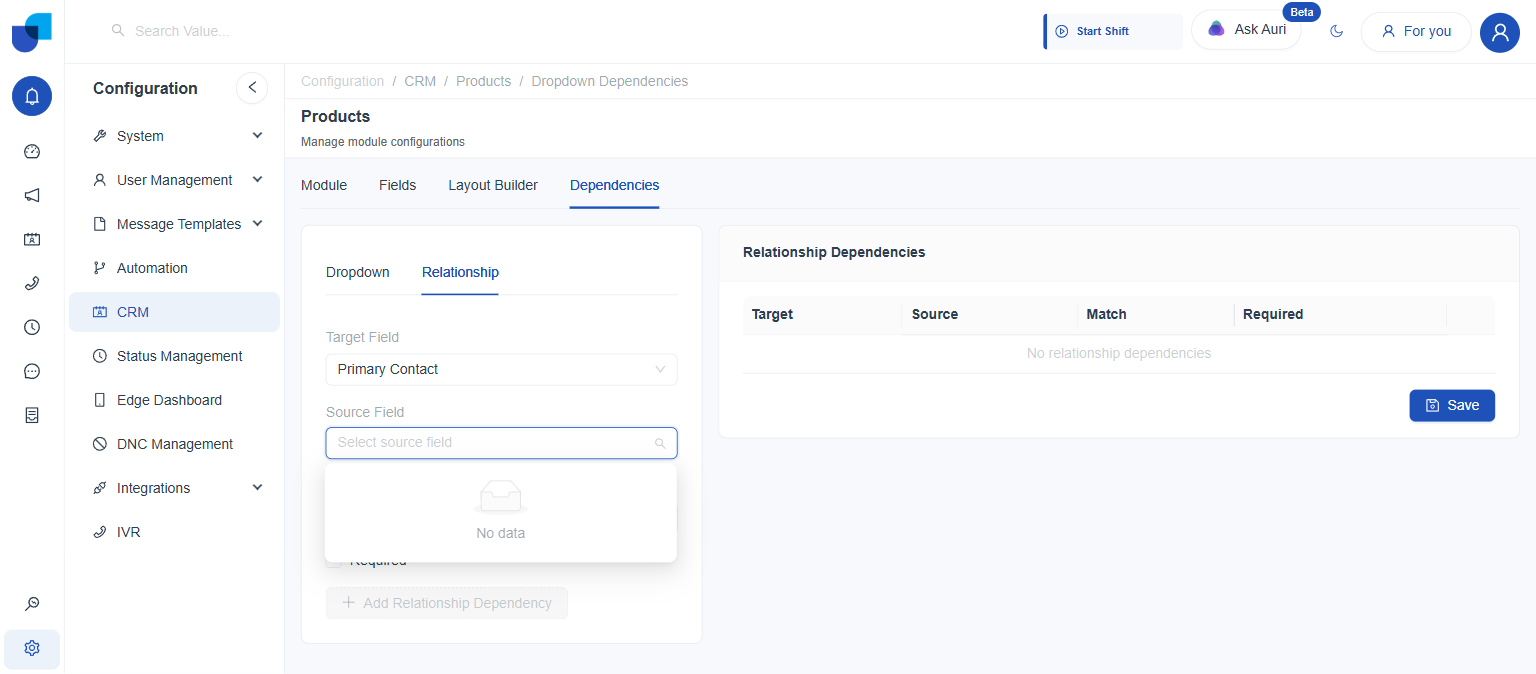
- Pick the Source Field. Lists other Relationship fields on this module that point to a module also referenced by a Relationship field on the related module, since that shared module is what the match actually runs against.
On Products, Source Field comes back "No data": Primary Contact is the only Relationship field on the module, so there's nothing else to offer as a Source.
- Pick the Matching Field. Once a Source Field exists to offer, Matching Field lists the Relationship fields on the related module (Contacts) pointing to that same shared module.
- Tick Required, if the match should be mandatory. Left unticked, a record can still be picked even without a match; ticked, picking one becomes impossible until Source and Matching line up.
- Click Add Relationship Dependency. Stays disabled until Target, Source, and Matching are all set. Adds one row to the tracking table, listing Target, Source, Match, and Required.
- Click Save. Located at the bottom right of the tracking table; commits every row added.
On a module with a second Relationship field to match through, e.g. an Account field pointing to the same Accounts module that Contacts' own Account field points to, a completed rule looks like this once added:
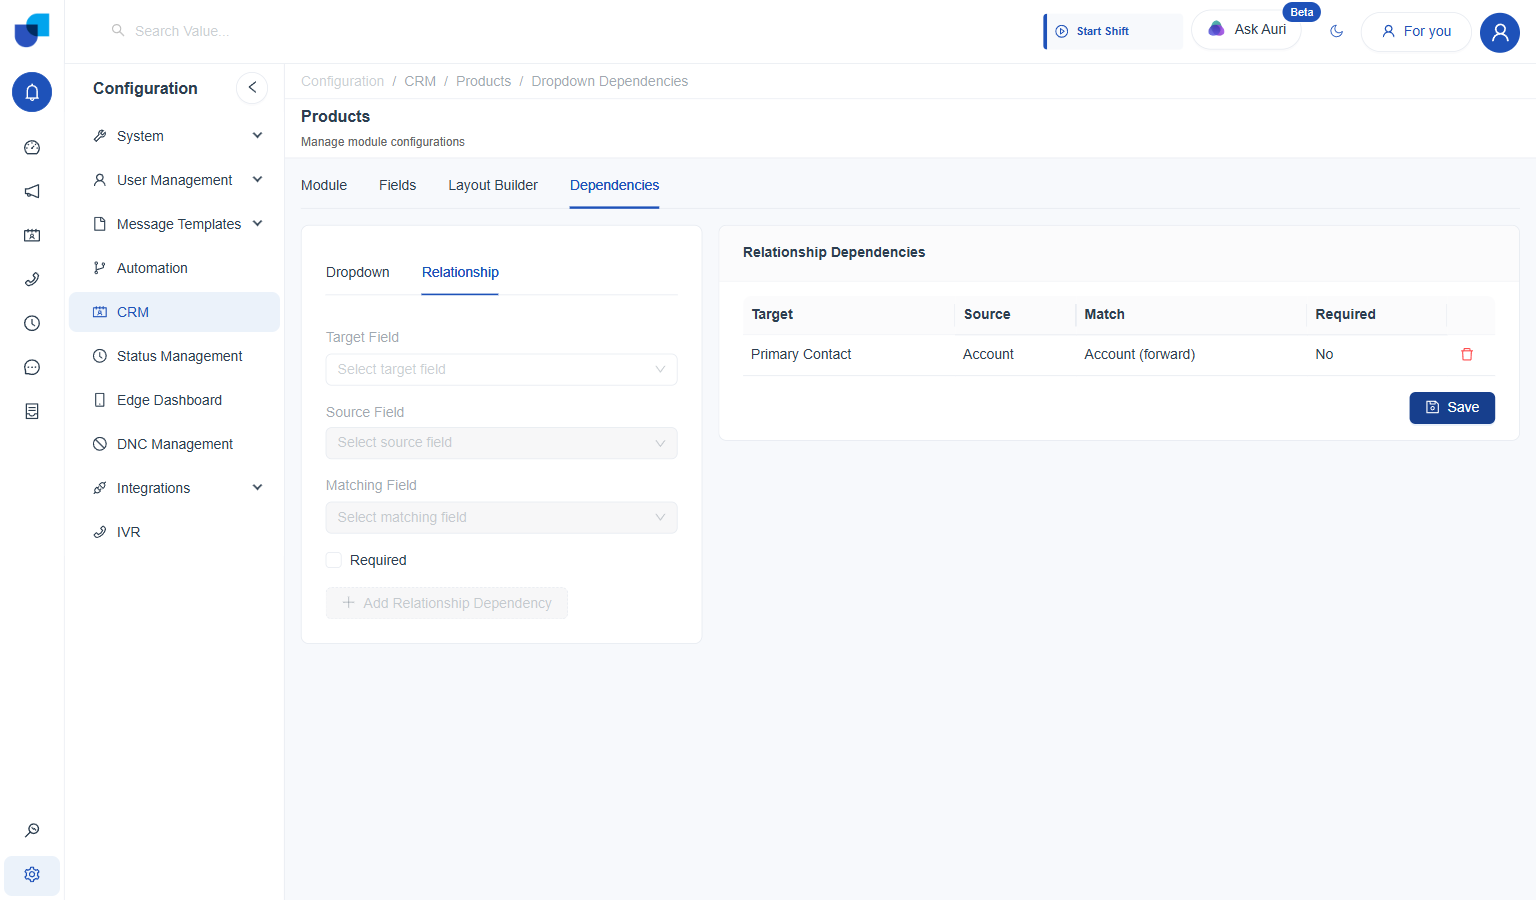
Target, Source, and Match filled in; Required stays No unless ticked when the rule was added.
How Configured Relationship Dependencies Work
Once saved, opening that Target Field's picker on a record narrows it down immediately, the same moment-to-moment feel as the Dropdown Dependencies example above:
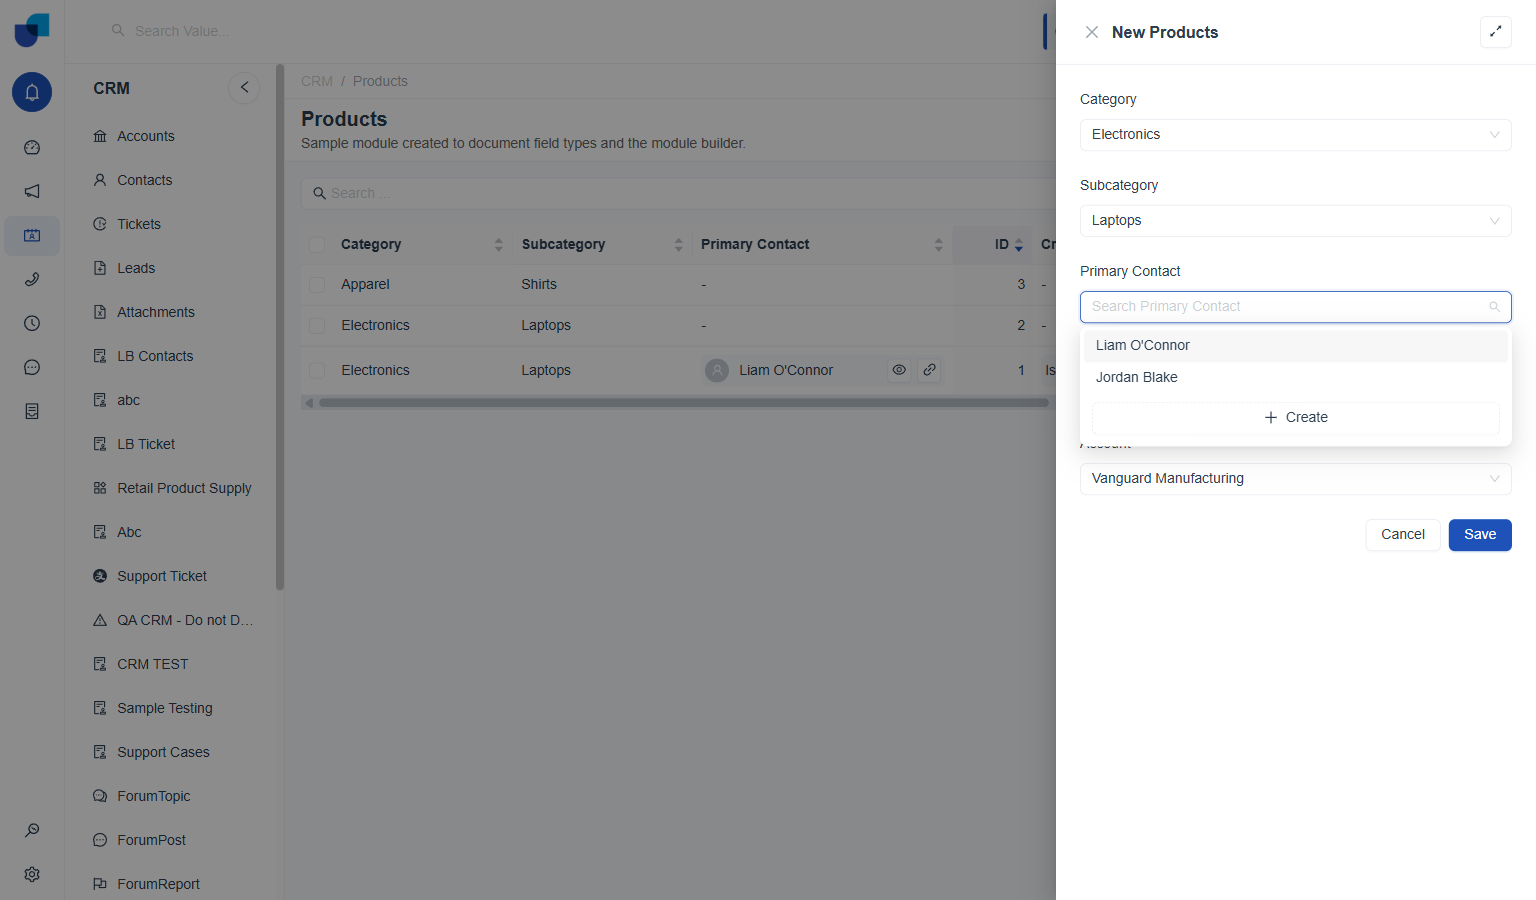
With Account set to Vanguard Manufacturing, Primary Contact's picker narrows to only the contacts whose own Account field matches it.