Getting Started
Workforce Management
Take a Collections team from default statuses to a supervisor watching the floor in five steps.
Before You Start
- Users exist. Each agent has a user account. See the Users page under Configuration → User Management.
- Groups exist. Agents are placed in groups such as Collections Tier 1, and in queues where calls are routed.
- A supervisor role exists. User B's role will carry the Workforce Management permissions.
The Setup Sequence
| Step | What you do | Where |
|---|---|---|
| 1 | Review the default statuses and add your own | Configuration → Status Management |
| 2 | Check which groups and queues each agent belongs to | Workforce Monitor → Manage User Groups |
| 3 | Give supervisors the Workforce Management permissions | Configuration → User Management → Roles |
| 4 | Have agents start their shifts | Start Shift in the page header |
| 5 | Watch the floor and respond to requests | Workforce Monitor |
Step 1: Review the Statuses
New accounts include statuses such as Available, Away, Out Of Office, Dialing, Ringing, On Hold, Talking, Disconnected, On Mute, After Call and Offline. Each shows how it handles calls under its name. Add statuses for your own rules, such as Coaching Session. See Custom Status Configuration.
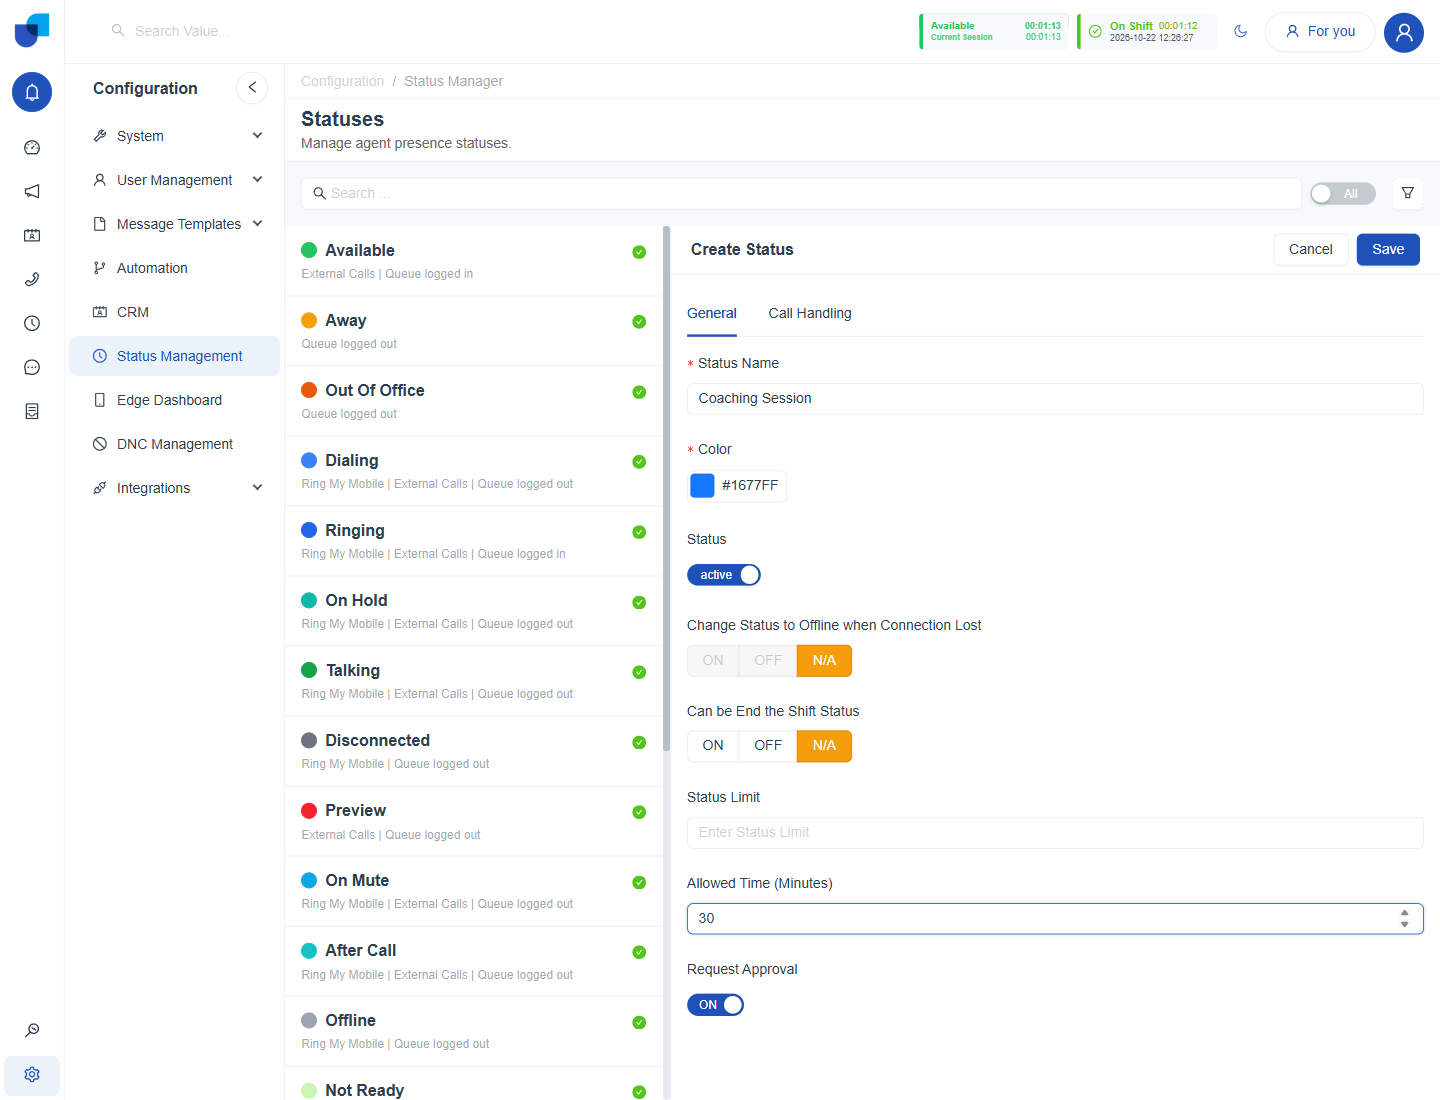
Figure 1. The Status Manager with a new Coaching Session status being created.
Step 2: Check Group Membership
The Groups column of the Workforce Monitor lists each agent's groups and queues. User A should appear under Collections Tier 1 so that the Group filter finds that agent. Use the Manage User Groups button on that row to change it. See Group Management.
Step 3: Set Permissions
Open the supervisor's role and expand Workforce Management. Switch Manage Status on if the supervisor edits statuses, and choose a scope for Force Shift Start, Force Status Changed, Approve Break Requests and Dismiss Raise Hand. See Workforce Permissions.
Info: Permissions belong to a role, not to a person. Every user in the role receives the same Workforce Management access, limited by the scope you choose: Own, Group or All.
Step 4: Start a Shift
- Sign in as the agent. The page header shows a Start Shift button until a shift begins.
- Click Start Shift. The header changes to show On Shift with the start time, and a status badge with a timer.
- Choose a status from the status badge when it changes. Available is the usual starting status.
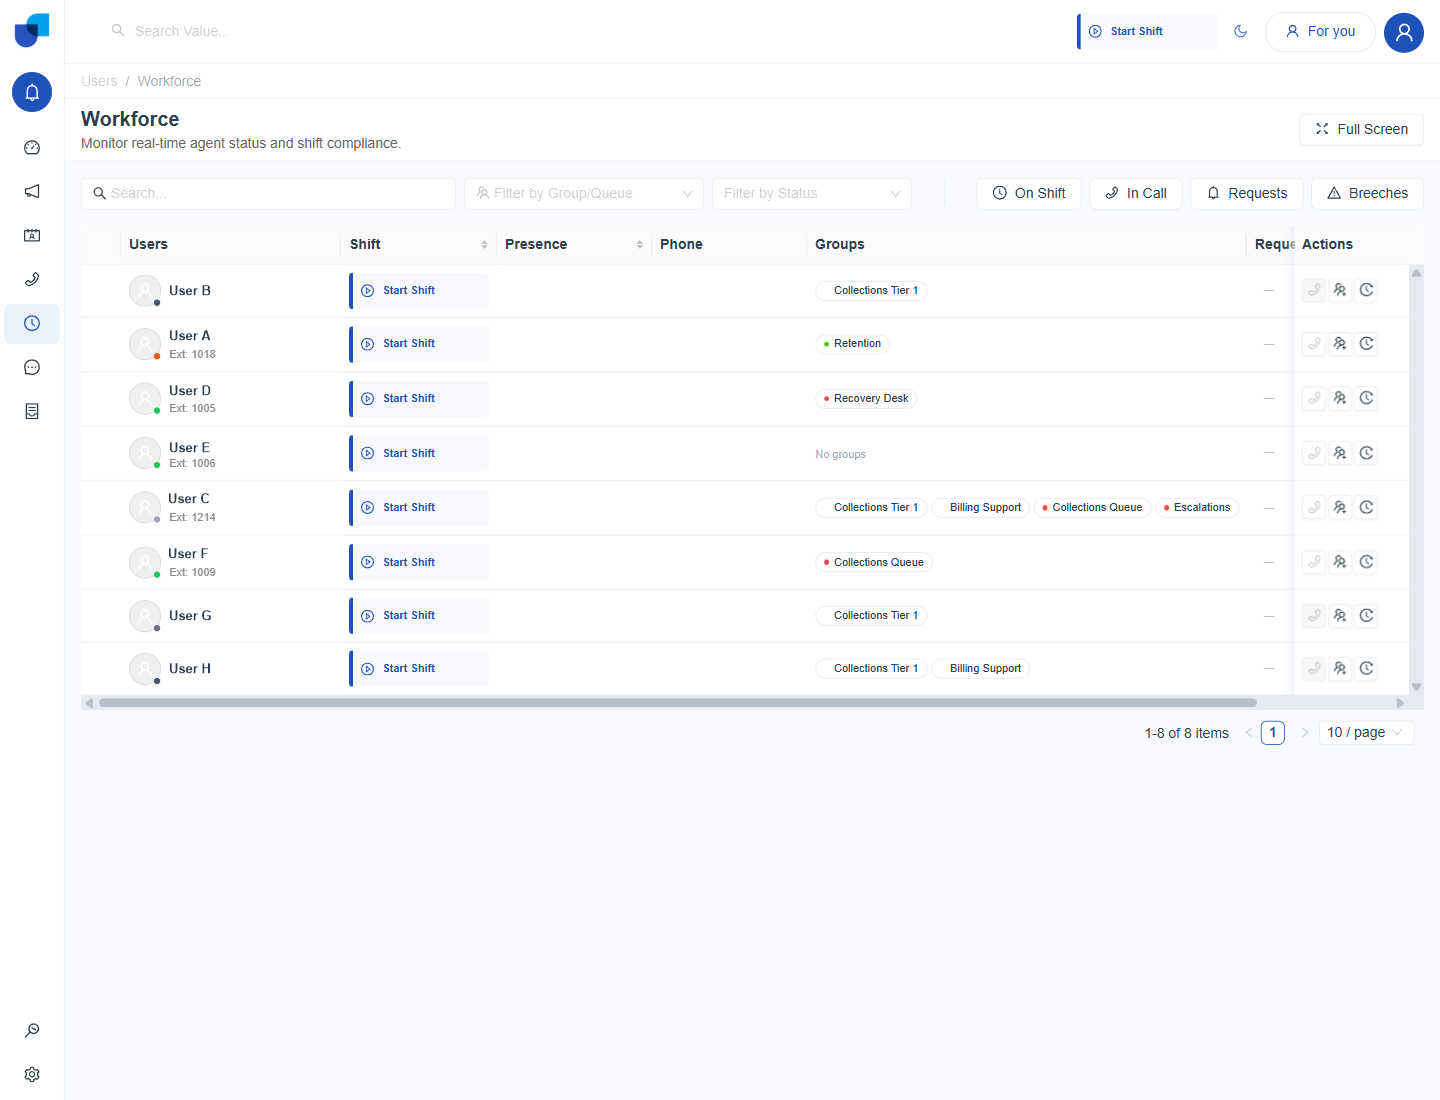
Figure 2. The page header before a shift starts, with the Start Shift button at the top right.
Step 5: Watch the Floor
Open Workforce Monitor from the main menu. Agents who started a shift show a green On Shift badge and a presence status with a timer. Use the quick filters to narrow the list, for example On Shift to see only working agents.
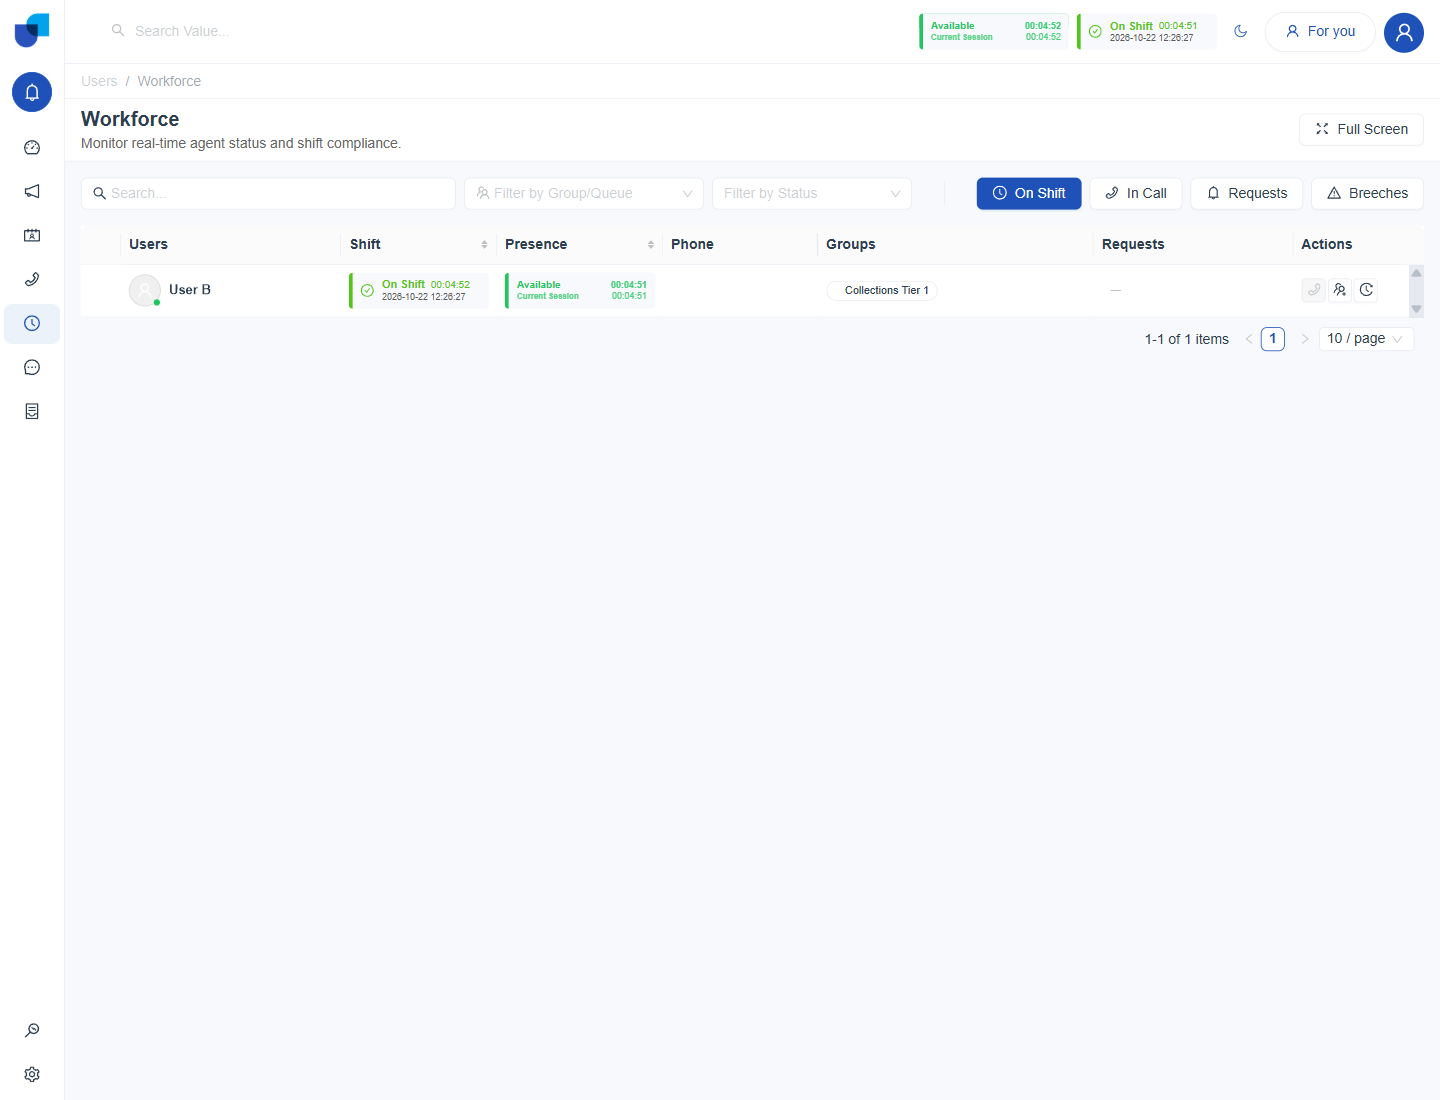
Figure 3. The On Shift quick filter, showing only User B, who is currently in the Available status.