How to Configure the Use Case in UNICONNECT AI
Configuration › CRM › Service Cases
Here is the detailed configuration implemented for the AUS Bank use case. It serves as the technical companion to the CRM Use Case Scenario, translating the business narrative into a working solution.
Creating the Module
A new internal module named Service Cases was created from Configuration → CRM, carrying the description used throughout the scenario.
- Go to Configuration → CRM, and click Create. Opens a blank new module form.
- Enter the Module Name and Module Description. Named Service Cases, with a description covering card disputes, fraud alerts, loan servicing, and account access.
- Leave Source Type set to Internal, and click Save. Internal is the default; this module's data lives entirely inside Uniconnect, unlike the external connection covered later.
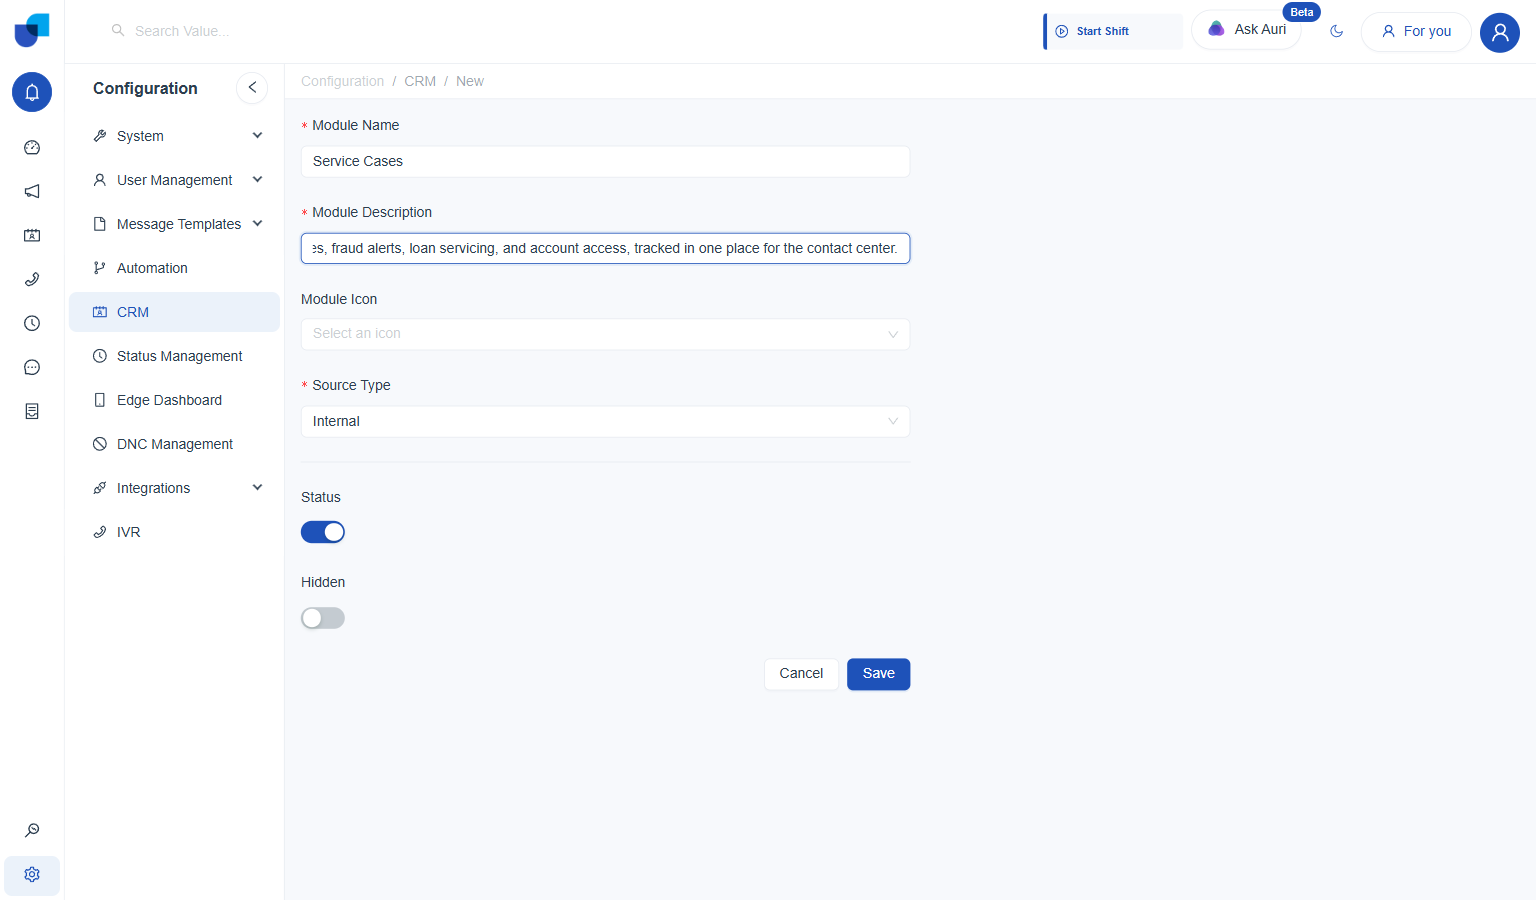
Module Name and Module Description filled in, Source Type left at Internal.
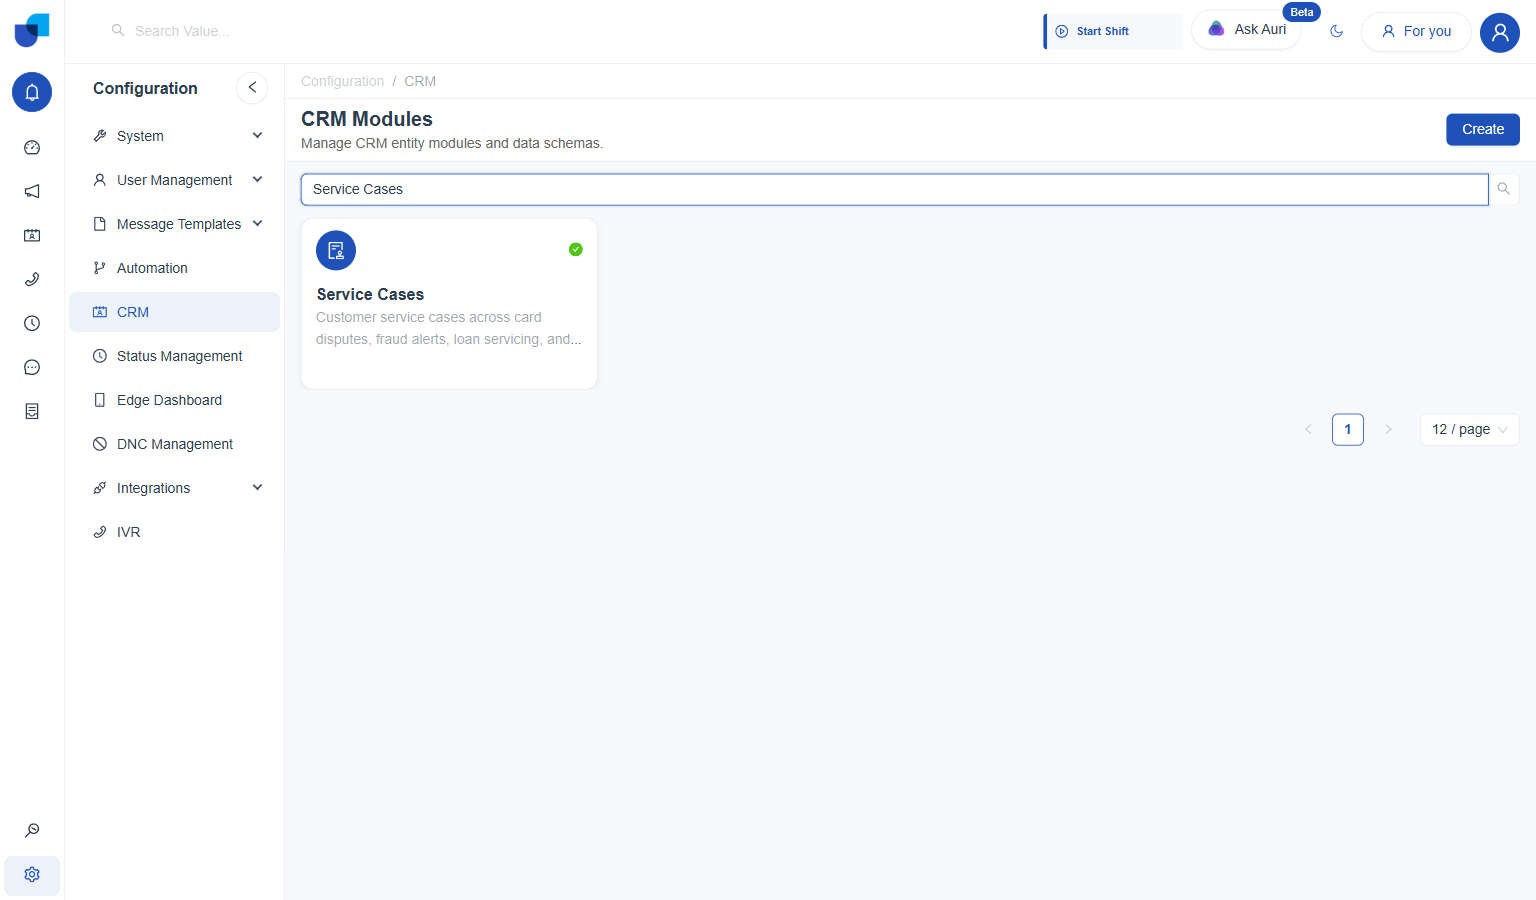
Service Cases appears in the CRM Modules list immediately after saving.
Adding the Fields
Three fields were added on the module's Fields tab, matching the scenario exactly:
| Field | Type | Configuration |
|---|---|---|
Case Type | Enumeration | Card Dispute, Fraud Alert, Loan Servicing, Account Access |
Case Reason | Enumeration | Unauthorized Transaction, Billing Error, Suspected Identity Theft, Suspicious Login |
Assigned Agent | Relationship | Related Module: Contacts; Relationship Type: Many to One |
Case Type
- Open the Fields tab, and click New Field. Opens the field type picker, listing every available field type as its own tile.
- Pick Enumeration from the field type picker.
- Name it Case Type, and add the four values. Card Dispute, Fraud Alert, Loan Servicing, Account Access, each added with its own Add Enumeration Value click.
- Click Save.
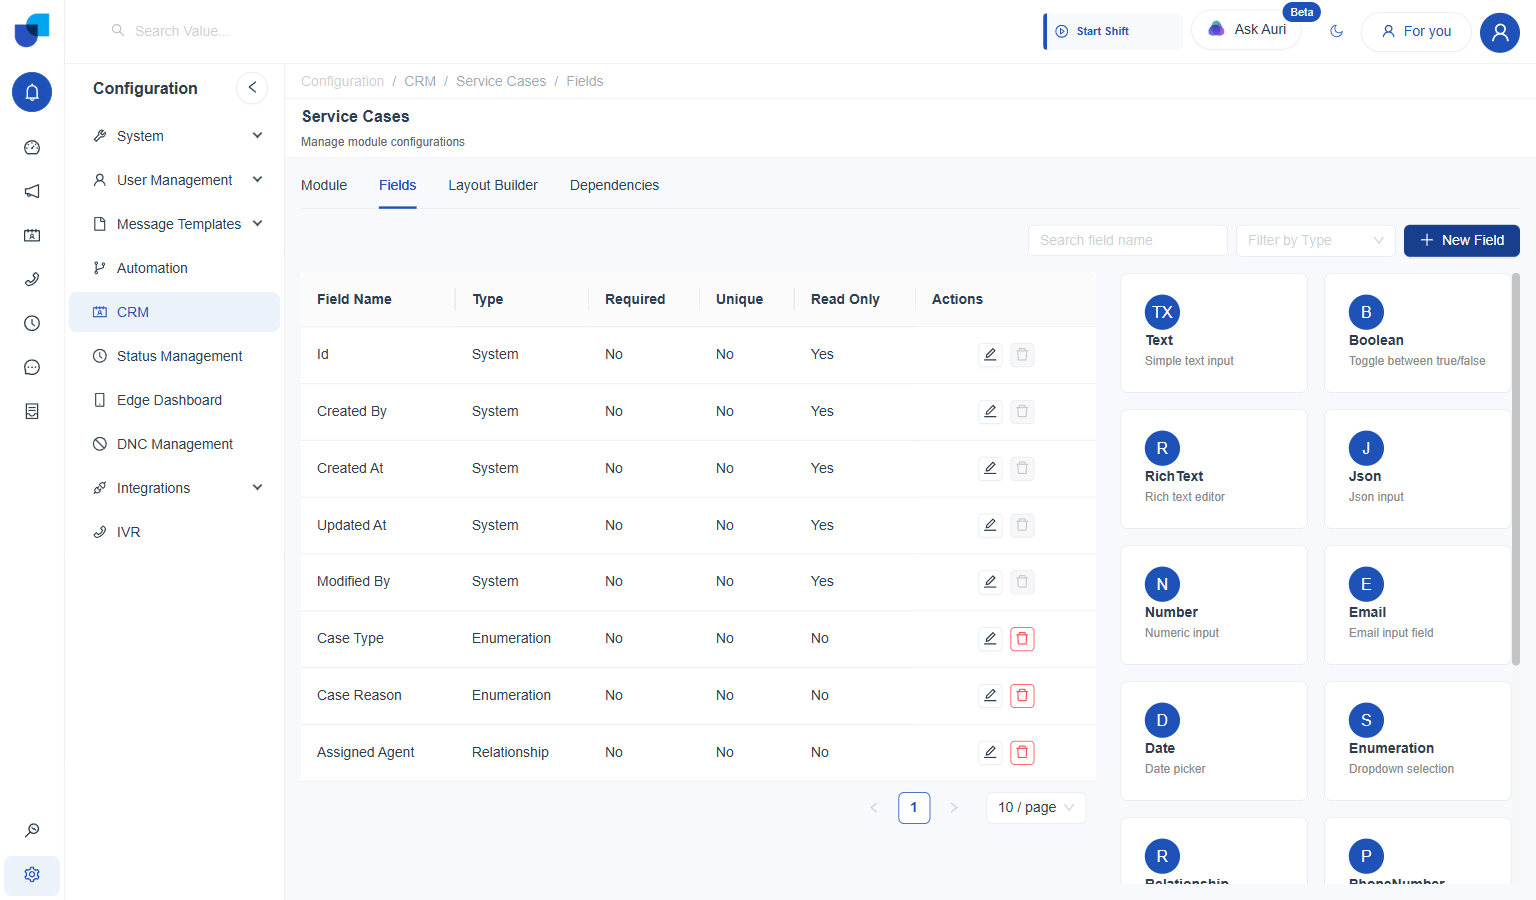
The field type picker, opened from New Field; Enumeration is one tile among many.
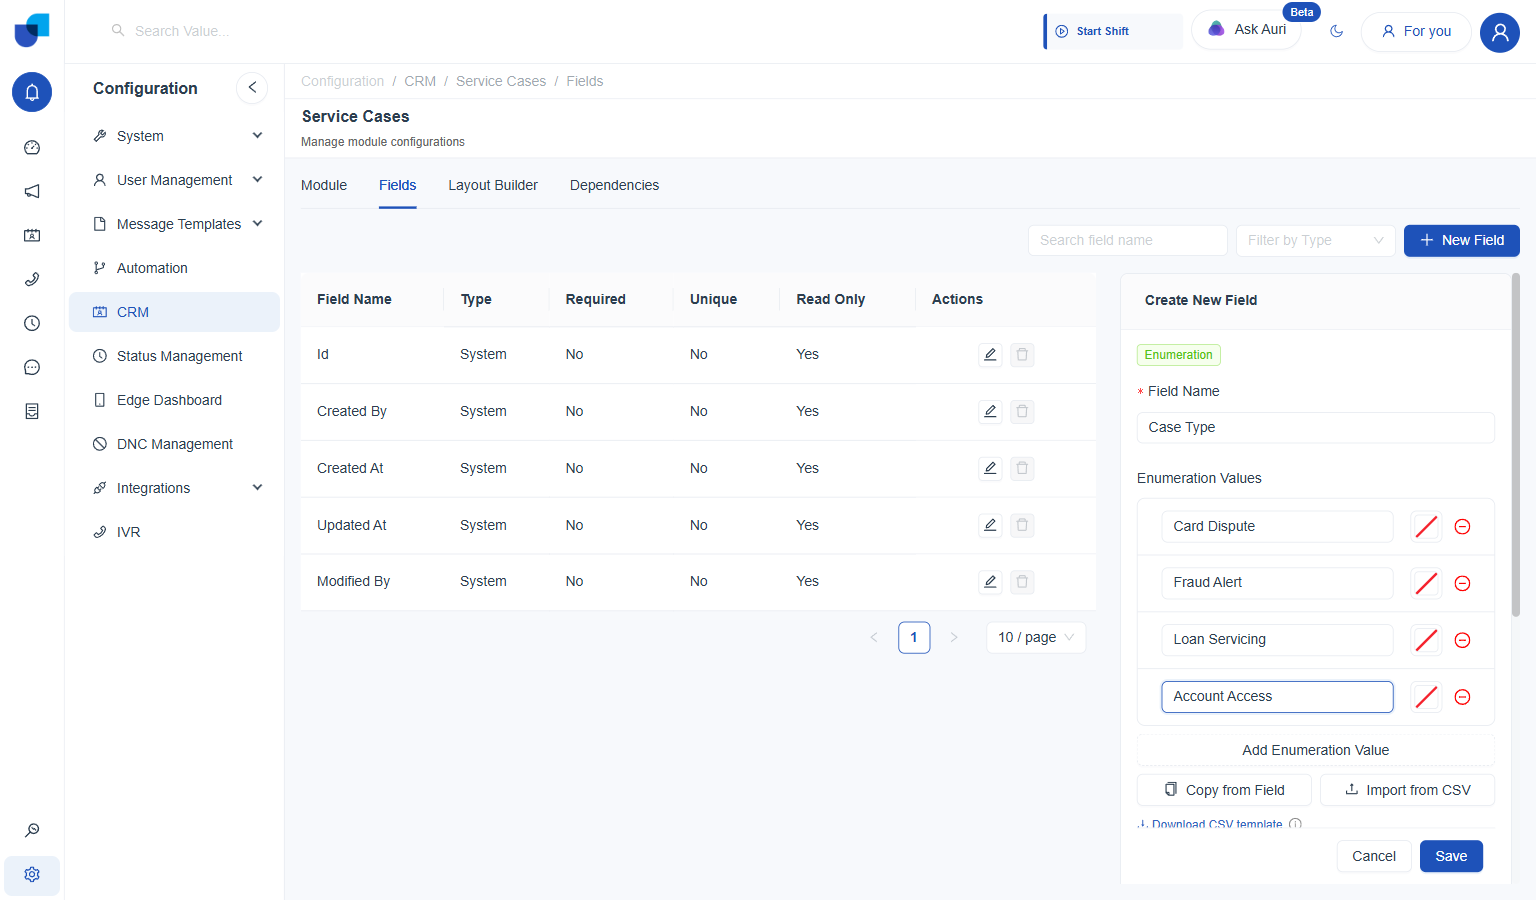
Case Type, with all four values entered before saving.
Case Reason
- Click New Field again, and pick Enumeration.
- Name it Case Reason, and add its four values. Unauthorized Transaction, Billing Error, Suspected Identity Theft, Suspicious Login.
- Click Save.
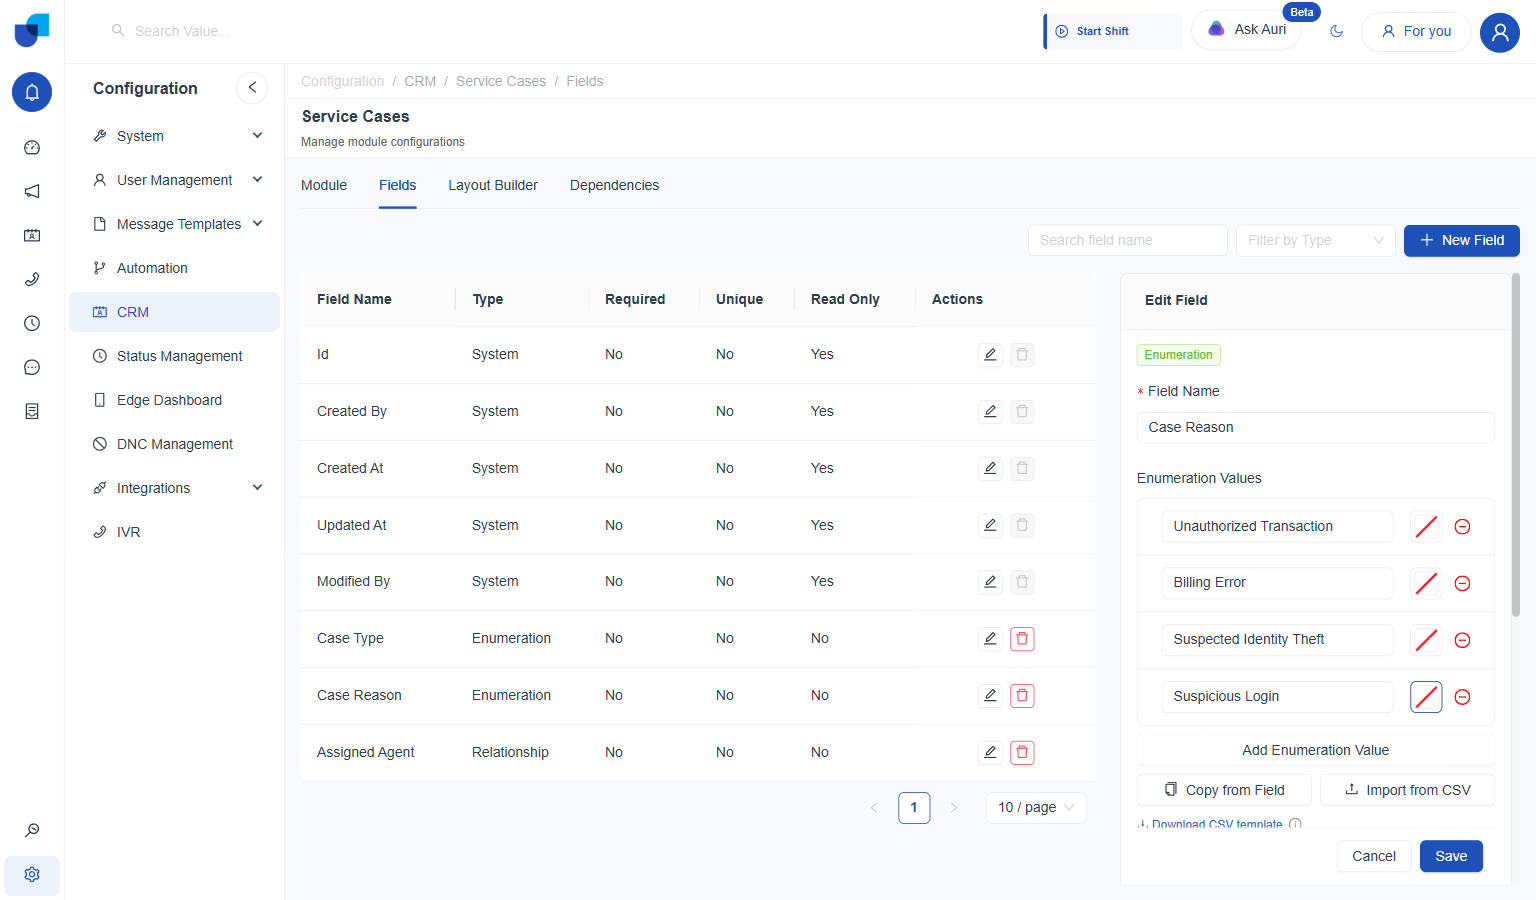
Case Reason, reopened after saving to confirm all four values.
Assigned Agent
- Click New Field, and pick Relationship.
- Name it Assigned Agent, and set Related Module to Contacts.
- Set Relationship Type to Many to One, and click Save. A small diagram confirms the direction: one Contact can be linked to multiple Service Cases, but each Service Case has a single Assigned Agent.
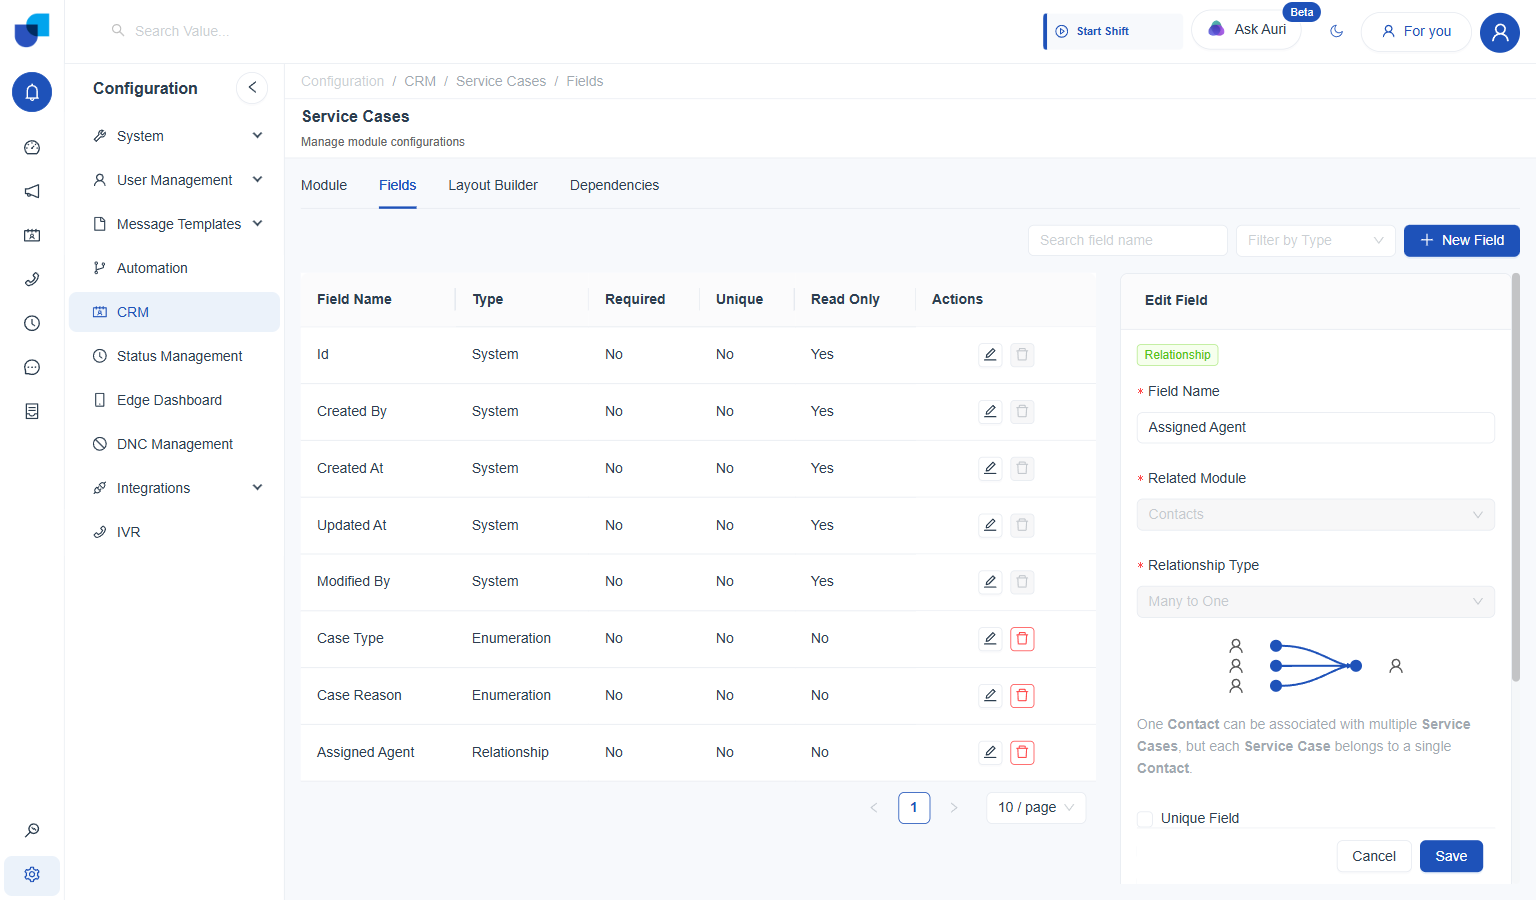
Related Module and Relationship Type both set, with the relationship direction shown beneath them.
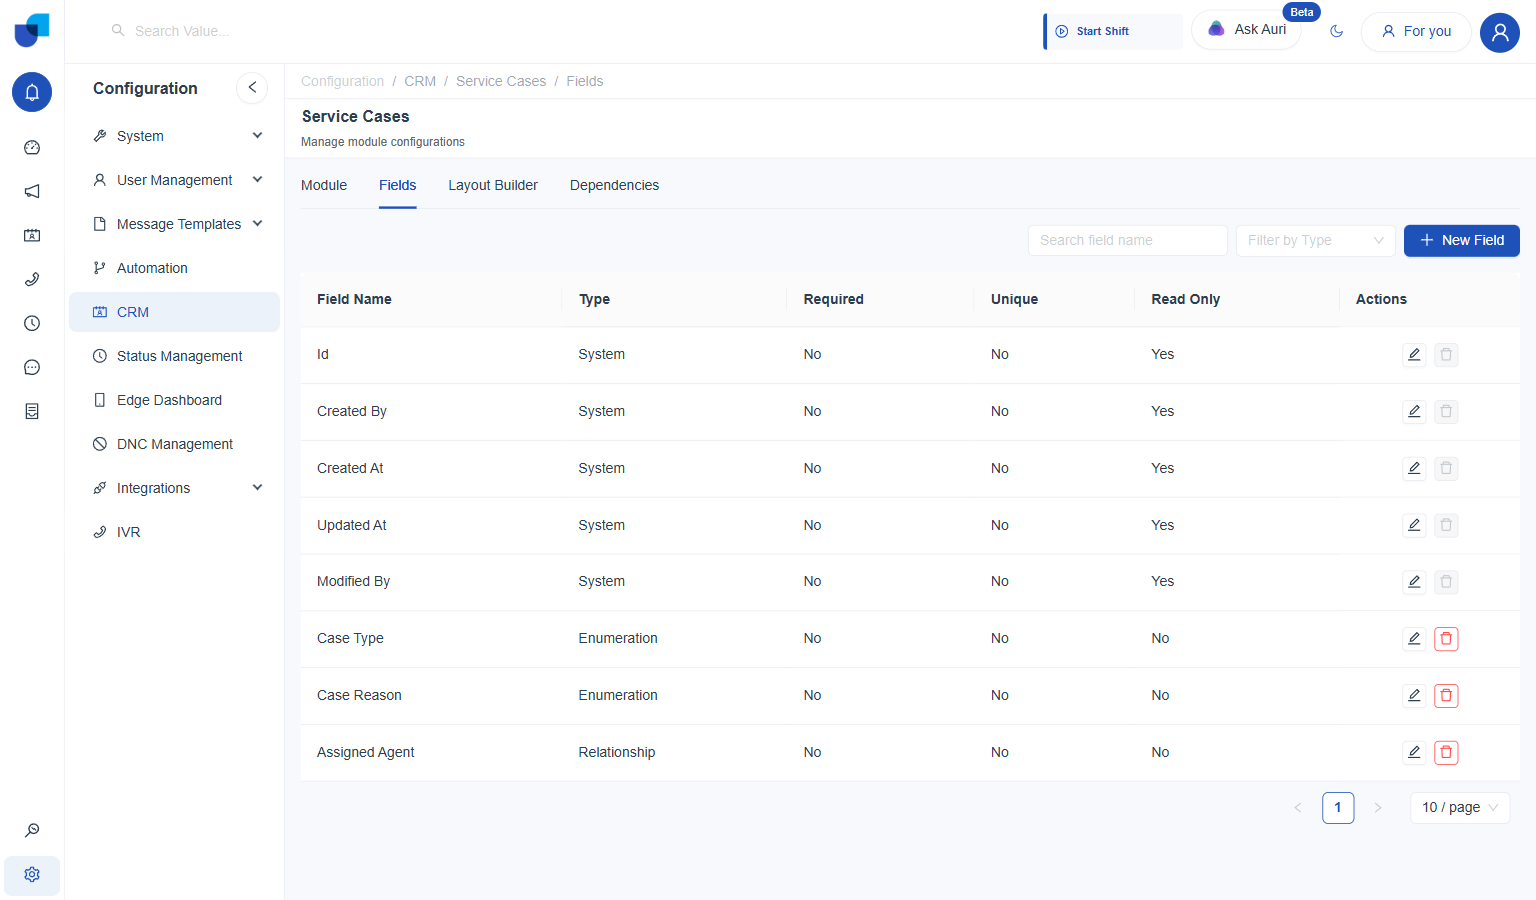
All three fields, saved and listed alongside the module's system fields.
Linking Case Type to Case Reason
A Dropdown Dependency was configured on the module's Dependencies tab so that Case Type narrows Case Reason, with all four pairings from the scenario added to the schema.
- Open the Dependencies tab, staying on the Dropdown sub-tab.
- Pick Case Type then Case Reason from the Fields selector, and click Add Fields to Order. Locks in the chain direction: Case Type controls Case Reason.
- Map each Case Type value to its Case Reason values, one pairing at a time. Card Dispute paired with Unauthorized Transaction, then again with Billing Error; Fraud Alert paired with Suspected Identity Theft, then again with Suspicious Login. Each pairing is added with its own Add to Schema click.
- Click Save.
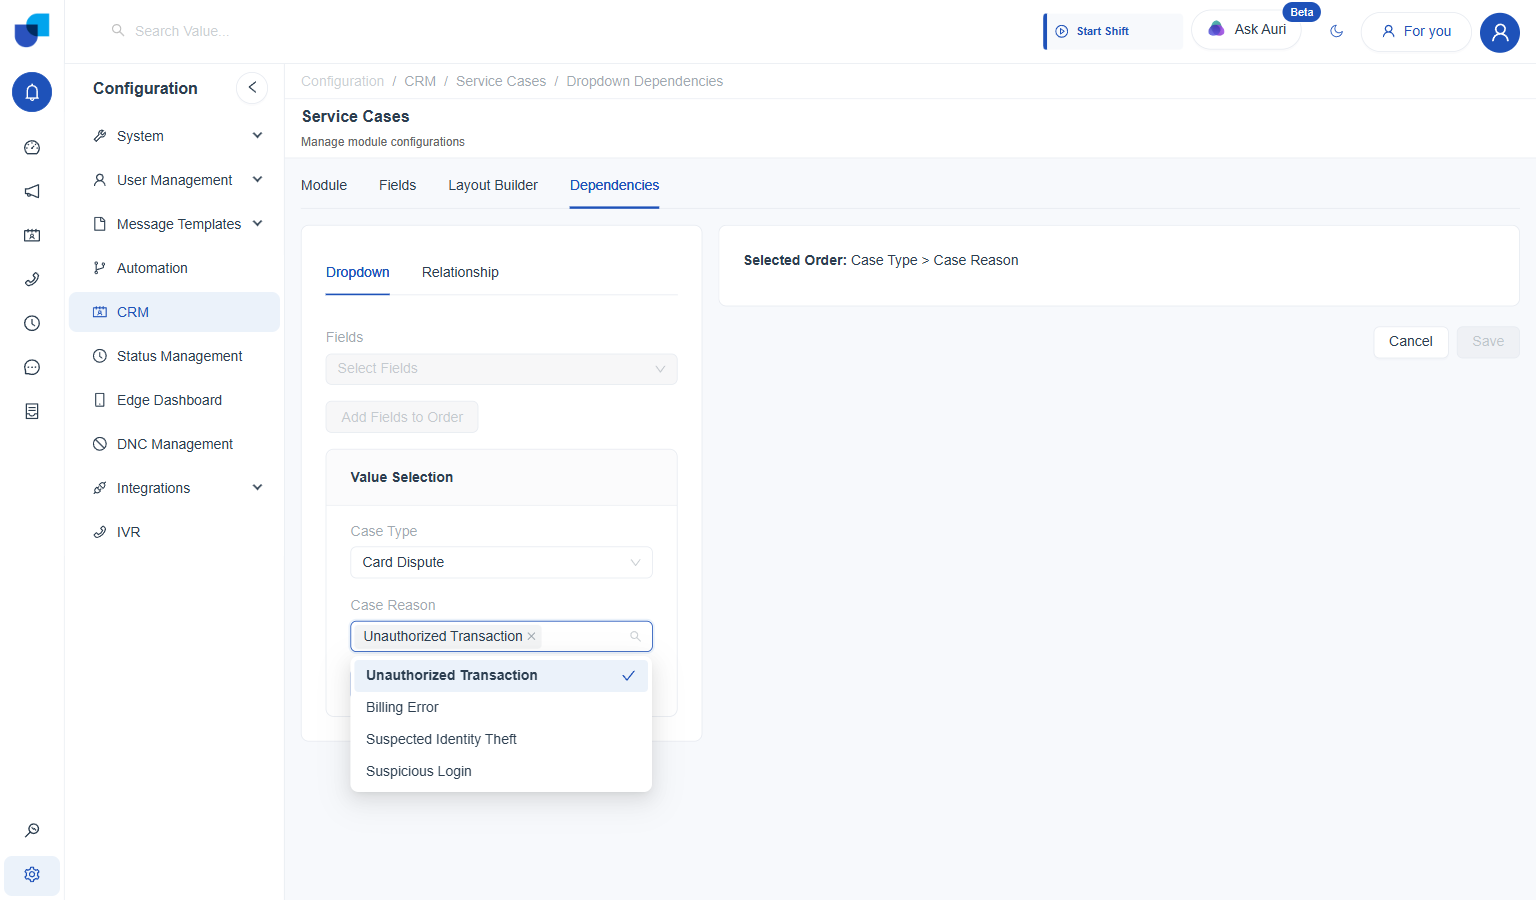
The first pairing, Card Dispute to Unauthorized Transaction, before being added to the schema.
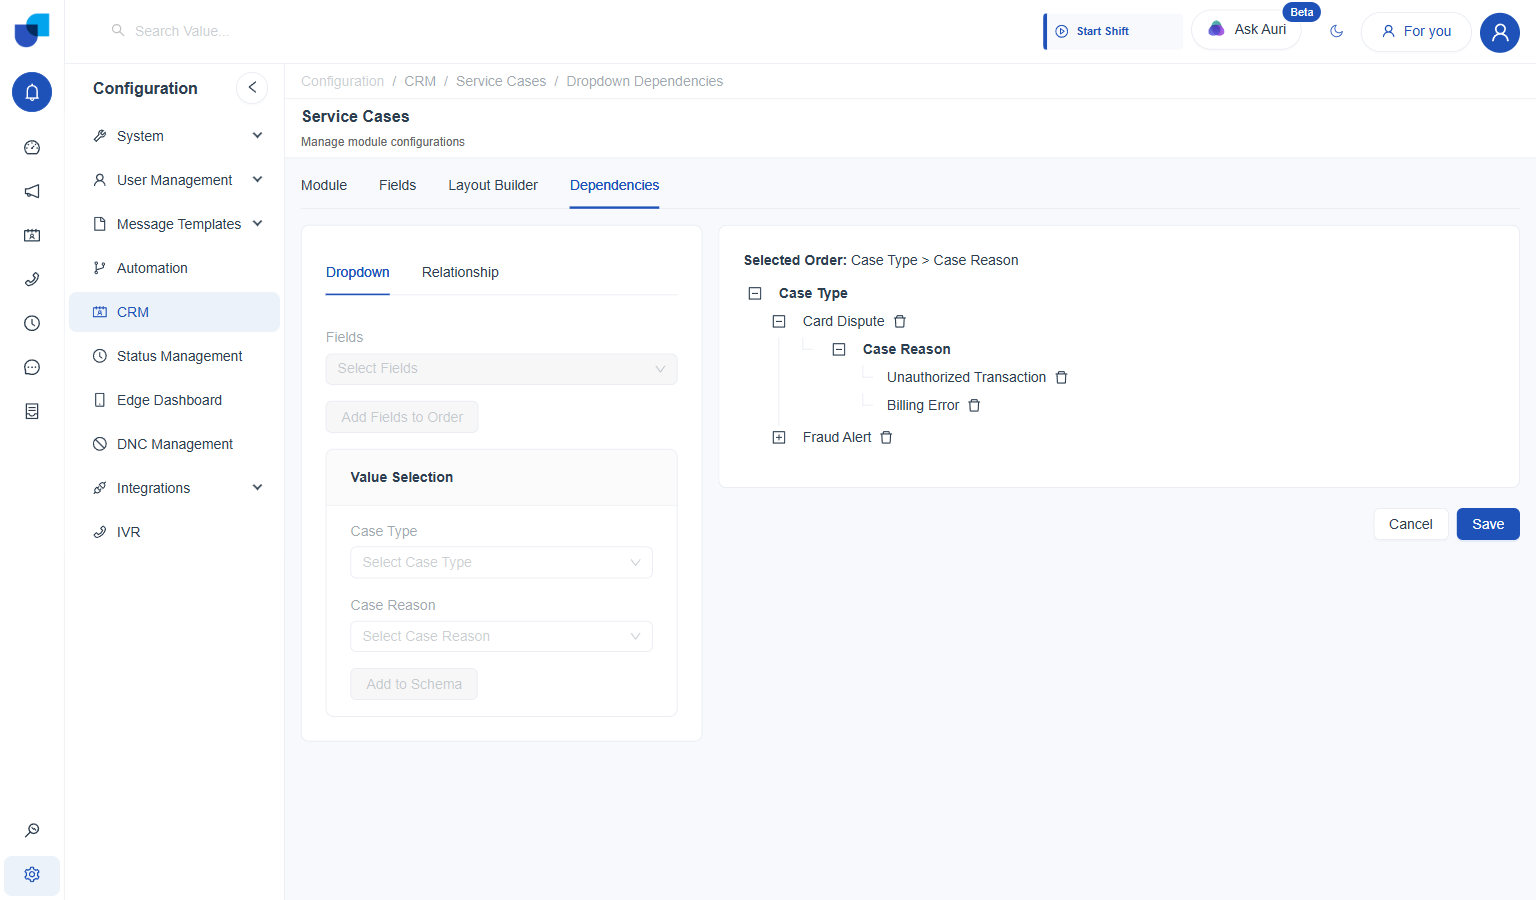
All four pairings built up in the tree: Card Dispute → Unauthorized Transaction, Billing Error; Fraud Alert → Suspected Identity Theft, Suspicious Login.
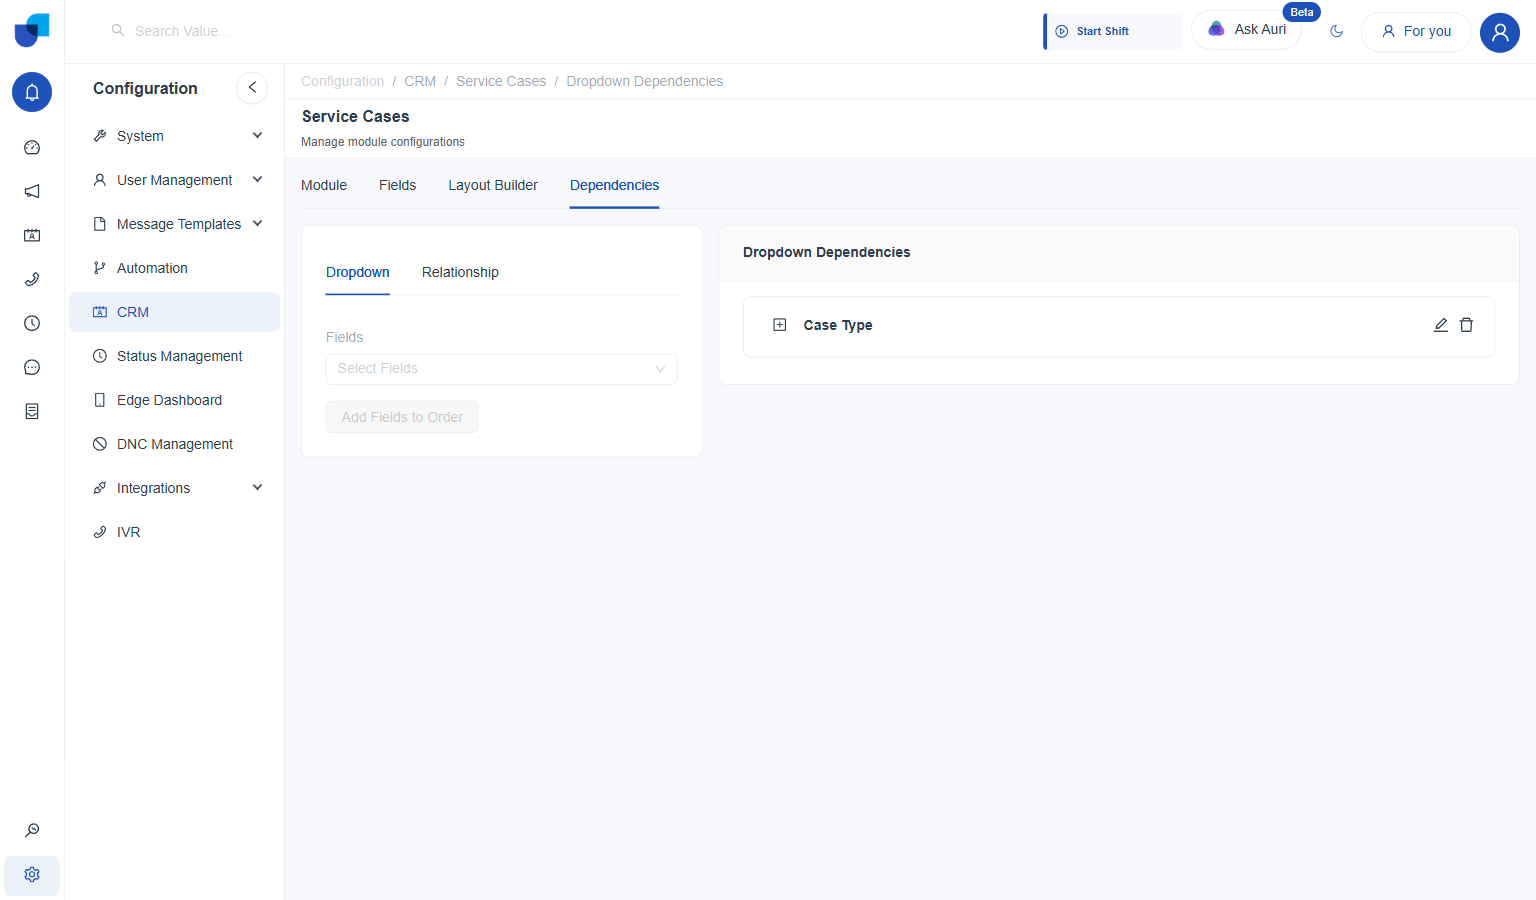
Once saved, the whole chain collapses into a single Case Type entry.
Reopening that entry with its edit icon brings back the full tree, with a per-node delete icon on every branch, for correcting a single pairing without rebuilding the whole chain.
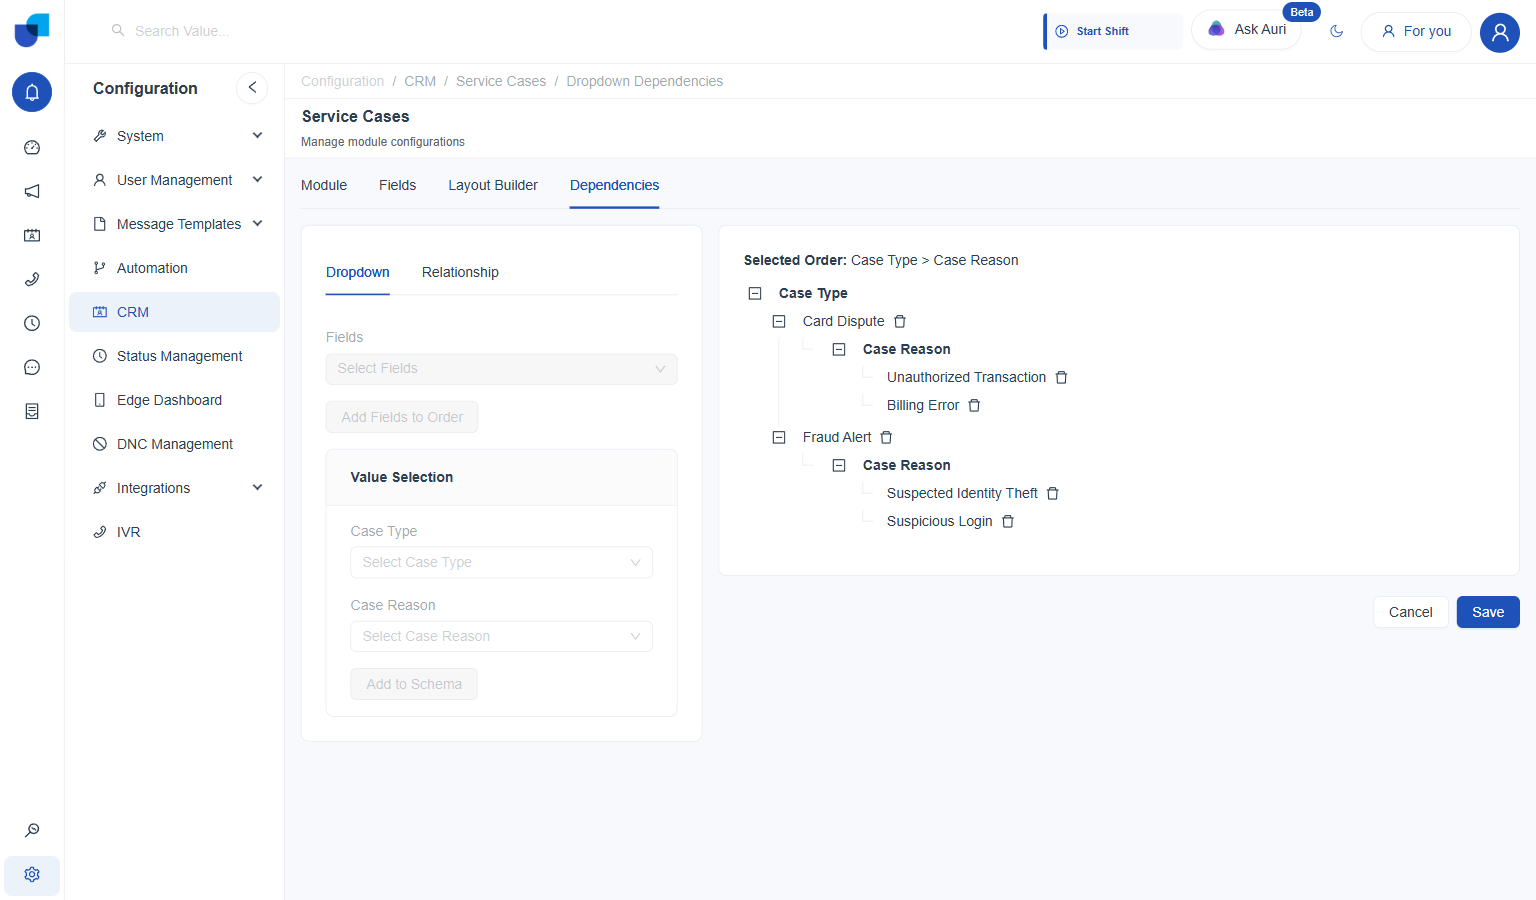
Edit mode: the complete tree, every node with its own delete icon.
For the full walkthrough of this feature, see Configuring CRM Dependencies.
Designing the Case Detail Screen
A Detail Page Layout named Case Detail was built with two sections: Case Type and Case Reason grouped together, and Assigned Agent in its own section below, exactly as described in the scenario.
- Open the Layout Builder tab, and click New Layout. Offers a choice of four layout types.
- Pick Detail Page Layout.
- Name it Case Detail.
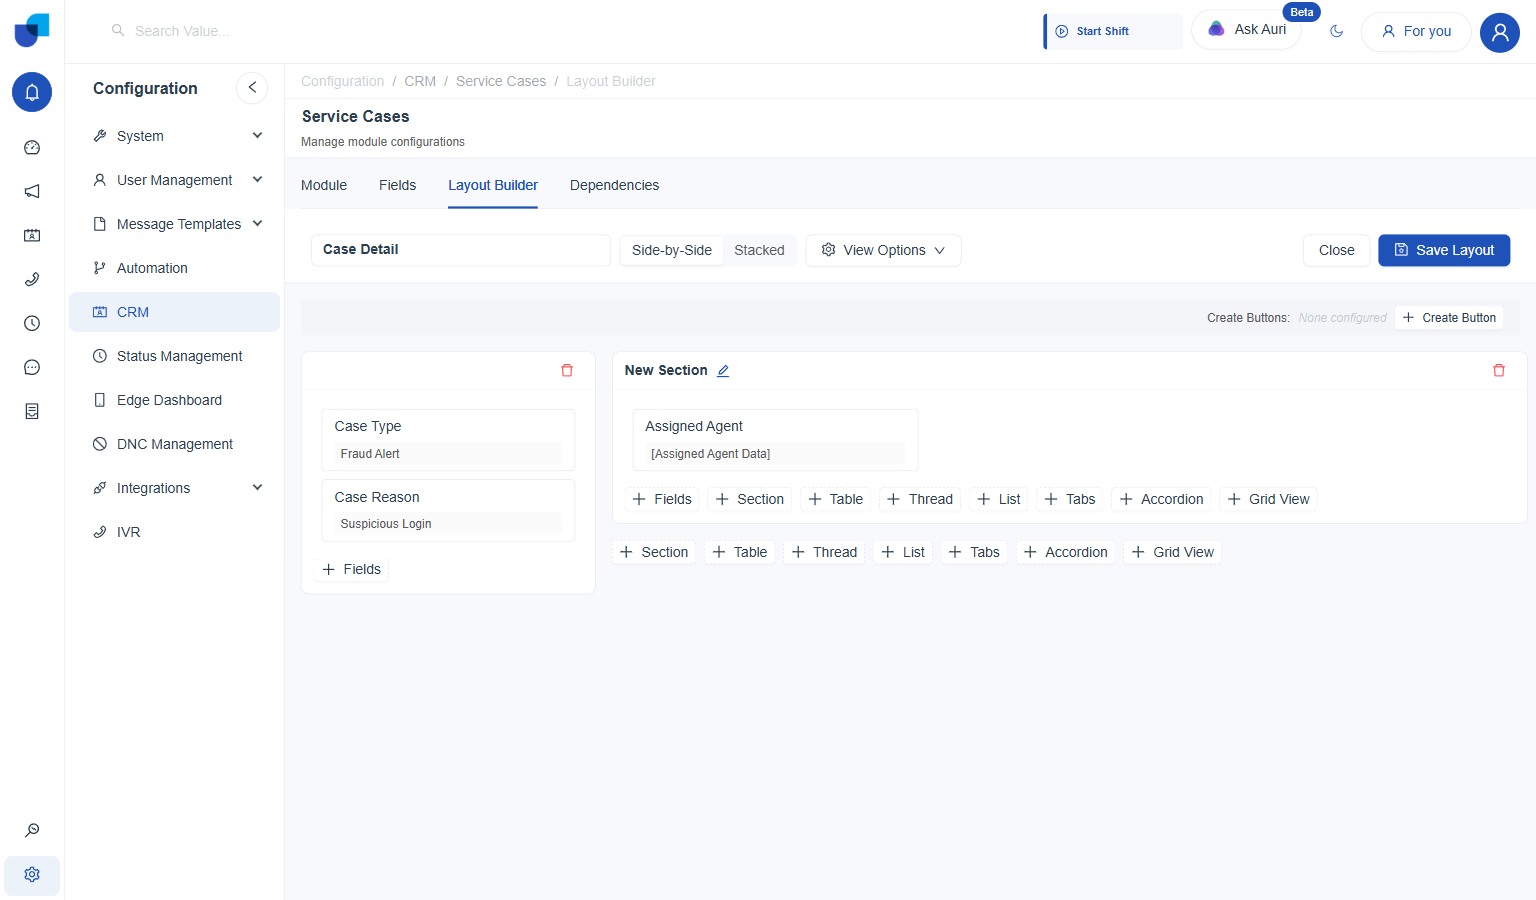
- Click Section, then + Fields, and add Case Type and Case Reason. Both fields land in the same first section.
- Click Section again, then + Fields, and add Assigned Agent. Kept in its own, second section, separate from Case Type and Case Reason.
- Click Save Layout.
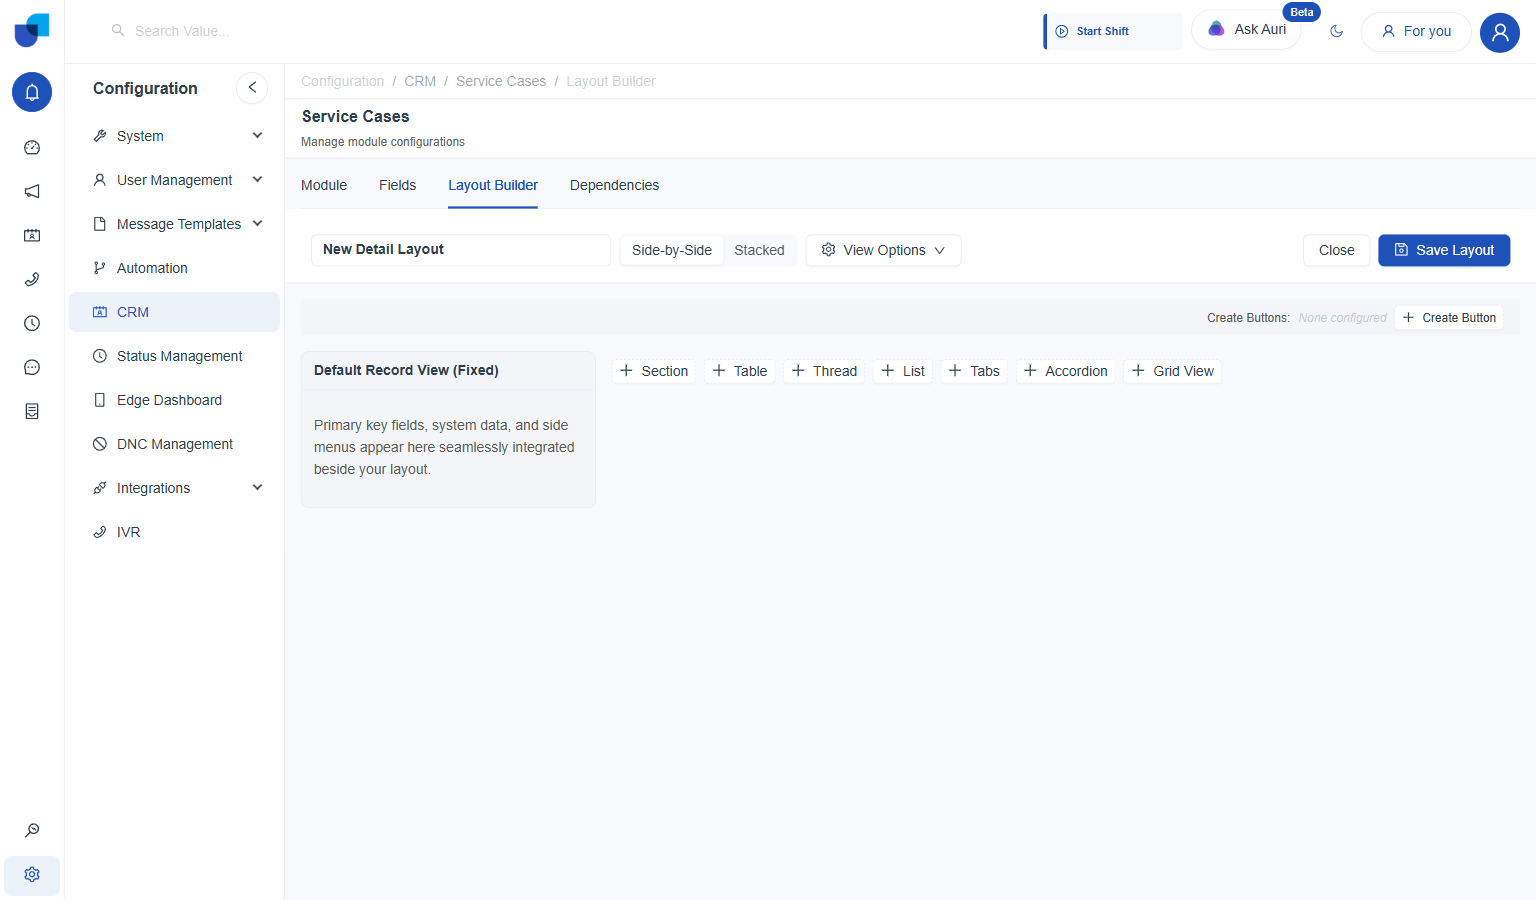
New Layout offers four types; Detail Page Layout is the one used here.
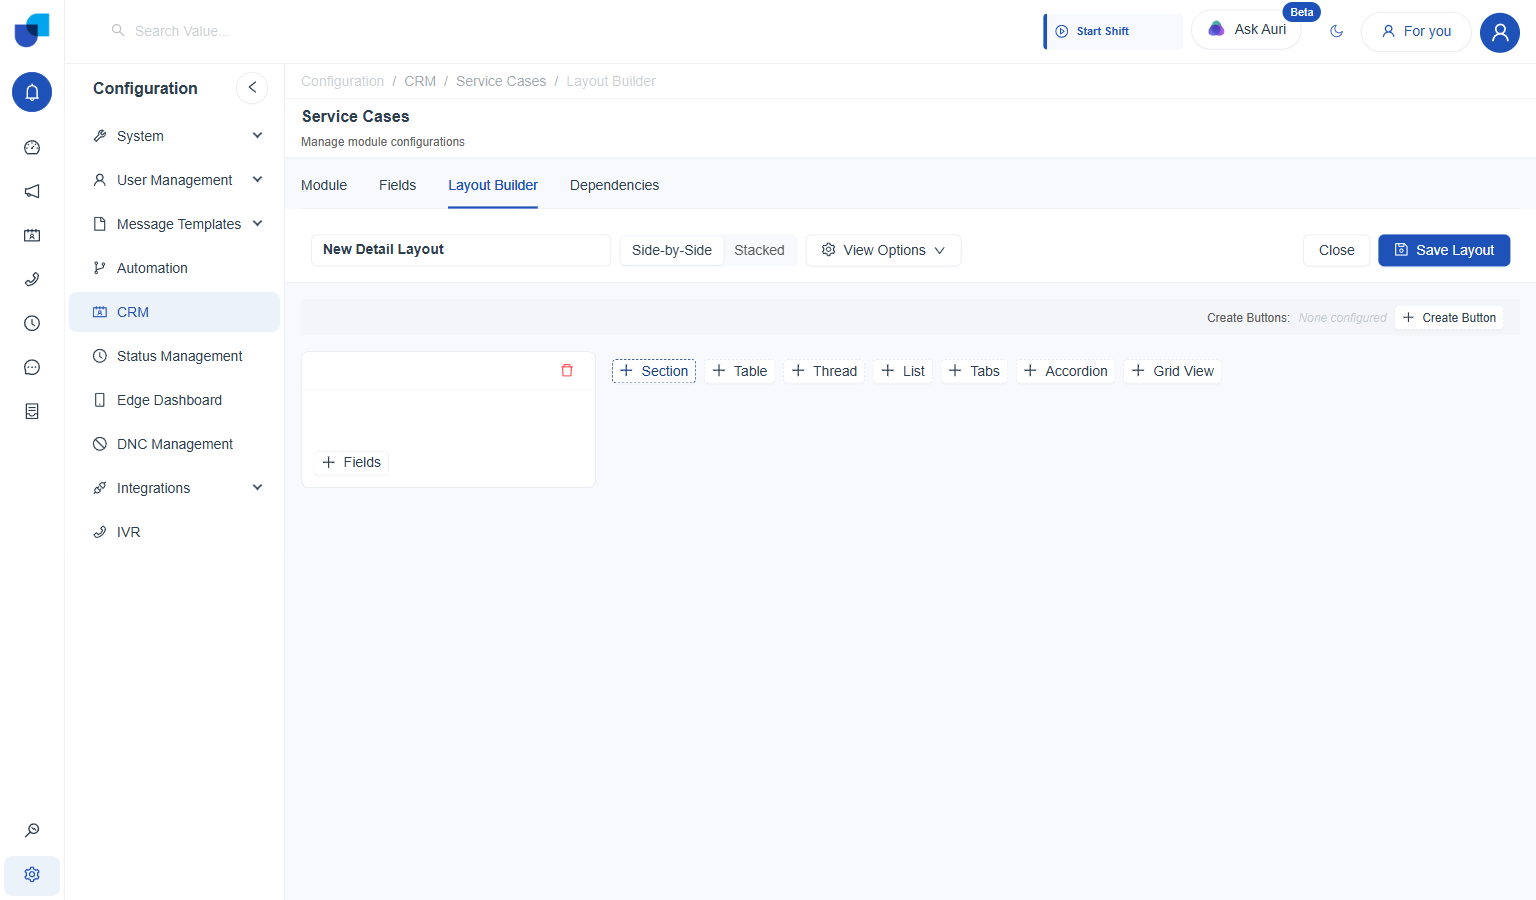
The builder starts completely empty: a name field and a row of block buttons.
An empty Section block, immediately after clicking Section and before adding any fields.
Two sections: Case Type and Case Reason together, Assigned Agent on its own.
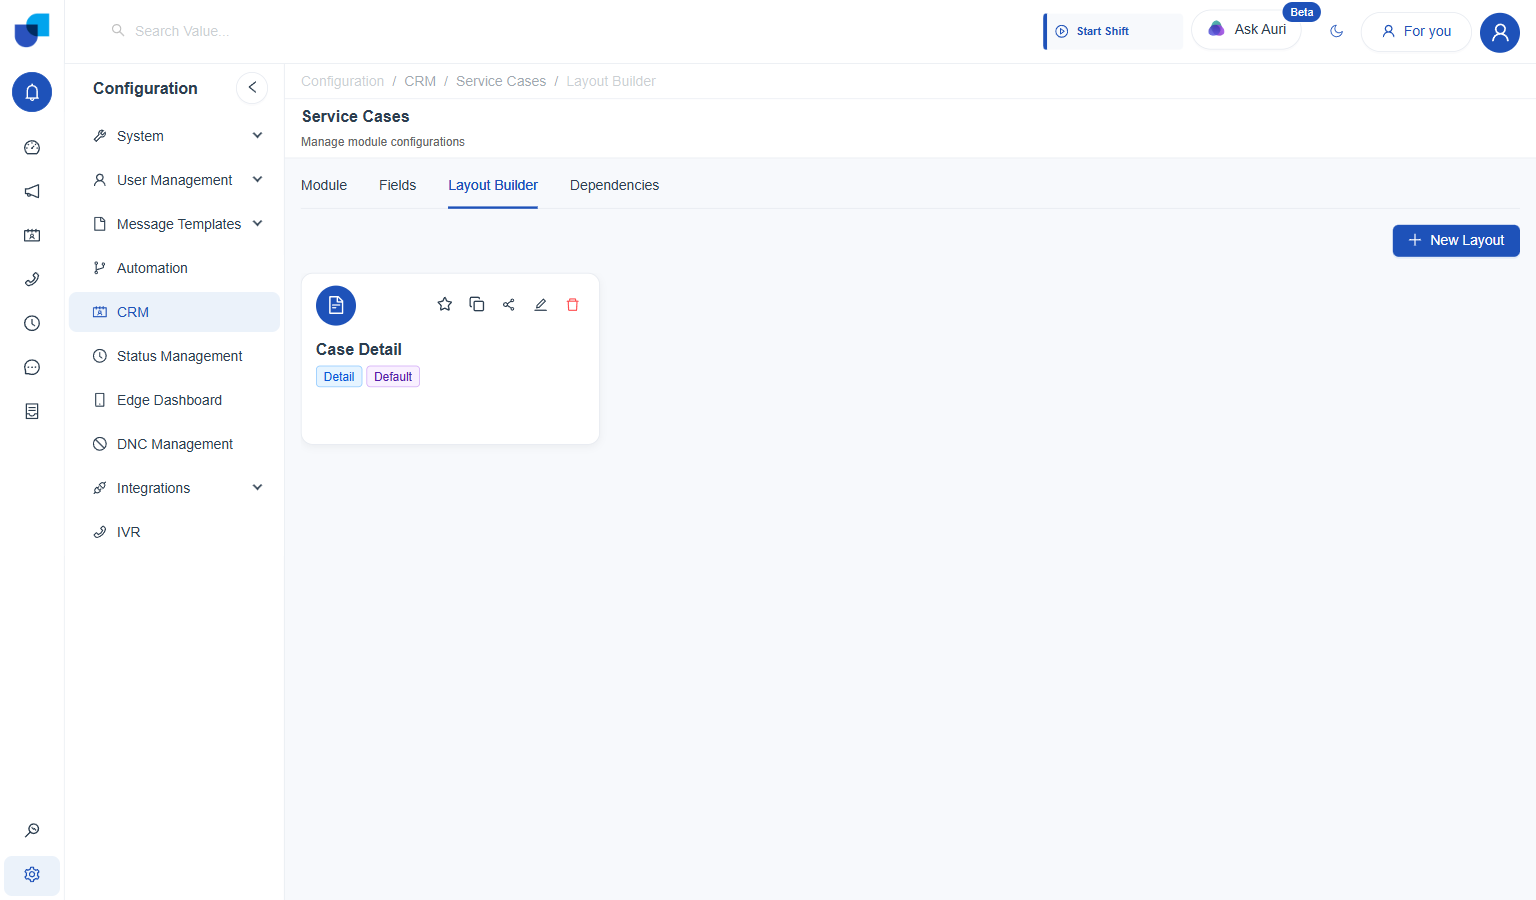
Case Detail, saved and listed on the Layout Builder tab.
For every layout type and block in detail, see Configuring CRM Layouts.
Connecting an Outside System
The Core Banking Platform connection described in the scenario was built as a real External source type module, pointed at the bank's account API.
Setting up the API connection
- Go to Configuration → Integrations → API Integrations, and click Create. Opens a new, empty API collection.
- Name the collection, and set its Base URL. Named Core Banking API, pointed at the bank's account endpoint.
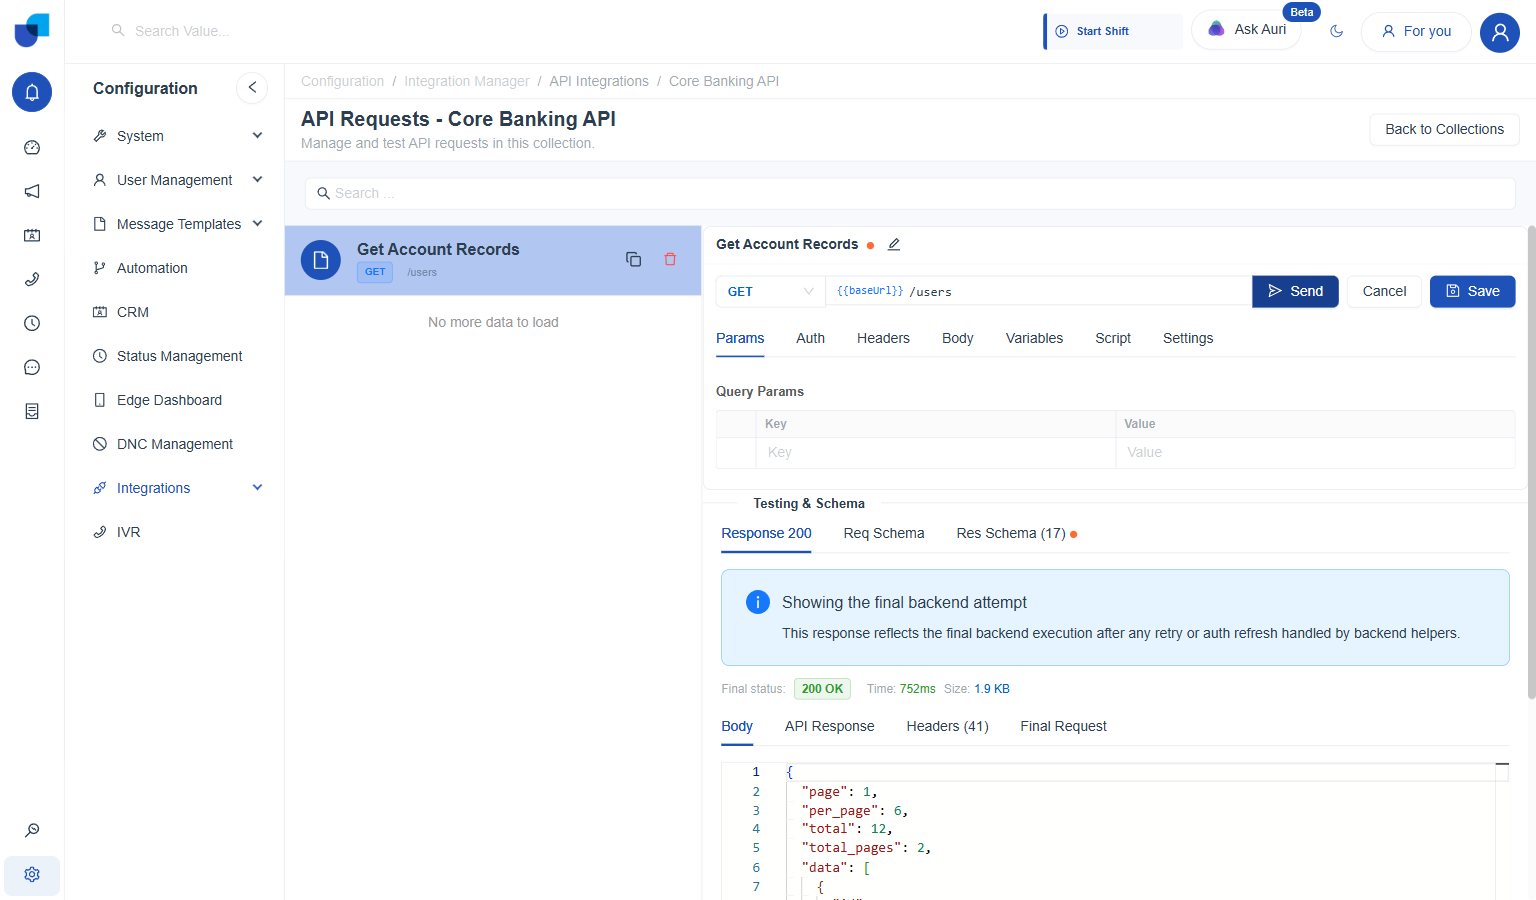
- Open the collection, click Create, and point the new GET request at an endpoint. Named Get Account Records, a GET request returns the account list.
- Send the request, and check the response shape.
The response included a
dataarray, but used a plaintotalfield instead of thepagination.totalRecordsshape Uniconnect requires. - Add a Post Script reshaping the response, then edit the Res Schema to match.
The script sets
response.pagination = { totalRecords: response.total }; the Res Schema was then set to detectdata(array) andpagination.totalRecords(number). - Save the request.
The account API's response: a data array already present, but total instead of pagination.totalRecords.
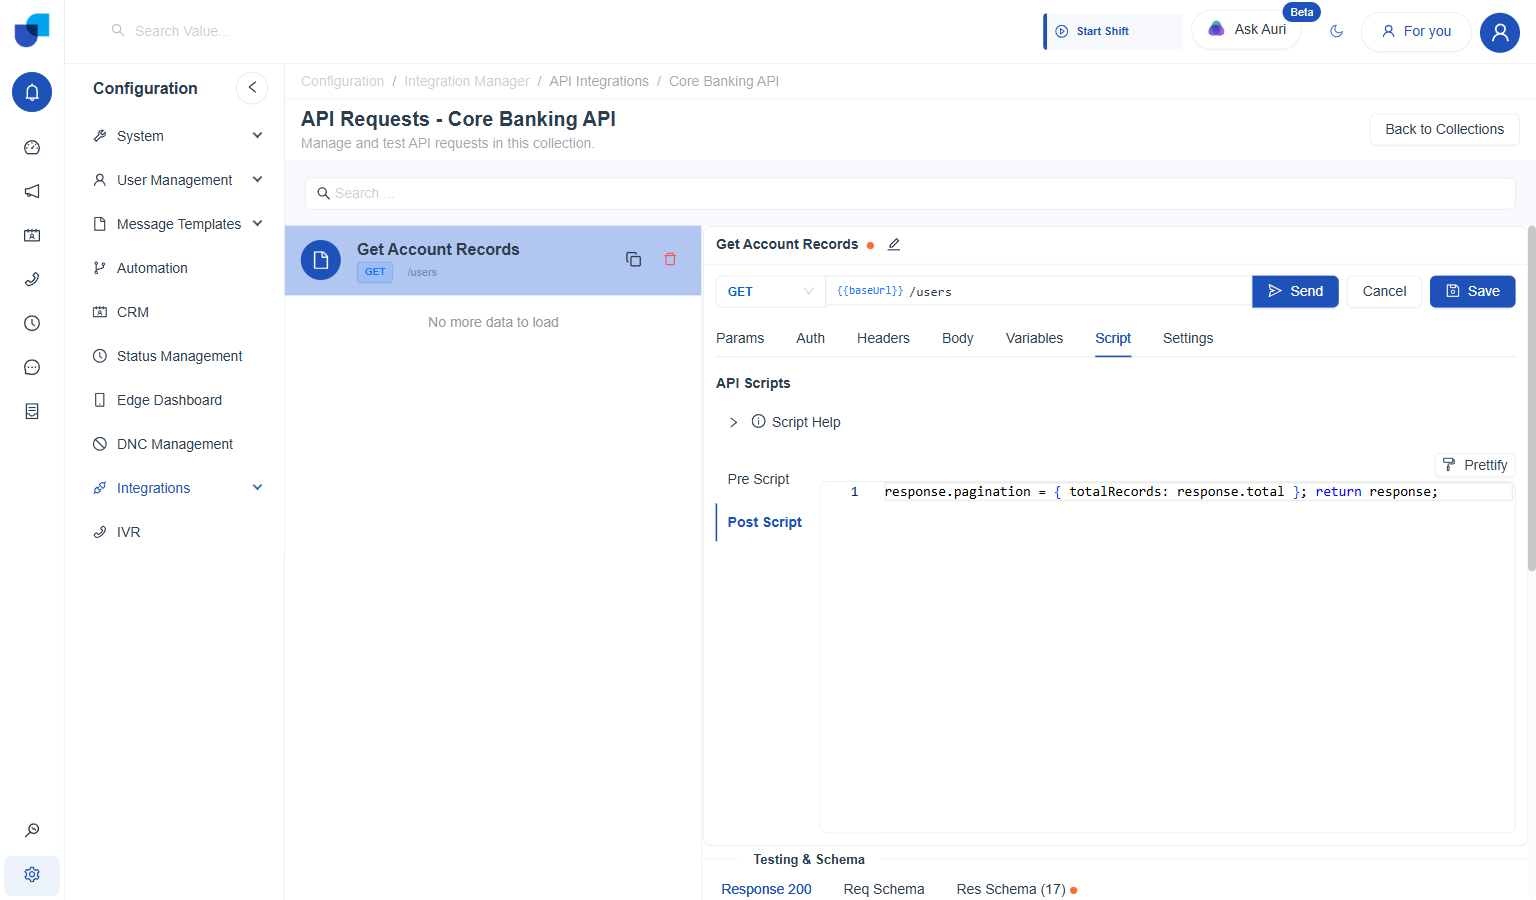
The Post Script reshaping the response.
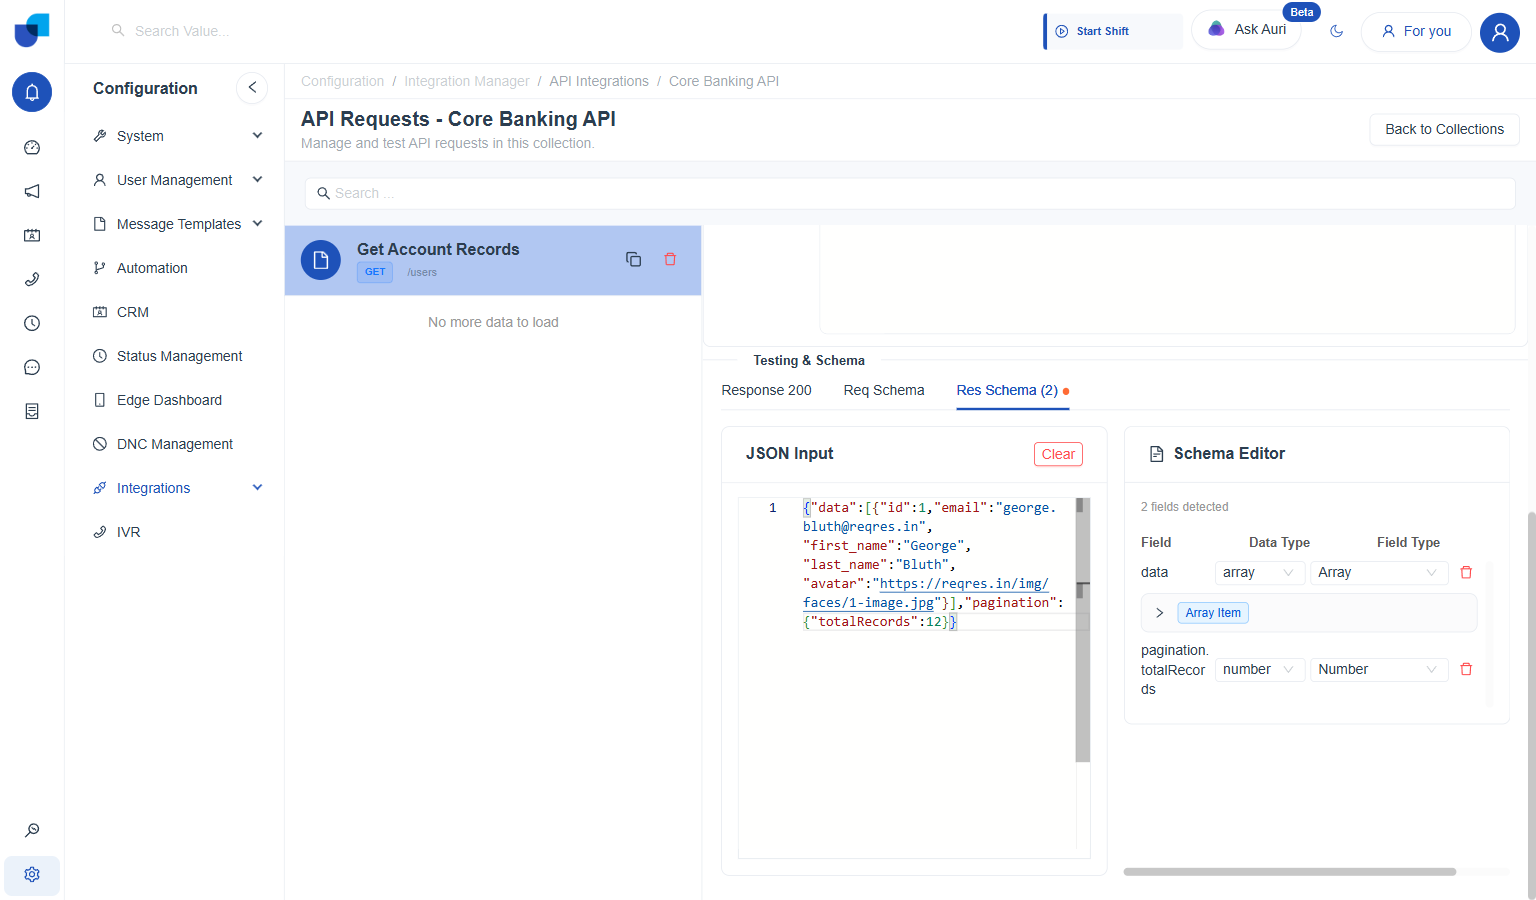
The Res Schema, matching exactly what the External Module configuration requires.
Building the External Module
- Go to Configuration → CRM, click Create, and set Source Type to External. Named Core Banking Platform, with the same description used throughout the scenario.
- Set Select Collection to the Core Banking API, and Get All API to the saved request.
- Click Save.
- Open the Fields tab, and click Fetch Schema Response. Automatically created five fields from the connection's response: id, email, firstName, lastName, avatar.
- Mark id as the primary field. A confirmation prompt appears first, since changing the primary field can affect existing records; this module had none yet.
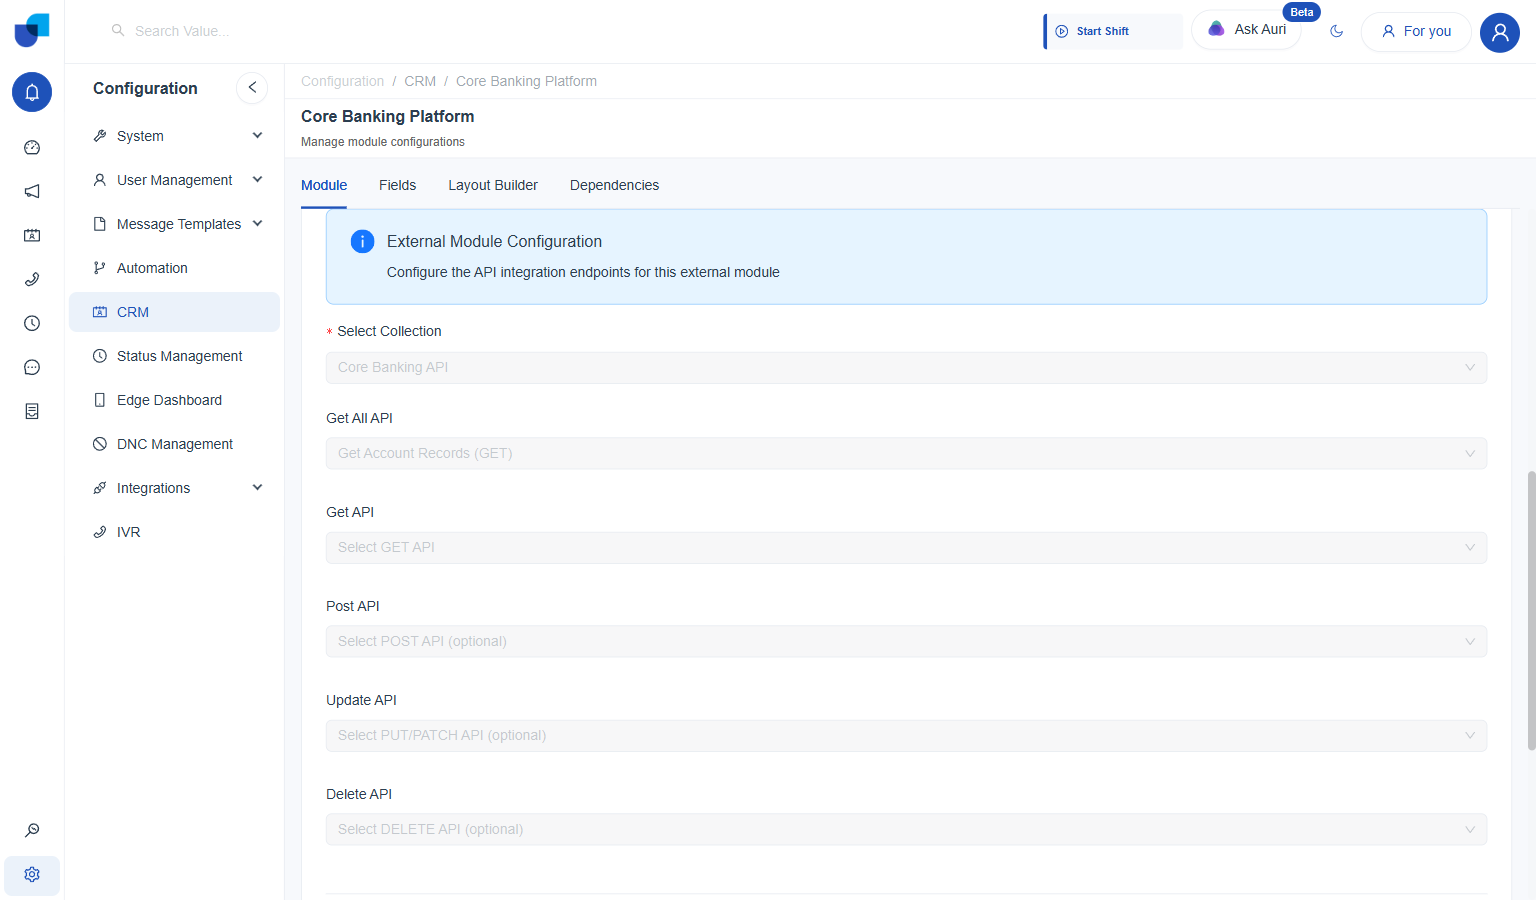
Source Type, Select Collection, and Get All API all configured.
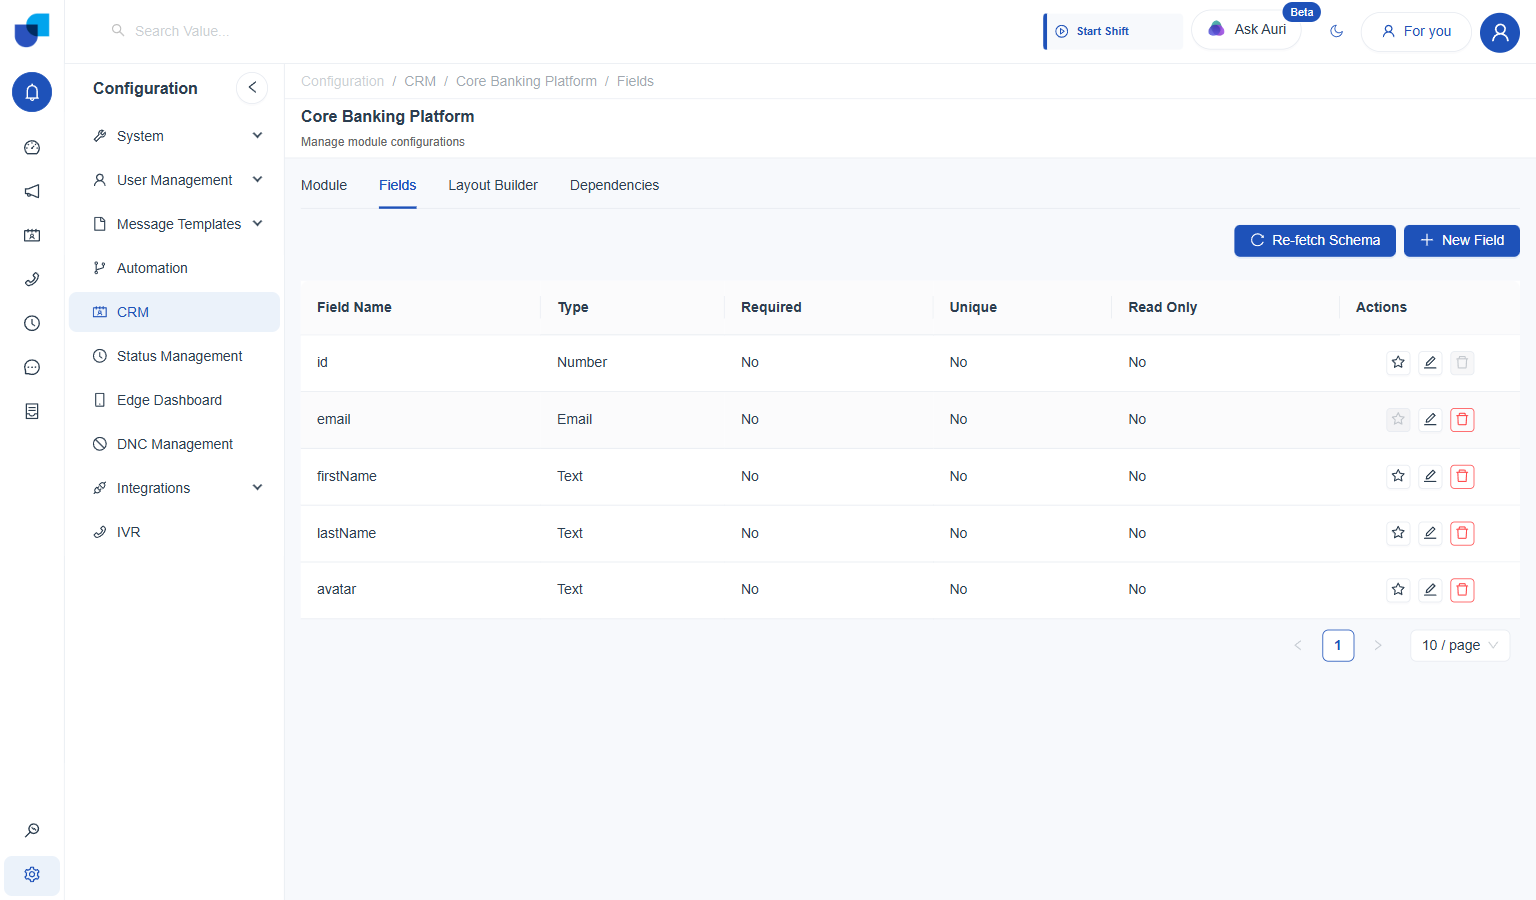
Fetch Schema Response created all five fields in one click.
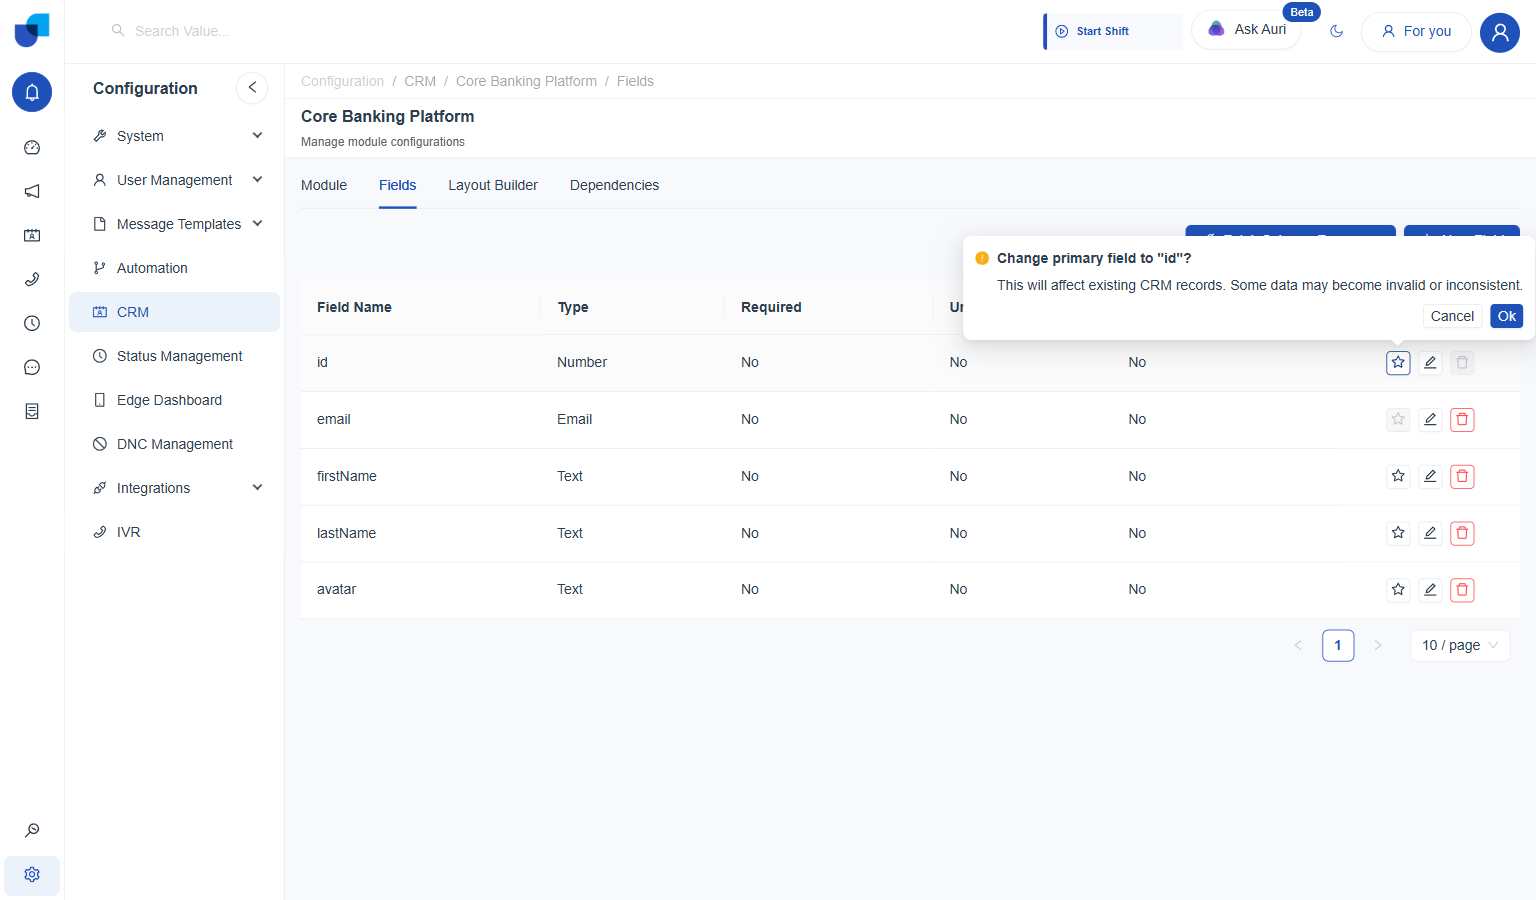
Marking id as primary; confirmed since no records existed yet on this new module.
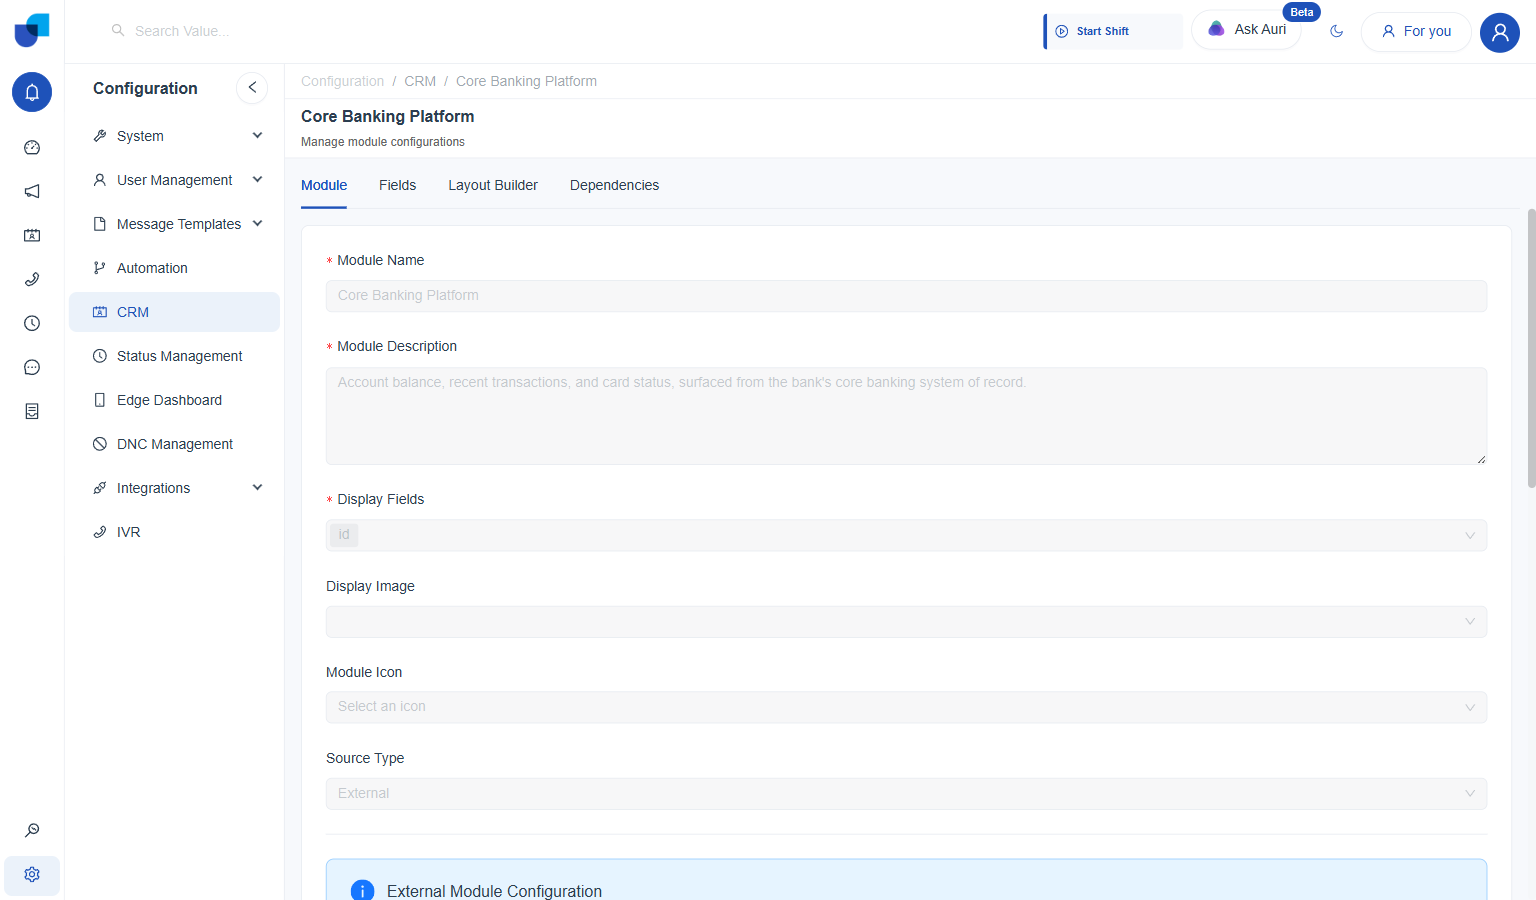
The completed module: no Primary Key warning, fully usable.
Setting Up the Two Roles
Two roles were created under Configuration → User Management → Roles, with CRM Module permissions set on Service Cases to match the scenario.
| Role | Create | Update | View | Delete |
|---|---|---|---|---|
Contact Center Supervisor | Yes | All | All | All |
Service Agent | No | Own | All | No access |
- Go to Configuration → User Management → Roles, and click Create. Opens a blank Create Role panel: Role Name is required, and every permission category starts at 0 permissions set.
- Name the Role, and expand CRM Modules under Permissions.
- Find the Service Cases row, and set Create, Update, View, and Delete. Create is a plain Yes/No switch; Update, View, and Delete are each their own dropdown offering Own, Group, or All.
- Click Save. Repeated once for each role: Contact Center Supervisor got Create switched on and every dropdown set to All; Service Agent kept Create off, Update set to Own, View set to All, and Delete left at No access.
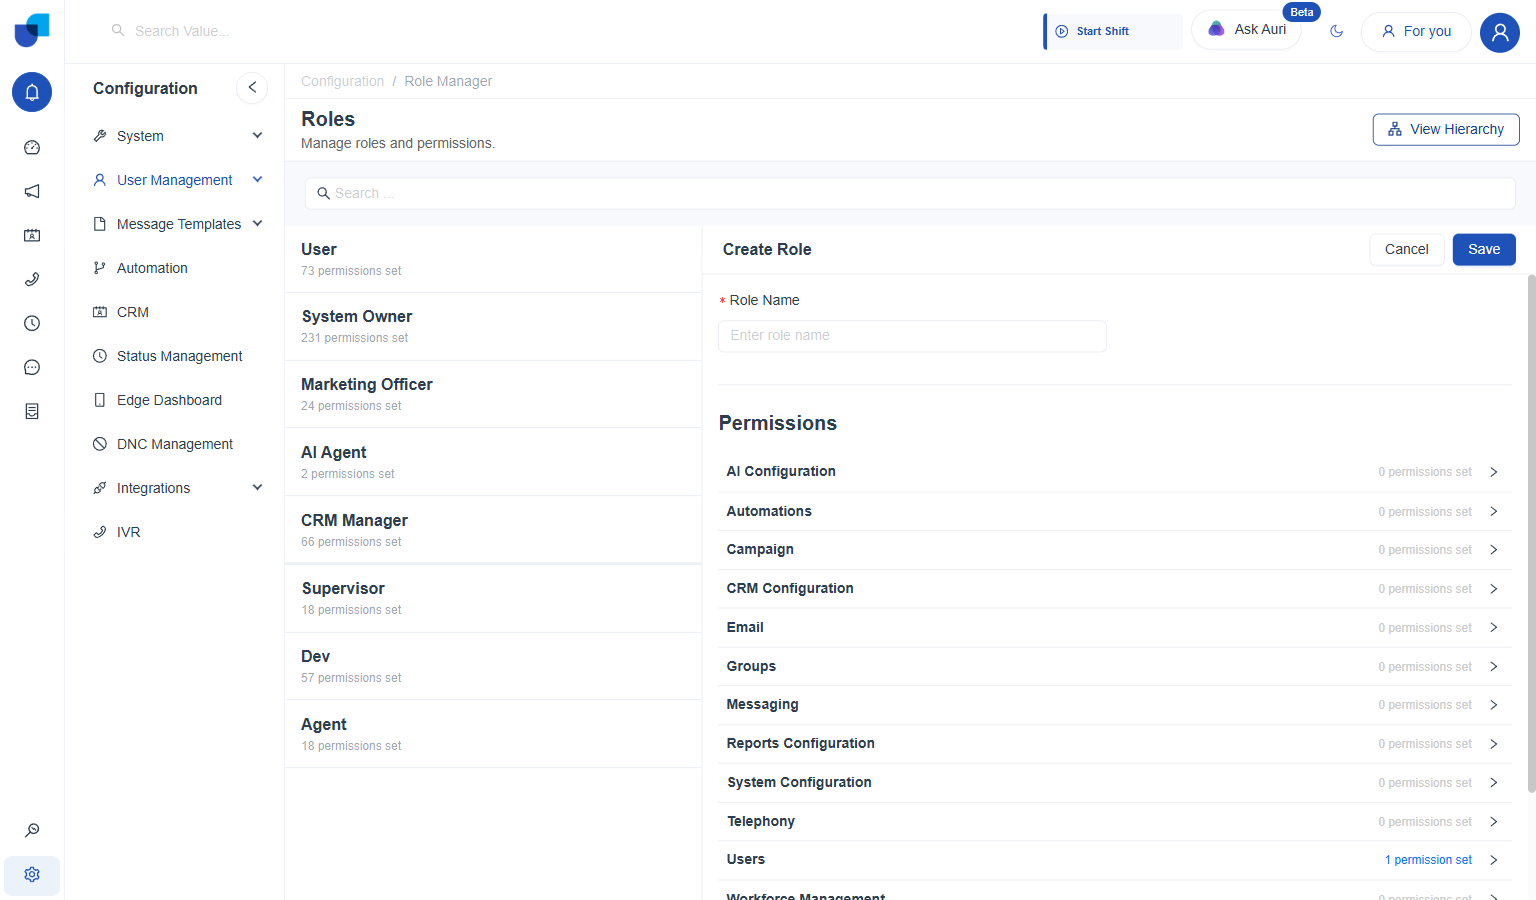
A brand new Role: nothing is granted until Permissions are explicitly set.
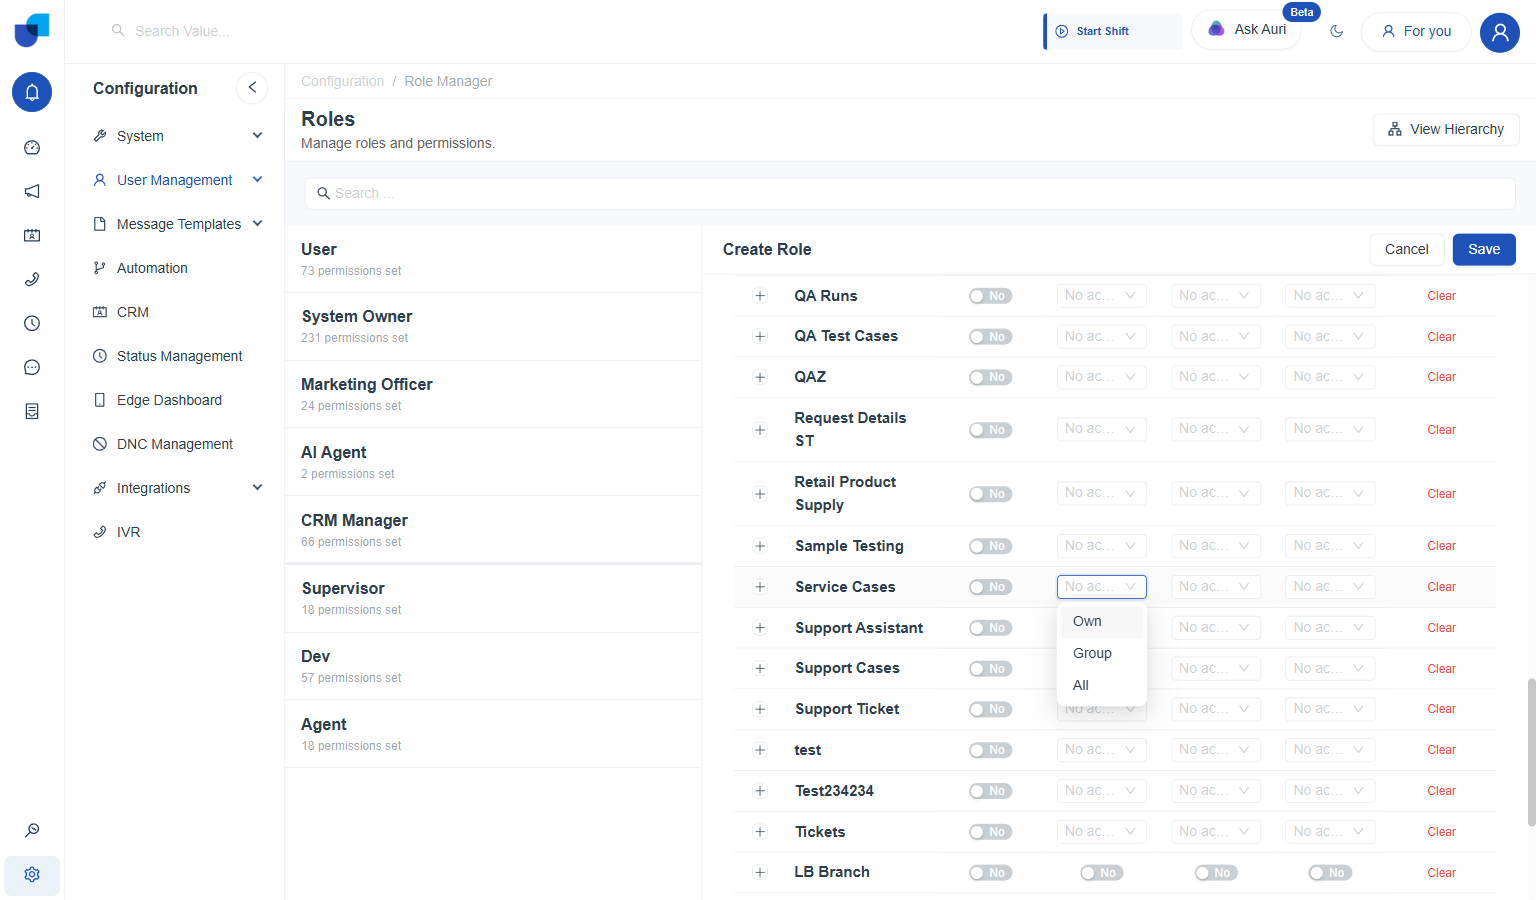
The Update dropdown on Service Cases, open to show Own, Group, and All.
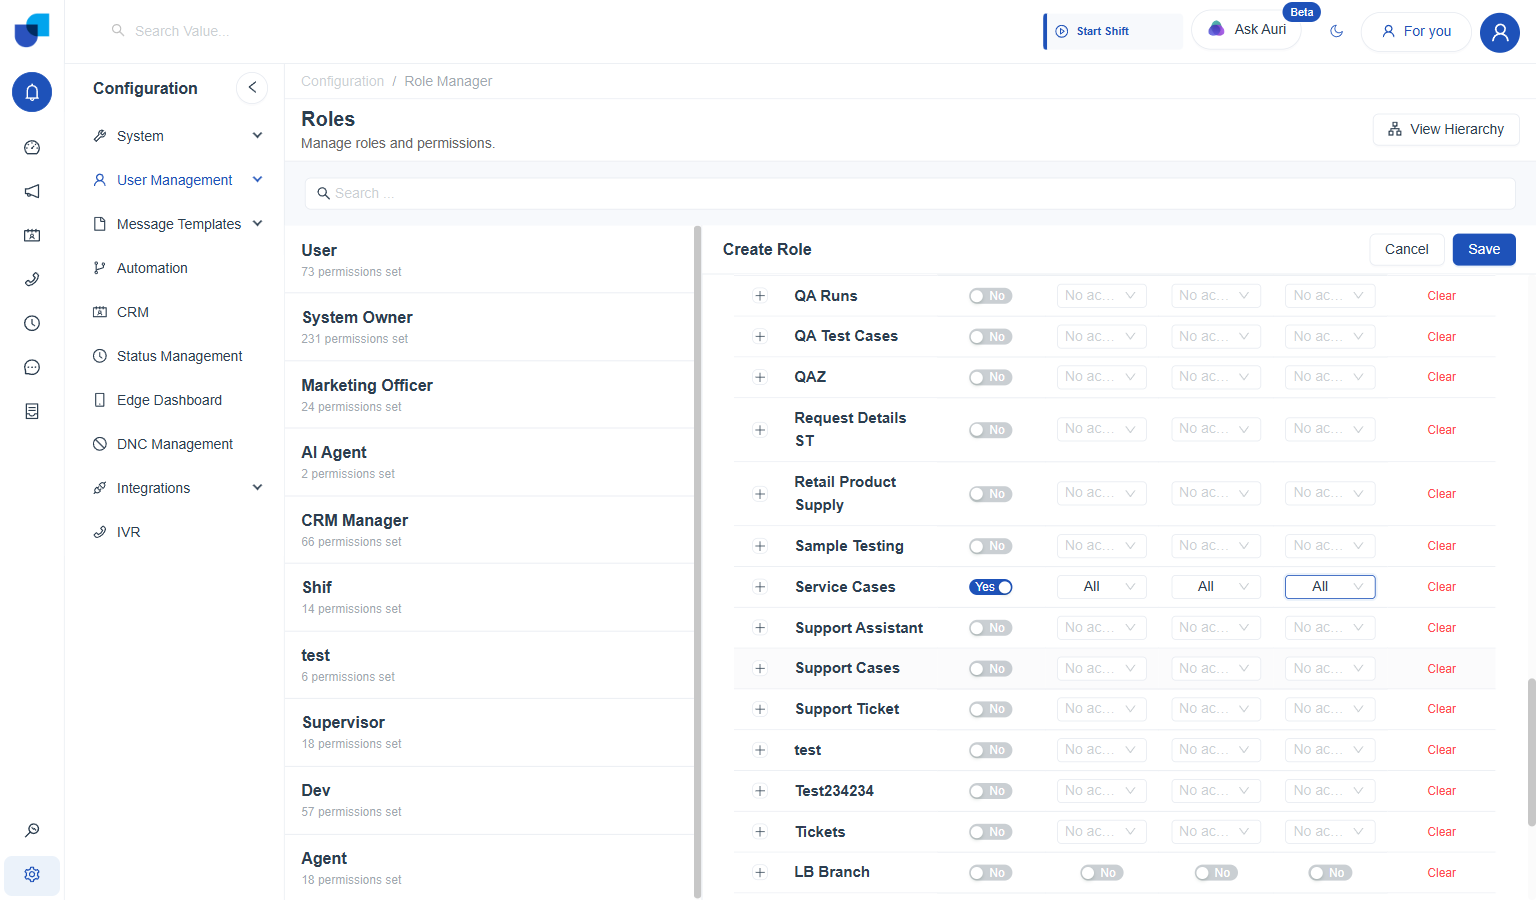
Contact Center Supervisor: full access.
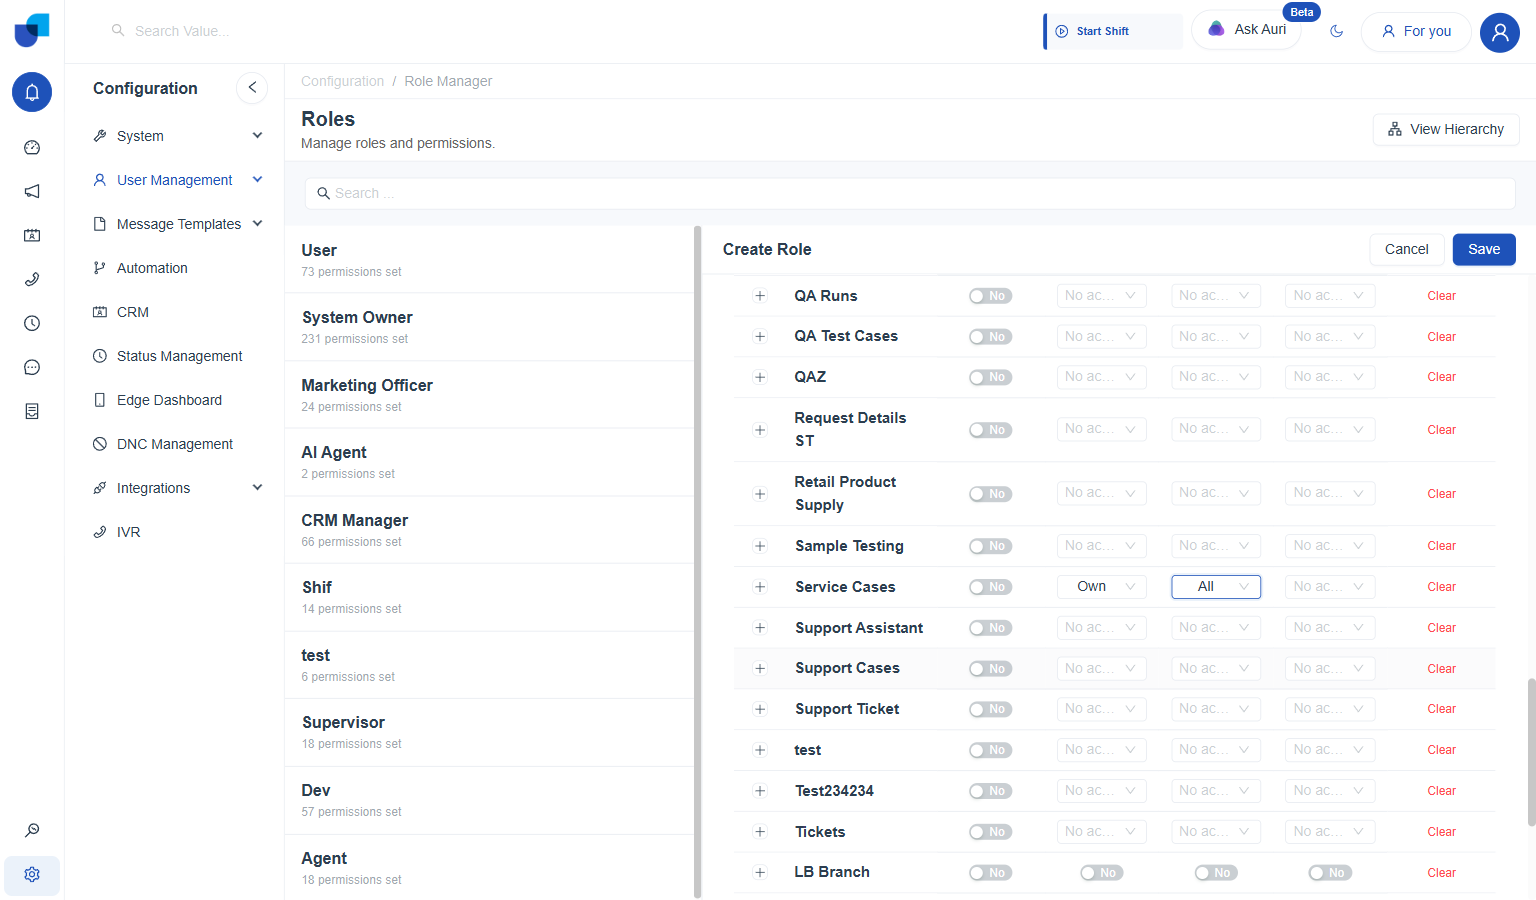
Service Agent: scoped to records assigned to them.
For every permission category and field-level options, see Configuring CRM Permissions.
Creating and Viewing Records
With the module, fields, dependency, screen, and roles all in place, logging a case works the same way as any other CRM module, from an empty list through to a saved record.
- Open Service Cases from the CRM menu. Starts empty, with no records yet.
- Click New Service Cases. Opens a blank intake panel with all three fields.
- Select a Case Type. Card Dispute, in this example.
- Open Case Reason. Already narrowed to only the two values that belong under Card Dispute, Unauthorized Transaction and Billing Error.
- Select a Case Reason, then search and select an Assigned Agent.
- Click Save.
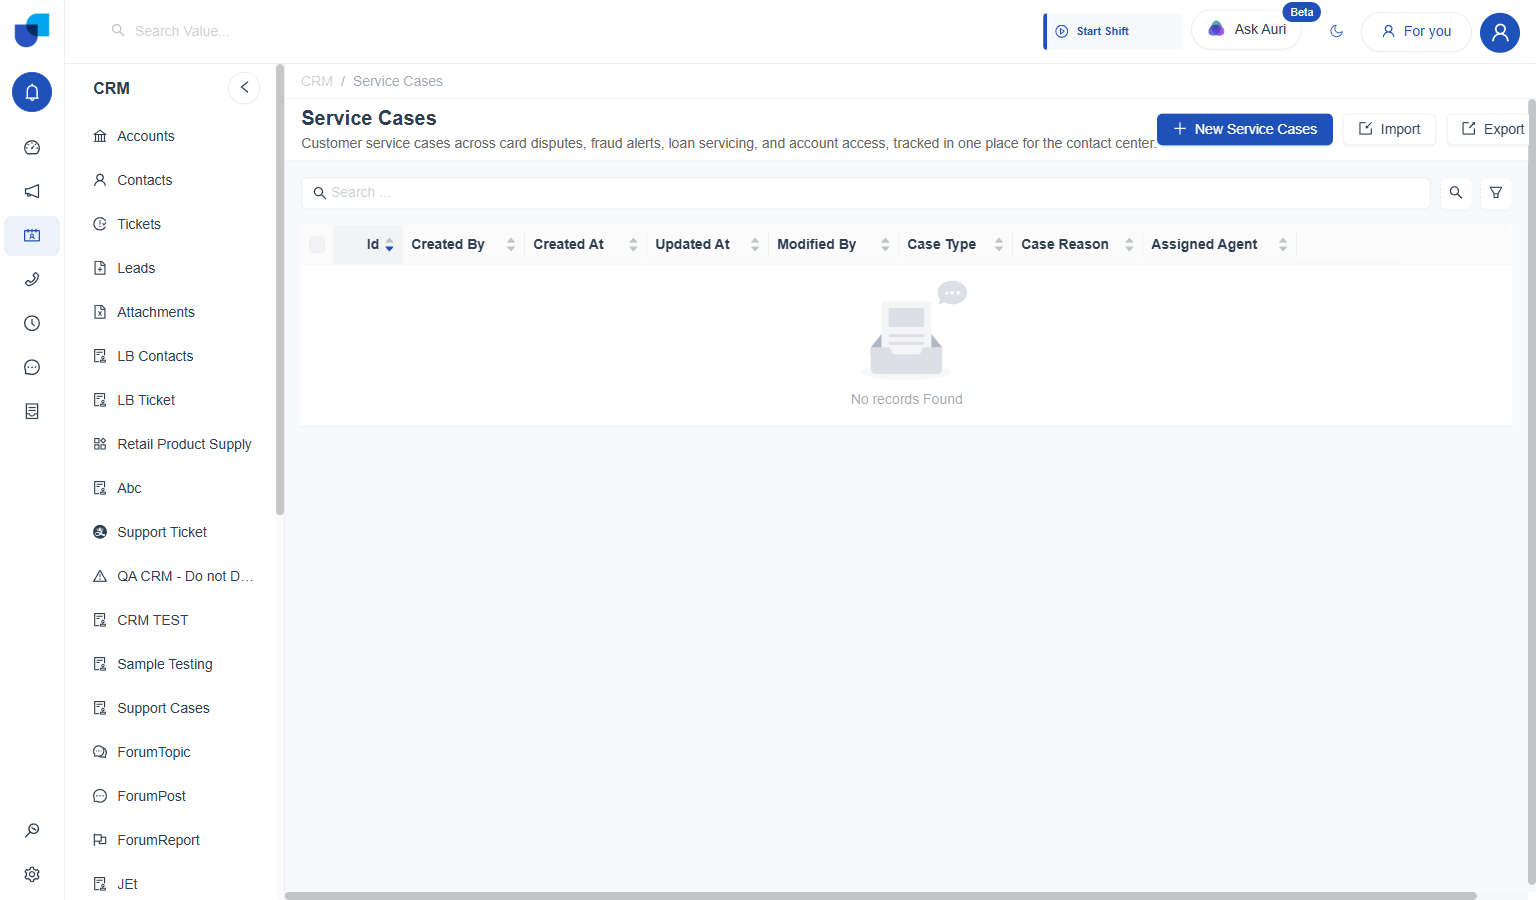
Service Cases before any record has been logged.
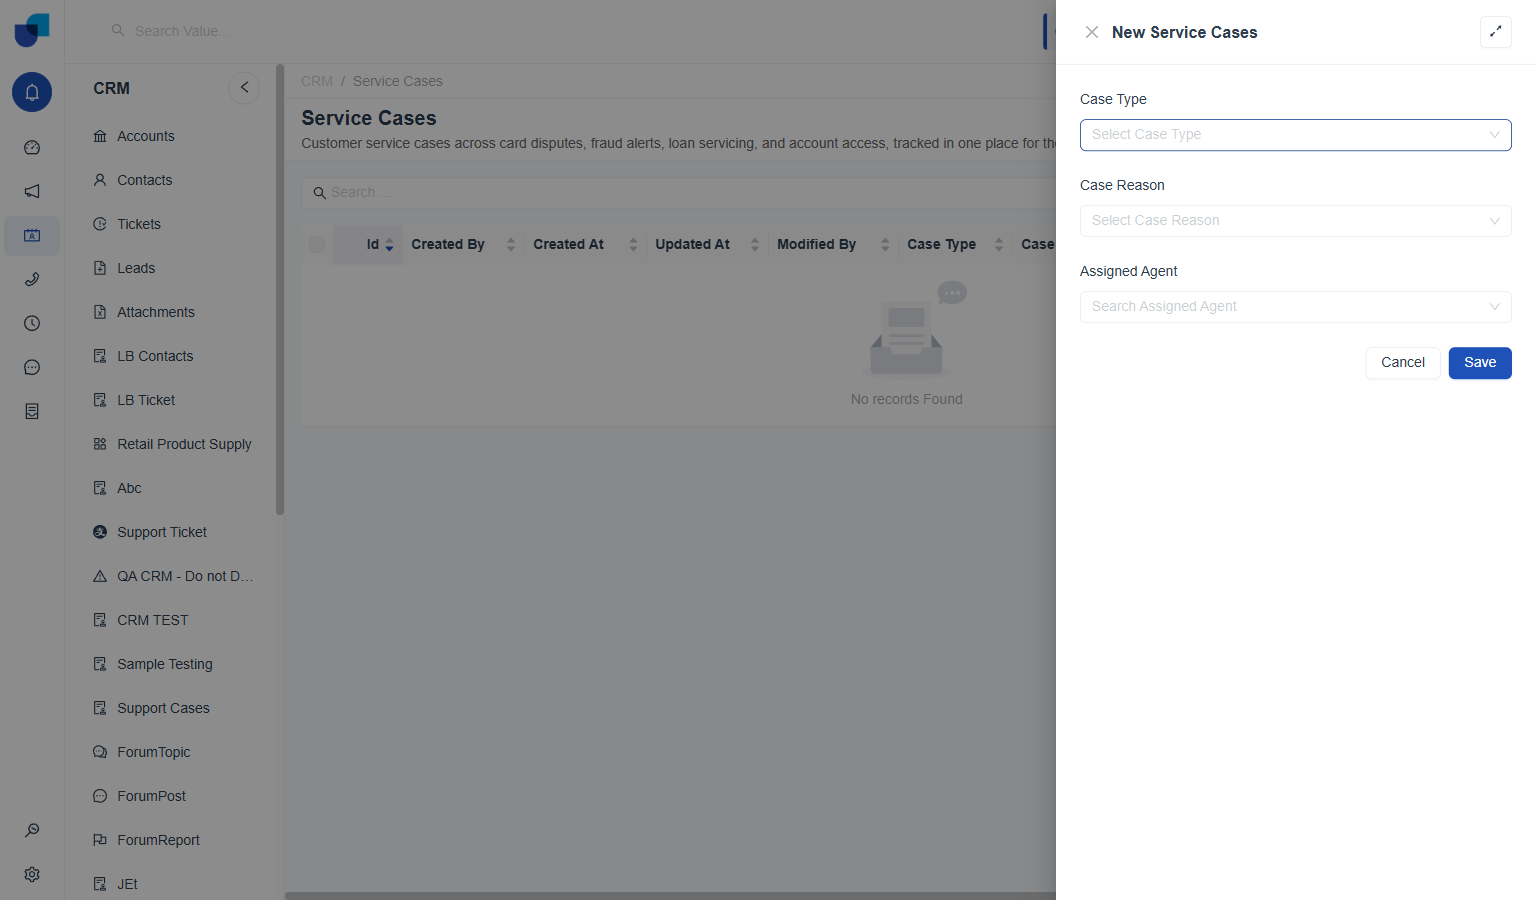
The intake panel opened by New Service Cases.
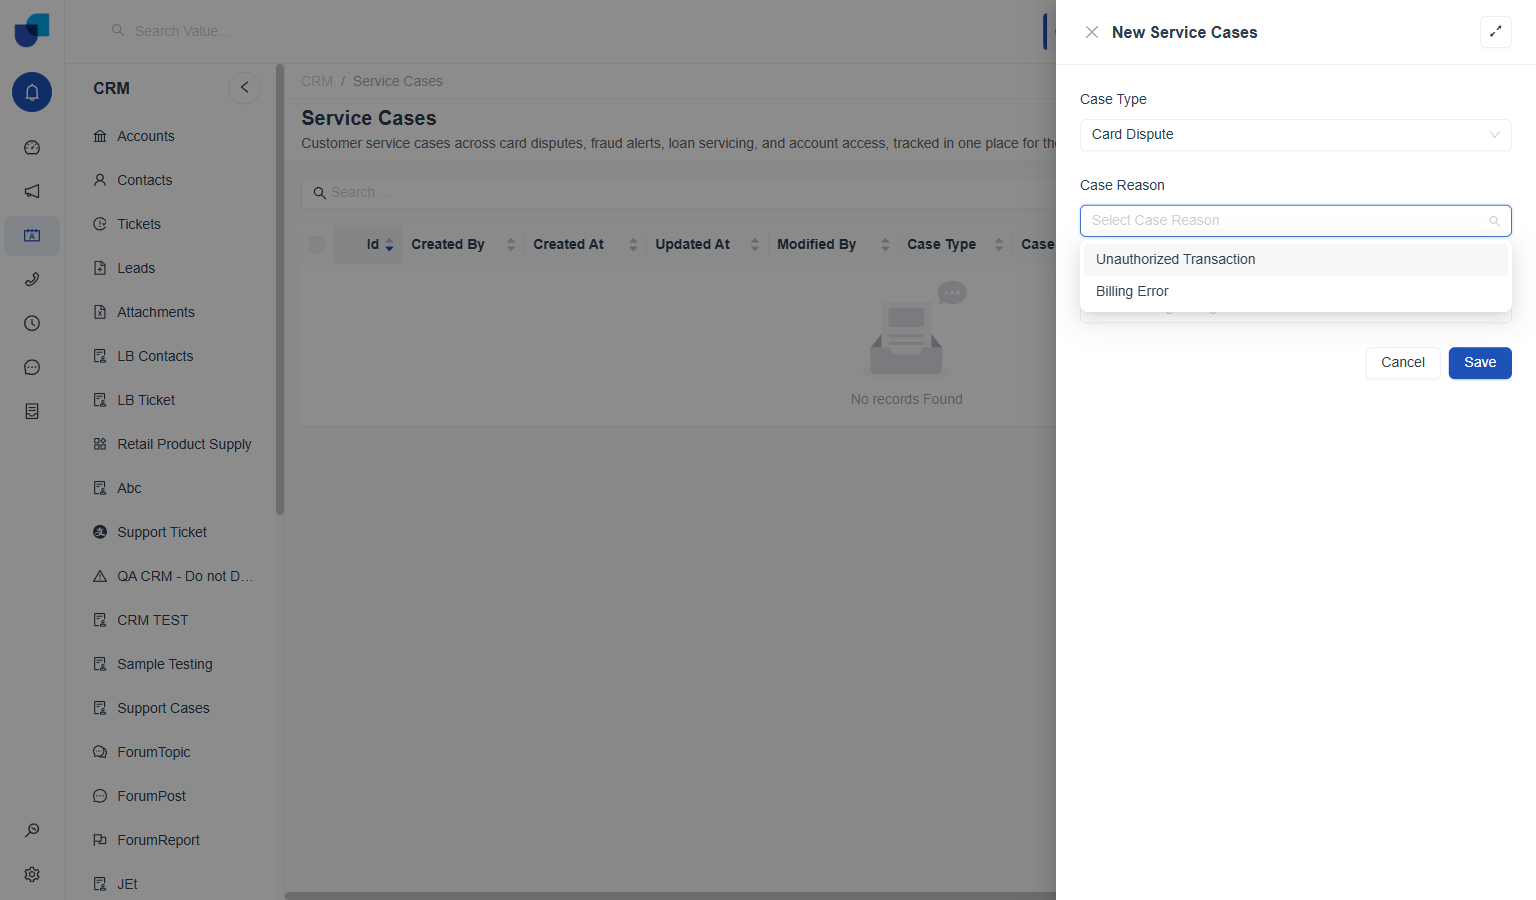
Case Reason narrowed to the two values that belong under Card Dispute.
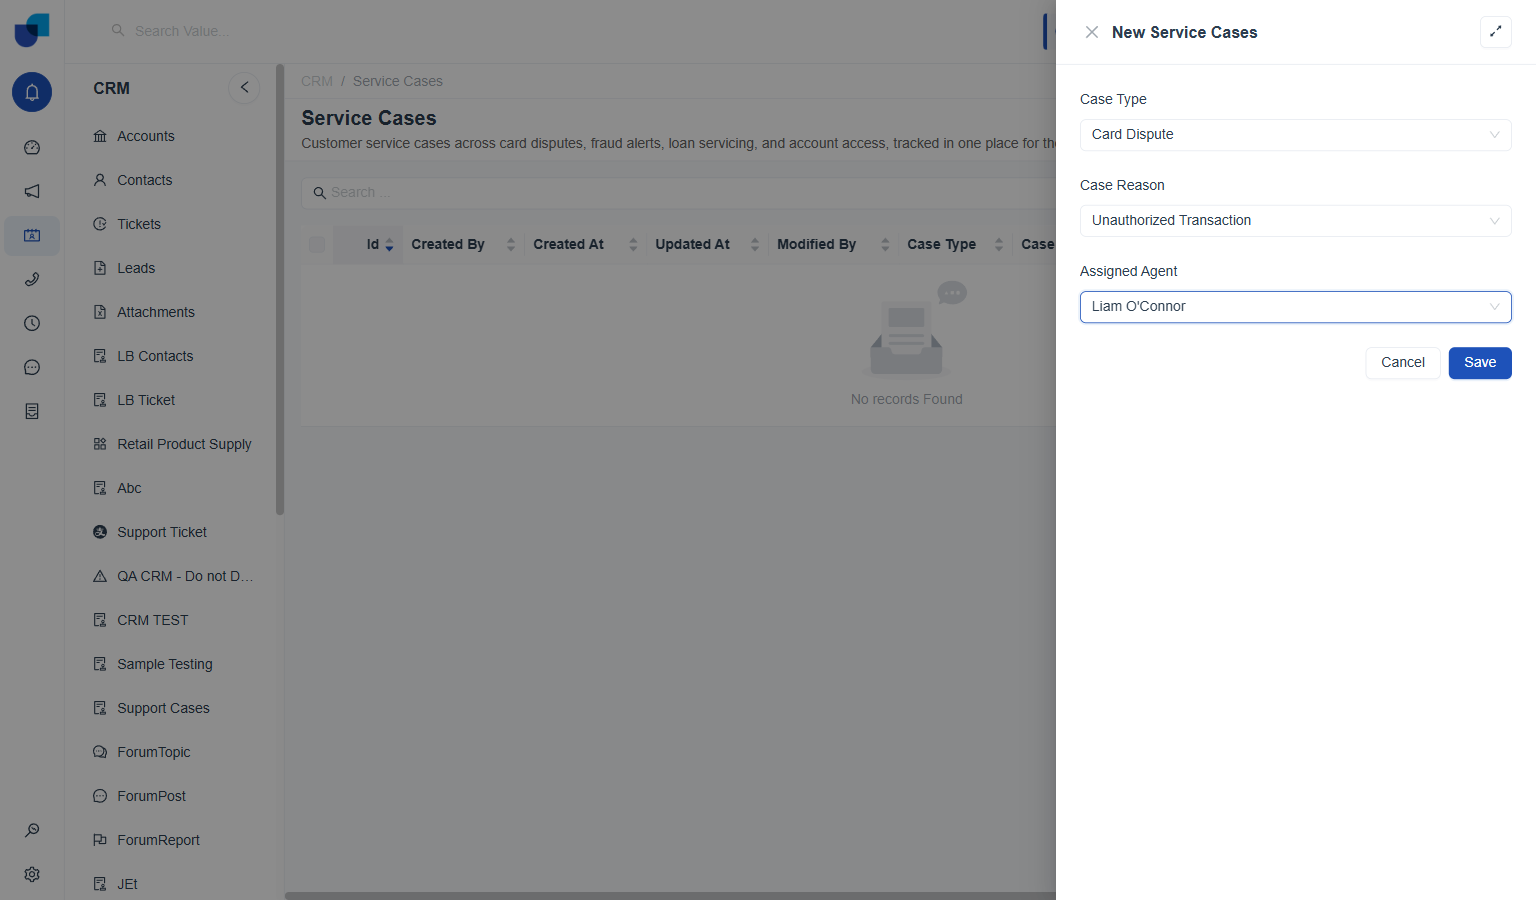
The completed intake panel, ready to save.
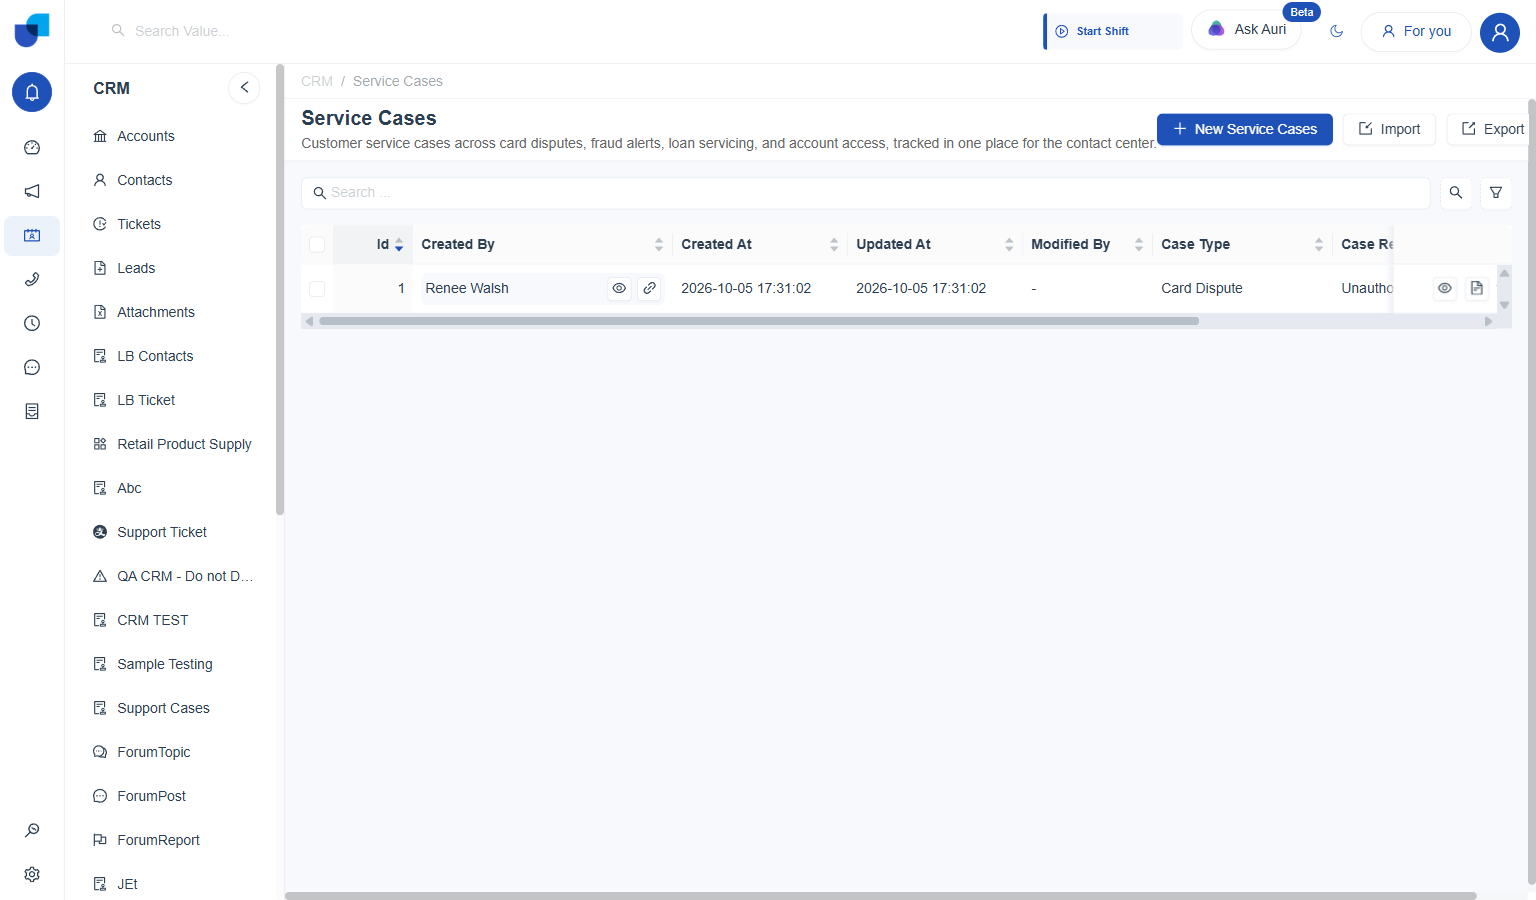
The list view immediately after saving, with the new case now appearing as a row.
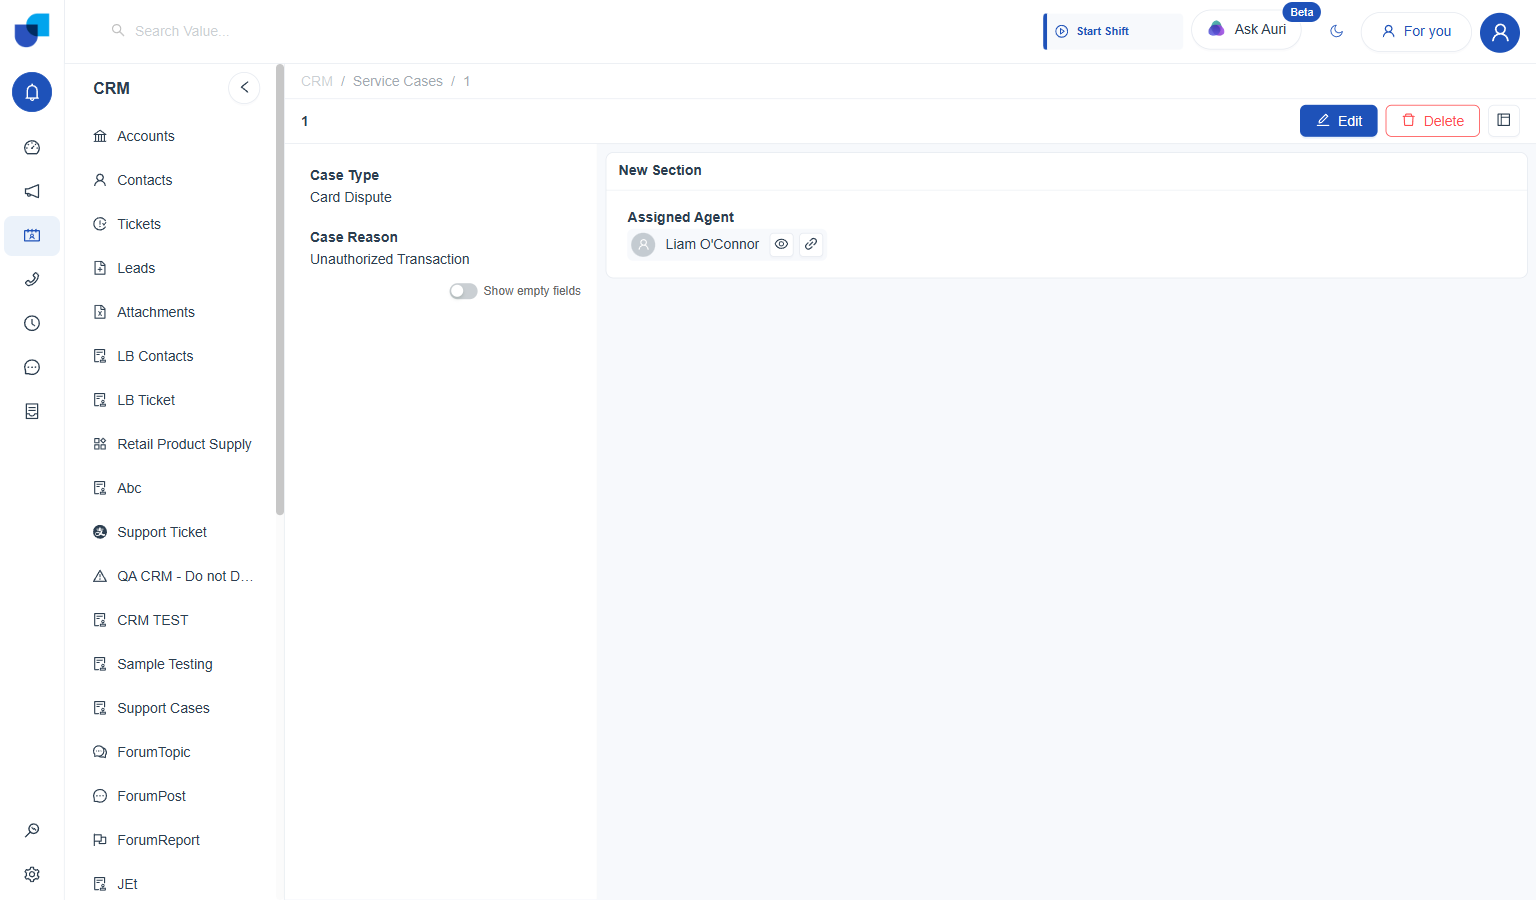
Opening the record shows the Case Detail screen built earlier: Case Type and Case Reason together, Assigned Agent in its own section.
Viewing data from the external connection
The Core Banking Platform module, built earlier in this same way, works the same way too: opening it from the CRM menu pulls the account records directly from the connection, no different from any other CRM module's list view.
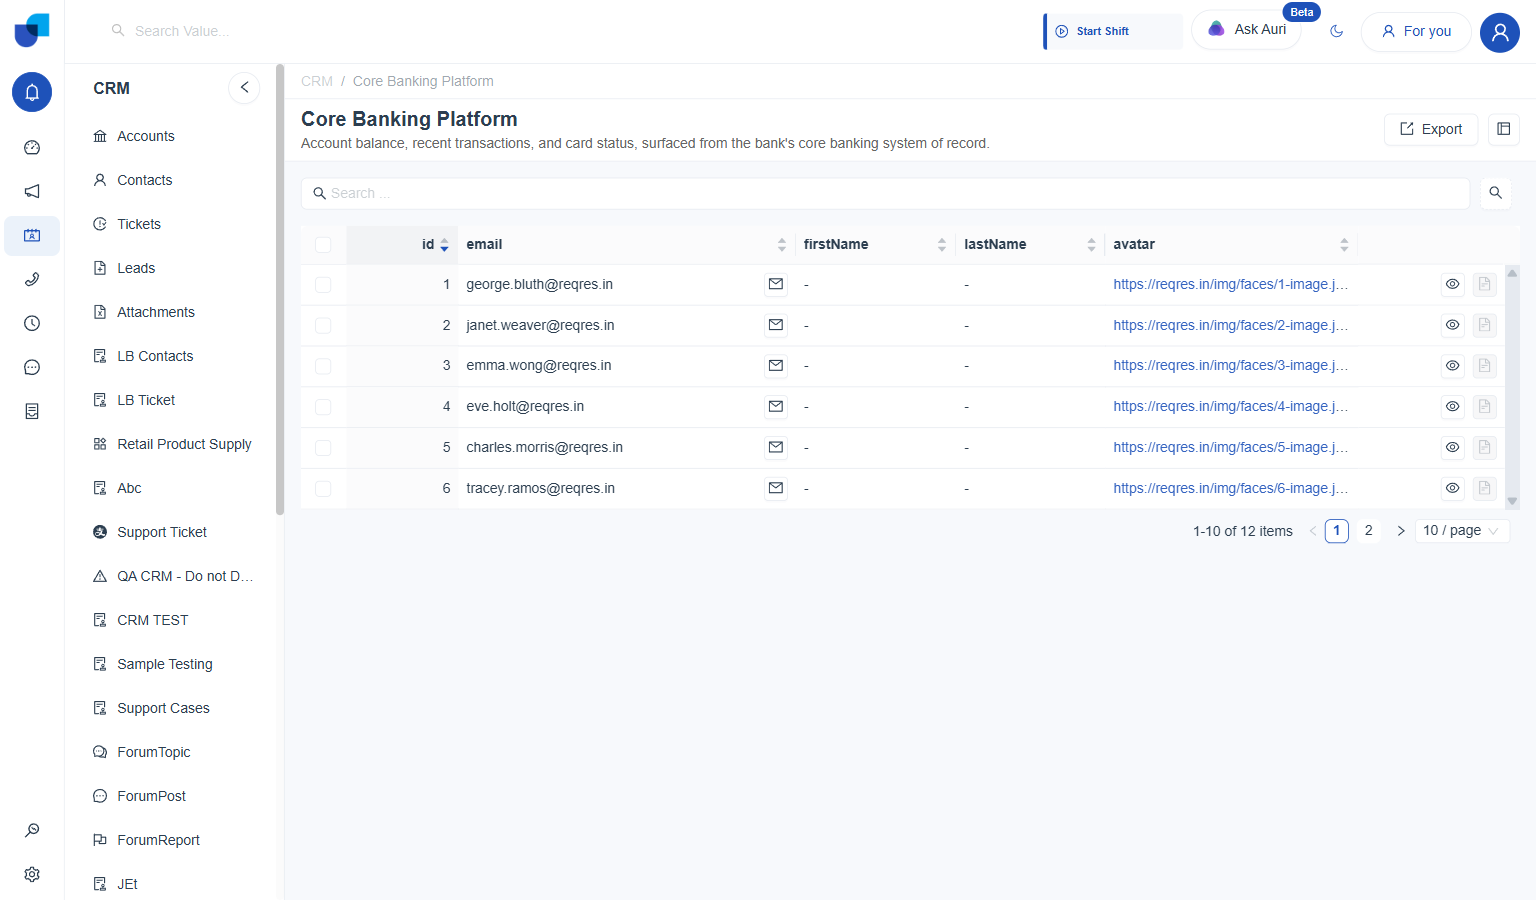
Account records fetched directly from the connection, displayed in the module's own list view.