How to Configure the Workforce Use Case in UNICONNECT AI
Workforce Management
Info: This page is the technical companion to Workforce Use Case Scenario. The steps run in the order a person follows them, and each part names the requirement from the scenario that it meets. The scenario continues the AUS Bank story in CRM Use Case Scenario, so the groups follow the service lines of the Service Cases register and Hannah receives the Contact Center Supervisor role.
Part 1: Create the Statuses
Lunch and Tea Break need approval and a limit. See Custom Status Configuration.
- Open Configuration → Status Management and select Lunch.
- Enter 45 as the Allowed Time.
- Switch Request Approval ON and click Update.
- Repeat for Tea Break with an Allowed Time of 15.
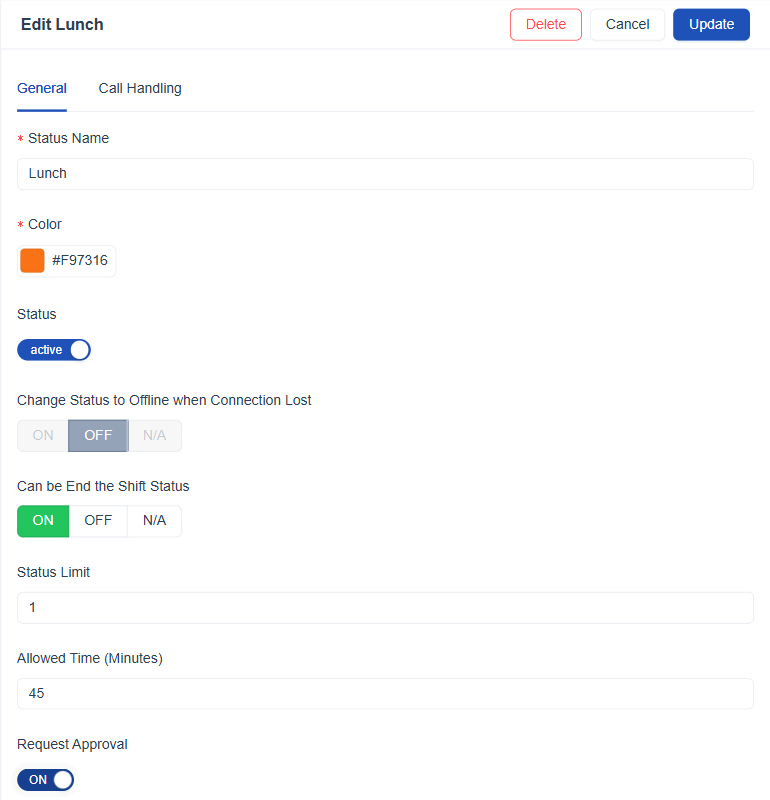
Figure 1. The Lunch status with an Allowed Time of 45 minutes and Request Approval switched on.
Part 2: Set Call Handling
Agents on a break should not receive queue calls. See Status Call Handling.
- Open the Call Handling tab of Lunch.
- Set Queue Login to OFF and Enable External Calls to OFF.
- Click Update, then repeat for Tea Break.
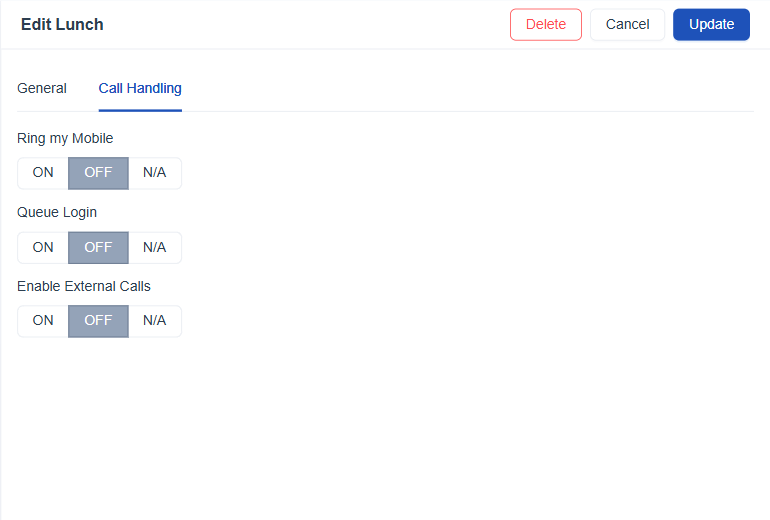
Figure 2. The Call Handling tab of Lunch, with Queue Login and Enable External Calls set to OFF.
Part 3: Create the Service Line Groups
The Service Cases register has one service line for each kind of case, so the floor is grouped the same way. Hannah's agents work Loan Servicing. See Group Management.
- Open Configuration → User Management → Groups and click Create.
- Enter Loan Servicing as the Group Name and switch Status to active.
- Use Add Users to add the agents who are certified for that service line, then click Save.
- Repeat for Card Disputes and Fraud Alerts.
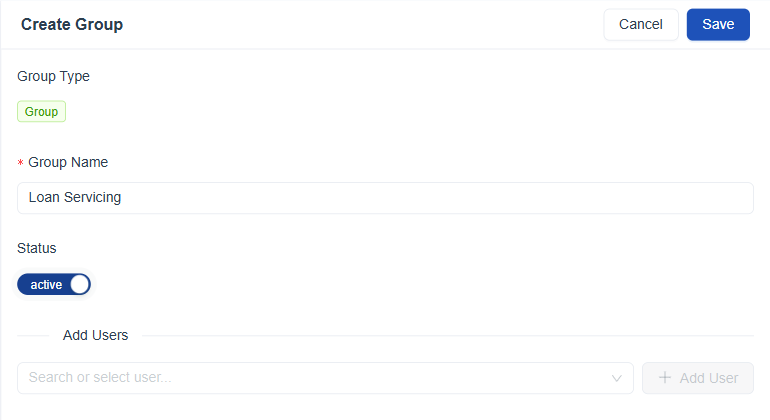
Figure 3. The Create Group form for the Loan Servicing group.
Part 4: Give Hannah Her Permissions
Hannah holds the Contact Center Supervisor role from the Service Cases setup. See Workforce Permissions.
- Open Configuration → User Management → Roles and select Contact Center Supervisor.
- Expand Workforce Management.
- Set Force Shift Start, Force Status Changed, Approve Break Requests and Dismiss Raise Hand to Group.
- Leave Manage Status off, and click Save.
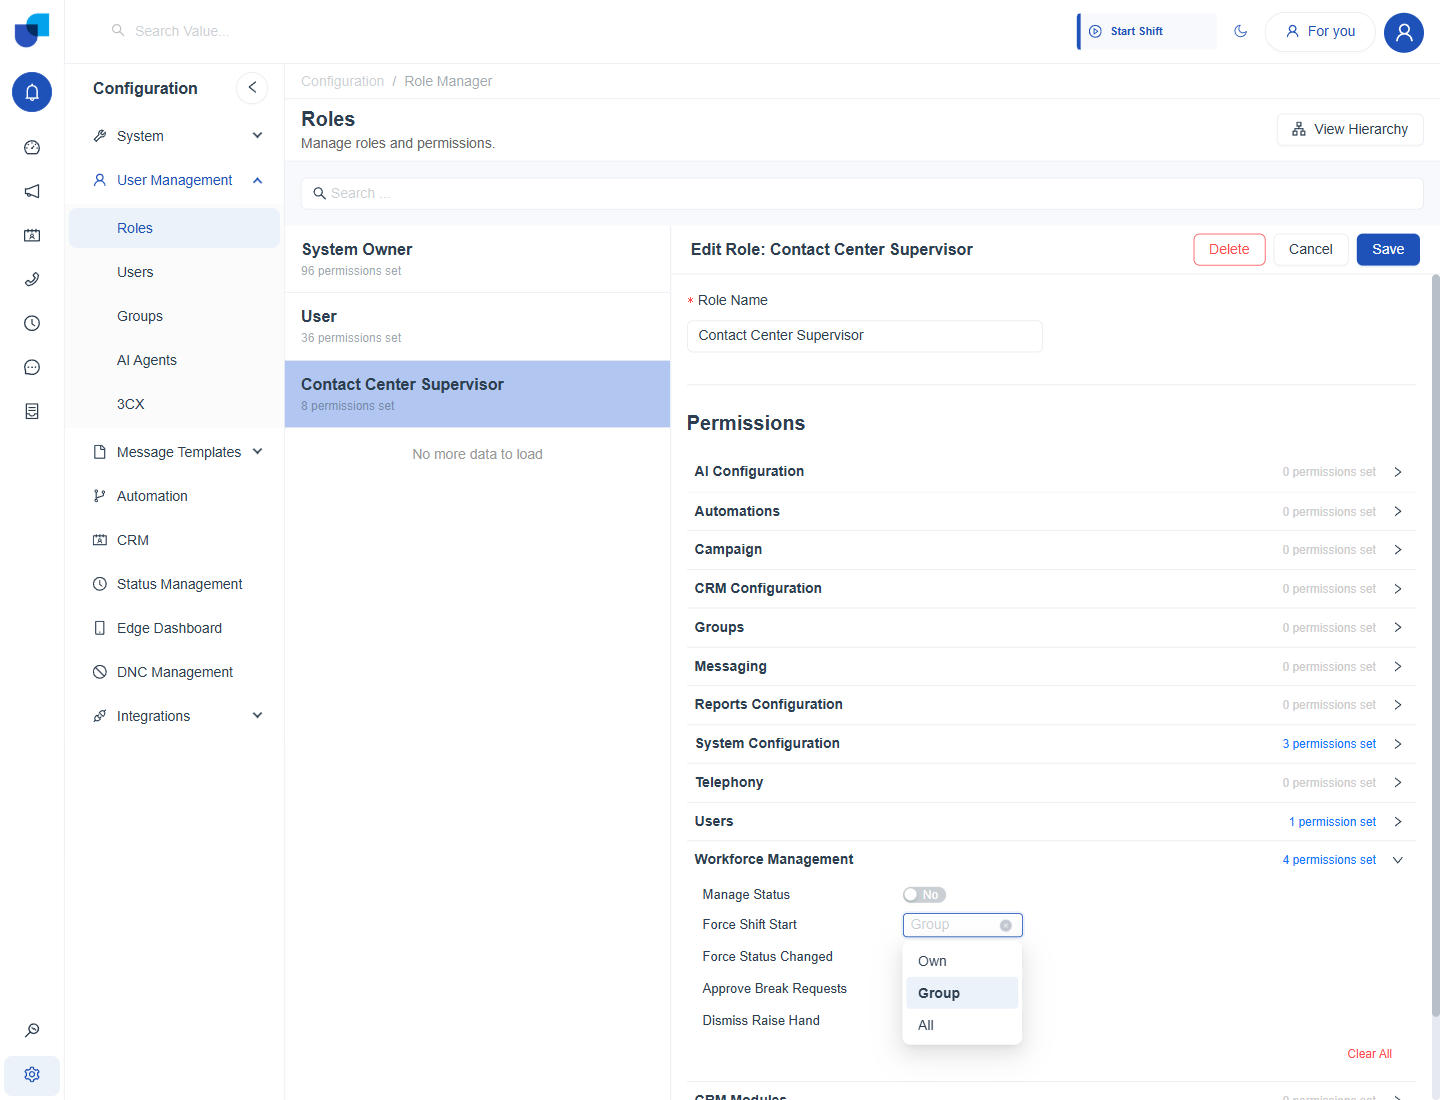
Figure 4. The Contact Center Supervisor role, with the scope list open for a Workforce Management permission.
Part 5: Watch the Floor
See Monitoring Agents and Workforce Filters.
- Open the Workforce Monitor and choose Loan Servicing under Filter by Group/Queue.
- Click On Shift to see who is working.
- Use Requests and Breeches during the day.
Part 6: Keep a Record
- Open Reports and select Activity Summary.
- Choose Loan Servicing under Groups and click Generate Report.
- Review the Break and Away columns for each agent.
Important: Check the setup with an agent's role before announcing it. Make sure an agent can start a shift, change status and request Lunch, and that Hannah sees the request.