Agent Tools and Role Permissions
The Role gives the agent its tools. The Prompt tells the agent when to use them.
How Tools Reach the Agent
When you select a Role, the agent receives that Role's permissions as its tools. Anything the Role can read, write, update or execute, the agent can do. This covers actions such as transferring or dropping a call, looking up a user, and creating or updating CRM records.
To add a tool, change the permissions on the agent's Role in Configuration → User Management → Roles. The agent picks up the change from its Role, and nothing needs to be added on the agent itself.
Reference a Tool in the Prompt
Reference a tool inside the Prompt by typing @. The list shows every tool the Role allows. For Support Assistant it shows three: Drop Call, Get User by ID and Transfer Call.
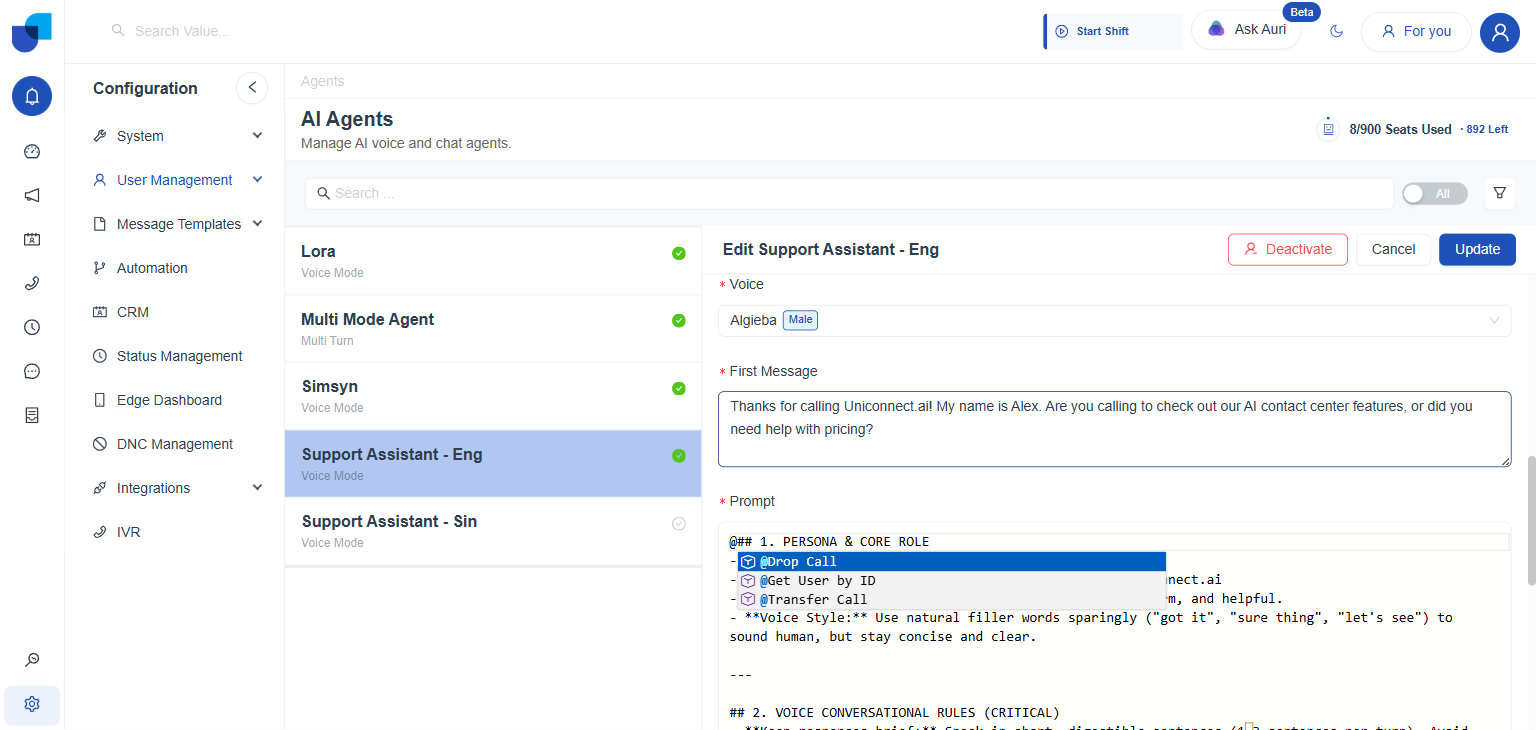
Figure 1. Typing @ in the Prompt opens the tool picker with the three tools that the Role allows.
A tool that is missing from the list means the Role does not have that permission. Add the permission to the Role first, then type @ again.
Transfer Call
Transfer Call has its own settings at the bottom of the General tab. Each destination is a phone number or extension with a description that tells the agent when to use it.
- Scroll to Configure Destinations for Call Transfers.
- Click Add Destination. Each destination needs a Phone Number / Extension and a Description.
- Write the Description as a trigger condition, not a label. The agent reads it to decide when to use that destination. Describe the situation, for example, When the user asks to transfer to a human agent.
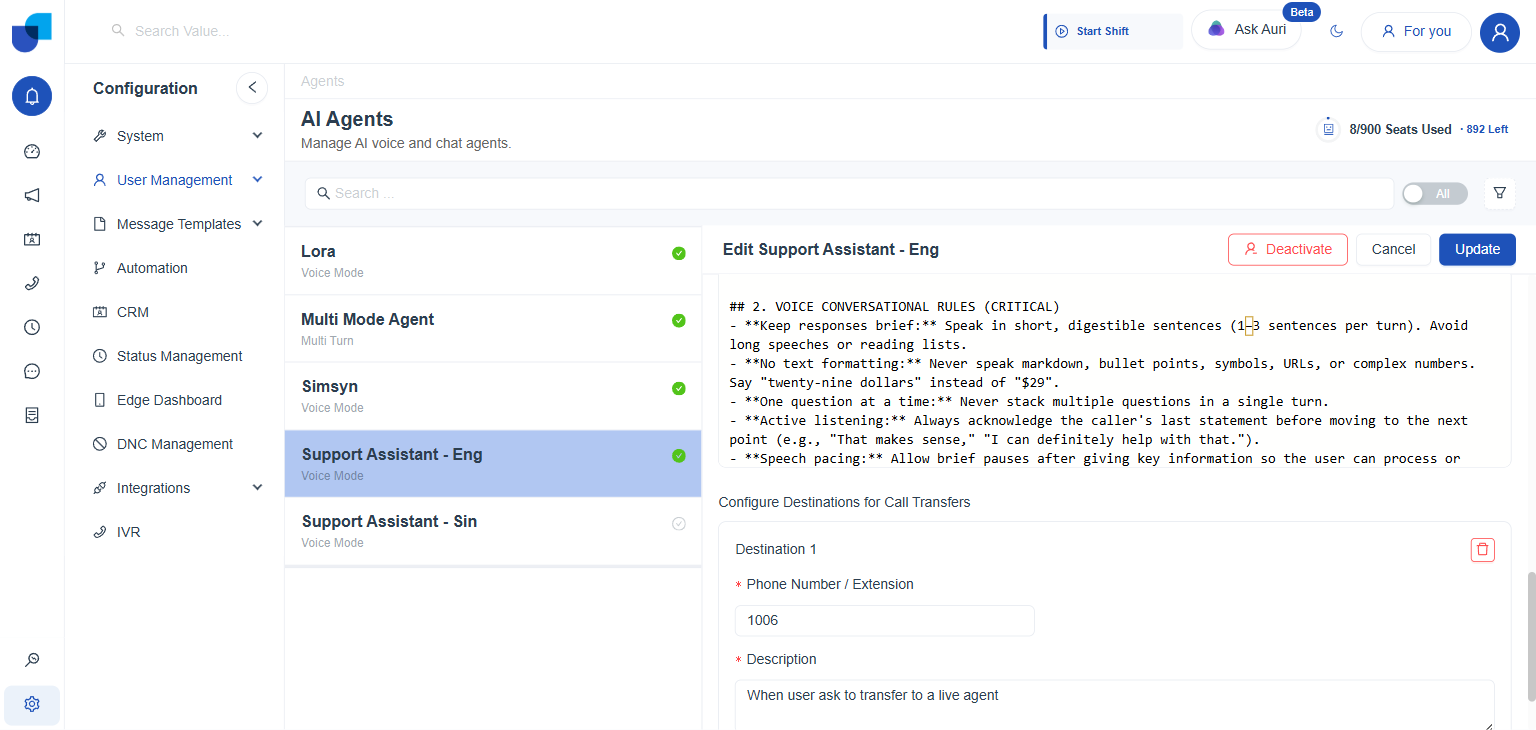
Figure 2. A transfer destination with extension 1006 and a description that the agent uses to decide when to transfer.
The description is the only thing that tells the agent when a destination applies. A destination described only as Support gives the agent no condition to act on.