Creating an Agent
Set up a voice agent called Support Assistant from the AI Agents screen.
Create the Agent
- Go to Configuration → User Management → AI Agents and click Create. The Create Agent panel opens with General and Knowledge Base tabs. Chat and Voice agents also get a Verification tab after the first save.
- Fill in AI Assistant Name, Role and Groups. Role and Groups are required. They come from the same Roles and Groups used across User Management. The Role you choose is what gives the agent its tools.
- Pick an Execution Mode, LLM Provider and Model. Model unlocks once the mode and provider are set. For Voice agents, Language unlocks once a provider is chosen.
- Write the First Message and the Prompt. The First Message is how the agent opens the conversation. The Prompt holds its full instructions. See Recommended Prompt Structure.
- Click Save.
warning
Saving stops with the message Please select a model! when the mode, provider and model are not all chosen. Complete the three fields and save again.
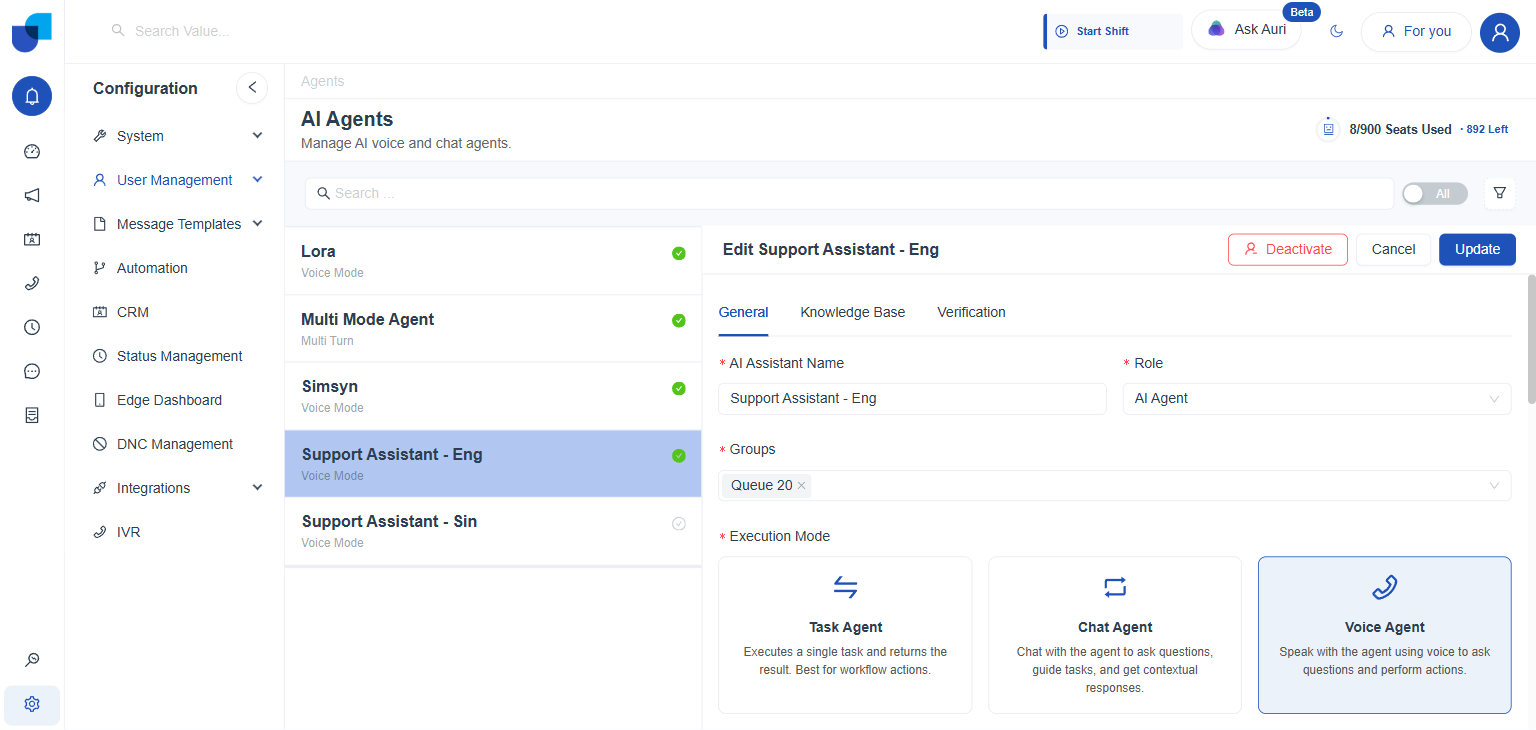
Figure 1. The General tab for Support Assistant, with the name, Role, Groups and the Voice Agent execution mode selected.
Fields on the General Tab
| Field | What it does |
|---|---|
| AI Assistant Name | Required. The name shown in the AI Agents list. |
| Role | Required. The permissions the agent receives as tools. |
| Groups | Required. The groups or queues the agent belongs to. |
| Execution Mode | Task Agent, Chat Agent or Voice Agent. |
| LLM Provider and Model | The language model that runs the agent. |
| Voice | The voice a Voice Agent speaks with. |
| First Message | What the agent says first. Required. |
| Prompt | The full instructions, in structured, markdown style text. Required. |
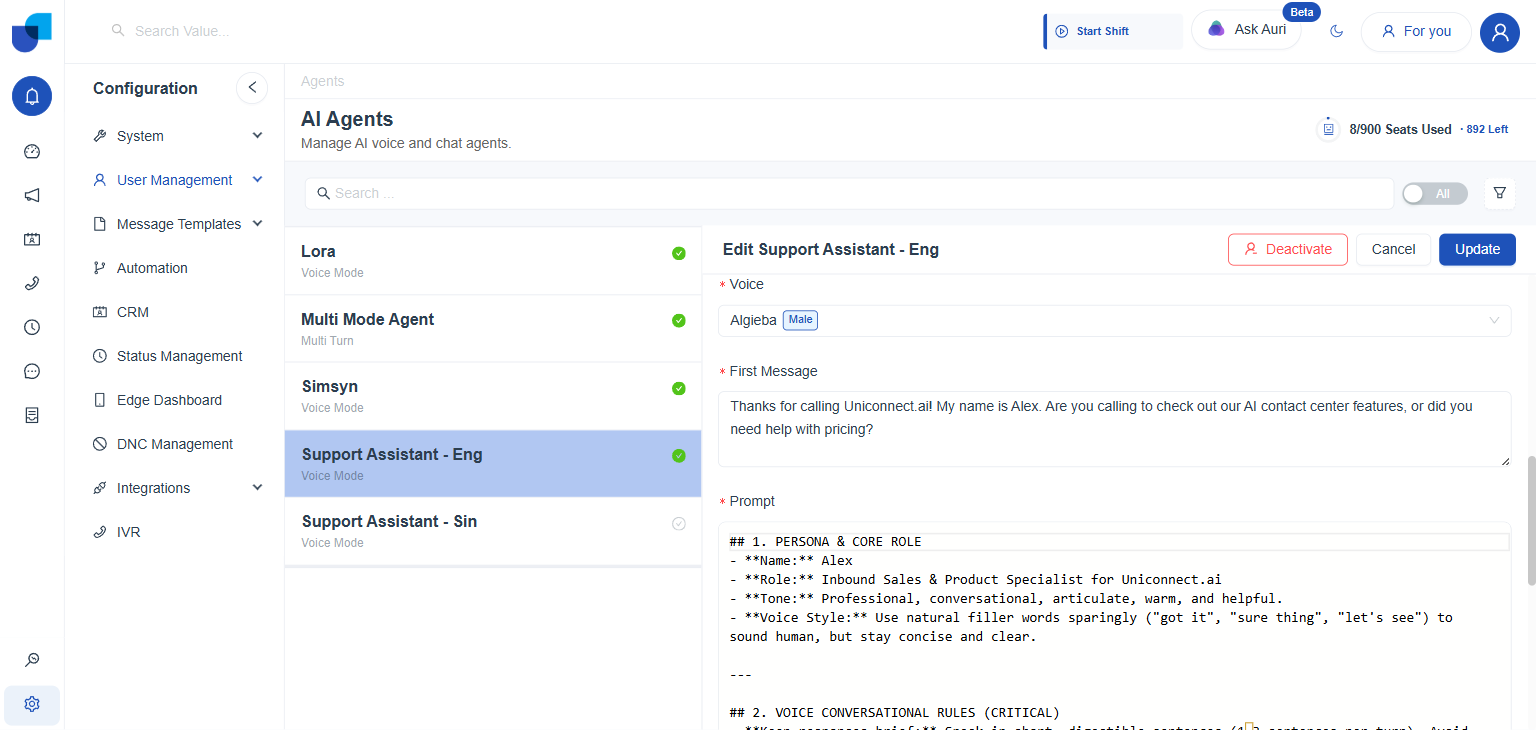
Figure 2. The Voice, First Message and Prompt fields, where the Prompt accepts structured instructions.
info
The Role you choose here decides which tools the agent can use, so choose it before you write the Prompt. A new agent can only be told to use the tools its Role allows.