Message Templates
Messaging, Message Templates
Reusable content for email, SMS and WhatsApp. The examples build a welcome email and a welcome text for the Contacts module, using a customer named Emily Carter.
How Templates Work
Open Configuration, Message Templates and choose Email Templates, SMS Templates or WhatsApp Templates. Each page has a list on the left, a search box and a Create button. Select a template to edit it, or click Create to start a new one.
Placeholders
A placeholder is a name inside double curly brackets, such as {{First Name}}. When a message is sent, the platform replaces each placeholder with a value from the record. Write the name exactly as the field is named, with the same capital letters and spaces. A placeholder that has no matching value is sent as typed, so check every message you build with the preview values.
| Setting | Meaning |
|---|---|
| Template Name | The name agents and administrators see in lists. |
| Module | The CRM module the template belongs to. It decides which record fields can be used as placeholders. |
| Send With Email, Send As | The sender address for email and the sender ID or number for SMS. |
Email Templates
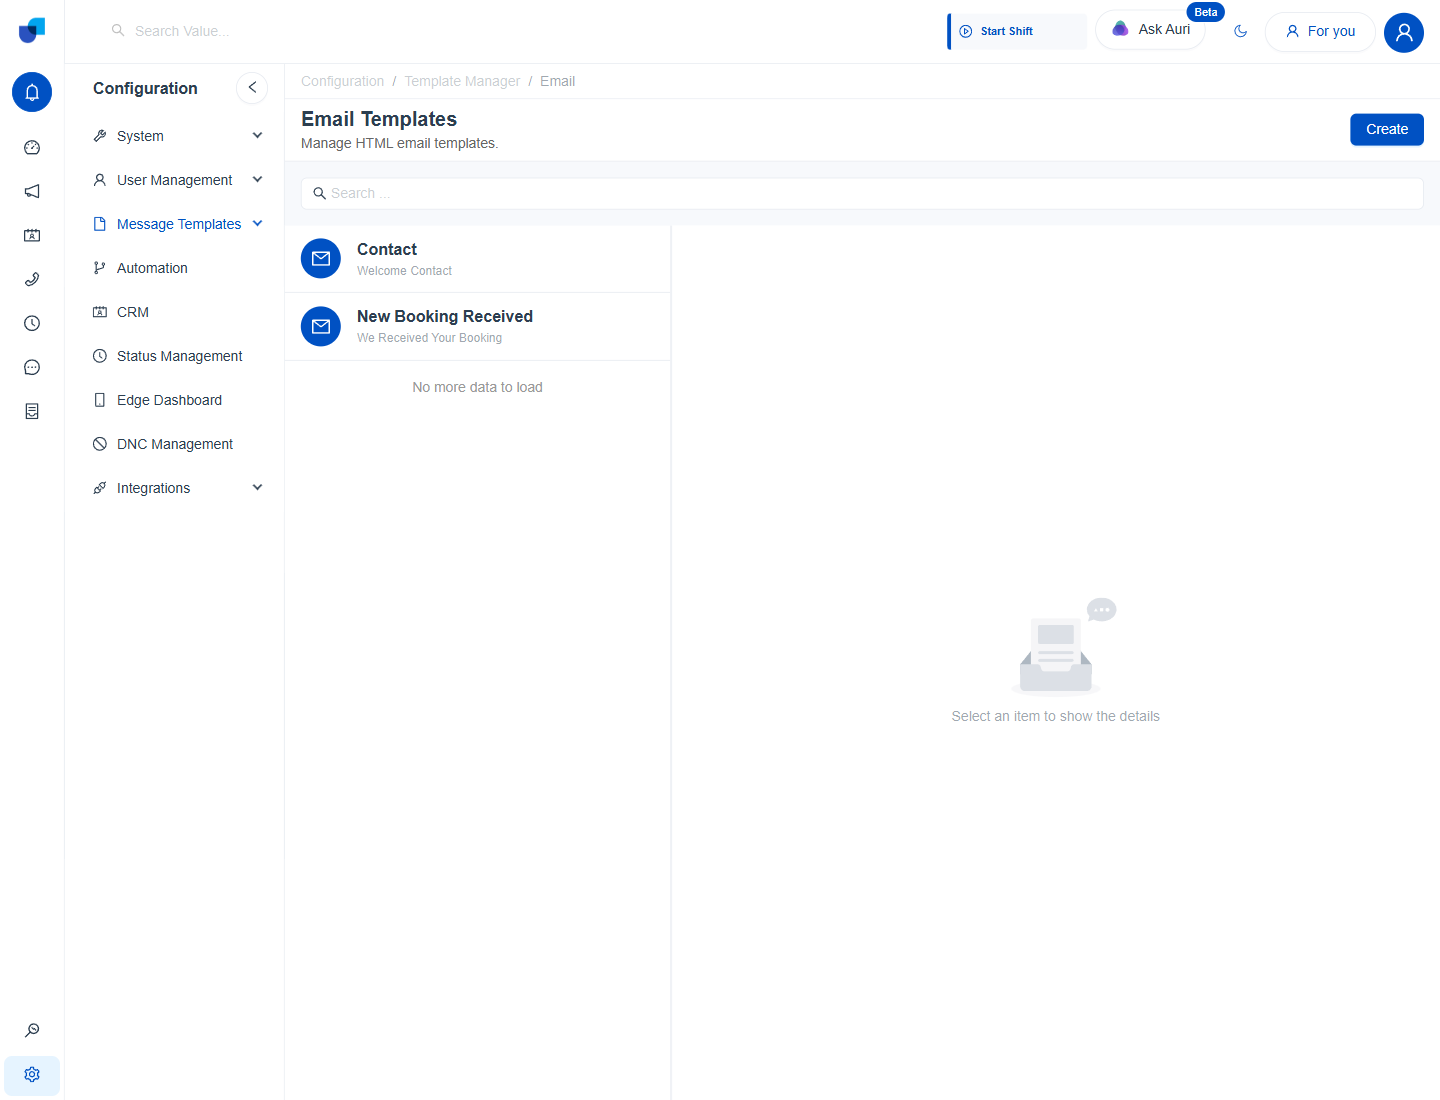
Figure 1. The Email Templates page with two templates in the list and a Create button at the top right.
Create an email template
- Click Create. The Create Email Template form opens.
- Enter the Template Name. For example Customer Welcome.
- Choose the Module.
- Choose the sender under Send With Email. The list shows the sender addresses of the active email provider.
- Enter the Subject. For example Welcome to Brightpath. Placeholders work here too.
- Design the Content. Use the editor described below.
- Add attachments with Add Files if every message needs them.
- Click Save.
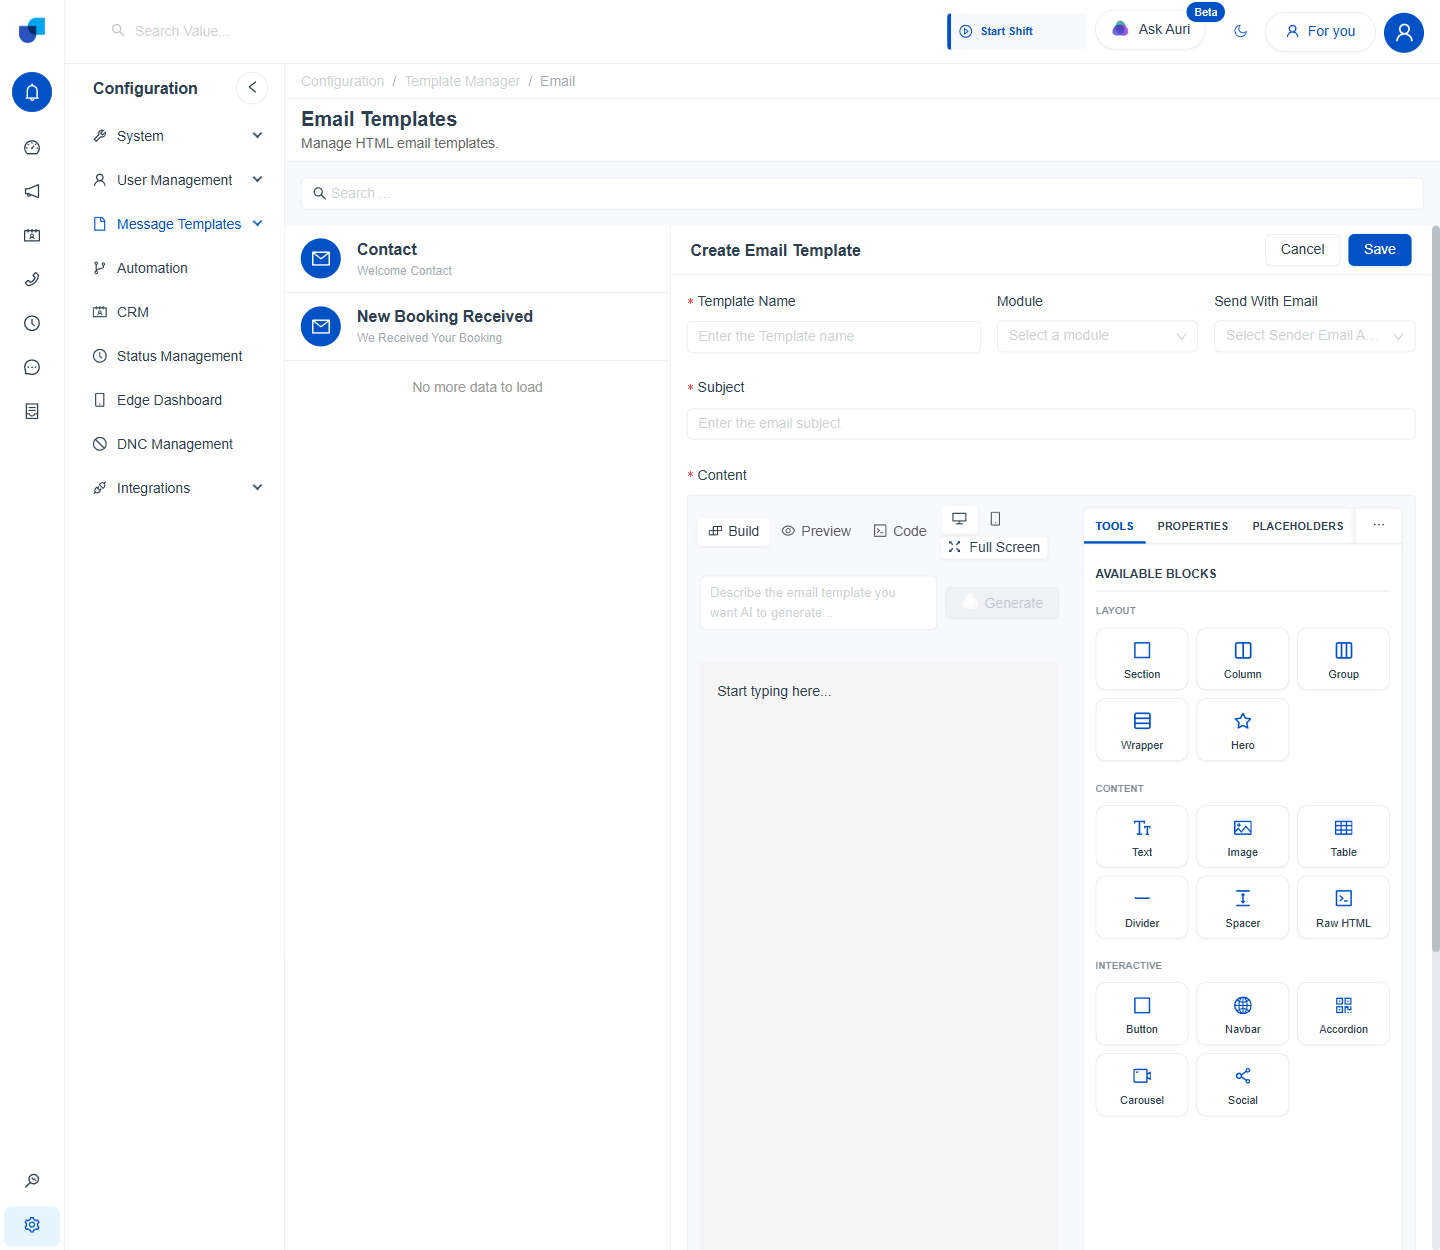
Figure 2. The Create Email Template form, with the visual editor and the palette of available blocks.
The email editor
| Control | What it does |
|---|---|
| Build | Design with blocks. Drag Section, Column, Text, Image, Table, Button and other blocks into the page. |
| Preview | See the email as the customer will see it. |
| Code | Edit the HTML directly. |
| Desktop and phone icons | Switch the preview between a computer and a mobile screen. |
| Full Screen | Enlarge the editor. |
| Generate | Describe the email in the box next to it and let AI draft the design. |
| Tools, Properties, Placeholders | Tabs for blocks, for the settings of the selected block, and for the placeholders you can insert. |
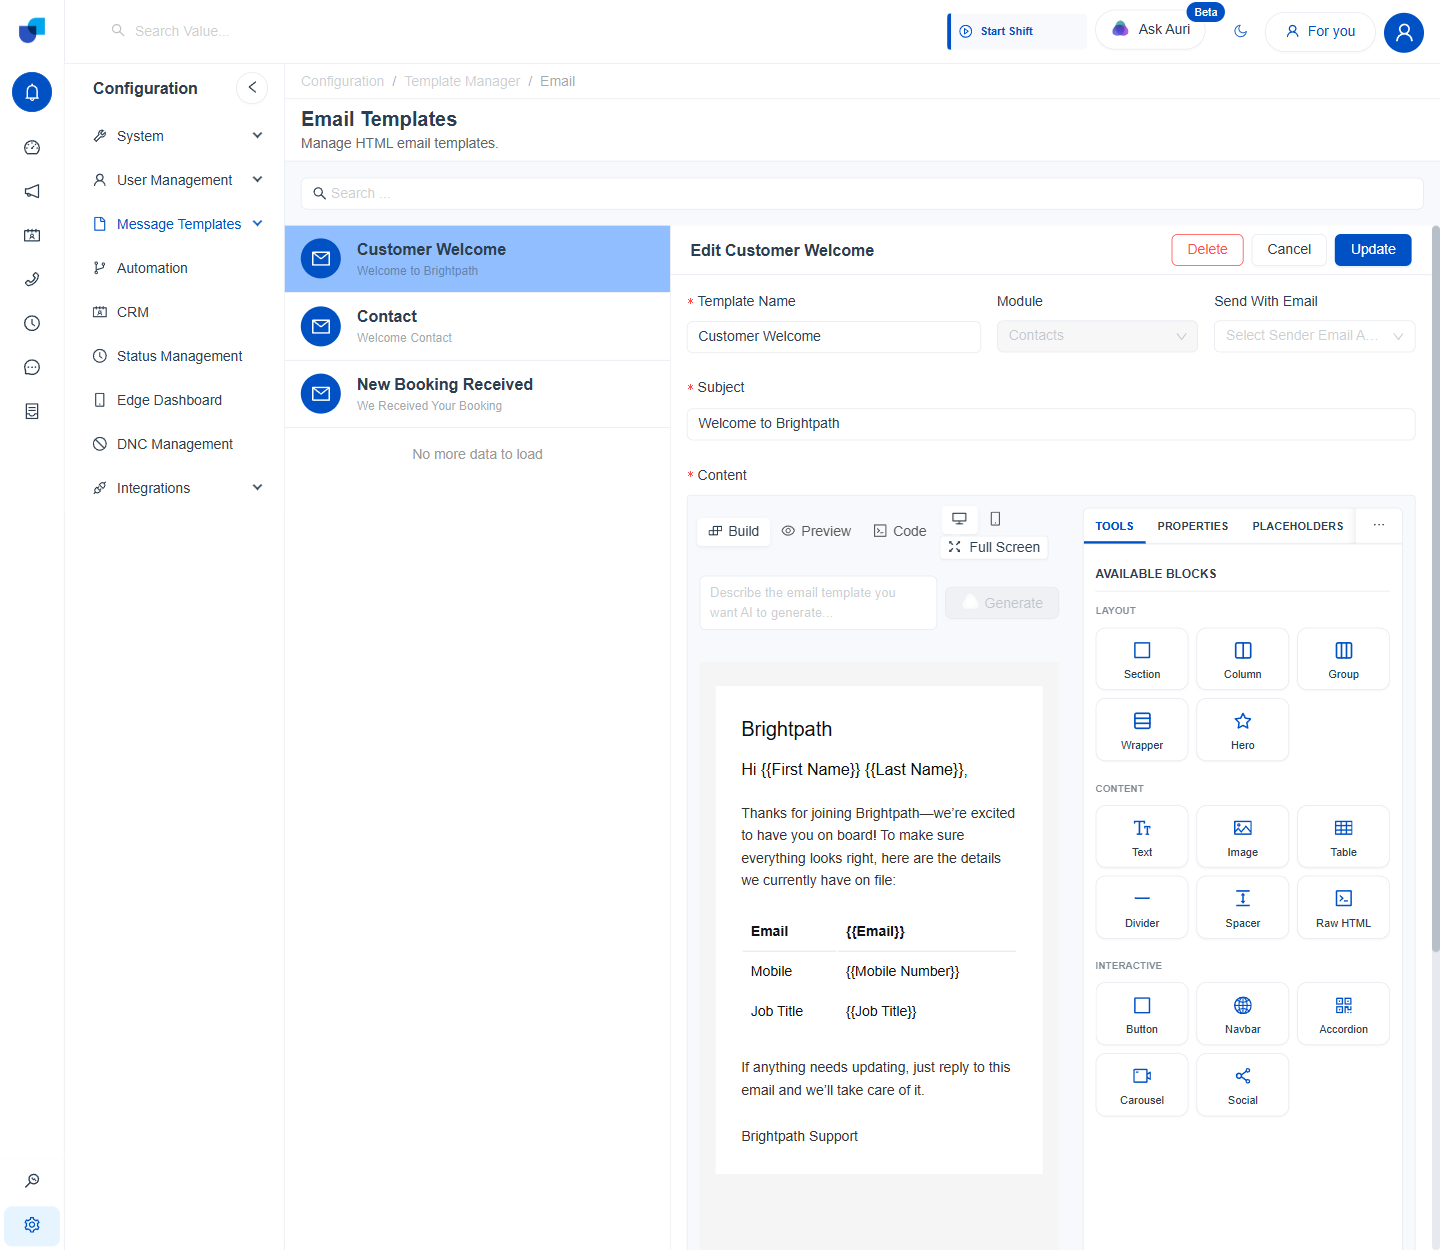
Figure 3. The Customer Welcome template for the Contacts module, with its subject and the content designed in the visual editor. The Module field is greyed out because the template is saved.
Tip: Send yourself a test email after you change a design, and open it on a phone as well as a computer.
SMS Templates
- Open SMS Templates and click Create.
- Enter the Template Name and choose the Module.
- Choose the sender under Send As. The list shows the sender IDs or numbers of the active SMS provider.
- Write the message in Compose SMS. The page asks Please enter your SMS message if it is empty.
- Click a field chip under the message to insert it. Once a Module is chosen, every field of that module appears as a chip, such as First Name, Last Name, Email and Mobile Number.
- Read the phone preview on the right. It shows the message with sample values from the module.
- Click Save.
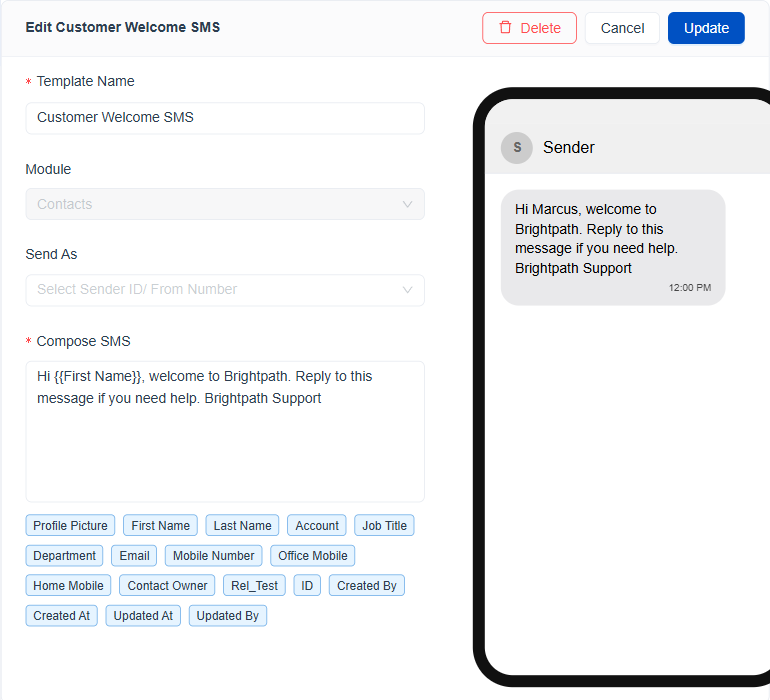
Figure 4. The Customer Welcome SMS template for the Contacts module, with the field chips under the message and a phone preview on the right.
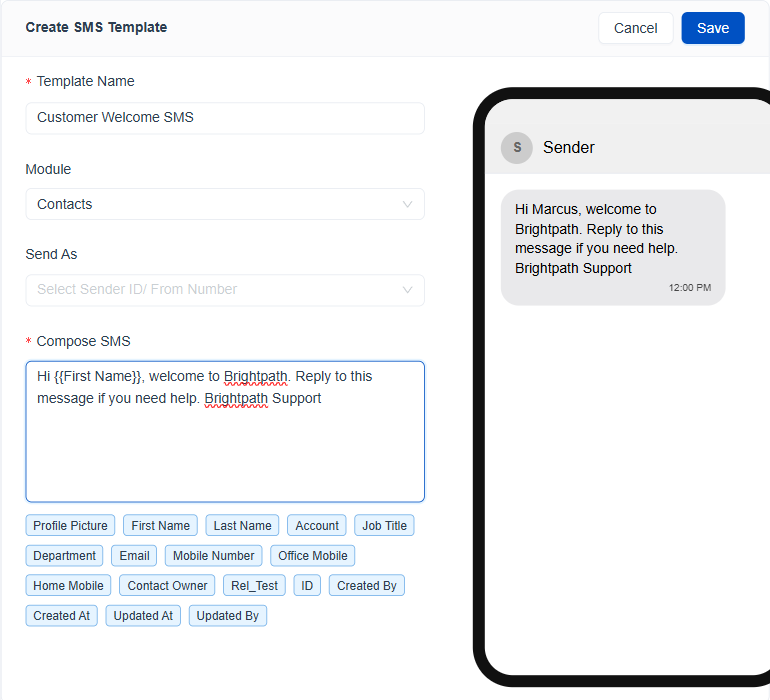
Figure 5. The Create SMS Template form with the Contacts module chosen. The fields of the module appear as chips under the message.
Info: Message length depends on the values that replace the placeholders. A long name can push a message into a second text, so test with realistic values.
WhatsApp Templates
WhatsApp requires message templates to be approved by Meta. The list shows each template with its language, such as en_US, and its category, such as Marketing or Utility.
- Open WhatsApp Templates and click Create.
- Enter the Template Name. Use lower case letters, numbers and underscores, for example booking_received.
- Choose the Language and the Category.
- Choose the Module.
- Choose the Header Type. None, or a picture or other media. For media, upload the Media File.
- Write the Body. The counter shows how many of the 1024 characters you have used. Click Variable to add a variable.
- Add a Footer if you want one. The footer allows 60 characters.
- Give each variable a Preview Value under Dynamic Variables.
- Add the buttons you need, such as Quick Reply, with Add Button.
- Click Create.
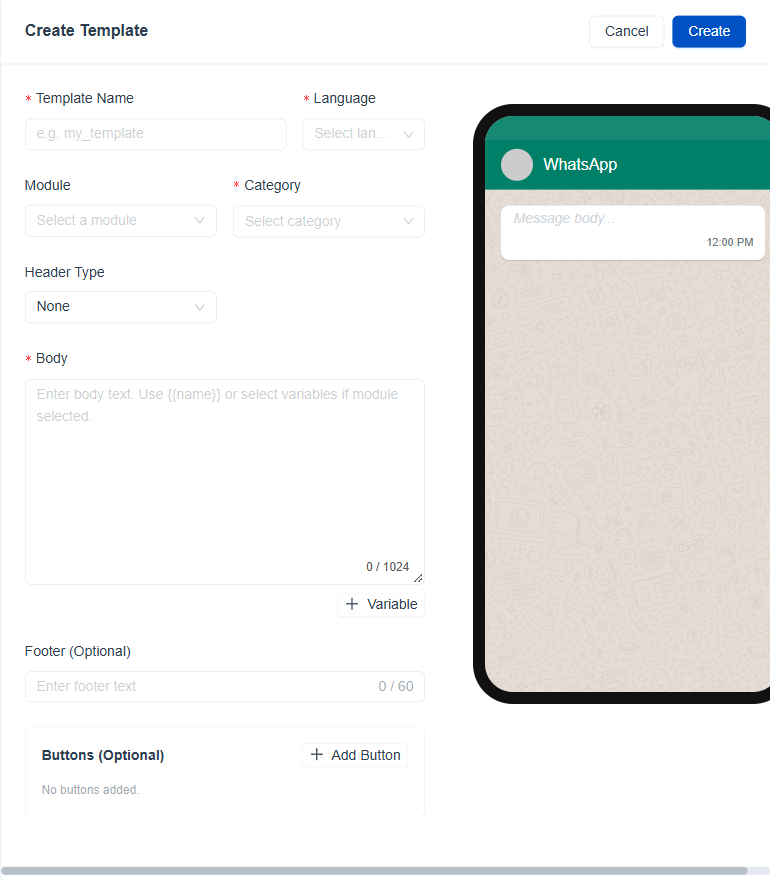
Figure 6. The Create Template form for WhatsApp, with a live preview of the message on the right.
Important: The name, language, module and category of a WhatsApp template are locked once it exists. To change them, create a new template.