Getting Started
Configuration › Automation
Every workflow begins the same way, with a short Create dialog that fixes its name, purpose, and Trigger Type before the Designer canvas even opens. The choices made here, particularly Trigger Type, shape everything that follows.
- Go to Configuration → Automation.
Lists every workflow already configured, with a Create button in the top right. - Click Create.
Opens the Create Item panel on the right. - Enter a Title.
Required. This becomes the heading shown on the workflow's card in the list, and at the top of the Designer once it opens. - Enter a Description.
Required. A short note explaining what the workflow is for, shown underneath the Title on its card.
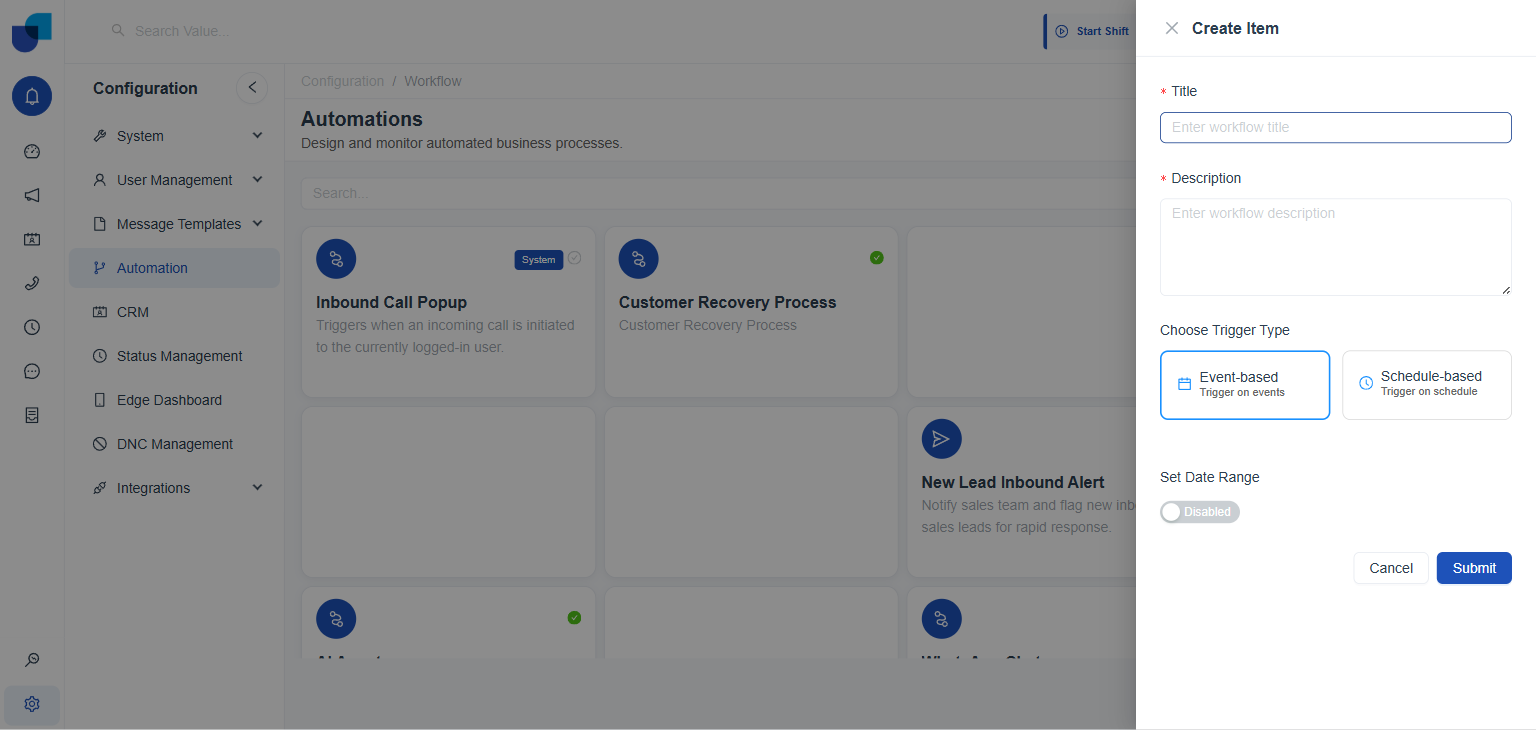
Figure 1: The Create Item panel. Event-Based is selected by default, shown by its blue outline.
- Choose a Trigger Type.
Event-Based starts the workflow in response to something happening elsewhere in the system; Schedule-Based runs it on a recurring timetable instead. Both are explained in their own, separate documentation.
| TRIGGER TYPE | SUBTITLE SHOWN IN THE DIALOG | STARTS WHEN |
|---|---|---|
| Event-based | Trigger on events | A chosen event occurs elsewhere in the system, such as a record being created or a call connecting. |
| Schedule-based | Trigger on schedule | A recurring time is reached, set through Quick Presets or a Custom Schedule. |
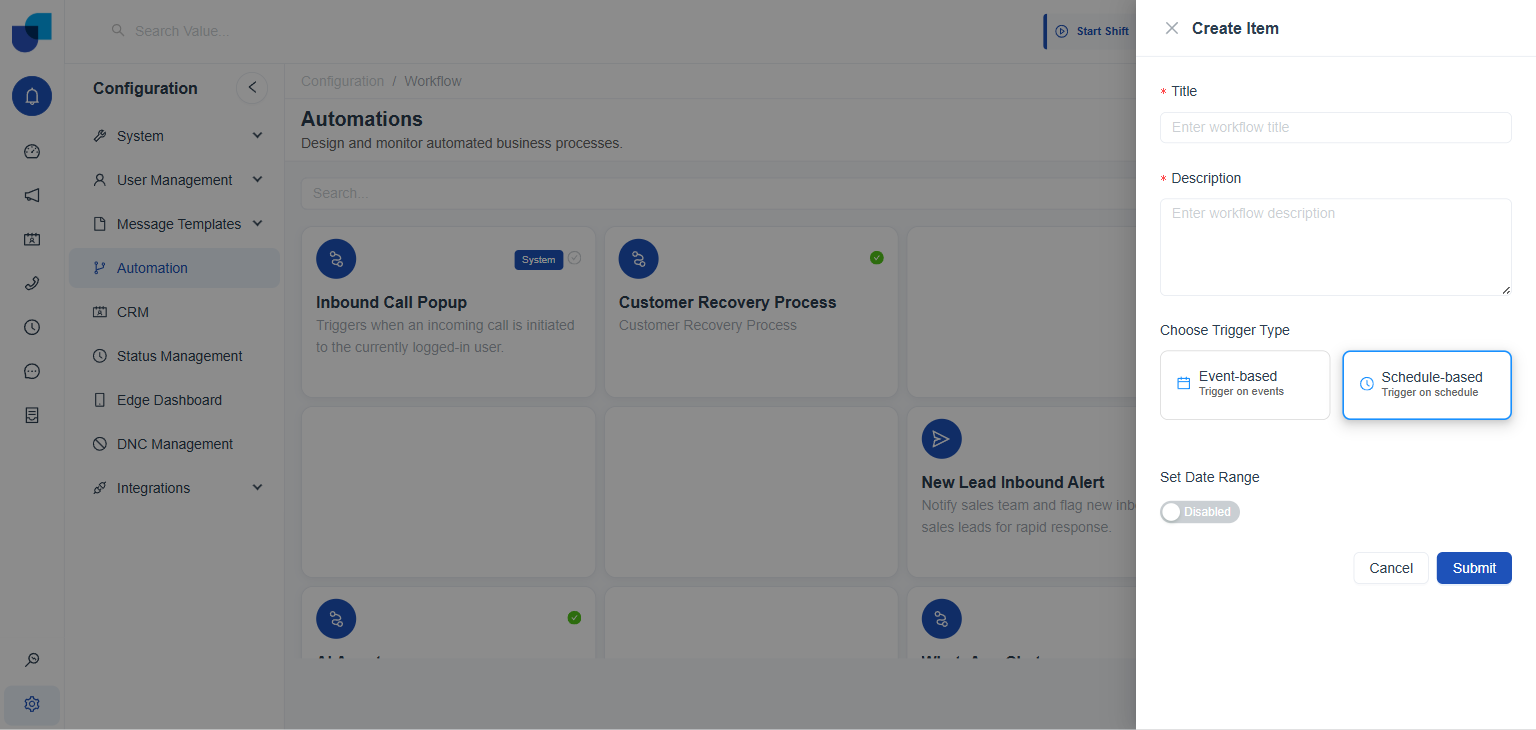
Figure 2: Schedule-based selected instead; the outline moves to show which Trigger Type is active.
- Set a Date Range, only if the workflow should be limited to a specific period.
Left Disabled by default, meaning the workflow runs indefinitely once active. Switching it to Enabled reveals a Start Date and an End Date; outside that window, the workflow stays inactive even if its trigger condition would otherwise be met. - Click Submit.
Creates the workflow immediately and opens it in the Designer, with a single, unconfigured Trigger node already placed on the canvas and ready to be set up.
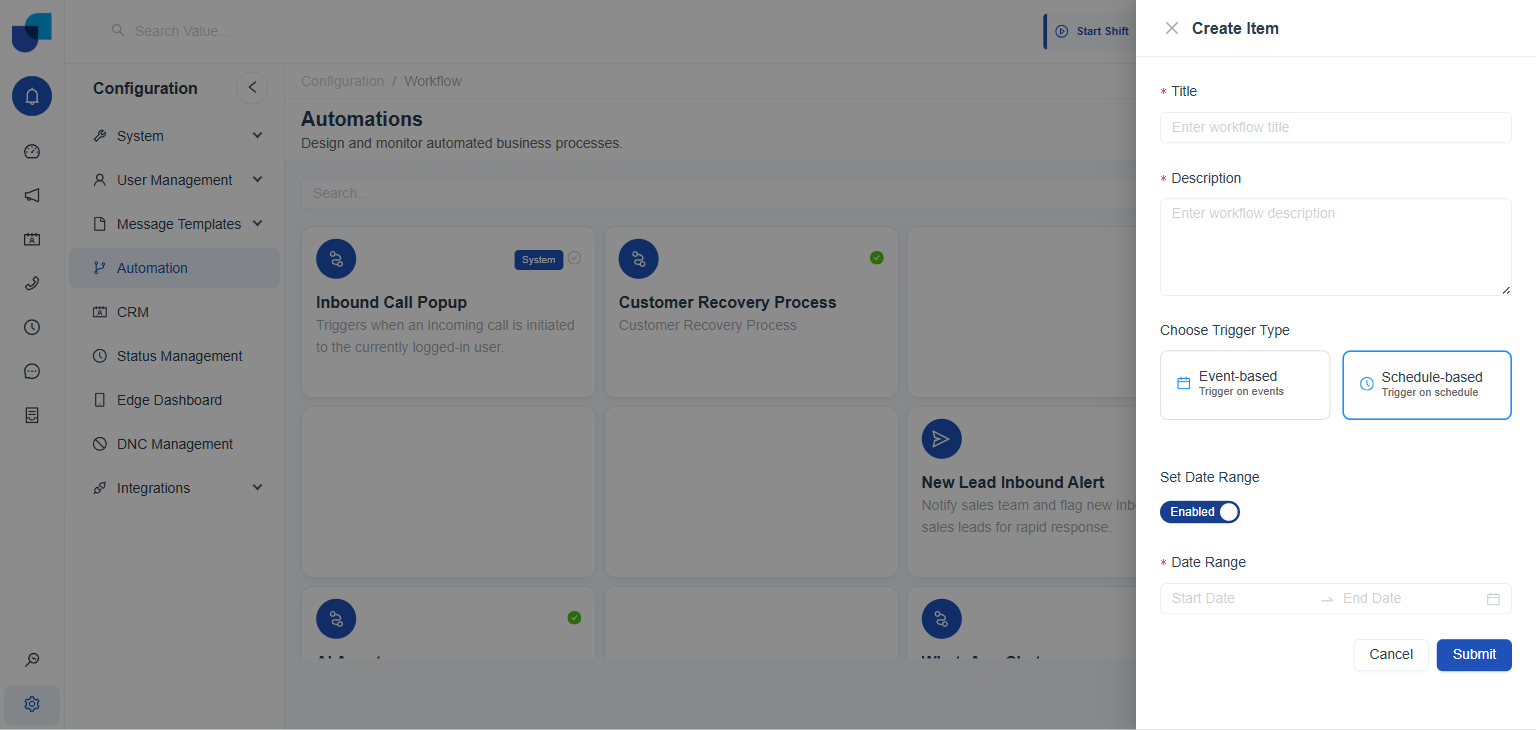
Figure 3: Set Date Range, switched on, revealing the Start Date and End Date fields together as one range picker.
Title, Description, and Trigger Type are all required. Leaving any of them blank, or leaving a Date Range half set, keeps Submit from completing until every required field is filled in.
After Creation
Submitting the dialog does not finish a workflow; it only starts it. The new workflow still needs its Trigger configured with a specific event or schedule, and at least one further step, usually an Action, connected after it, before the workflow does anything useful. Building that out happens in the Designer, covered in full in Workflow Builder.