Configuring the Messaging Use Case
Messaging
The steps AUS Bank followed to send a Case Received message from the Service Cases module, in the order they were done.
This page continues the Messaging Use Case Scenario. It assumes that the Service Cases module already exists with the fields Case Type, Case Reason and Assigned Agent, and that the customer's record holds an email address and a mobile number.
Connecting the Three Providers
- Turn on the modules. Open Configuration, System, Modules. Switch Email and Messaging on.
- Choose the providers. Choose Mailgun Email under Email Configurations and Dialog E–SMS under Messaging Configurations. Save each module.
- Connect Mailgun. Open Configuration, System, Plugins, select Mailgun Email, enter the sender addresses and the API key, and save.
- Connect Dialog E–SMS. Enter the sender mask, the user name and the password, and save.
- Connect WhatsApp. Enter the App ID, App Secret, Business ID, a permanent Access Token and the Verify Token. Copy the Webhook URL into the Meta app, and save.
The Email Template
- Open Configuration, Message Templates, Email Templates and click Create.
- Enter the Template Name Case Received.
- Choose the module Service Cases.
- Choose the sender under Send With Email.
- Enter the Subject: We have received your case.
- Design the Content. Add the bank's name at the top, a short greeting that uses the customer's name, and a table that lists the case reference, the Case Type and the Assigned Agent. Insert each value from the Placeholders tab.
- Check the Preview tab on a computer and on a phone.
- Click Save.
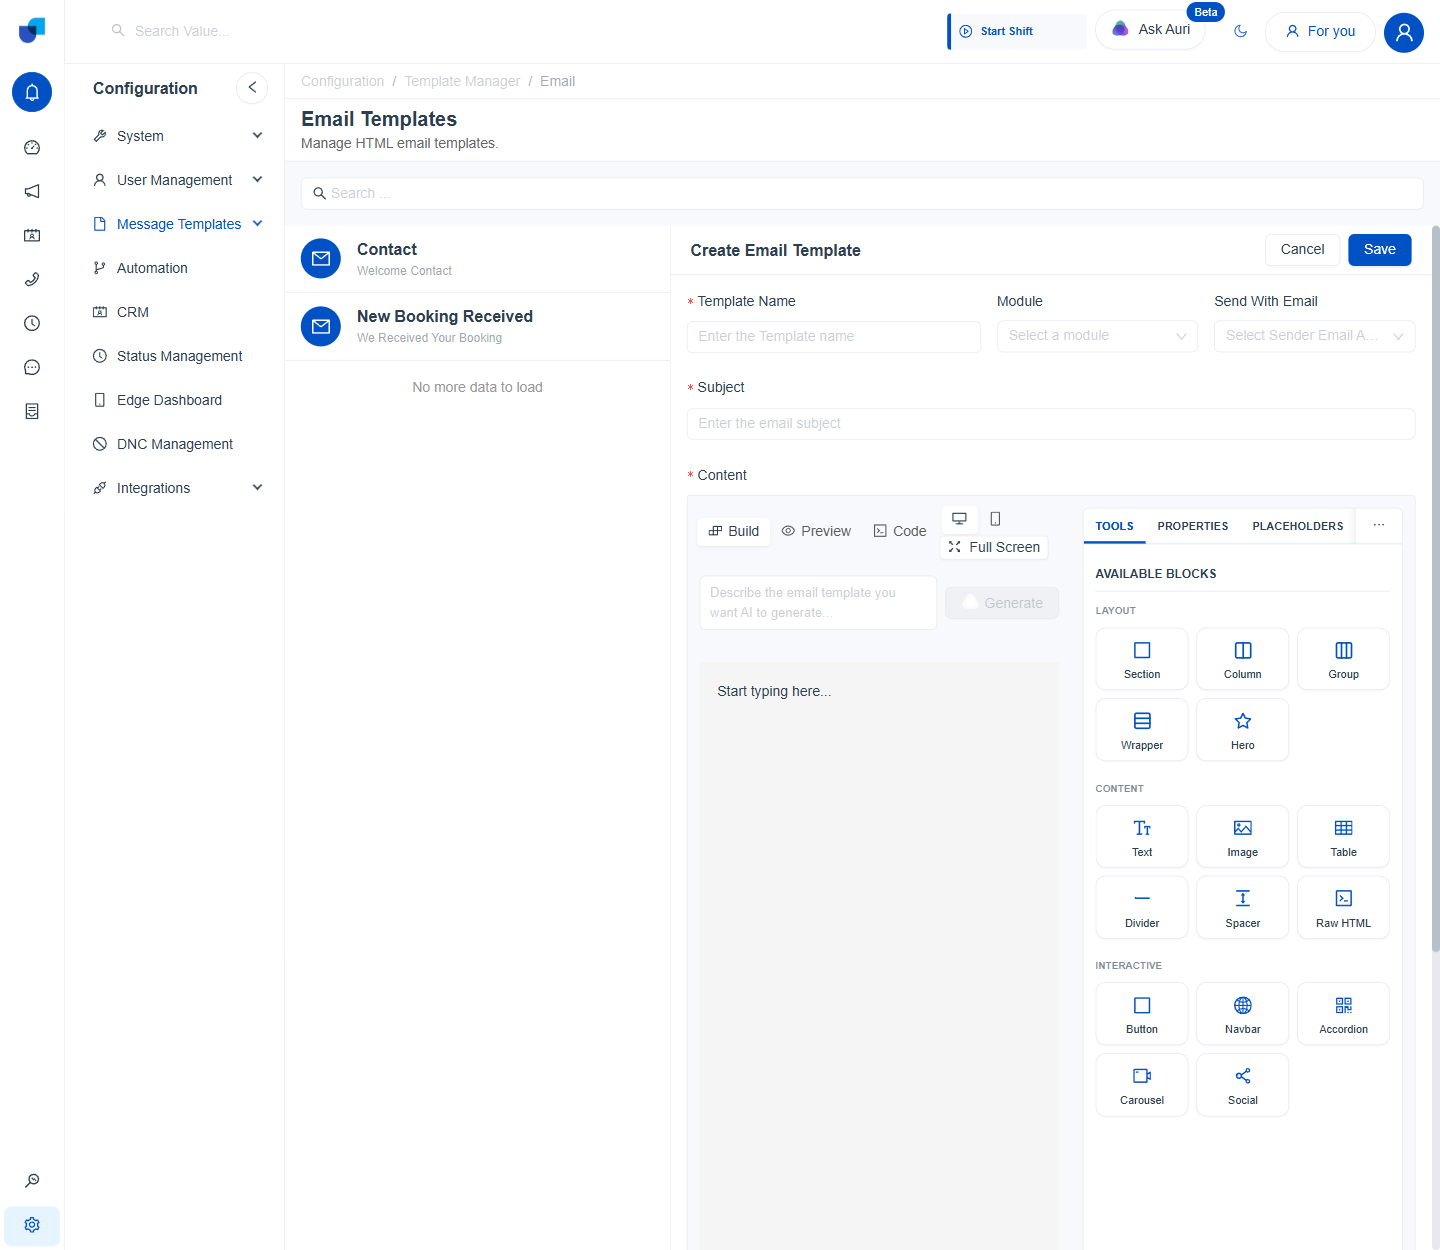
Figure 1. The Create Email Template form, where the Case Received template is built with the visual editor.
The SMS Template
- Open SMS Templates and click Create.
- Enter the Template Name Case Received and choose the module Service Cases.
- Choose the sender under Send As.
- Write the message in Compose SMS. For example: Hello, your case has been logged. Your reference is the case reference and your agent is the assigned agent. Please keep this message.
- Insert the placeholders with Add Placeholder and enter a preview value for each.
- Check that the text is short enough for one message, then click Save.
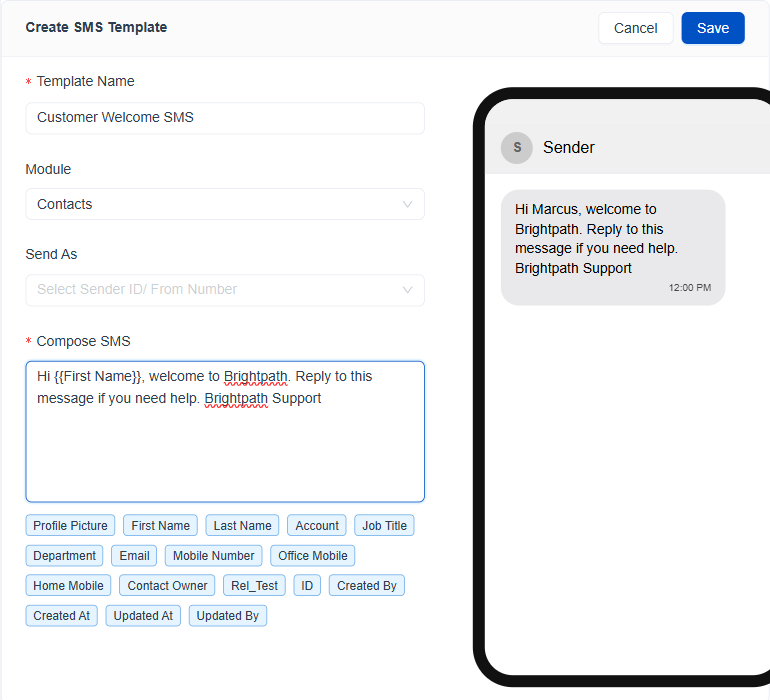
Figure 2. The Create SMS Template form, shown with a sample appointment reminder to illustrate the fields you fill in for Case Received.
The WhatsApp Template
- Open WhatsApp Templates and click Create.
- Enter the Template Name case_received.
- Choose the language, the category Utility and the module Service Cases.
- Write the Body. Use variables for the customer's name, the case reference, the Case Type and the Assigned Agent.
- Enter a preview value for each variable.
- Add a Quick Reply button, for example Received.
- Click Create and wait for Meta to approve the template.
Important: A WhatsApp template can be used only after Meta has approved it. Plan for this wait when you set a go live date.
Setting Up the Two Roles
- Open Configuration, User Management, Roles.
- Select Contact Center Supervisor and open the Messaging group.
- Set Send Message to Yes, Manage Message Templates and Manage Email Templates to Yes, and both view permissions to All.
- Save the role.
- Select Service Agent and open the Messaging group.
- Set Send Message to Yes, both view permissions to Own, and both template permissions to No.
- Save the role.
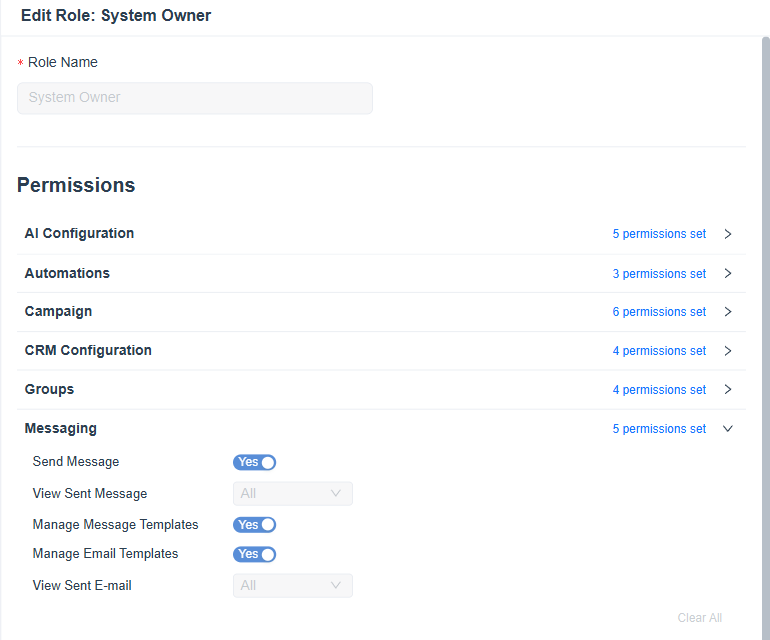
Figure 3. The Messaging group of a role, where Send Message, the view scopes and the template permissions are set.
Sending and Checking a Message
- Open a test case in Service Cases. Use a record with your own email address and mobile number.
- Send the Case Received template on each channel. Read the preview each time, and confirm that every value has filled in.
- Check your inbox and your phones.
- Open Conversations. Each message appears under your address or number, labeled Service Cases and the channel.
- Reply from your phone and check that the reply arrives in the same conversation.
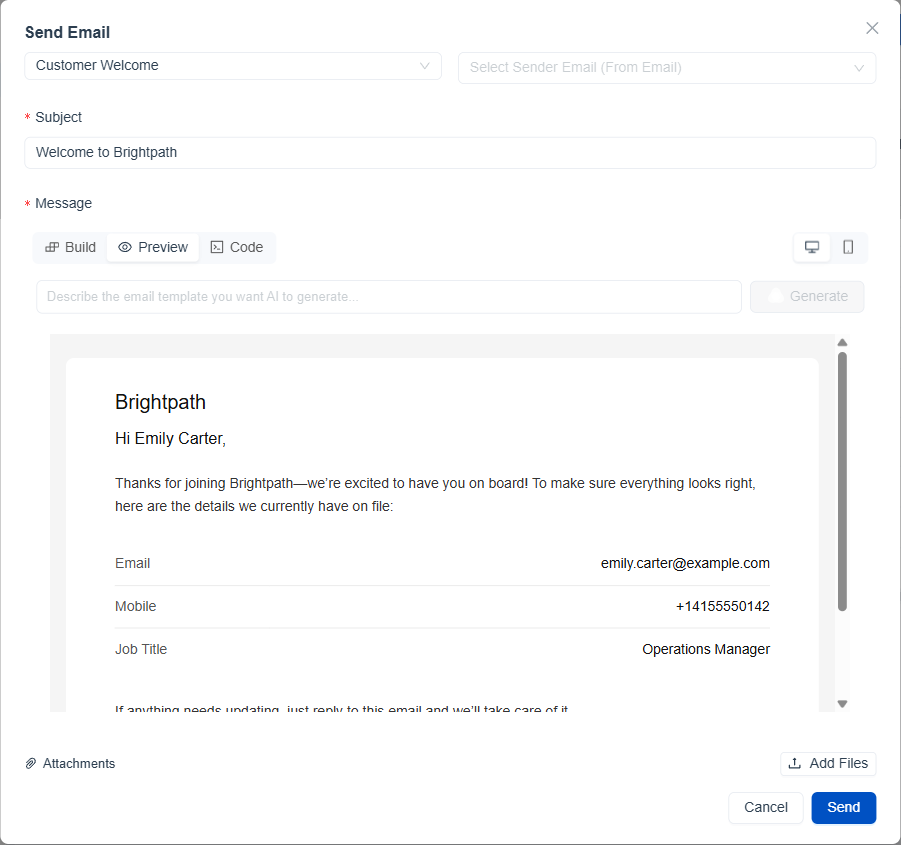
Figure 4. The Send Email window of a test record, where the Preview tab shows the values that will reach the customer.

Figure 5. The test SMS in Conversations, under the number of the test contact and labeled Contacts and SMS.
Info: When the test passes on all three channels, the process is ready for the floor. The related reference guides are Channel Configuration, Message Templates and Sending Messages.