3CX Login
Authentication, 3CX Login
Let agents sign in with their 3CX extension.
Enabling 3CX Login
3CX Login is part of the 3CX plugin. Connect the plugin to the PBX first, then switch the login option on. Until Enable 3CX Login is Yes, the Login with 3CX button does not appear.
- Open Configuration, System, Plugins and select 3CX.
- Switch the plugin on.
- Enter the PBX connection in 3CX Server Configurations. The fields are Host, Client Id and Api Key. See 3CX for every field.
- Choose the Data Sync Interval. For example Every 5 minutes. It sets how often people are copied from the PBX.
- Set Enable 3CX Login to Yes. The hint reads Enable 3CX as a login option.
- Decide on Self Registration. Turn it on to let synced users register themselves.
- Save the configuration.
- Open the Login page to check. Login with 3CX now appears under Or login with.
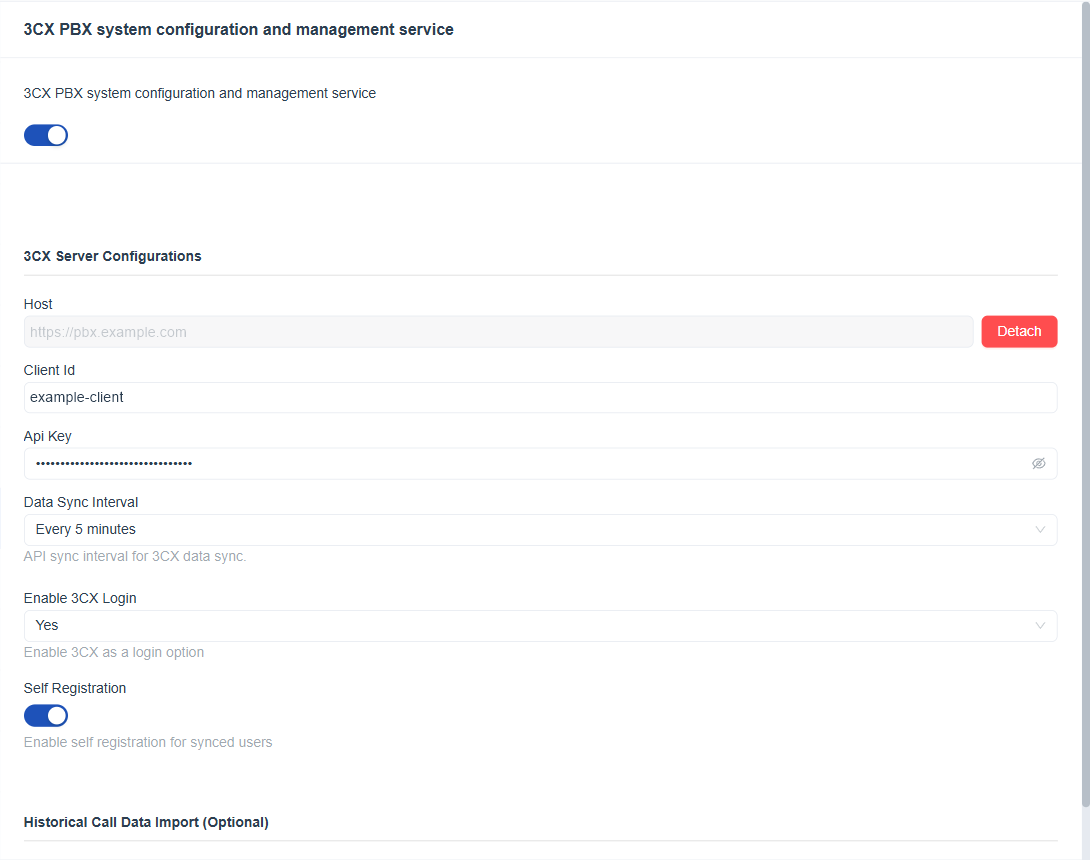
Figure 1. The 3CX plugin with Enable 3CX Login set to Yes and Self Registration switched on.
Important: Treat the Api Key like a password. Anyone who has it can read data from the PBX.
Signing In with an Extension
- Open the Login page.
- Click Login with 3CX. The form changes to Extension and Password.
- Enter your extension number.
- Enter your password.
- Tick or clear Remember me. The 3CX form has no Forgot password? link, because the password belongs to the PBX.
- Click Login with 3CX.
- Enter the one time password if one is asked. It appears when Two Factor Authentication is on for your account.
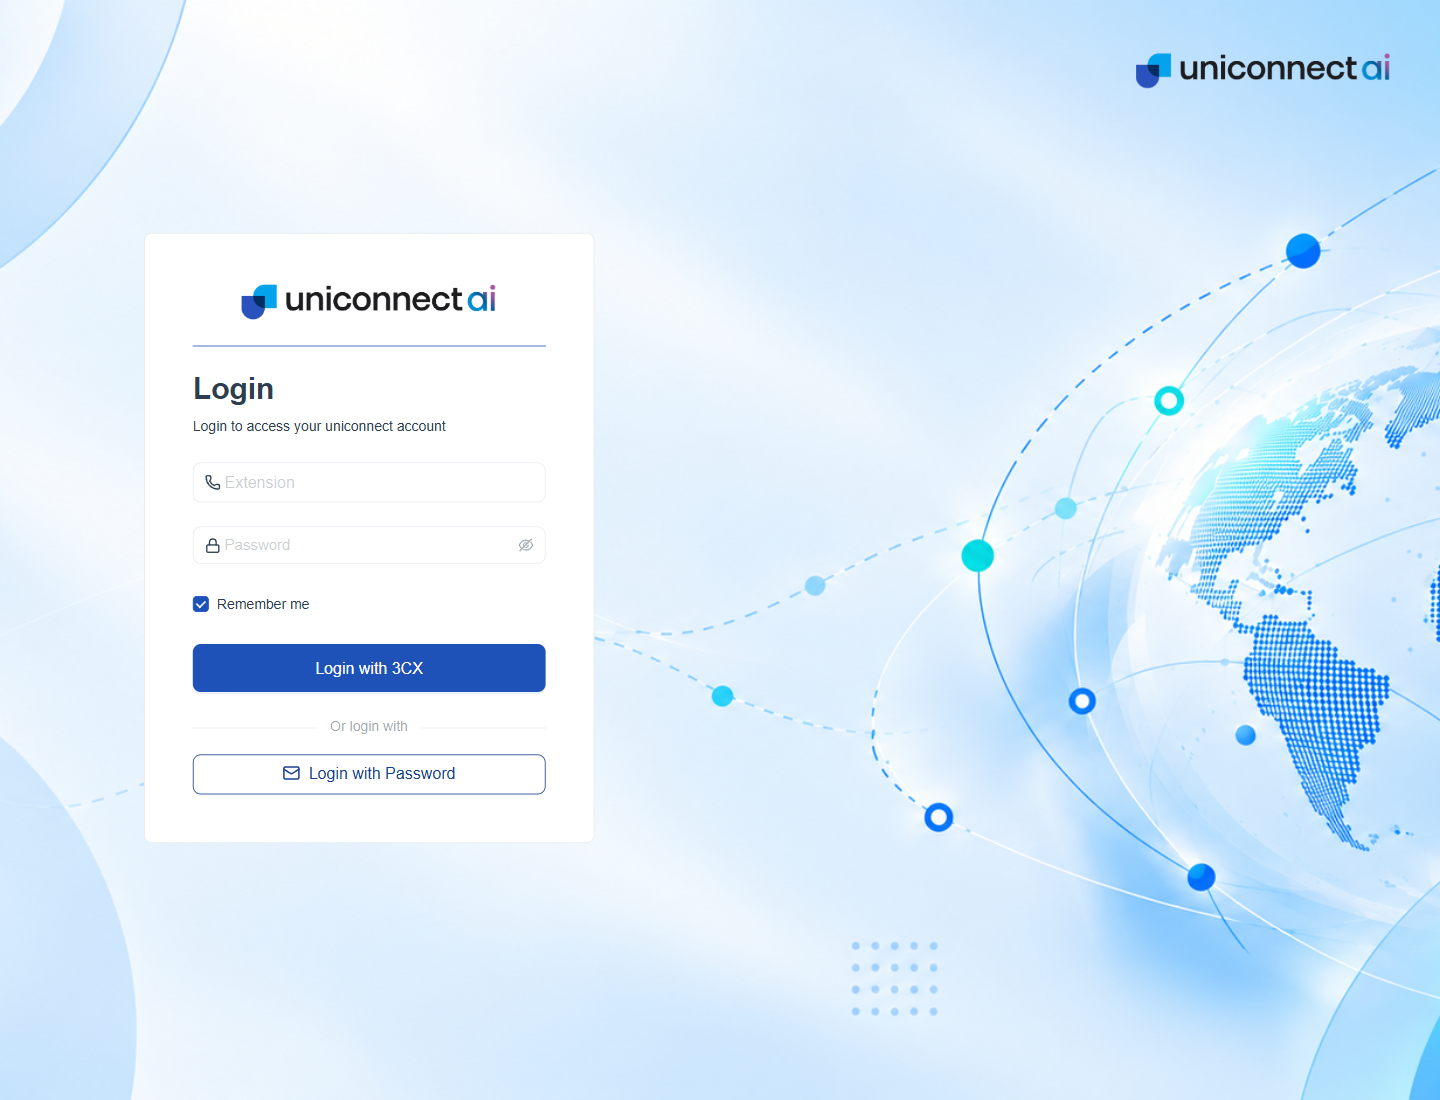
Figure 2. The 3CX form of the Login page, with Login with Password available as the alternative.
| Message | Meaning | What to do |
|---|---|---|
| Please input your extension! | The extension field is empty. | Type your extension number. |
| Please input your password! | The password field is empty. | Type your password. |
Info: Use the Login with Password button on the same page to go back to email sign in. With Remember me ticked, the next Recent Login card shows 3CX followed by your extension.
Syncing 3CX Users
The platform copies people from the PBX on a schedule. The Data Sync Interval of the 3CX plugin sets how often. Synced people appear in Configuration, User Management, Users with the status Synced, and they can sign in with their extension once 3CX Login is on.
- Wait for the next sync, or shorten the Data Sync Interval.
- Open Configuration, User Management, Users.
- Find the synced person and check the details. The User Details panel shows the extension, the role, Active and Status.
- Assign the right role and activate the user if needed.
| Situation | What to do |
|---|---|
| A new extension is not listed | Wait for the next sync, or shorten the Data Sync Interval. |
| A synced person cannot sign in | Check that the person is active and that 3CX Login is Yes. |
| The person has no email | Add one if the person should also use Login with Password. |
Synced users and their roles are managed in Users, Groups and Workforce Management Settings.