Two Factor Authentication
Authentication, Two Factor Authentication
Add a one time password to sign in for the accounts that need it.
Turning On Two Factor Authentication for a User
Two Factor Authentication is turned on for each person, not for the whole platform. Once on, the person enters a one time password after the normal sign in. It applies to every method that uses a password: Login with Password, Login with 3CX and Login with AD. The code is sent to the phone number of the user, so make sure the Phone field of the user is filled in.
- Open Configuration, User Management, Users.
- Select the person in the list. The User Details panel shows 2FA Enabled as Yes or No.
- Click Edit.
- Check the Phone field. The code goes to this number.
- Tick Enable 2FA under Two Factor Authentication.
- Click Save. 2FA Enabled now shows Yes for the person.
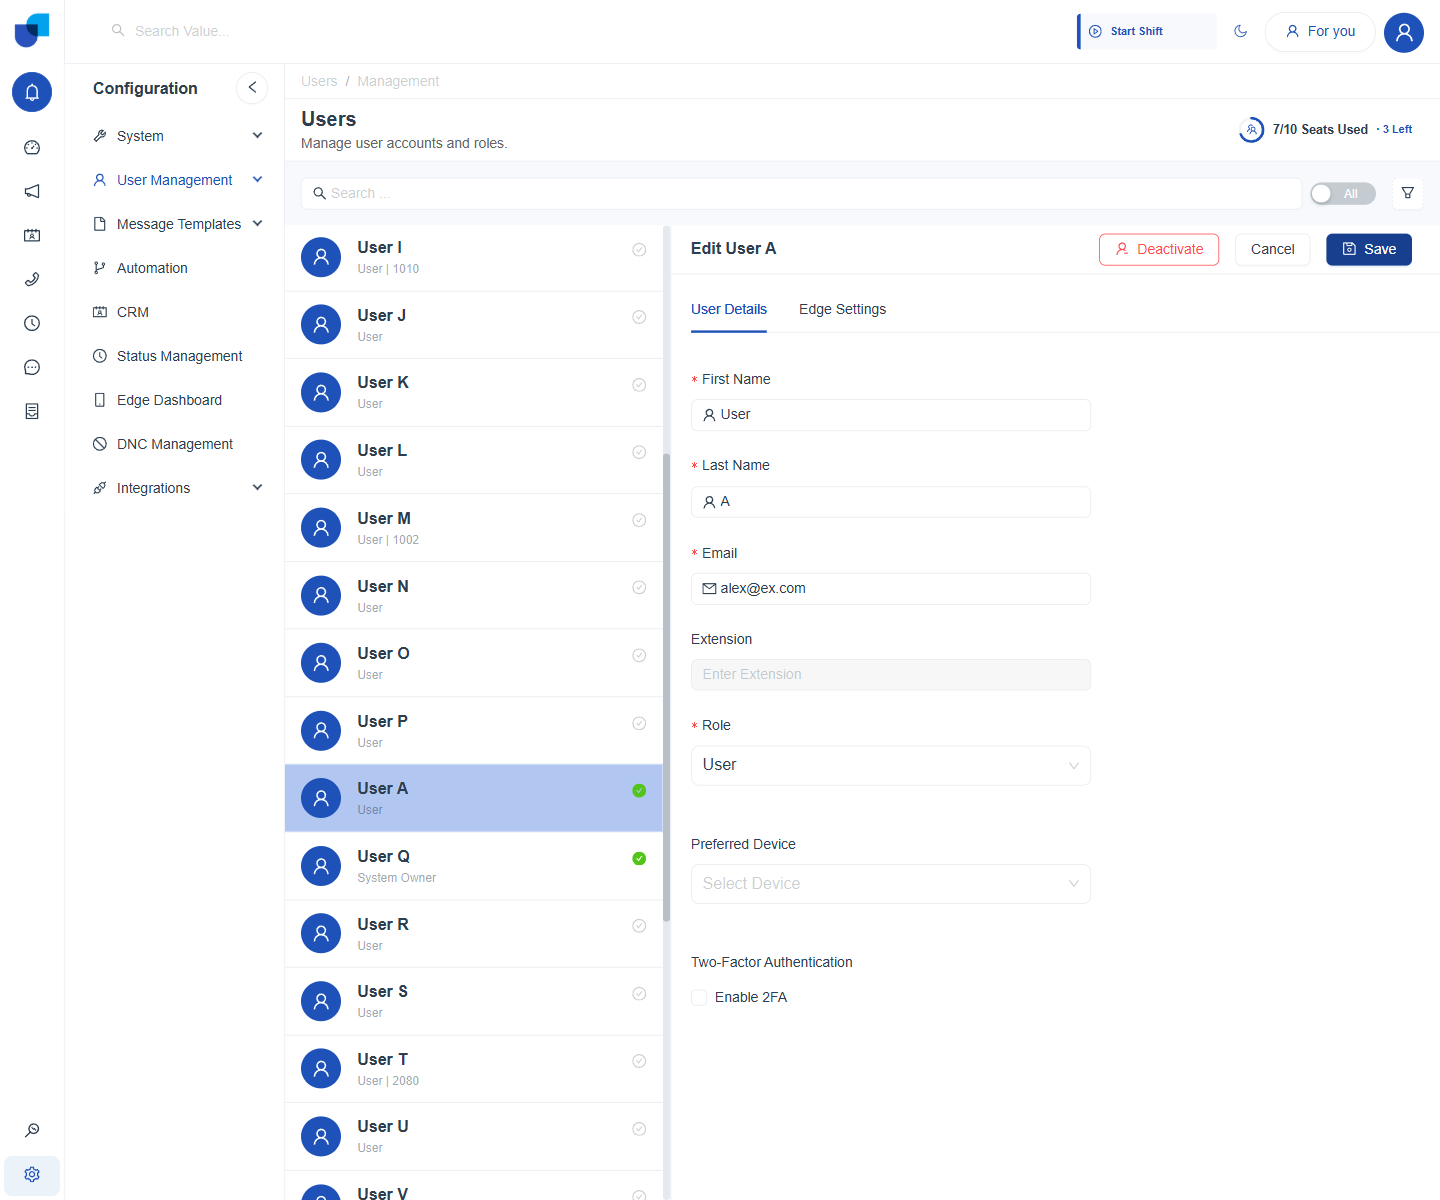
Figure 1. The Edit User form. The Enable 2FA tick box sits under Two Factor Authentication.
To turn it off again, open the same form, clear Enable 2FA and save.
Important: Turn it on first for supervisors and administrators. Their accounts can change settings for everyone.
Entering and Resending the OTP
After a correct password, the Two Factor Authentication page opens with the line Enter the OTP sent to your phone. The page needs a sign in to have just happened. If you open its address directly, you are sent back to the Login page.
- Sign in as usual. After the password is accepted, the verification page opens.
- Read the message on your phone. It holds the code.
- Type the code in the Enter OTP field. The field shows how many digits it expects, for example Enter the 6-digit OTP. It accepts numbers only.
- Click Verify OTP. On success the home page opens.
- If no code arrives, watch the line Resend OTP available in. It counts down in minutes and seconds, for example 1:00.
- When the countdown ends, click Resend OTP. A new code is sent and a new countdown starts.
| Message | Meaning | What to do |
|---|---|---|
| Please input your OTP! | The field is empty. | Type the code. |
| OTP must be 6 digits! | The code has the wrong length. The number shown follows the platform setting. | Type every digit of the code. |
| OTP must contain only numbers! | The code has letters or symbols. | Type digits only. |
Info: Resend OTP stays disabled while the countdown runs, and the countdown continues if you refresh the page. A new code replaces the old one, so always use the latest message.
OTP Limits and Blocking
Three settings protect against guessing. They are set in Global Settings and apply to every one time password, including password resets.
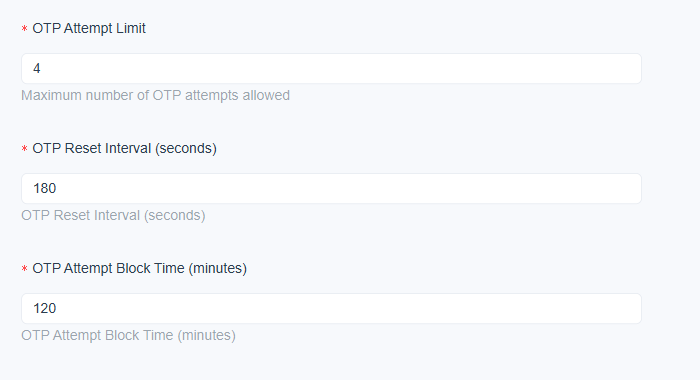
Figure 2. The one time password settings: an attempt limit of 4, a reset interval of 180 seconds and a block time of 120 minutes.
| Setting | What it does | Example |
|---|---|---|
| OTP Attempt Limit | The most wrong codes allowed before the person is blocked. | 4 |
| OTP Reset Interval (seconds) | How long a code stays valid, and how long the person waits before Resend OTP. | 180 |
| OTP Attempt Block Time (minutes) | How long the person is blocked after reaching the limit. | 120 |
- A wrong code shows an error message. The platform counts the attempt against the limit.
- When the limit is reached, the person is blocked.
- After the block time, the person signs in again and requests a new code.
With the example values, a person who enters four wrong codes must wait 120 minutes before trying again. The full setting reference is in Security and OTP Settings.