Email Login
Authentication, Email Login
Create an account by invitation, choose a password and understand self registration.
Account Invitation and Set Password
An administrator creates the user and sends an invitation by email. The email holds a link. The link opens the Set Password page for that person, where they choose their own password.
Administrator: send the invitation
- Open Configuration, User Management, Users.
- Create the user with a first name, a last name, an email address and a role.
- Send the invitation. The user's status shows Invited until the person sets a password.
- Use Resend Invite when the first email was lost or has expired. A new link is sent to the same address.
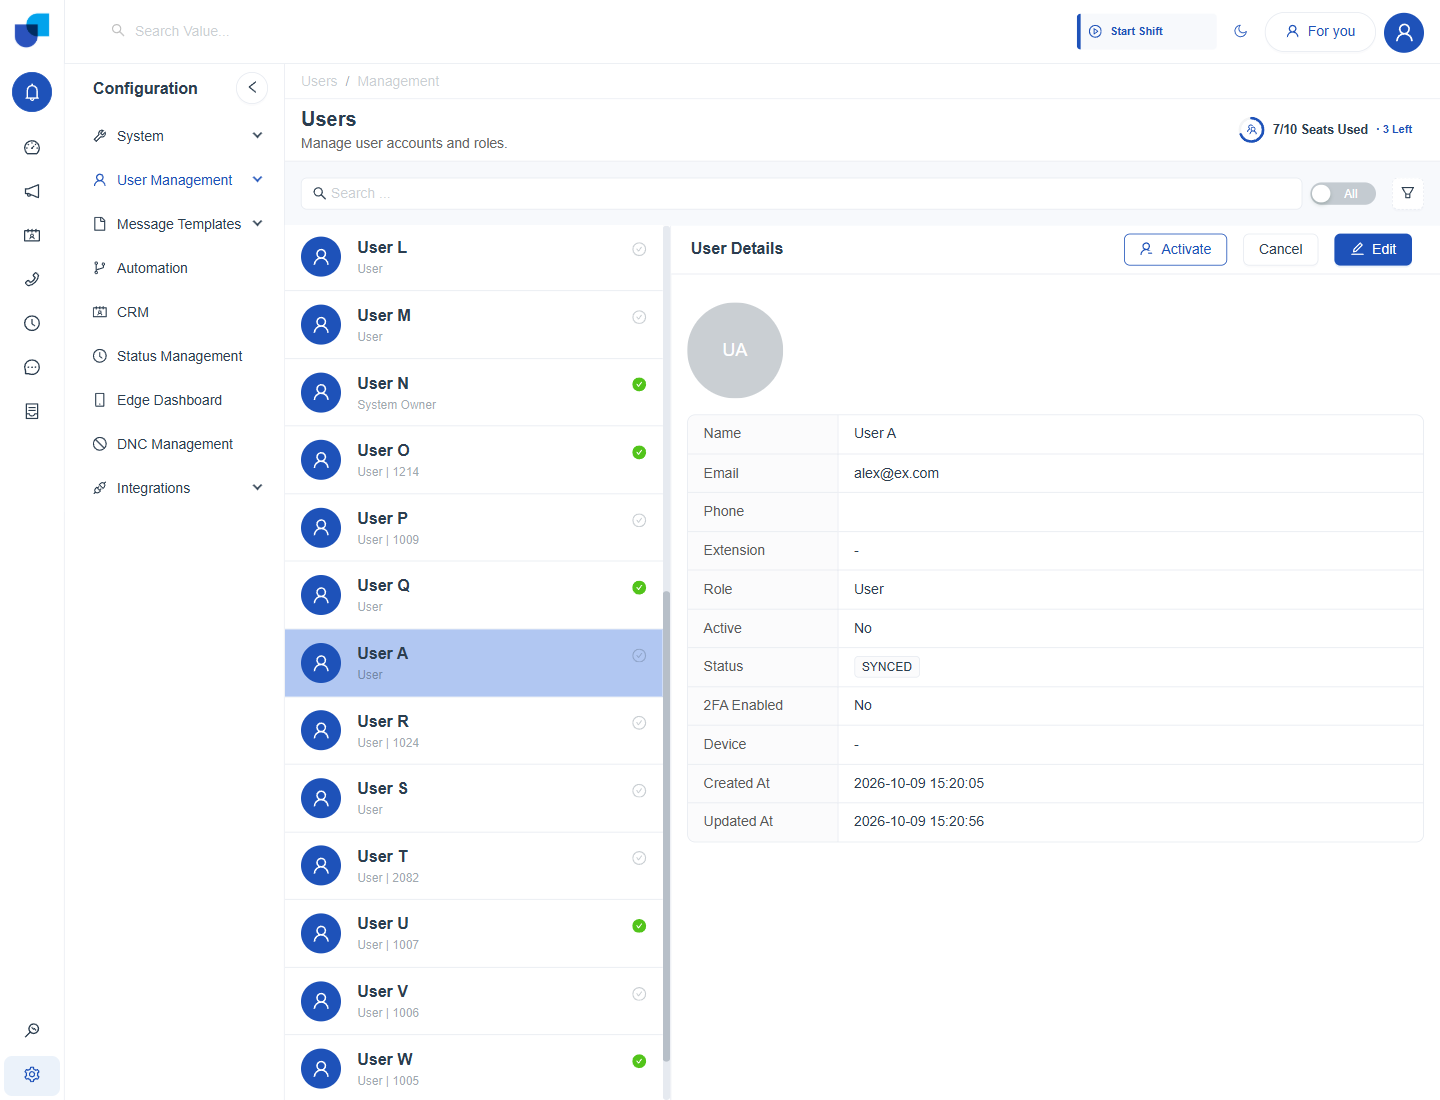
Figure 1. The User Details panel. Status shows where the person is in the account life cycle, such as Invited, Synced or Registered.
New user: set the password
- Open the link in the invitation email. Use it before the invitation expires.
- Read the guidelines on the Set Password page. They list the five password rules.
- Type the password in the Enter the Password field.
- Type it again in the Re Enter the Password field. A green tick appears on a field when it is accepted.
- Click Save. A confirmation message appears and the Login page opens.
- Sign in with your email and the new password.
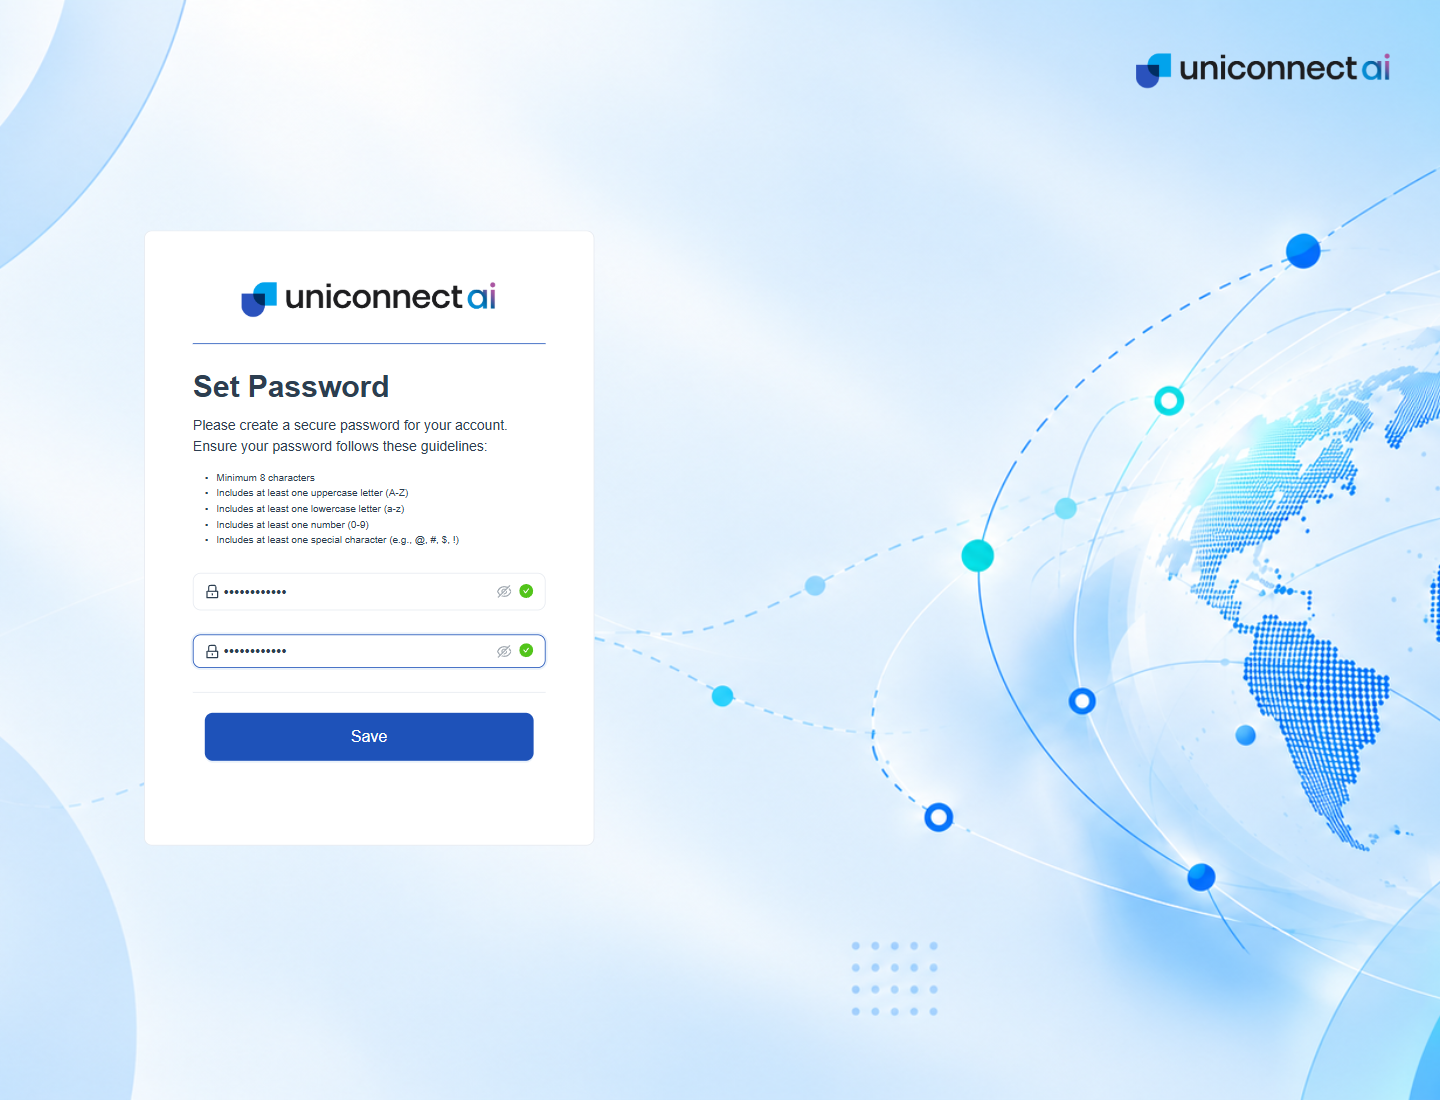
Figure 2. The Set Password page from an invitation link, with the guidelines above two password fields and a Save button.
| Message | Meaning | What to do |
|---|---|---|
| Please input your password! | The first field is empty. | Type a password. |
| Password must meet all requirements | One of the five rules is not met. | Compare the password with the guidelines. |
| Please confirm your password! | The second field is empty. | Type the password again. |
| The two passwords do not match! | The two entries differ. | Retype both entries carefully. |
| An error occurred while setting password. | The platform could not save the password. | Try again, then ask an administrator. |
When the link no longer works
A link that has expired, was already used, or is not valid opens the Link Expired page instead. The page explains that links are valid for a limited time for security reasons. Click Back to Login, then ask for a new link. For an invitation, ask the administrator to use Resend Invite. For a forgotten password, use Forgot password? on the Login page.
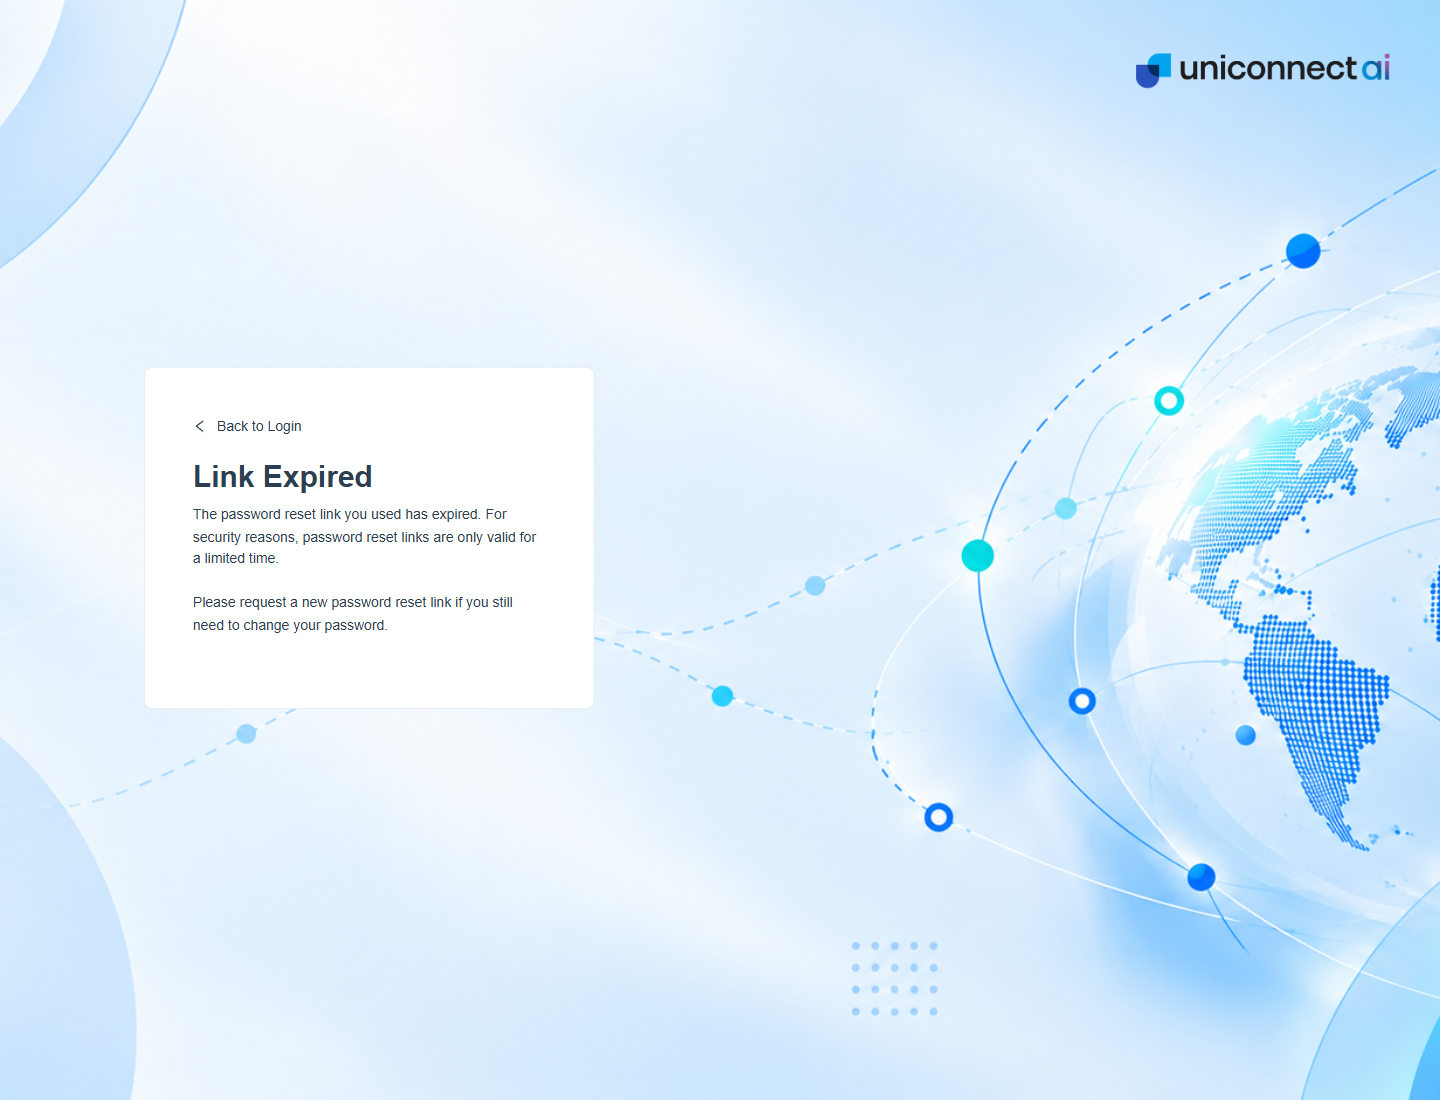
Figure 3. The Link Expired page. It appears when an invitation or reset link is expired, already used or invalid.
Info: The Invitation Expiry Window decides how long an invitation link stays valid. The setting is described in Configuration.
Password Requirements
The Set Password page lists the rules, and the same rules apply to a password reset.
| Rule | Meaning | Example of what to add |
|---|---|---|
| Minimum 8 characters | The password is at least eight characters long. | A longer phrase is stronger. |
| Uppercase letter | At least one letter from A to Z. | K |
| Lowercase letter | At least one letter from a to z. | m |
| Number | At least one digit from 0 to 9. | 7 |
| Special character | At least one symbol such as @, #, $ or !. | # |
Tip: Use a long phrase you can remember, then add a number and a symbol. Do not reuse a password from another service.
Self Registration (Sign Up)
There are two different things behind this name, and it helps to keep them apart.
The Sign Up page on a new installation
The platform has a Sign Up page with First Name, Last Name, Email Address and Phone Number fields and a Next button. It exists for the very first administrator. On a platform that has no users yet, it leads to a Set Password page for the first administrator, which shows the email address the password will be used for. Once the platform has any user, the Sign Up address sends everyone back to the Login page, so it cannot be used to create extra accounts.
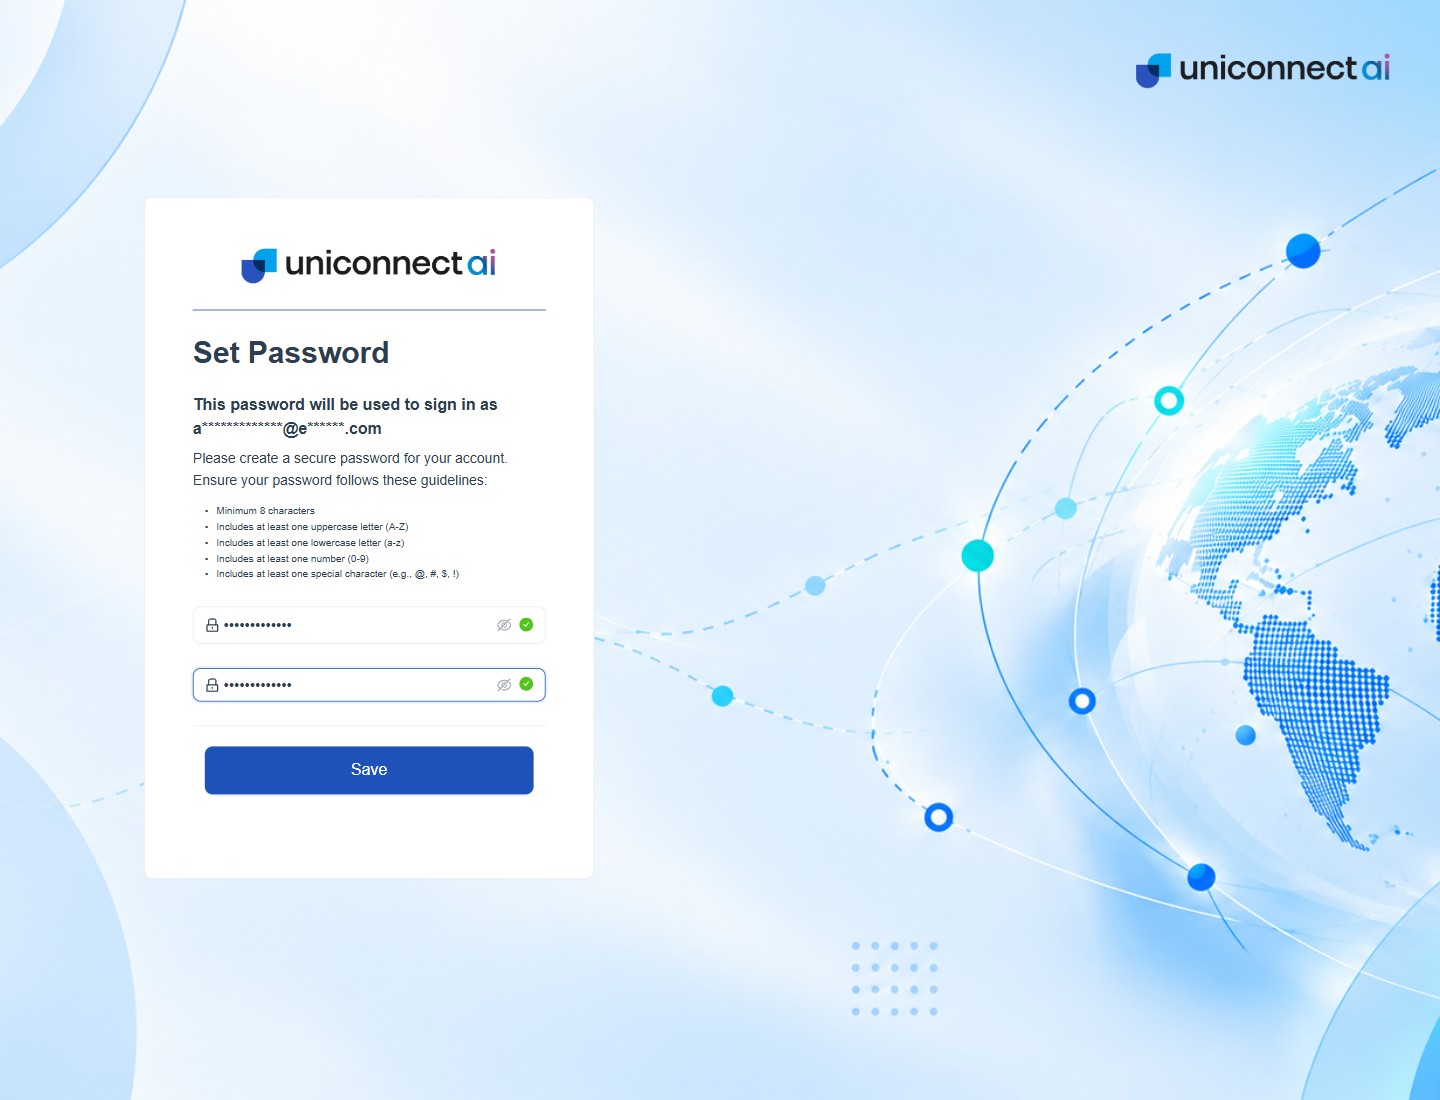
Figure 4. The Set Password page for the first administrator. It names the email address the password will be used for, partly hidden here.
- Create the first administrator on the new installation. Enter the password twice and click Save.
- Sign in with that administrator. The first sign in opens the global configuration, where the platform is prepared for everyone else.
- Invite all other people from Users.
Self registration for synced people
The 3CX and LDAP plugins each have a Self Registration switch for people who were synced from the PBX or the directory. When it is on, a synced person can register without waiting for an invitation. When it is off, every person must be invited first.
- 3CX. The setting reads Enable self registration for synced users.
- LDAP. The setting is named Self Registration.
Important: Turn Self Registration on only when everyone in the synced directory should be allowed to use the platform. Seats are limited by the license.
Where to find these switches is covered in Configuration. The matching sign in pages are 3CX Login and LDAP Login.