Roles
User Management
Decide what each kind of user can see and do. The examples use the standard Contact Center Supervisor role.
Creating and Deleting a Role
Open Configuration, User Management, Roles. The list shows each role with the number of permissions it holds. The standard roles are System Owner with 96 permissions, User with 36 and Contact Center Supervisor with 8. A search box above the list finds roles by name.
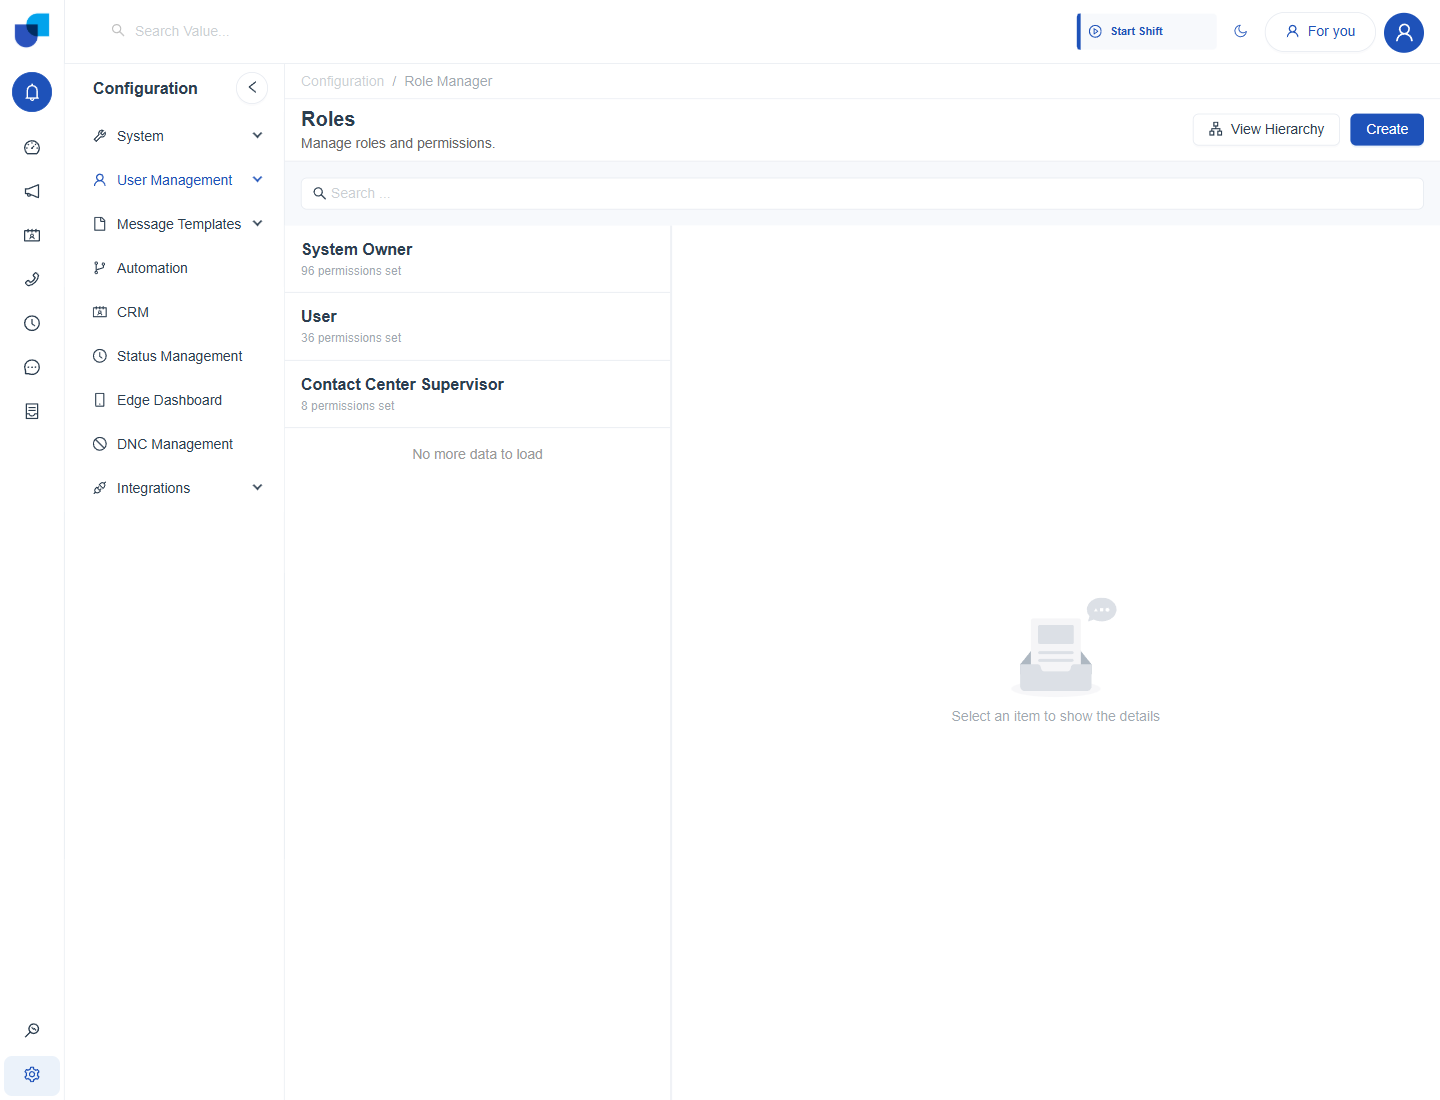
Figure 1. The Roles page with the three standard roles. View Hierarchy and Create are at the top right.
Create a role
- Click Create. The Create Role form opens.
- Enter the Role Name. For example Team Lead. If the name is empty, the form says Please input the role name!
- Set the permissions. The next section explains each group.
- Click Save.
Delete a role
- Select the role and click Delete.
- Read the question. It says Are you sure you want to delete this role? This action cannot be undone.
- Confirm to delete.
Important: Before you delete a role, move its users to another role. The System Owner role is read only and cannot be changed or deleted.
Role Permissions
Select a role to see its permissions. They are arranged in groups, and each group shows how many permissions are set. Click a group to open it.
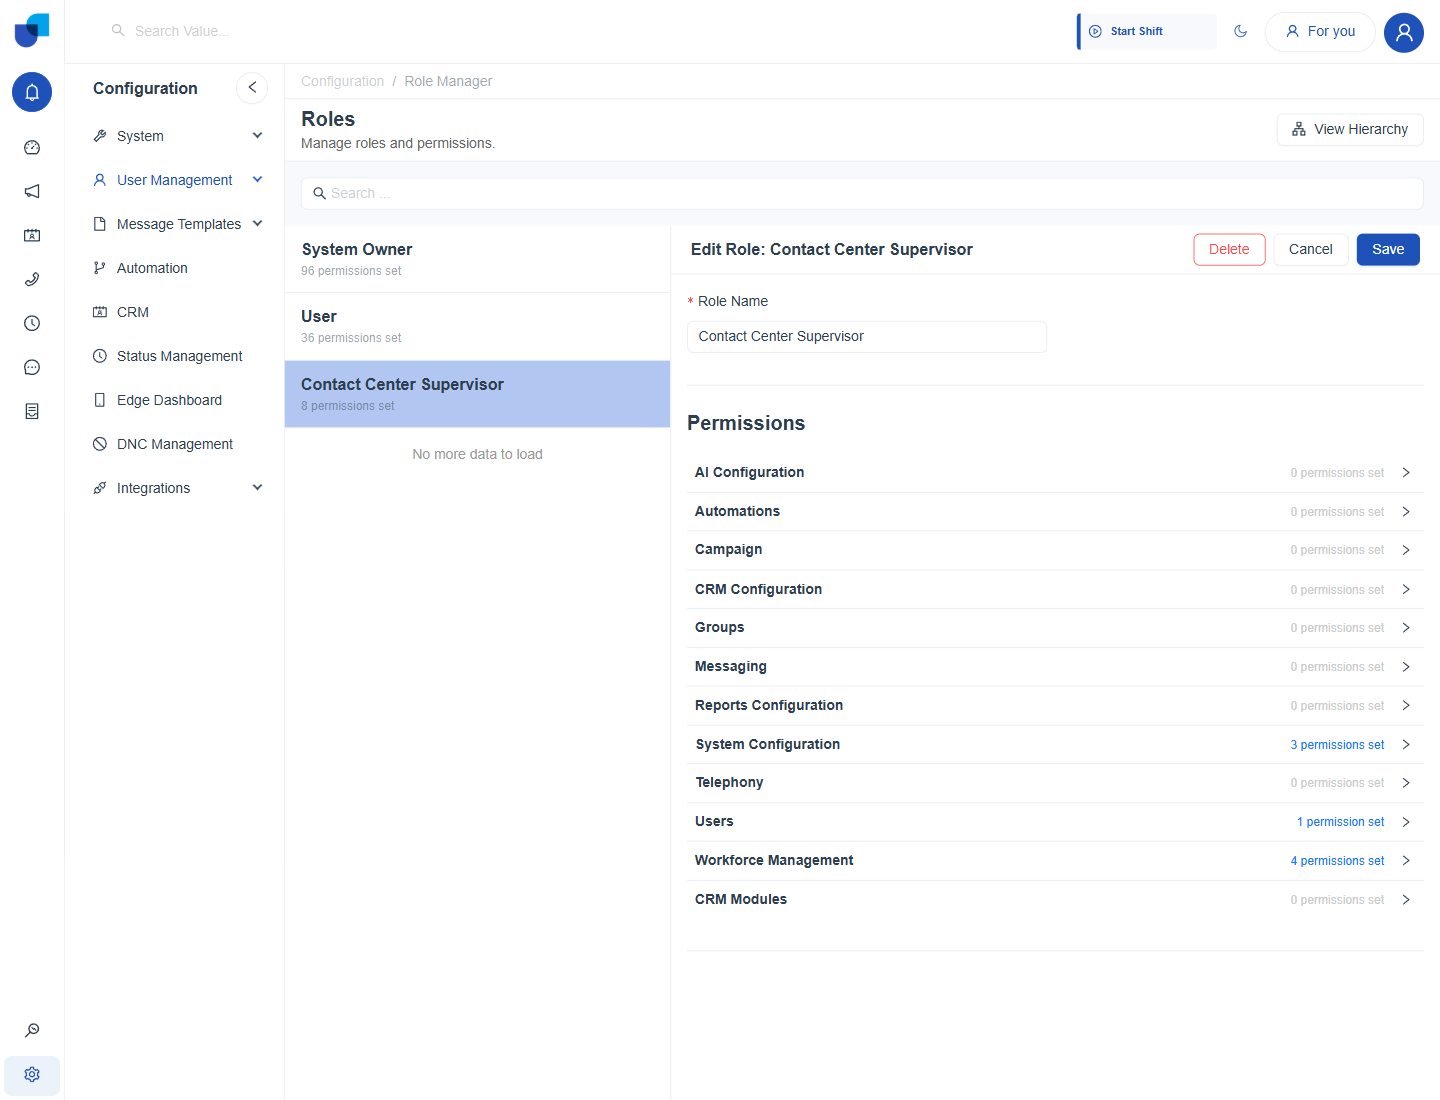
Figure 2. The Edit Role form for Contact Center Supervisor, with Delete, Cancel and Save at the top right.
| Group | What it controls |
|---|---|
| AI Configuration | AI agents and assistants. |
| Automations | Workflows and automation rules. |
| Campaign | Campaign setup and execution. |
| CRM Configuration | CRM module setup. |
| Groups | Viewing and managing groups. |
| Messaging | Messaging channels and templates. |
| Reports Configuration | Reports and dashboards. |
| System Configuration | Global settings, plugins, logs and updates. |
| Telephony | Calls and call handling. |
| Users | Viewing and managing users. |
| Workforce Management | Shifts, statuses and approvals. |
| CRM Modules | Record access for each CRM module, including fields. |
Types of permission
- Yes or No. A switch that allows or blocks an action, such as Create User.
- Scope. A drop down with Own, Group or All. Own limits the permission to the person's own records. Group extends it to the person's groups. All covers everyone. A larger scope includes the smaller ones.
- Clear All. A link at the bottom of a group that switches every permission of the group off.
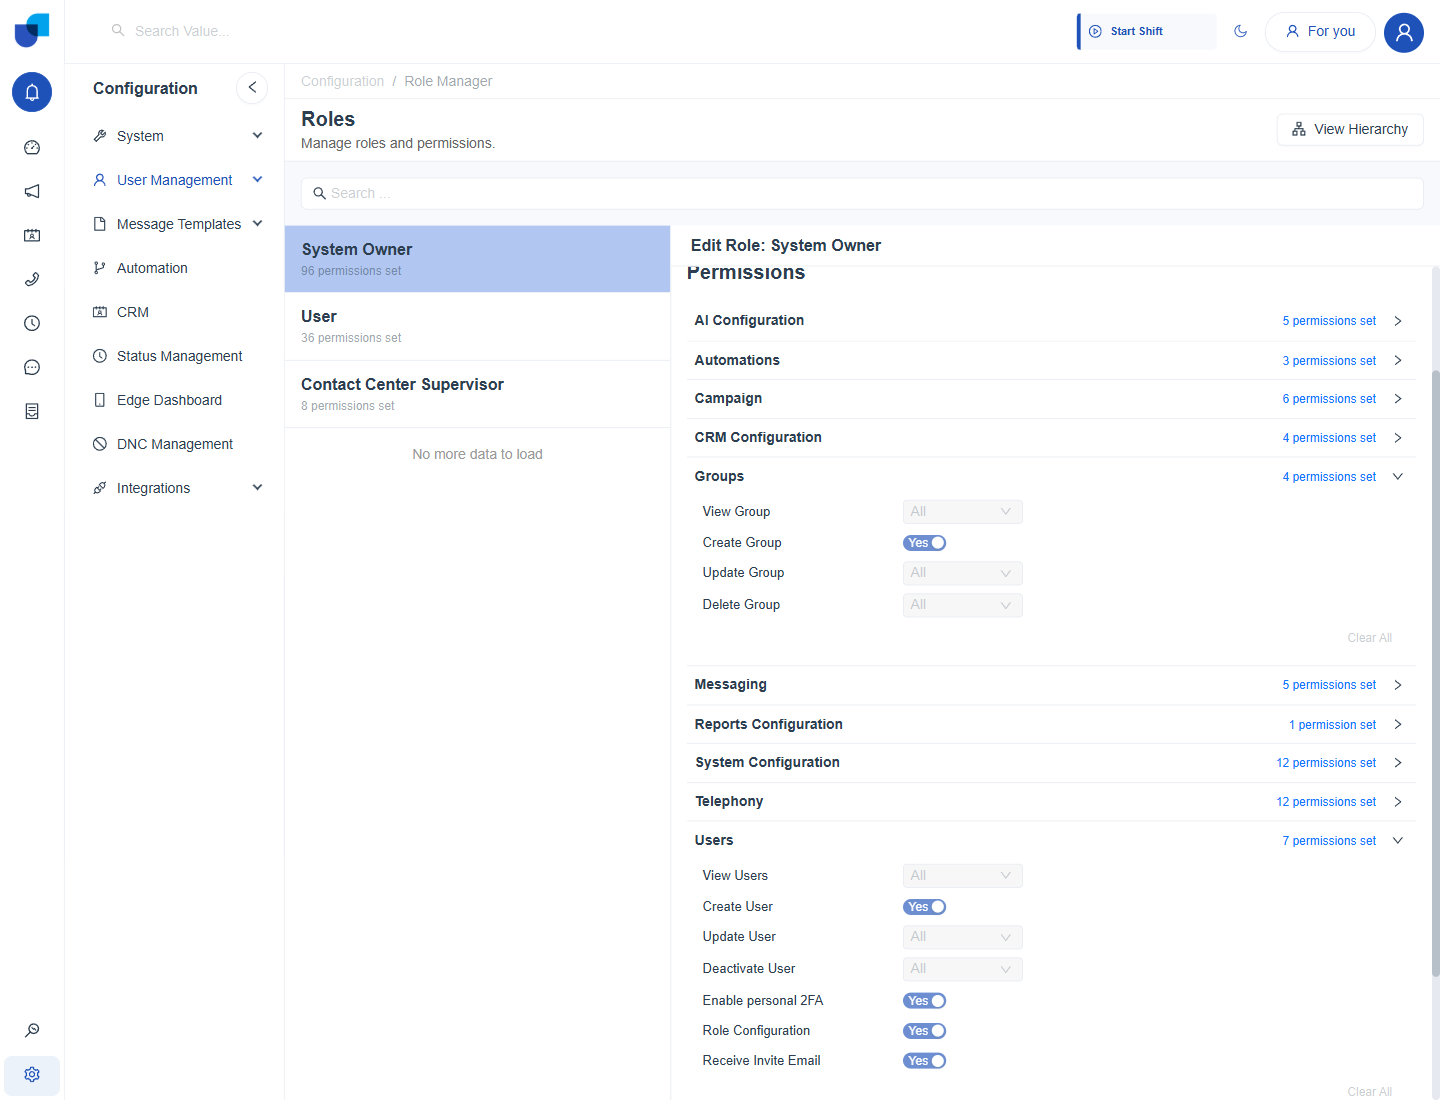
Figure 3. The Groups and Users permission groups opened. Scope drop downs and Yes or No switches are shown, greyed out because System Owner is read only.
Edit a role
- Select the role.
- Open a group and change the switches and scopes.
- Click Save. If the change should also reach higher roles, the next section explains the confirmation that appears.
Role Field Permissions
The CRM Modules group controls access to CRM records. Each module has a row with four columns: Create as a Yes or No switch, and Update, View and Delete as scopes. Click the plus sign beside a module to open its fields. Each field has its own Create, Update and View setting. A star marks a required field.
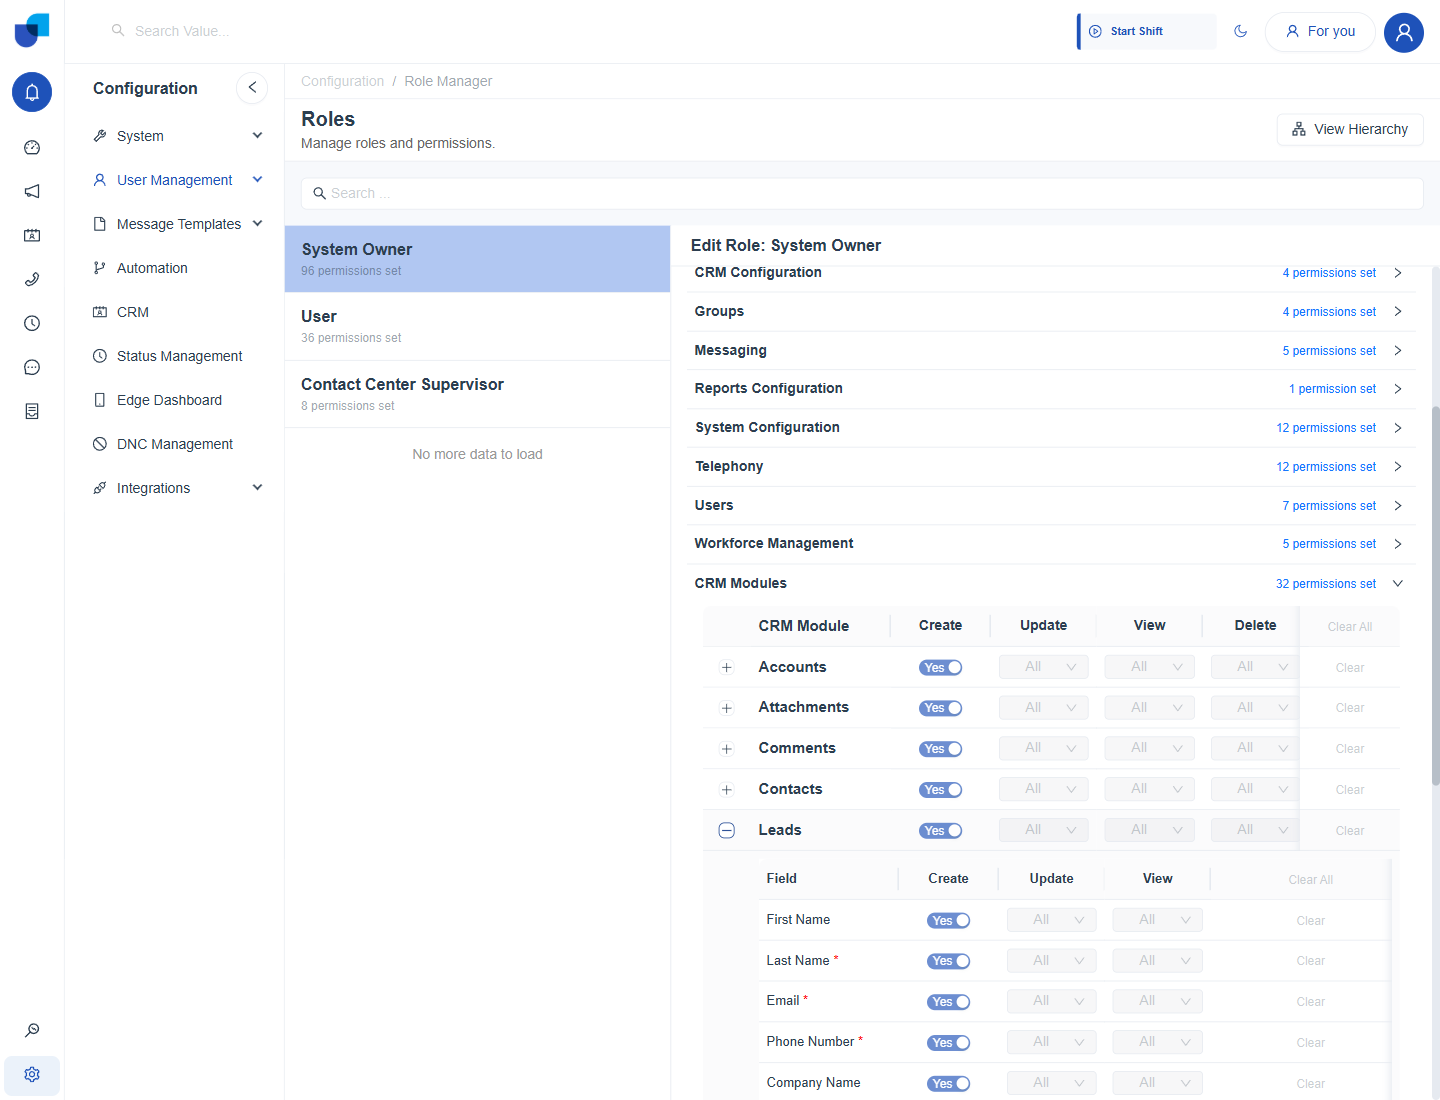
Figure 4. The CRM Modules group with the Leads module opened. The fields First Name, Last Name, Email, Phone Number and Company Name each have their own settings.
| Message or option | Meaning |
|---|---|
| Using Default: All Fields Accessible | No field level setting exists, so the role can use every field its module access allows. |
| Edit Mapping | Opens the field settings of a module so you can restrict individual fields. |
| Save the role first to configure field permissions. | A new role must be saved once before fields can be set. |
| No fields configured for this module. | The module has no fields to set. |
| Clear | Removes the settings of one row. |
Tip: Use field permissions to hide sensitive fields, such as a phone number, from roles that only need the lead name and company.
Role Permission Hierarchy
The hierarchy shows how roles relate. A parent role covers all permissions of its child roles. Click View Hierarchy at the top of the Roles page to open the diagram.
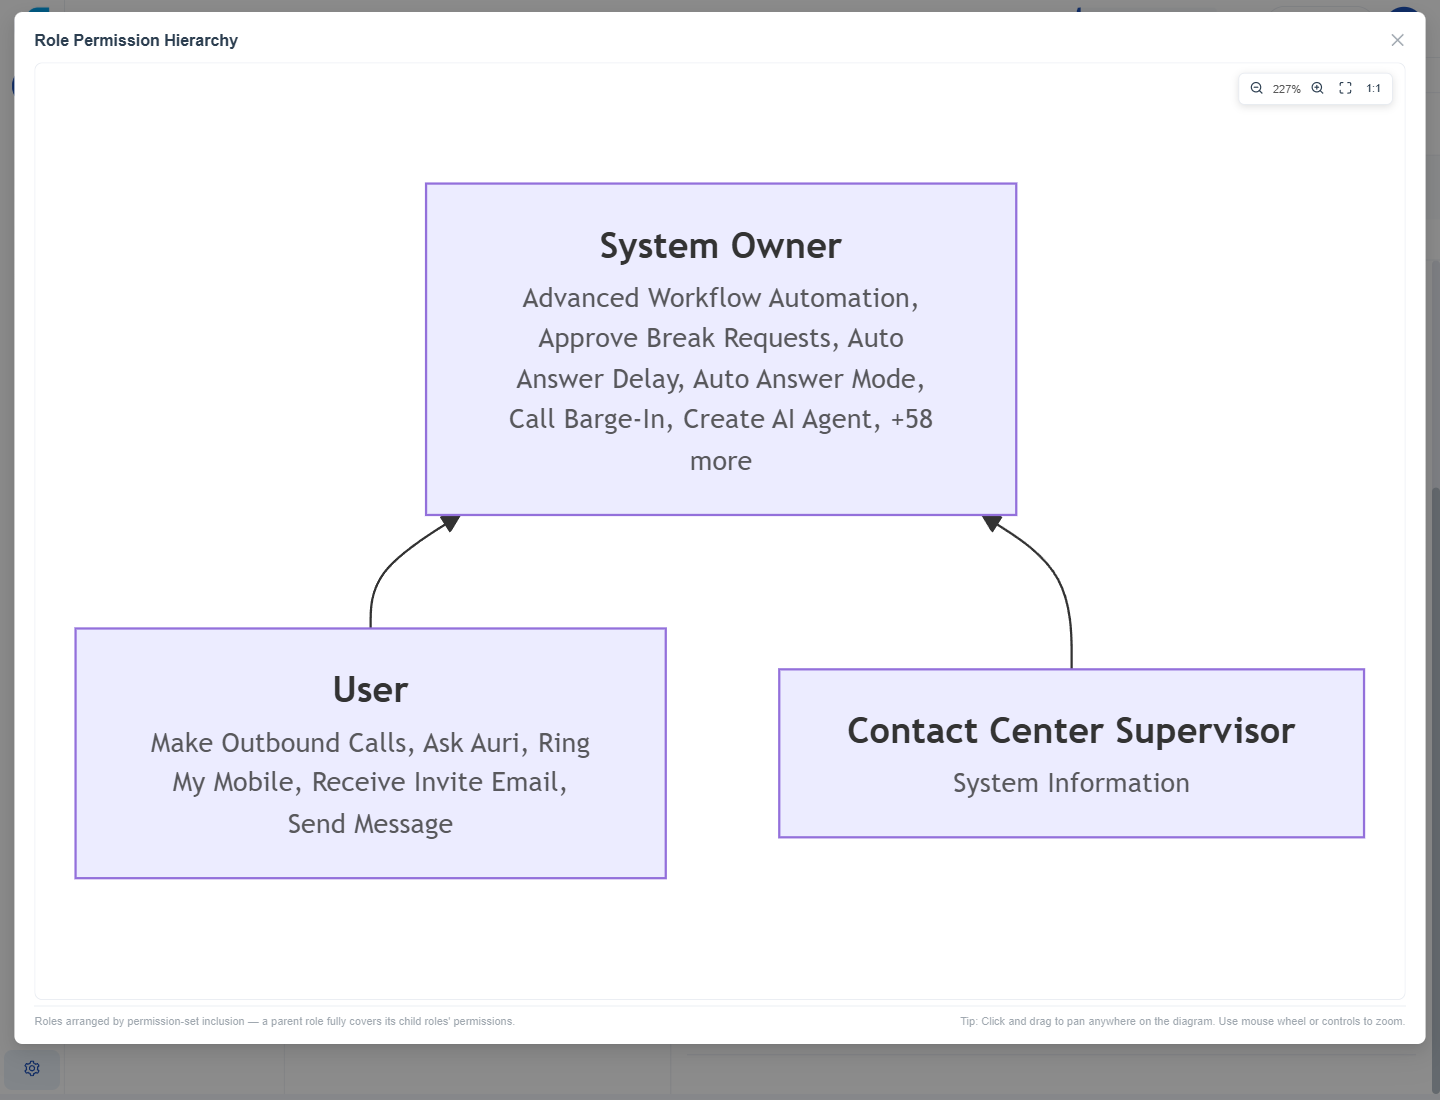
Figure 5. The Role Permission Hierarchy. System Owner sits above User and Contact Center Supervisor and covers their permissions.
- Click View Hierarchy.
- Read each box. The box names the role and lists some of its permissions. A count such as plus 58 more shows the rest.
- Drag to move the diagram and use the mouse wheel or the zoom buttons to resize it. The 1:1 button returns to the true size.
- Close the diagram.
Permission propagation
When you save a change to a role, a Confirm permission propagation window may appear. It explains that your change is saved either way, and lists the higher level roles that can also receive the new permissions so they keep covering everything this role has. Tick the roles you want to include. Anything left unticked is not changed. Then click Save.
Info: Roles are assigned to people on the Users page, as described in Users.