Users
User Management
Find, create, invite, edit, activate and deactivate accounts. The examples follow one new user, Alex Morgan.
Viewing and Searching Users
Open Configuration, User Management, Users. The list on the left shows each person with a picture, a name, the role and the extension. A green tick means the user is active. A grey tick means the user is inactive. Click a person to see the User Details on the right.
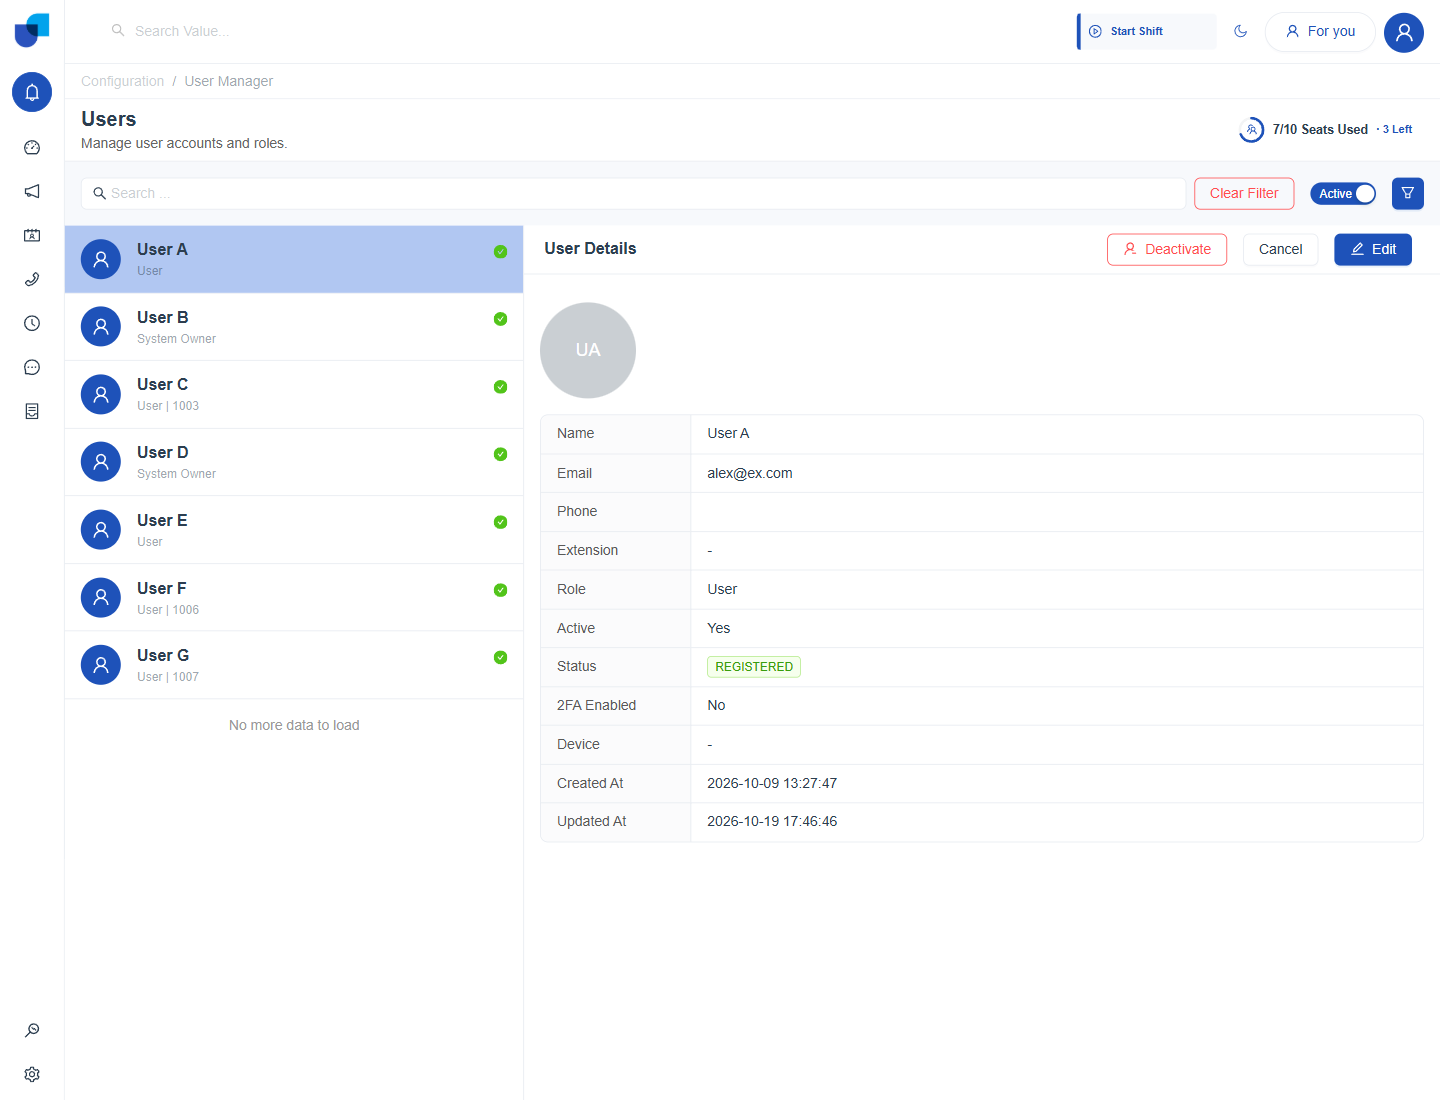
Figure 1. The Users page with an active, registered user selected. The Deactivate button sits at the top of the details.
The details panel
| Field | What it shows |
|---|---|
| Name, Email, Phone, Extension | The contact details of the person. |
| Role | The role that decides what the person can do. |
| Active | Yes when the person can sign in and uses a seat. |
| Status | Invited, Registered or Synced. |
| 2FA Enabled | Yes when a one time password is required at sign in. |
| Device | The preferred device of the person. |
| Created At, Updated At | When the record was created and last changed. |
Search and filter
- Type in the search box above the list. The list narrows as you type.
- Use the switch next to the search box. All shows every user. Active shows only active users.
- Click the filter icon for more options. Fill in one or more fields, then click Apply.
- Click Reset to clear the panel, or Clear Filter to remove the filter.
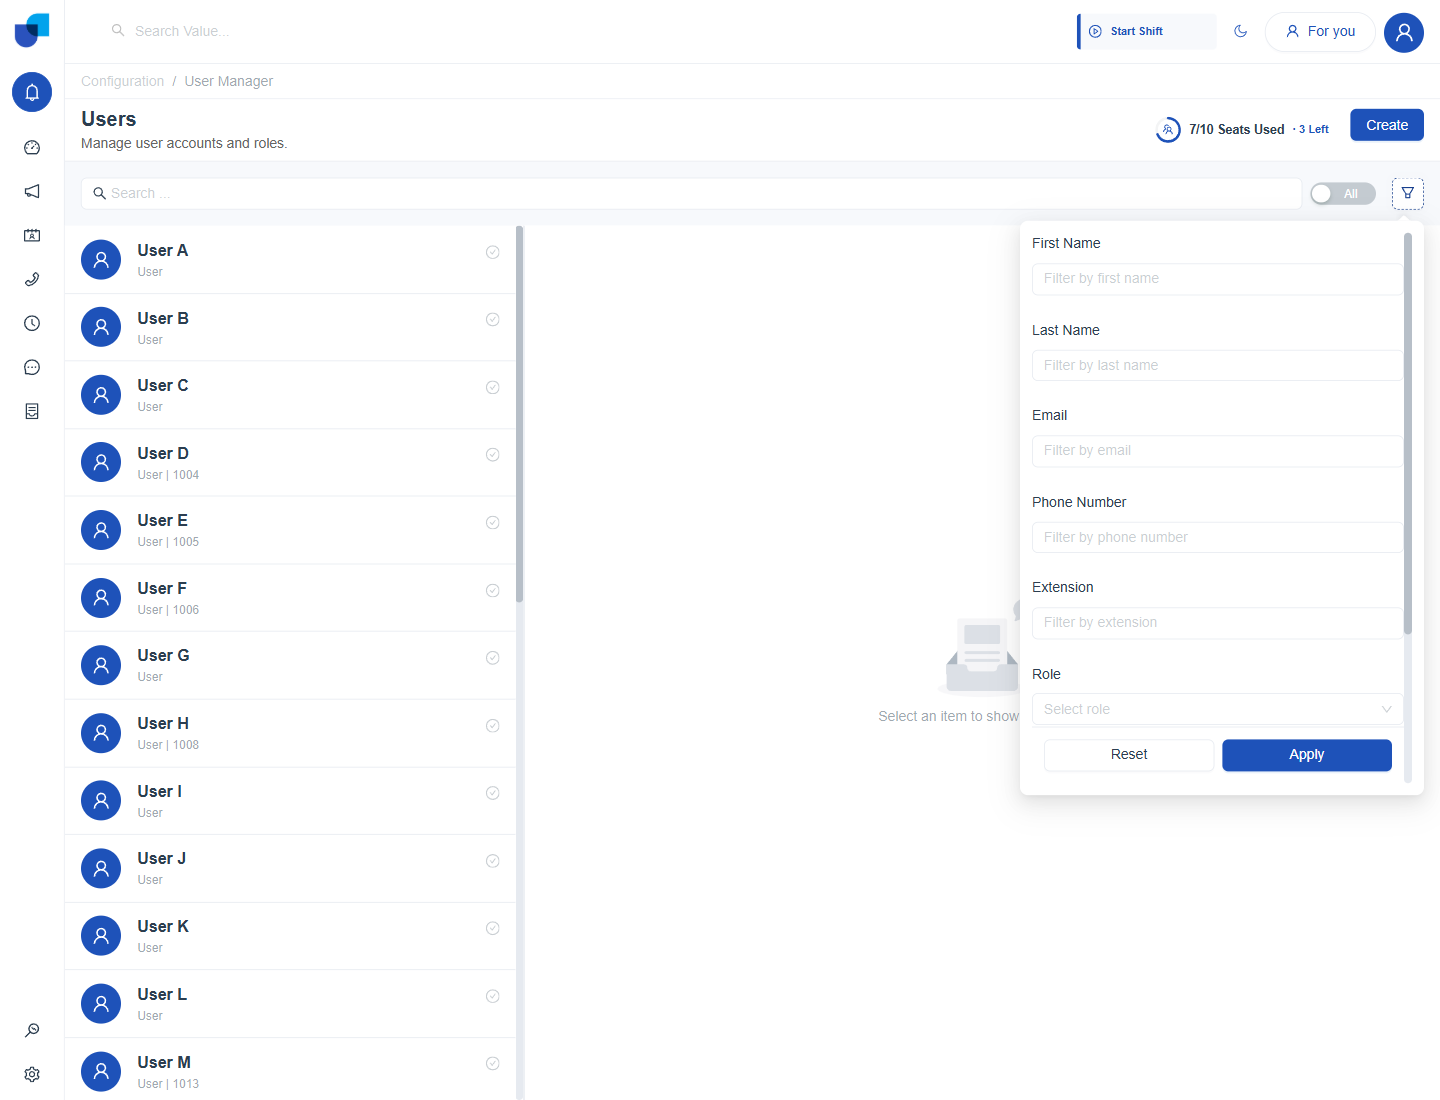
Figure 2. The filter panel of the Users page. It also offers Active and 2FA Enabled options further down.
| Filter | Use it to |
|---|---|
| First Name, Last Name, Email, Phone Number | Find one person from part of their details. |
| Extension | Find the owner of a phone extension. |
| Role | List everyone with one role. |
| Active | Choose Any, Yes or No. |
| 2FA Enabled | Choose Any, Yes or No, to find accounts without a second step. |
Creating a User
- Click Create at the top right. The Create User form opens in place of the details panel.
- Enter the First Name and the Last Name. For example Alex and Morgan.
- Enter the Email. For example alex@ex.com. The invitation goes to this address.
- Choose the country code and enter the Phone Number. Type the number without the country code. The number is checked against the country.
- Choose a Role. The list offers System Owner, User and Contact Center Supervisor, plus any role you created.
- Tick Enable 2FA if the person needs a second step.
- Click Save. The user is created and the invitation email is sent.
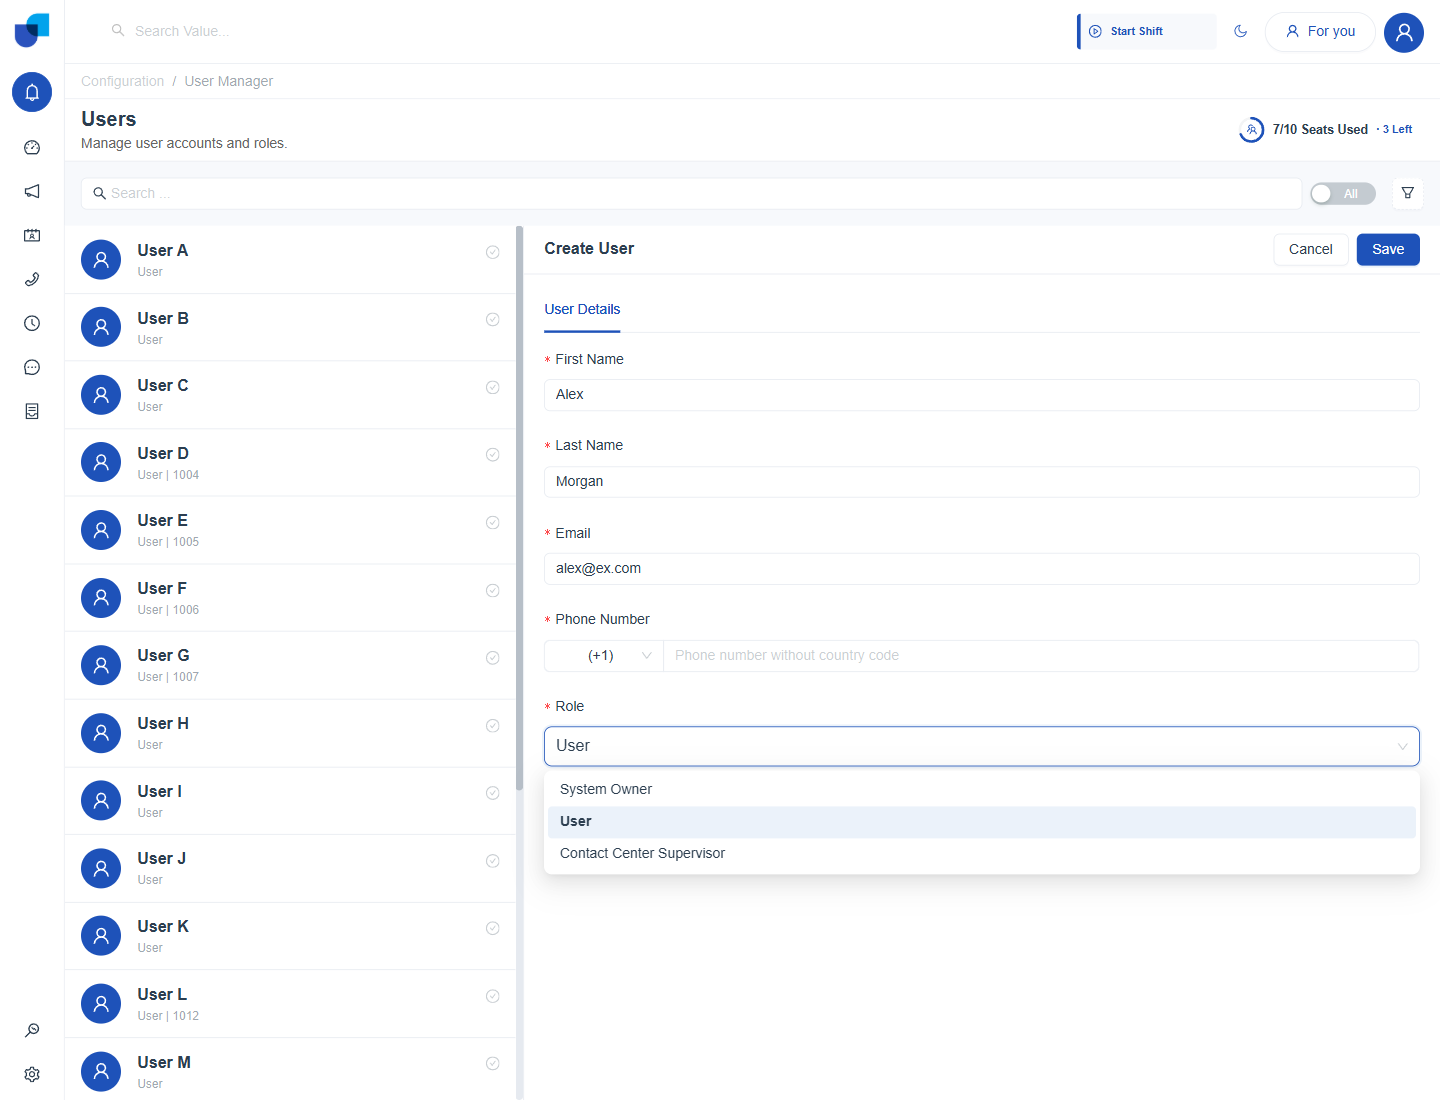
Figure 3. The Create User form for Alex Morgan, with the role list open to show the available roles.
| Message | Meaning | What to do |
|---|---|---|
| Please input First Name! | The first name is empty. | Type the first name. |
| Please input Last Name! | The last name is empty. | Type the last name. |
| Please input Email! | The email is empty. | Type the email address. |
| Please enter a valid email address! | The text is not shaped like an email address. | Check for a missing @ or a space. |
| Please input Phone Number! | The phone number is empty. | Type the number. |
| Invalid phone number for selected country | The number does not fit the chosen country code. | Change the country or correct the number. |
Important: A new user takes a seat once active. Check the seat counter before you create many users at once.
Resending an Invite Email
A person who has not yet set a password has the status Invited. Their details panel shows a Resend Invite button.
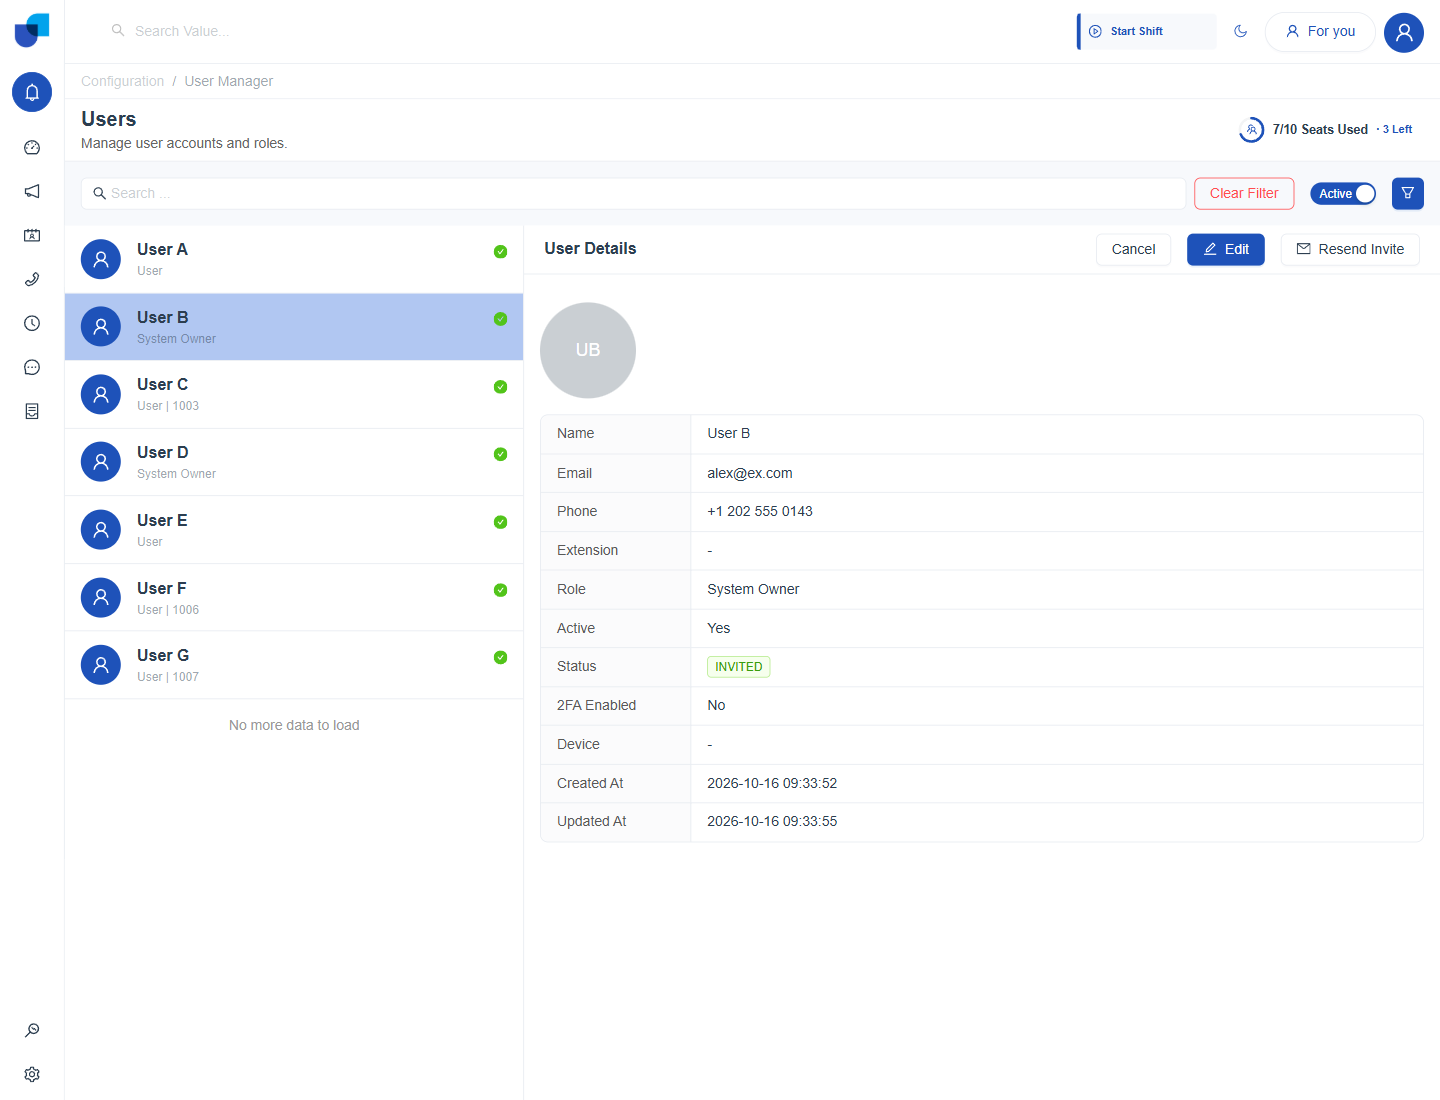
Figure 4. The details of an invited user. The Resend Invite button appears only for people who have not set a password.
- Open Users and find the person. Search by name or email, or open the filter panel.
- Check that Status shows Invited.
- Click Resend Invite. A new email with a fresh link goes to the same address.
- Ask the person to use the newest email.
Info: The link stays valid for the Invitation Expiry Window of the Users module, described in Authentication Configuration. The person then follows the steps in Email Login.
Who may create and update users is controlled in Permissions.
Activating and Deactivating a User
Deactivating stops a person from signing in without deleting their record, history or reports. It also frees a licensed seat.
Deactivate
- Select the active user.
- Click Deactivate. A question appears: Deactivate this user? This will prevent the user from accessing the system.
- Confirm. The grey tick in the list and Active No in the details show the new state.
Activate
- Switch the list to All and select the inactive user.
- Click Activate. The person can sign in again, and a seat is used.
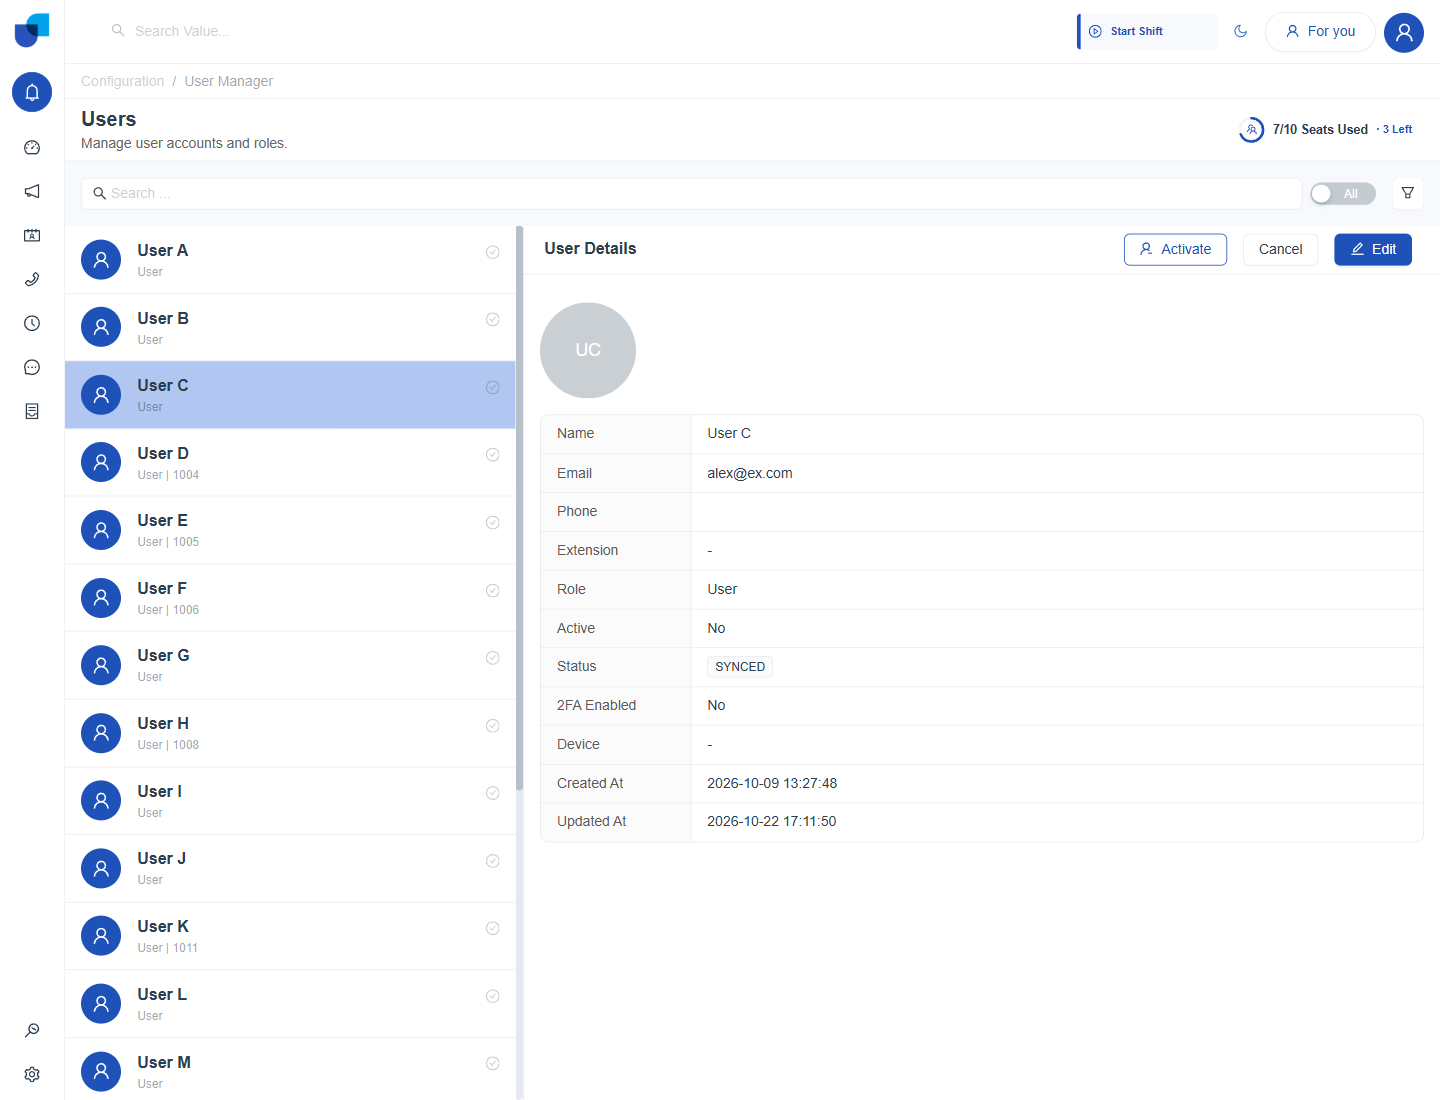
Figure 5. The details of an inactive, synced user. The Activate button replaces Deactivate.
Important: Synced users start inactive. Activate only the people who should use the platform, because each active user takes a seat.
Editing a User
- Select the person and click Edit.
- Change the details you need. You can change names, email, phone number, role, extension and the Enable 2FA tick box.
- Click Save. A message confirms the update. Click Cancel to leave without saving.
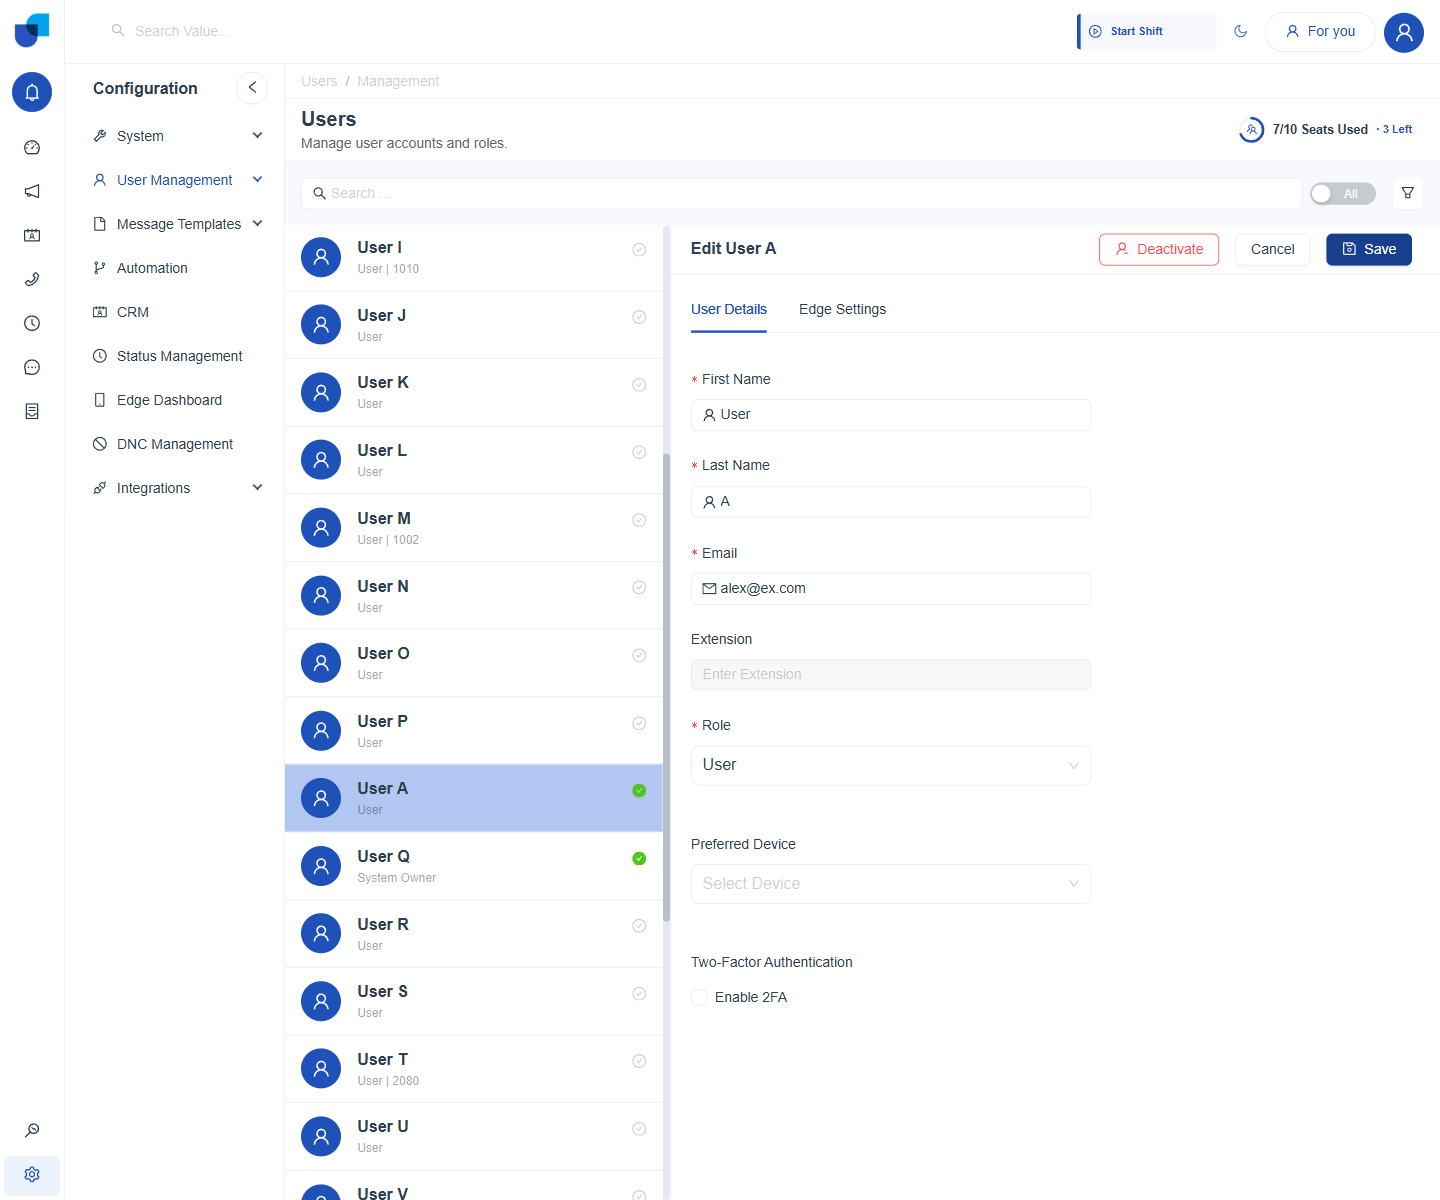
Figure 6. The Edit User form. The Enable 2FA tick box sits under Two Factor Authentication.
If the Edge module is turned on, the user also has an Edge Settings tab next to User Details. It holds the same audio and call options as the personal Edge Settings in User Profile.
Tip: Change one thing at a time when you edit a user, so the Updated At time tells you when each change was made.