Campaign Channels
A channel is the medium a campaign reaches contacts through. It is chosen on the first step of the Create Campaign wizard and decides what the Audience, Configuration, and later steps ask for.
Channels Compared
Every campaign is built on one of four channels: Voice Call, SMS, WhatsApp, or Email. All four share the same first two steps, Channel and Details, and an Audience step of the same shape. They differ in the field the Audience step asks for, in the Configuration step, and in whether a Disposition step exists. The shared steps are walked through in Campaign Builder. This page covers what is specific to each channel.
| Channel | Wizard steps | Audience field | Configuration |
|---|---|---|---|
| Voice Call | 7, including Disposition | Dialing Fields, phone type fields | Agent, IVR, or AI Agent handling, a dialing mode, an agent group, and an optional Caller ID. |
| SMS | 6 | Messaging Fields, phone type fields | An optional Template, a Sender ID, and a free text Compose SMS box with a live character and message count. |
| 6 | Messaging Fields, phone type fields | A required, pre approved Template. There is no free text compose box. | |
| 6 | Messaging Fields, email type fields | An optional Template, a From Email address, a Subject, and a drag and drop email builder with Attachments. |
The channel is fixed when the campaign is saved and cannot be changed afterward. A campaign title must also be unique across every campaign, whatever its channel.
A channel card that is greyed out on the Channel step is not currently enabled for the organization and cannot be selected.
Voice Call
Voice Call engages contacts through automated or agent led phone calls. It is the only channel whose Audience step asks for Dialing Fields, and the only channel with a Disposition step.
- Set the Dialing Fields in Audience. The phone number field the campaign is allowed to dial, for example Phone Number. The list is scoped to phone type fields only.
- Choose a handling type in Configuration. Agent, IVR, or AI Agent.
- Choose a dialing mode. Preview or Power, each with its own further options, for Agent handling.
- Select an Agent Group and, optionally, a Caller ID.
- Optionally enable Dispositions. Prefills a Call Type, Disposition, and Message for every call the campaign places.
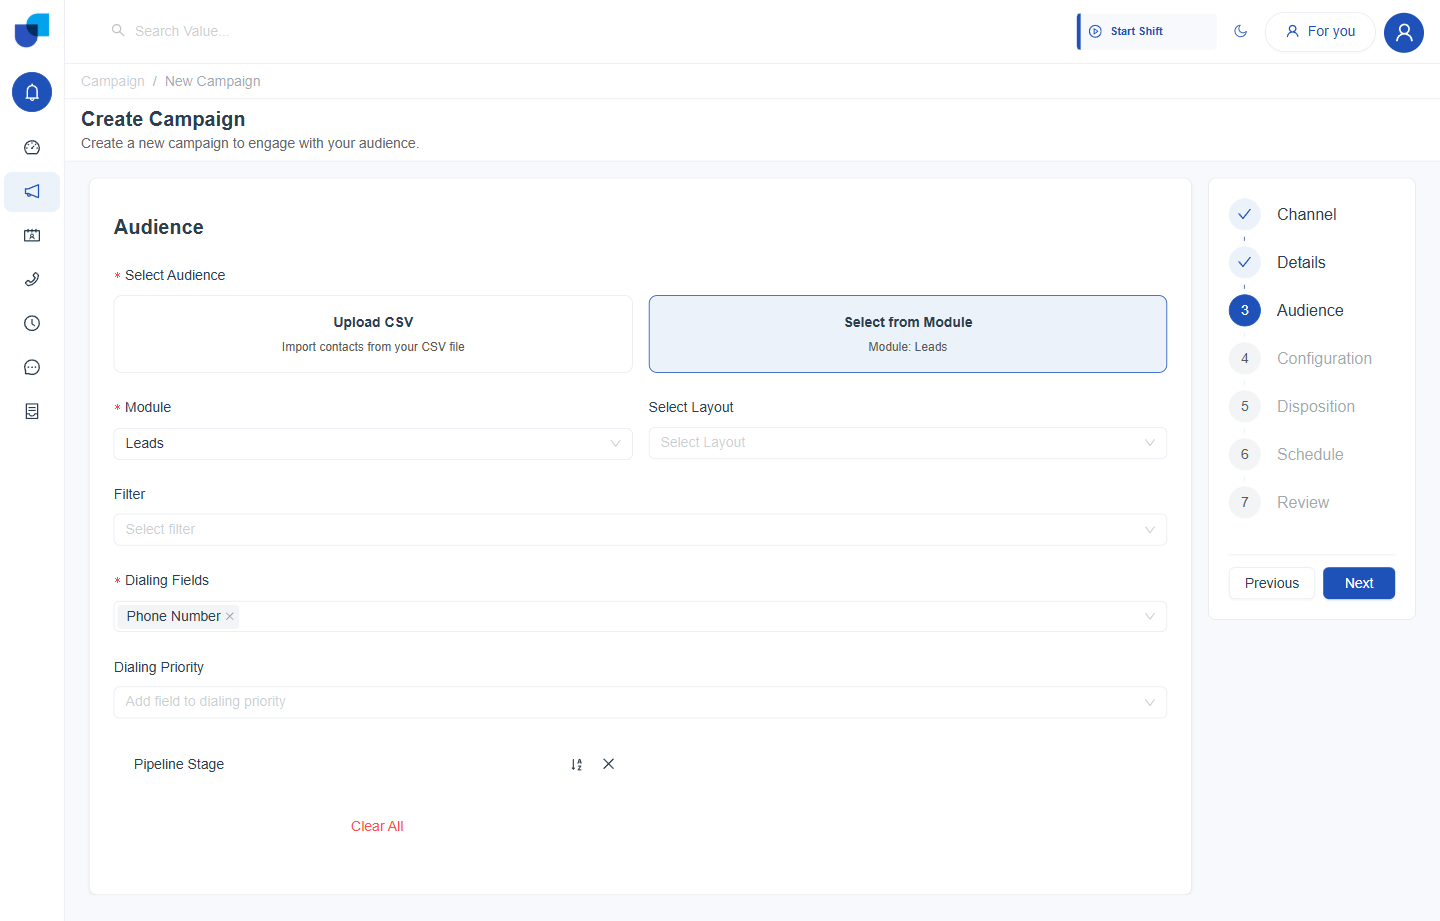
Figure 1. The Audience step for a Voice Call campaign. Dialing Fields is limited to phone type columns because it decides which number the campaign calls.
Every Voice Call field is covered in Campaign Builder, the Disposition step in Dispositions, and the Schedule step in Scheduling and Retries.
SMS
SMS delivers short, direct text messages. It has six wizard steps because there is no Disposition step. Its Audience step asks for Messaging Fields instead of Dialing Fields, and offers only phone type fields, for example Mobile Number, since that is what a text message is sent to.
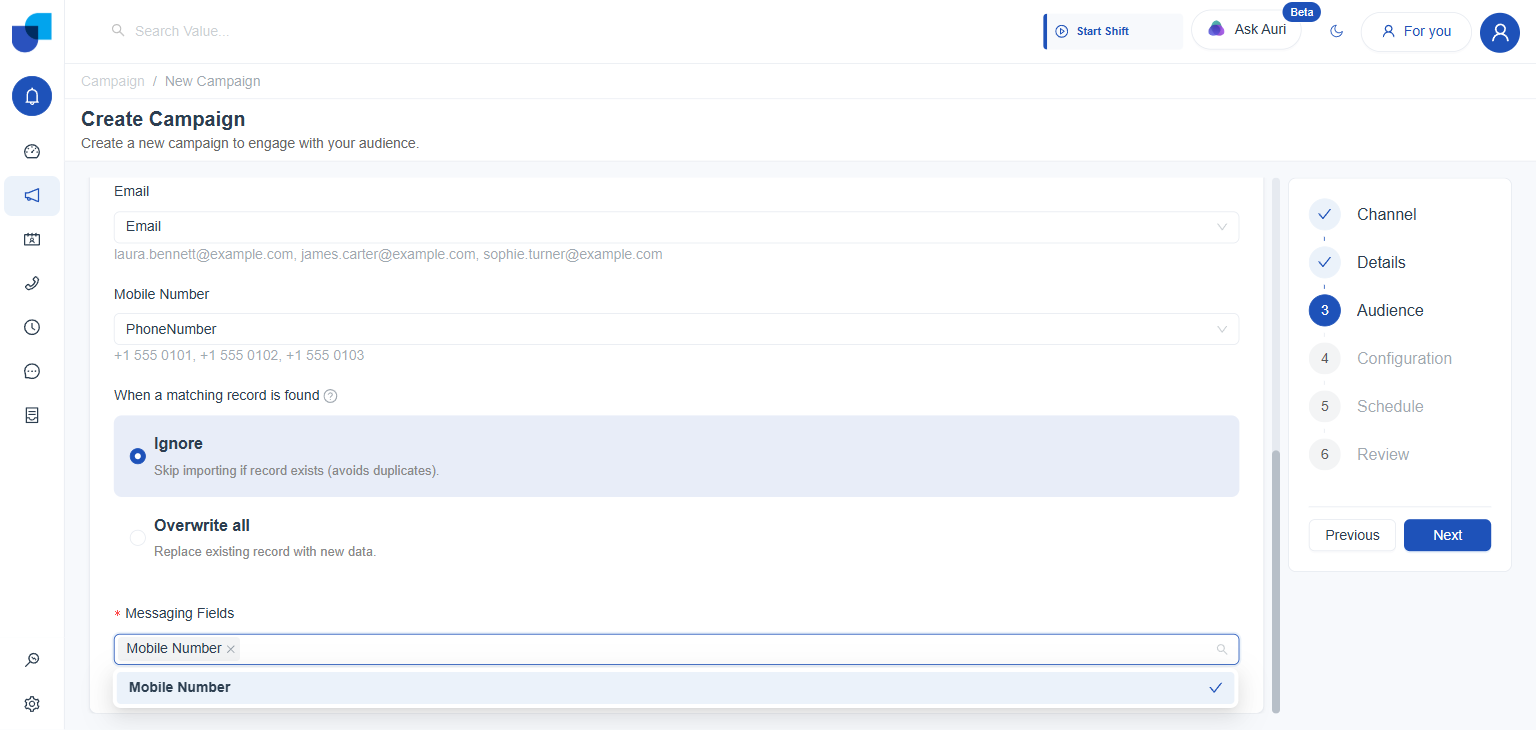
Figure 2. The Audience step for an SMS campaign. Messaging Fields offers only Mobile Number, because only phone type fields can receive a text message.
SMS Configuration
- Optionally select a Template. Starts the message from a saved SMS template. The dropdown shows No data until at least one template exists.
- Select a Sender ID. The number or ID the message appears to come from, drawn from the sender IDs configured for the organization.
- Write the message in Compose SMS. A free text box with a live character count and message count underneath it, and a preview beside it.
- Optionally click the Email or Mobile Number chips under the box.
Each chip inserts that field as a placeholder such as
{{Mobile Number}}at the cursor. The preview substitutes a sample value from the audience, and the counters update to match.
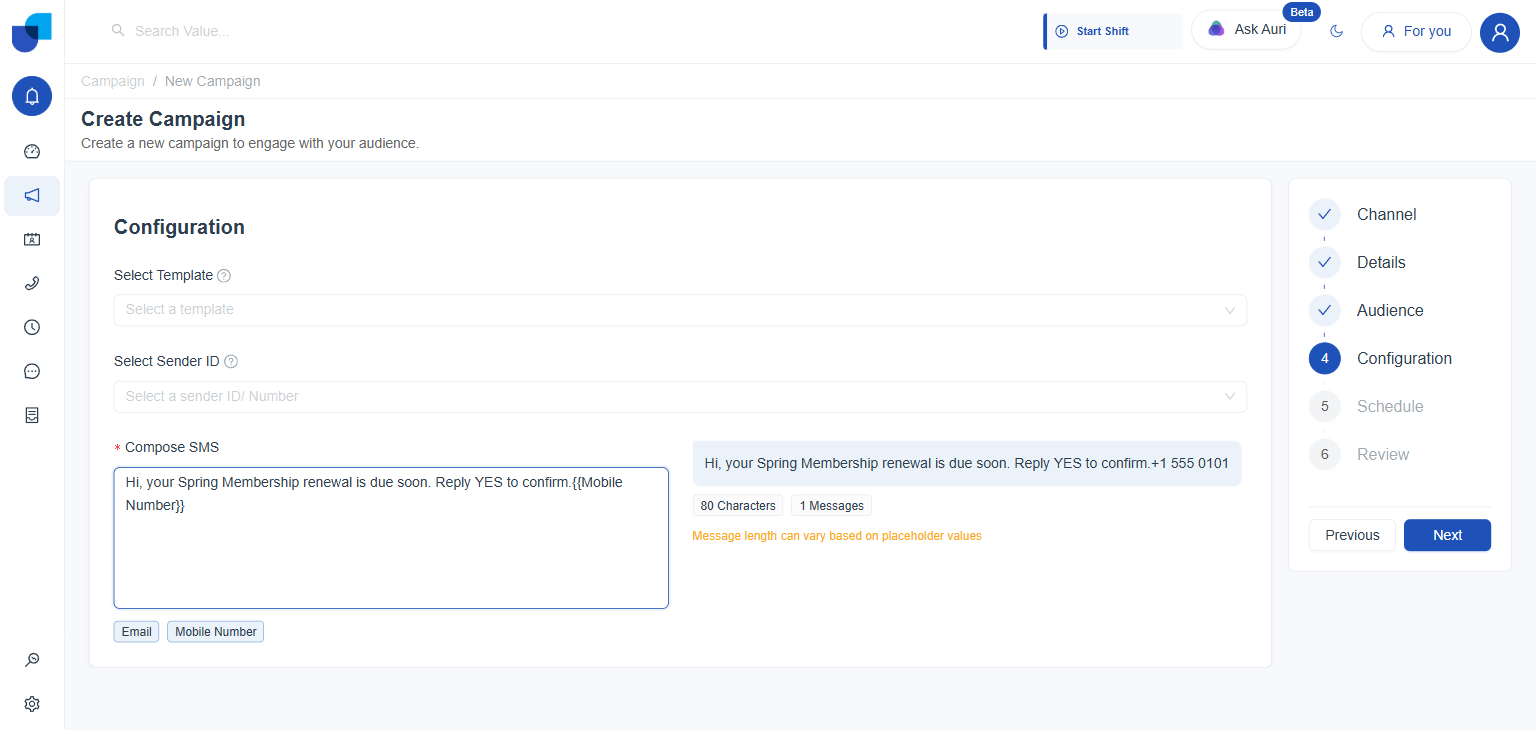
Figure 3. The SMS Configuration step with a merge field inserted. A note beneath the counters explains that final message length depends on each contact's placeholder values.
WhatsApp
WhatsApp reaches contacts on the messaging app of the same name. Like SMS it has six wizard steps and offers Messaging Fields scoped to phone type columns, but its Configuration step is simpler: a single required Template and no free text compose box.
- Set the Messaging Fields in Audience. Mobile Number is the only option offered, exactly as with SMS.
- Select a Template. Required. The dropdown lists every pre approved WhatsApp template configured for the organization.
- Review the preview beneath the field. Once a template is chosen, its text is shown as a chat bubble, exactly as a contact would see it.
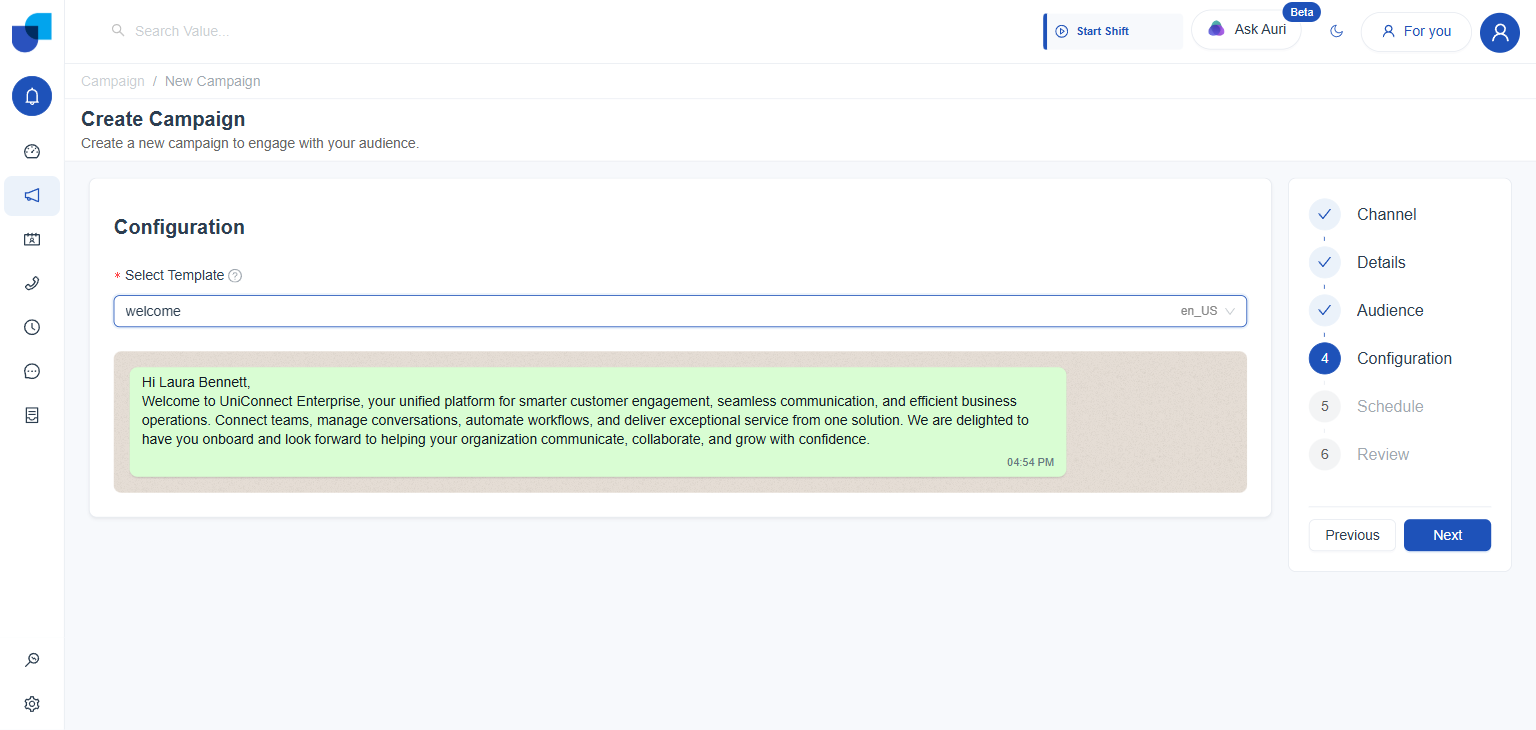
Figure 4. The WhatsApp Configuration step with a template selected. There is no free text compose box, unlike SMS.
A WhatsApp campaign can only send an approved Template. A campaign without a suitable template cannot be configured past this step until one exists.
Email
Email sends rich text messages built in a drag and drop editor. Its Audience step asks for Messaging Fields scoped to email type fields, and its Configuration step is the most involved of the four channels.
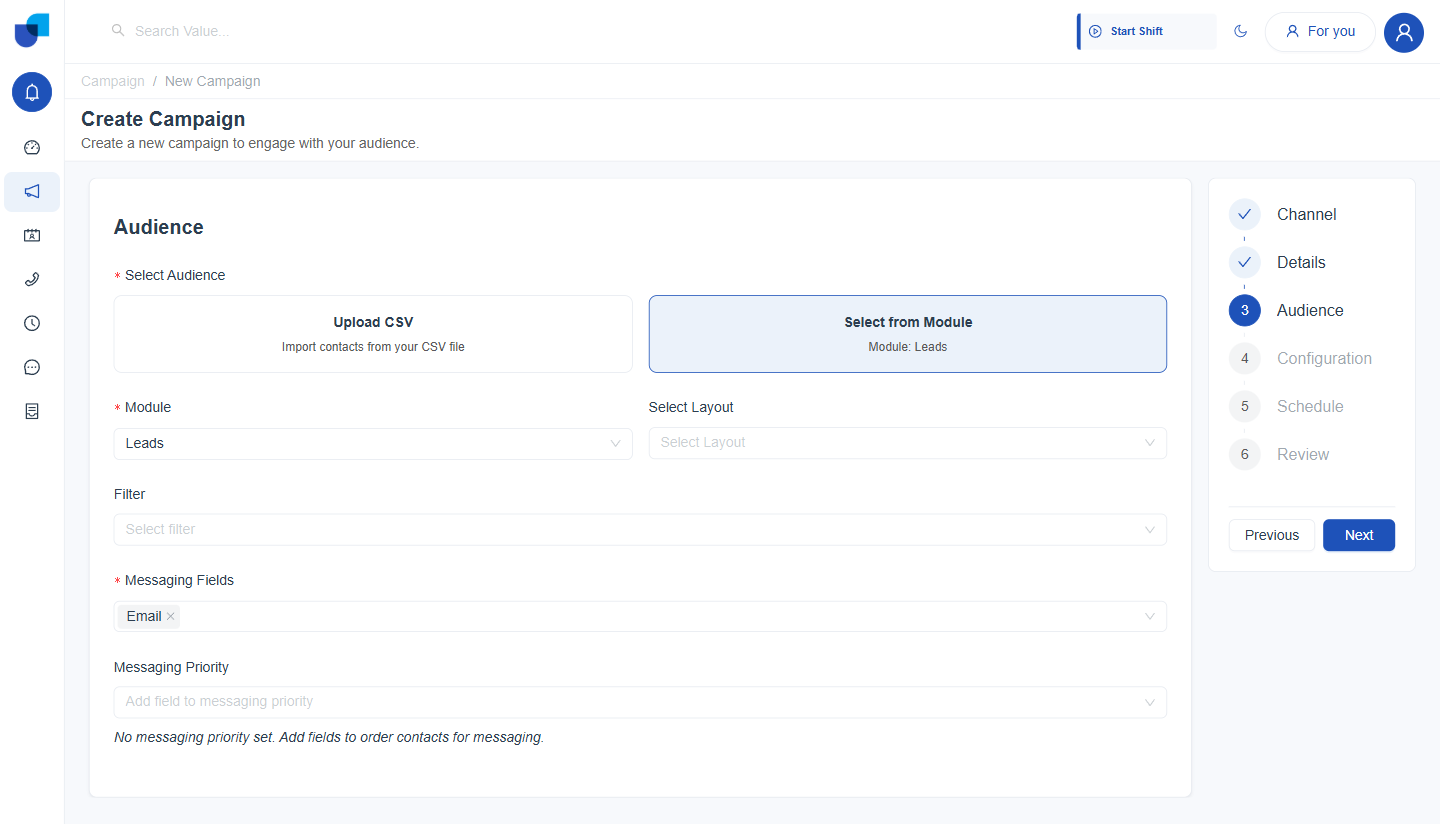
Figure 5. The Audience step for an Email campaign. Messaging Fields offers only Email, the mirror image of SMS and WhatsApp offering only a phone field.
Email Configuration
- Optionally select a Template. Templates are filtered by the module chosen as the audience. The dropdown shows No data when none match.
- Select a From Email address. The sending address recipients see, chosen from the addresses configured for the organization.
- Enter a Subject. Required.
- Build the Email Content. Required. Build, Preview, and Code tabs sit above the canvas, beside a desktop and mobile view toggle and a Full Screen option.
- Optionally attach files under Attachments. The Add Files button beneath the canvas opens the file picker.
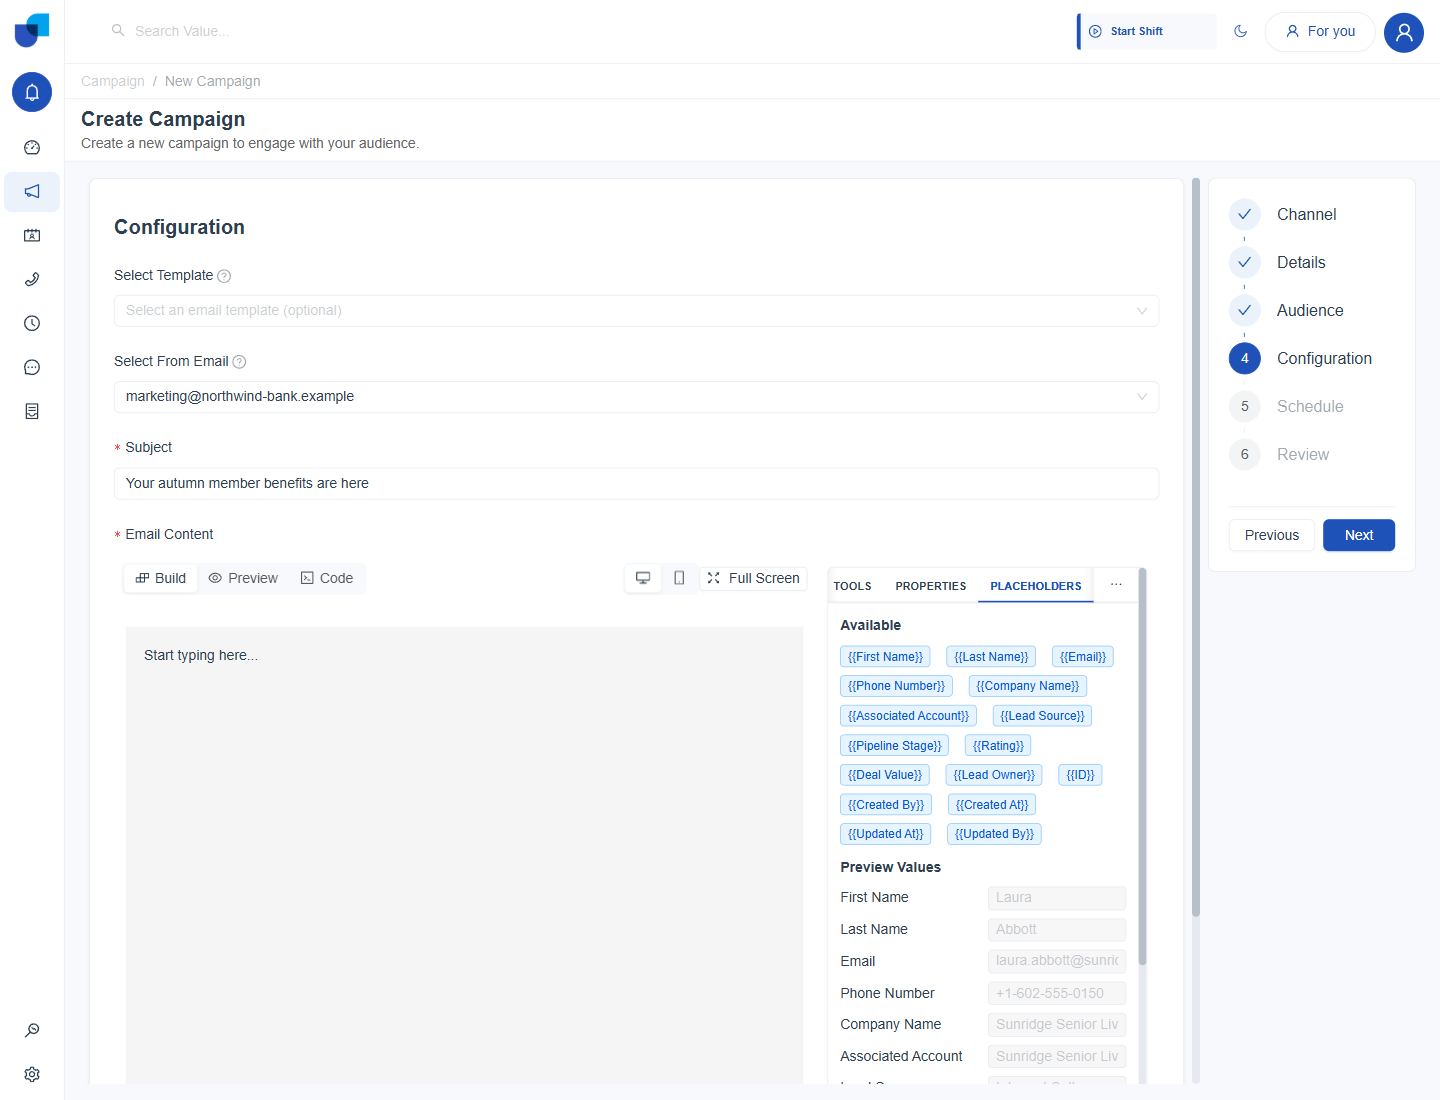
Figure 6. The Email Configuration step. The canvas is on the left, and the right hand panel switches between Tools, Properties, Placeholders, and Layers.
The Email Editor Panels
| Panel | What it holds |
|---|---|
| Tools | The block library, dragged onto the canvas. Layout blocks are Section, Column, Group, Wrapper, and Hero. Content blocks are Text, Image, Table, Divider, Spacer, and Raw HTML. Interactive blocks follow beneath them. |
| Properties | The settings of the block currently selected on the canvas. It reads No block selected until one is chosen. |
| Placeholders | Every mergeable field from the audience module, such as {{First Name}} or {{Email}}, with a Preview Values list of sample data used in Preview. |
| Layers | The structure of the email as a list of its blocks. |
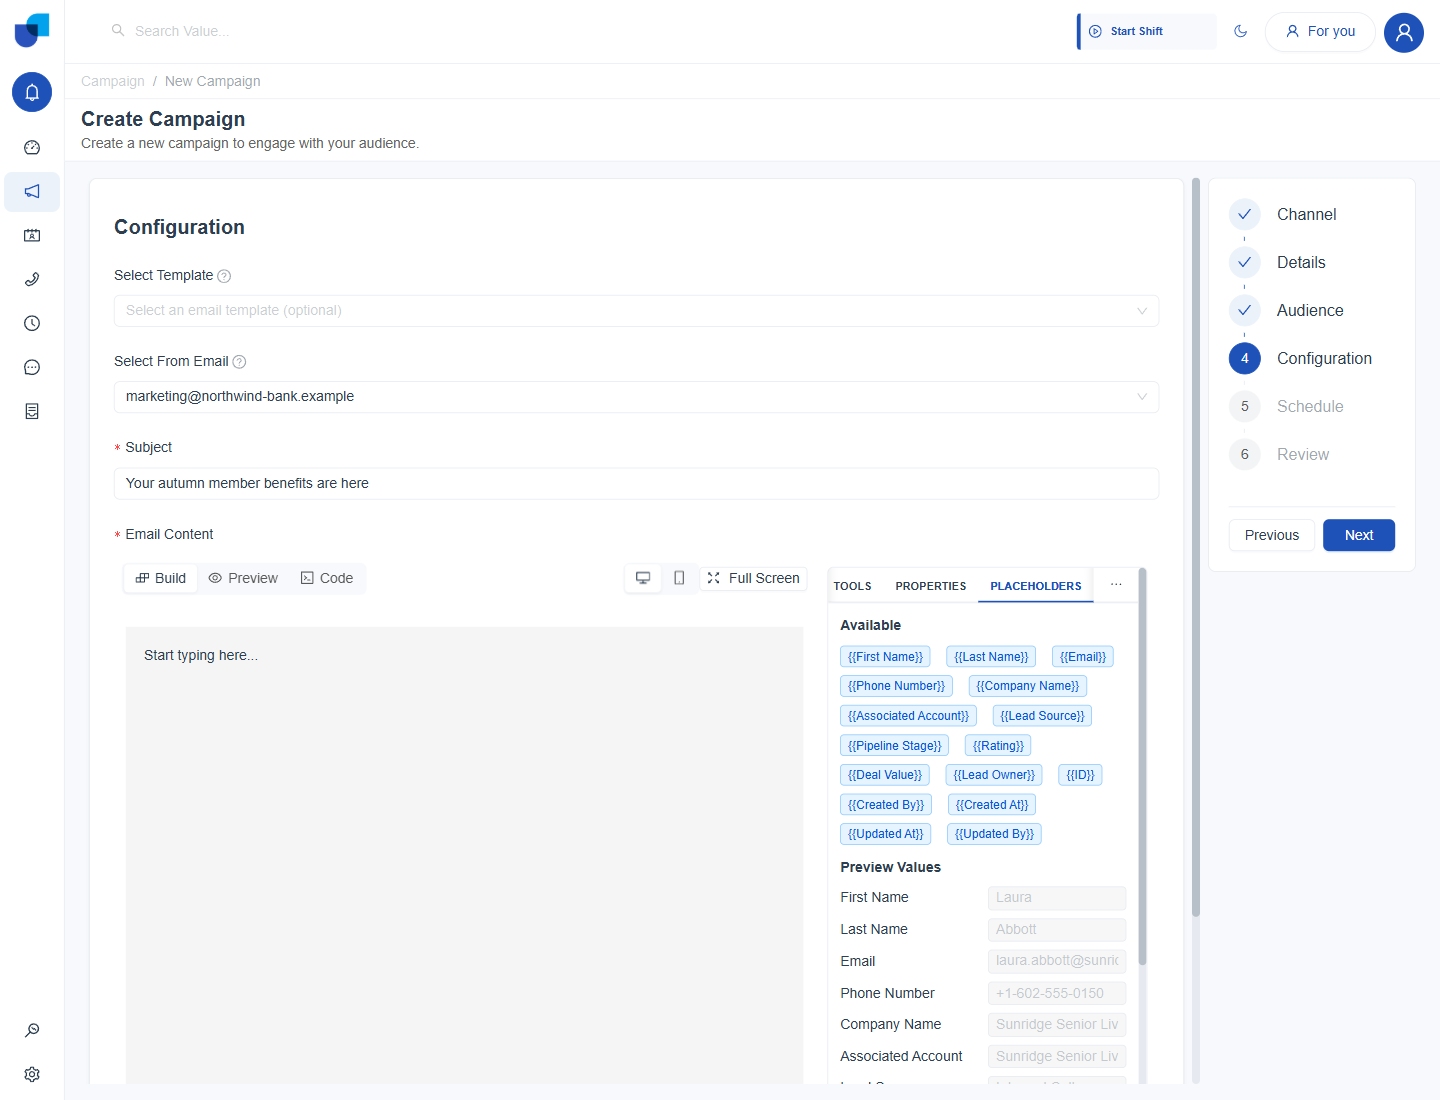
Figure 7. The Placeholders panel lists every mergeable field, each with a sample value used when previewing the email.
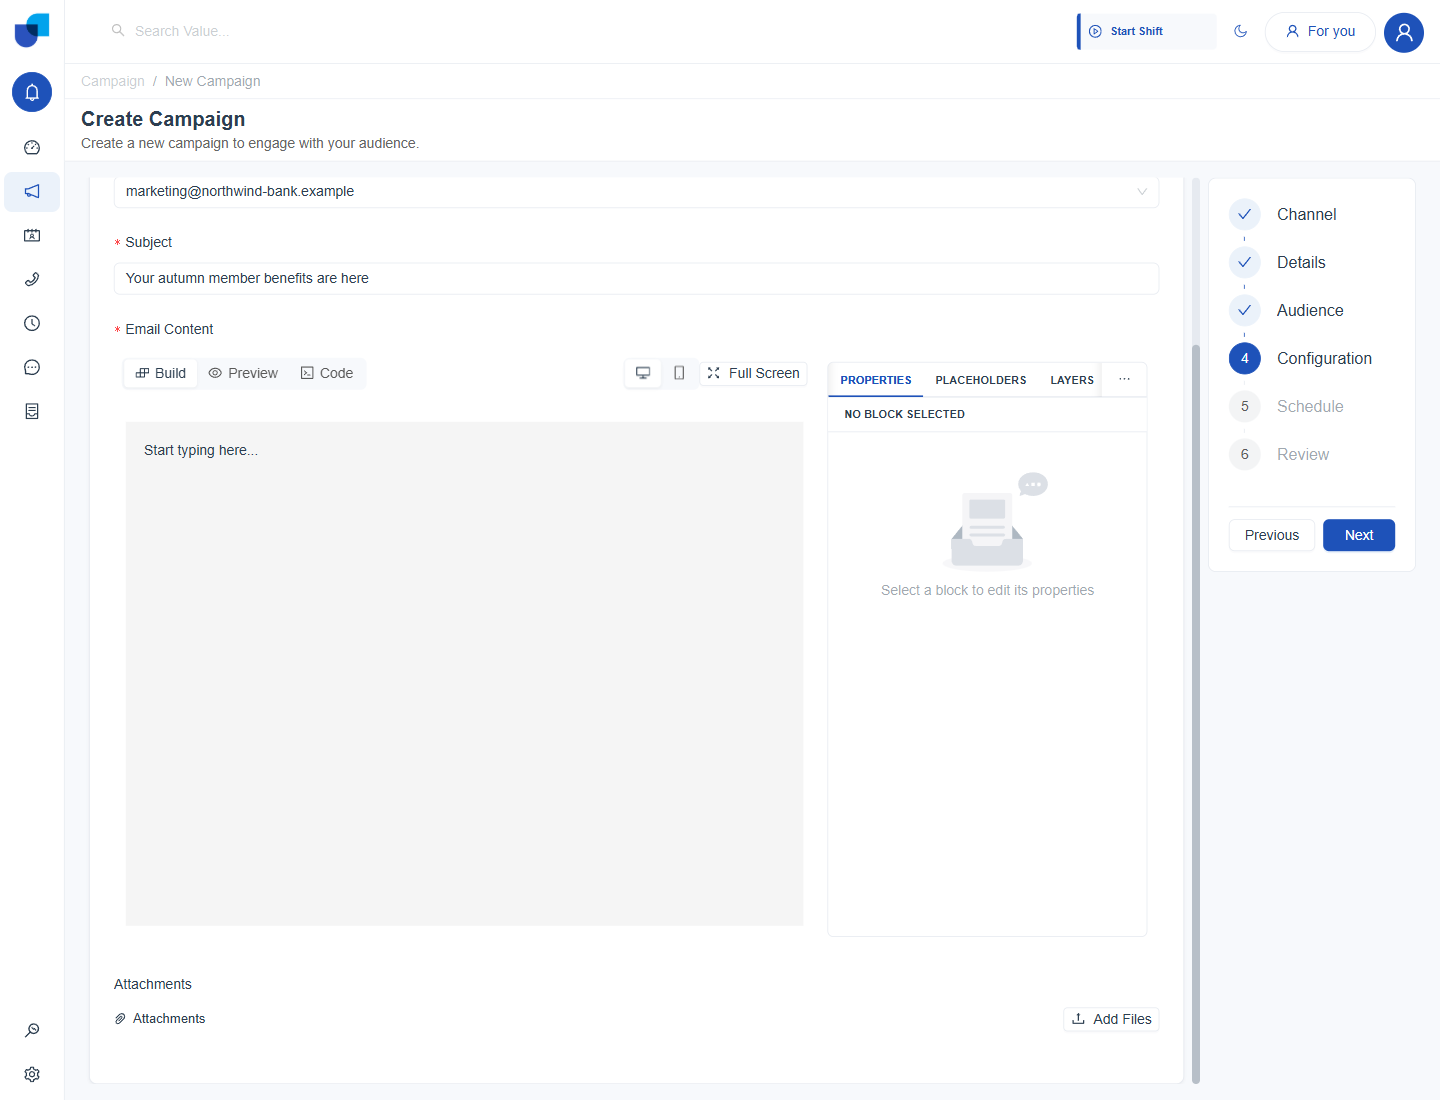
Figure 8. The lower part of the Email Configuration step, with the Attachments section and its Add Files button.