Campaign Filters
The Filter field sits inside the Audience step of the Create Campaign wizard, directly beneath Module, whenever Select from Module is chosen as the audience source. A filter is not built inside Campaign. It lists the named filters already saved on that module's own record list elsewhere in the platform, and only those saved against the specific module currently chosen.
Where a Filter Comes From
A saved filter is built from a module's own list view, reached under CRM rather than Campaign. Clicking the filter icon on the Leads list opens a panel that holds the filters already saved for the module, followed by a condition row for every field on the module. Each row has an operator suited to its type: Contains or Equals for text, In for a picklist or multi select, Is for a related record lookup, and a date picker for date fields.
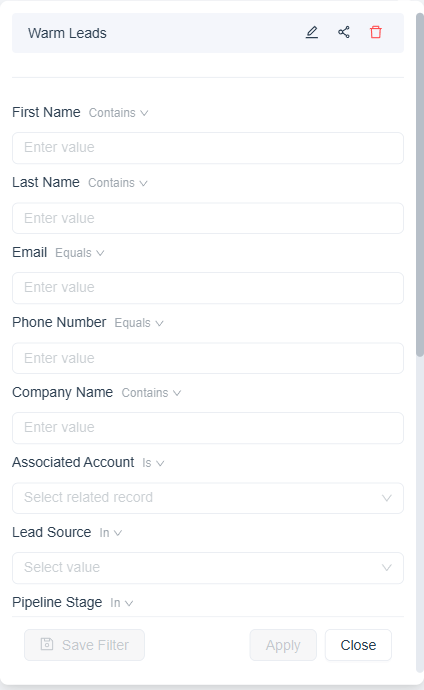
Figure 1. The Leads module's Filter panel. The saved Warm Leads filter sits at the top, with edit, share, and delete icons, above the condition rows.
Building and Saving a Filter
- Open the module's own list and click its filter icon. Every field the module carries appears as its own condition row.
- Set one or more conditions. A single condition, for example Rating In Warm, is enough to enable Save Filter.
- Click Save Filter and name it. A Save New Filter panel opens inline with a name field. Save stays disabled until a name is entered.
Applying, Sharing, and Managing a Saved Filter
Each saved filter is listed at the top of the panel with three icons beside its name.
| Control | What it does |
|---|---|
| Filter name | Clicking the name applies the filter to the list. A chip such as Rating: Warm appears above the table, the list narrows, and a Clear Filters button appears beside the search box. |
| Edit icon | Changes the saved filter. |
| Share icon | Opens the Share Filter dialog, where users, groups, or roles are added under People with access. General access is Restricted, so only people explicitly shared can open the filter. |
| Delete icon | Removes the saved filter. |
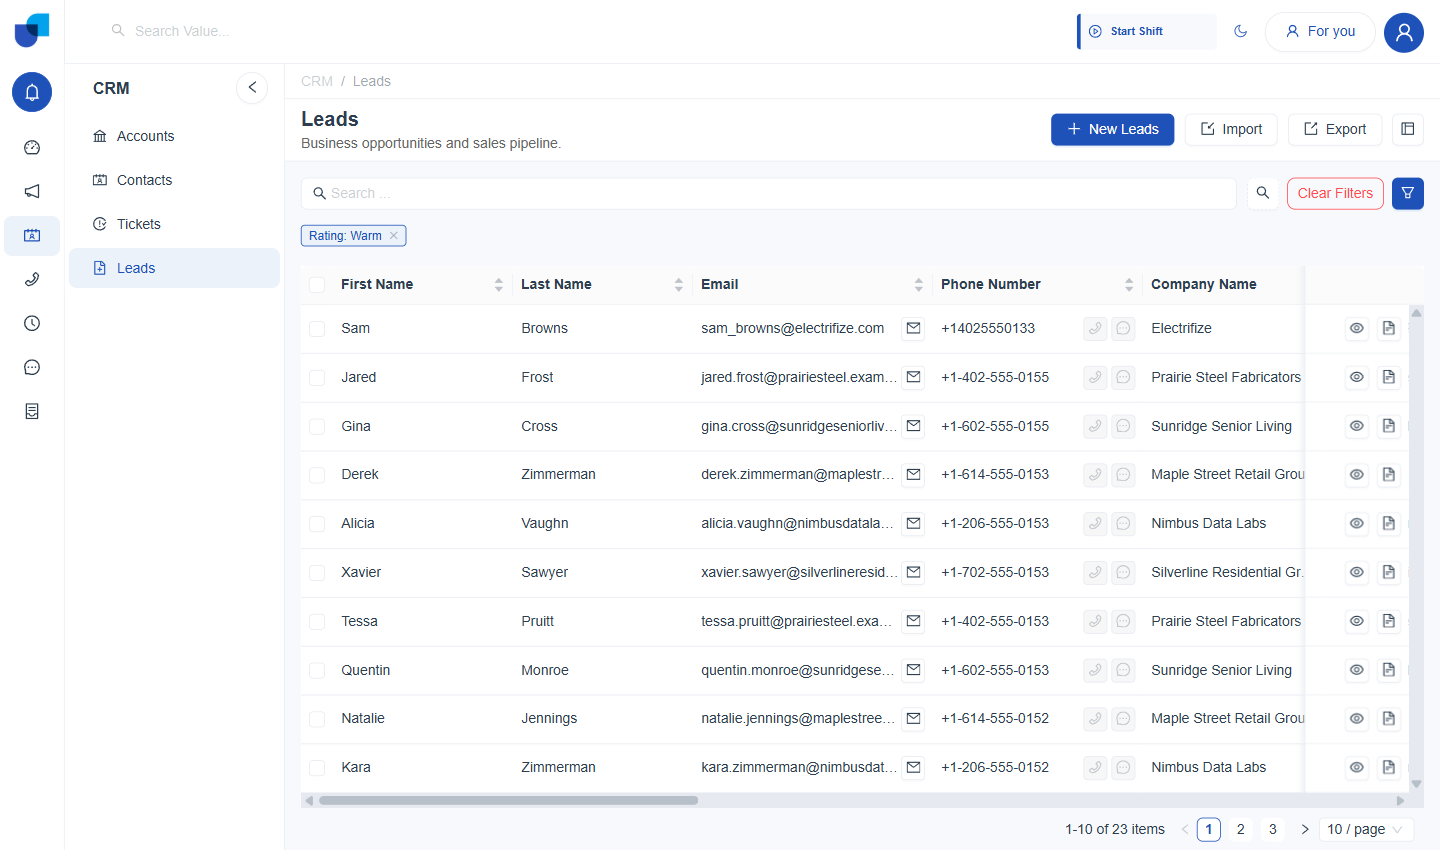
Figure 2. The Leads list after the Warm Leads filter is applied, with its Rating: Warm chip and a Clear Filters button.
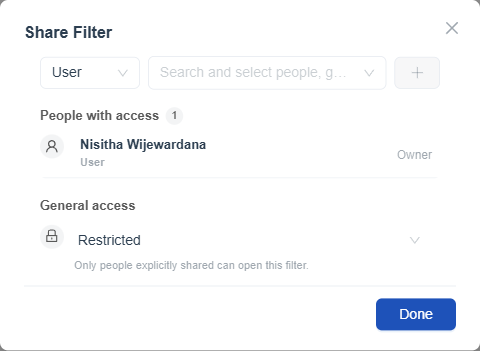
Figure 3. The Share Filter dialog. General access is Restricted, which means only people explicitly shared can open the filter.
Using a Saved Filter in a Campaign
A filter saved on the Leads module appears in the campaign's Audience step as soon as Leads is chosen as the Module. No further step is needed.
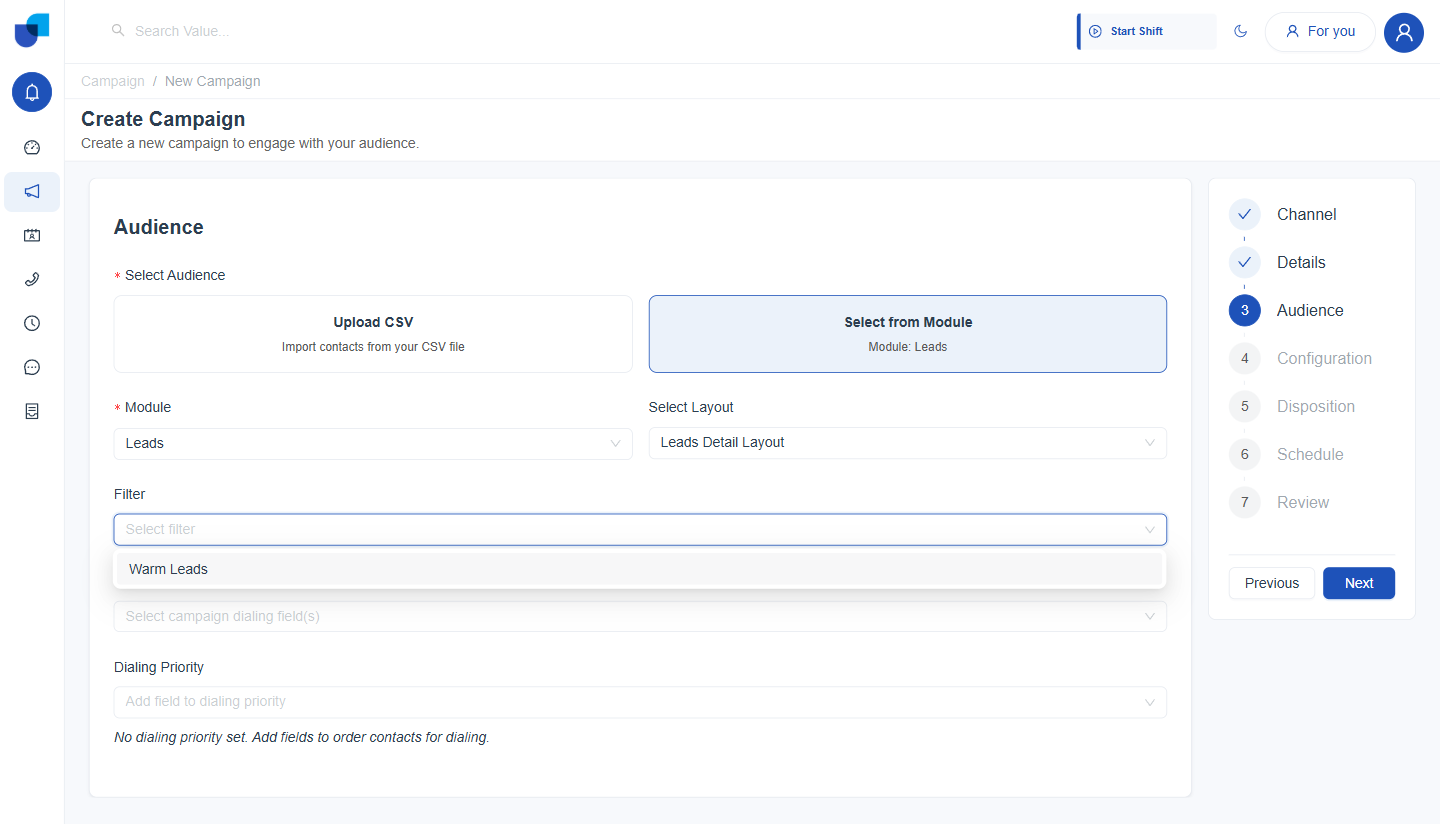
Figure 4. The Filter dropdown in the Audience step, listing the filters saved on the Leads module.
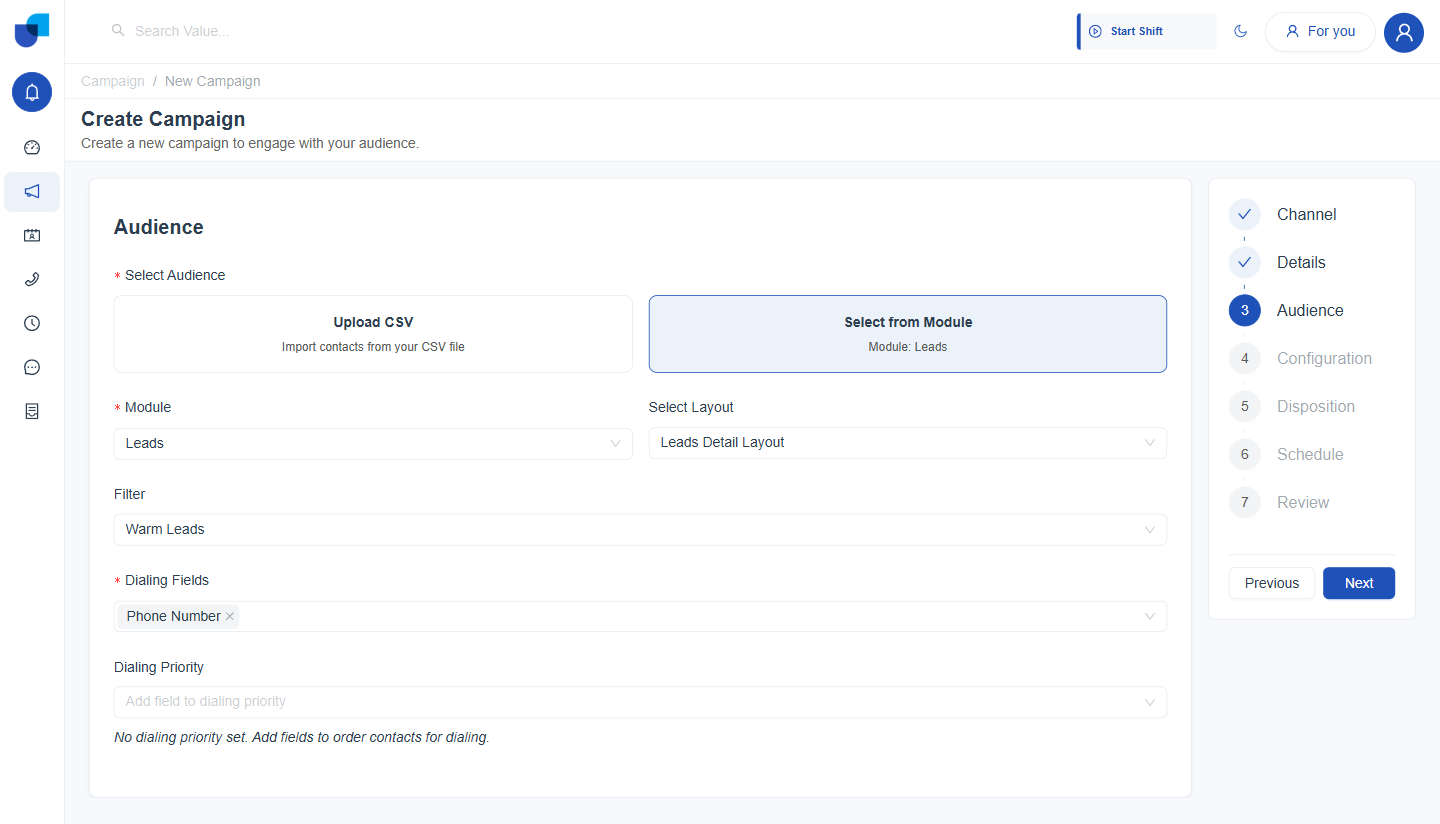
Figure 5. The Audience step with the Warm Leads filter selected, so only matching leads are pulled into the campaign.
A saved filter is scoped to the module it was built on. If a module has no saved filter, the Filter dropdown for that module reads No data until one is saved on that module's own list.
Where This Fits
Building and saving a filter is a general CRM capability, used wherever a module's list view appears. Campaign's part in it is small: the Audience step offers whatever filters already exist on the chosen Module and narrows the records pulled into the campaign to the ones that filter matches. The full Audience step is described in Campaign Builder.