DNC Management
DNC Management is a shared list of do not contact entries, reached under Configuration rather than inside the Campaign module itself. Each entry blocks one Channel and Value combination, a phone number, an email address, or an email domain, from one Type of outreach, Promotional or Transactional, across the platform.
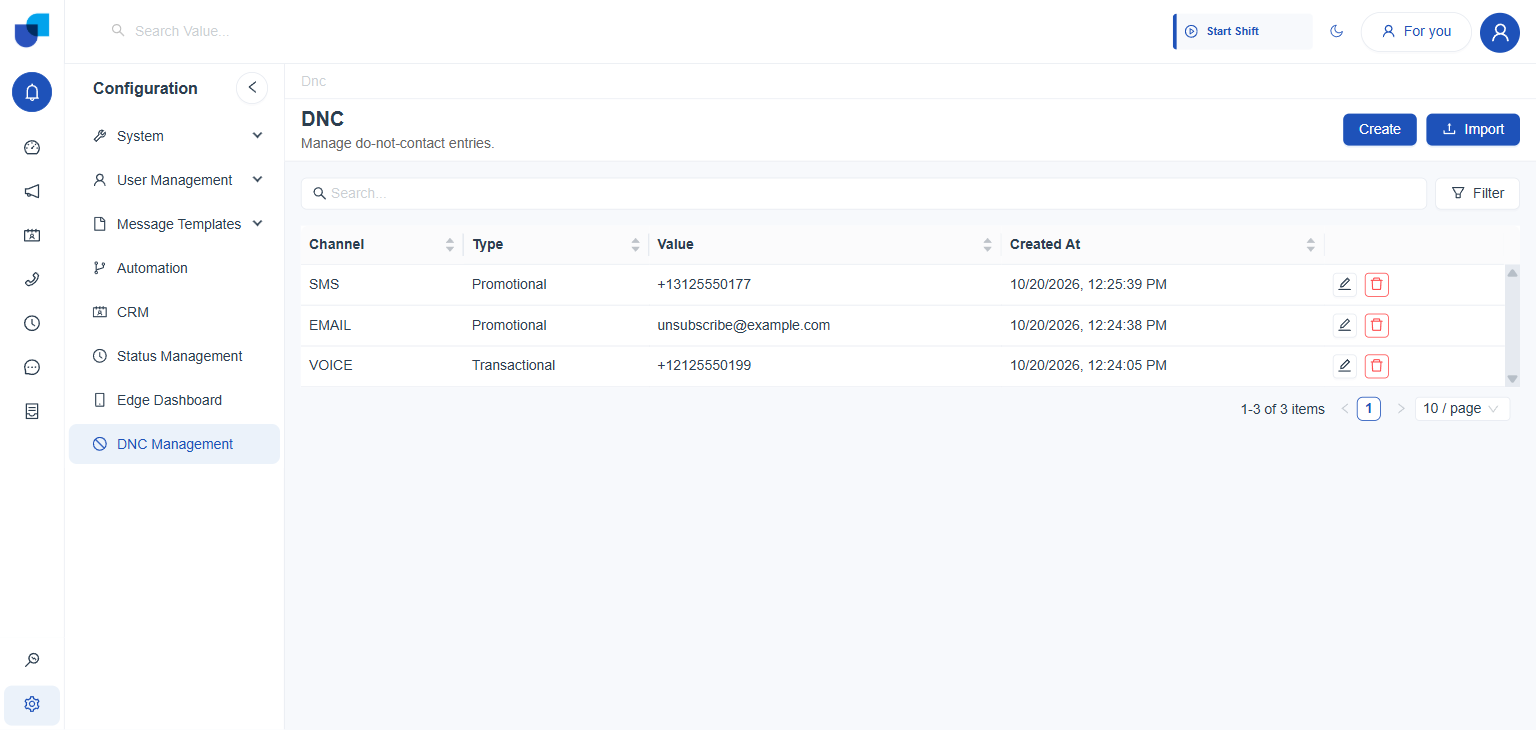
Figure 1. The DNC list. Every entry shows its Channel, Type, Value, and the date and time it was added.
What a DNC Record Holds
| Field | Meaning |
|---|---|
| Channel | The outreach medium the entry blocks: Voice, Email, SMS, or WhatsApp. |
| Type | Promotional or Transactional. A number or address can be blocked for one Type while still reachable for the other, since each combination is its own record. |
| Value | A phone number for Voice, SMS, and WhatsApp, or an email address or a bare domain such as @domain.com for Email. A bare domain blocks every address at that domain in one entry. |
Creating a DNC Record
The Value field changes shape depending on the Channel chosen.
- Click Create. Opens the Create DNC Record panel, with Channel and Type required.
- Choose a Channel. Voice, Email, SMS, or WhatsApp. The Value field beneath it changes to suit the choice.
- For Voice, enter a phone number. Value becomes a Phone Number field, with a country selector and its dial code beside a digits only input.
- For Email, enter an address or a domain.
Value becomes a plain text field. Its helper text states that it accepts a full address such as
user@domain.comor a bare domain such as@domain.com. - Choose a Type and click Create. Promotional or Transactional. The new record appears in the list immediately.
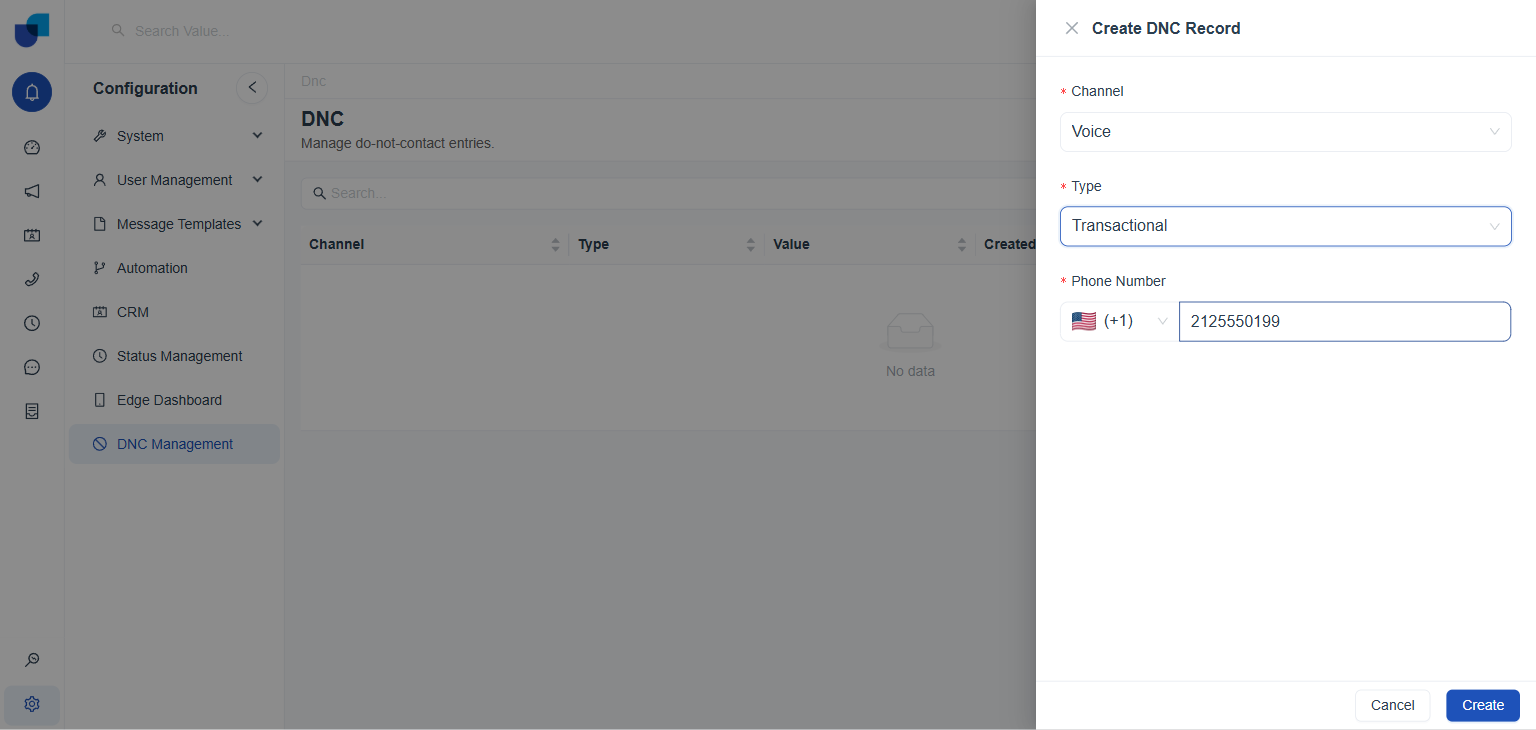
Figure 2. Creating a Voice entry. The Value field becomes a Phone Number input with its own country selector.
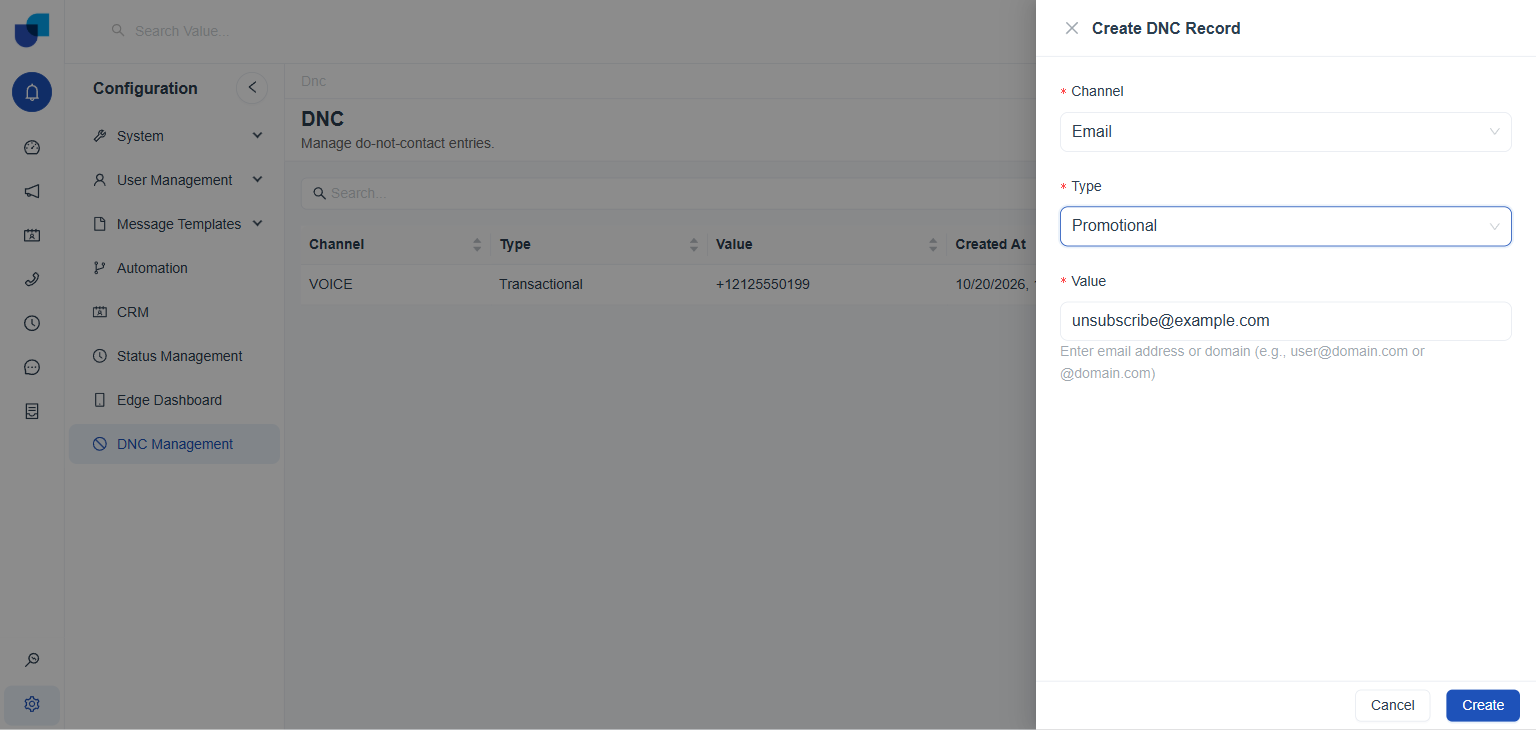
Figure 3. Creating an Email entry. The helper text under Value confirms that a bare domain such as @domain.com is also accepted.
Editing and Deleting a Record
The edit icon on a row reopens the same Channel, Type, and Value fields, with one addition: a read only Record Information block beneath them that lists the record's ID and its Created and Updated timestamps.
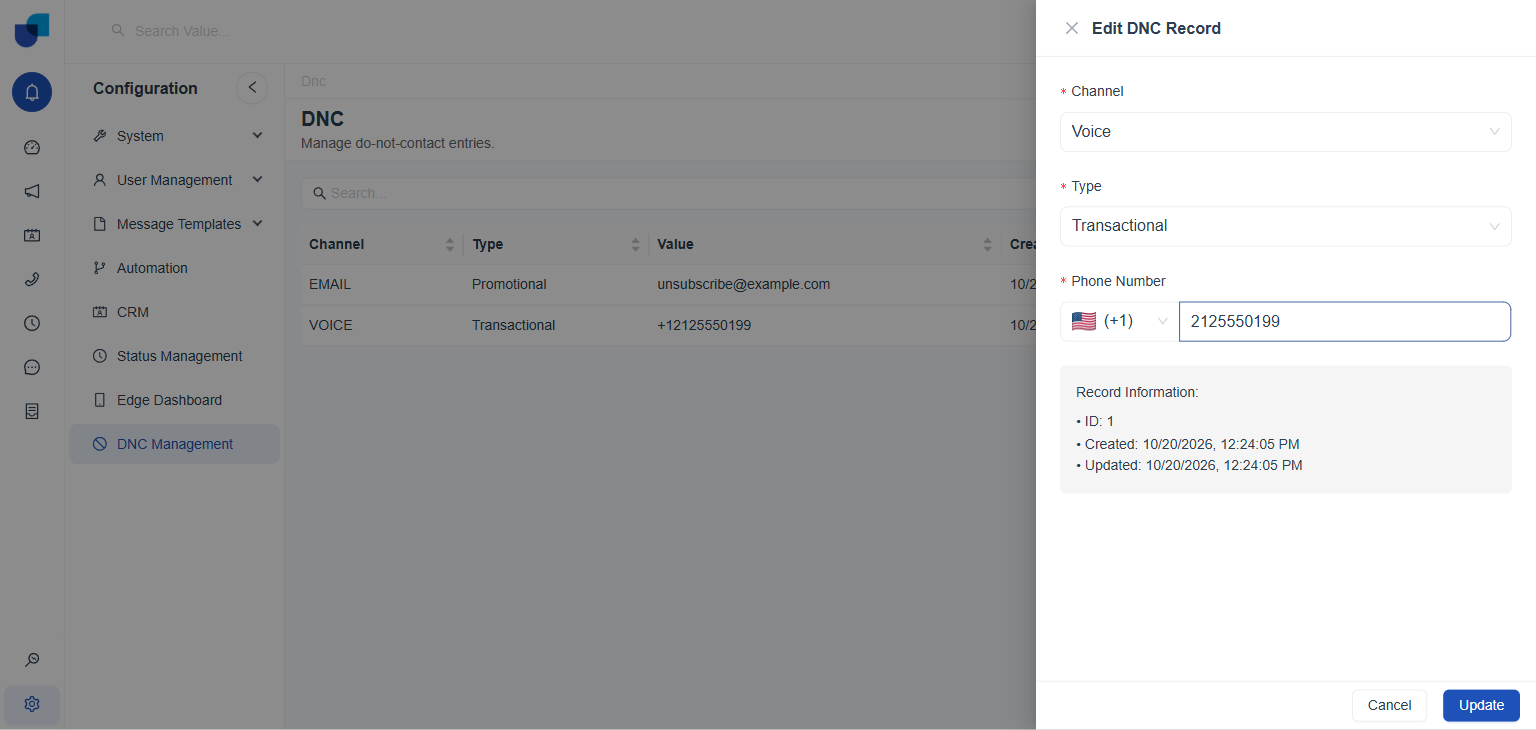
Figure 4. The Edit DNC Record dialog, with its Record Information panel.
The delete icon does not remove a record immediately. It opens a Delete this DNC entry? confirmation with No and Yes buttons.
Searching and Filtering
A search box above the list matches against Value as it is typed. The Filter button beside it opens a separate panel with three conditions: Channel, Type, and a Created Date Range. They can be combined, and Reset clears them all at once.
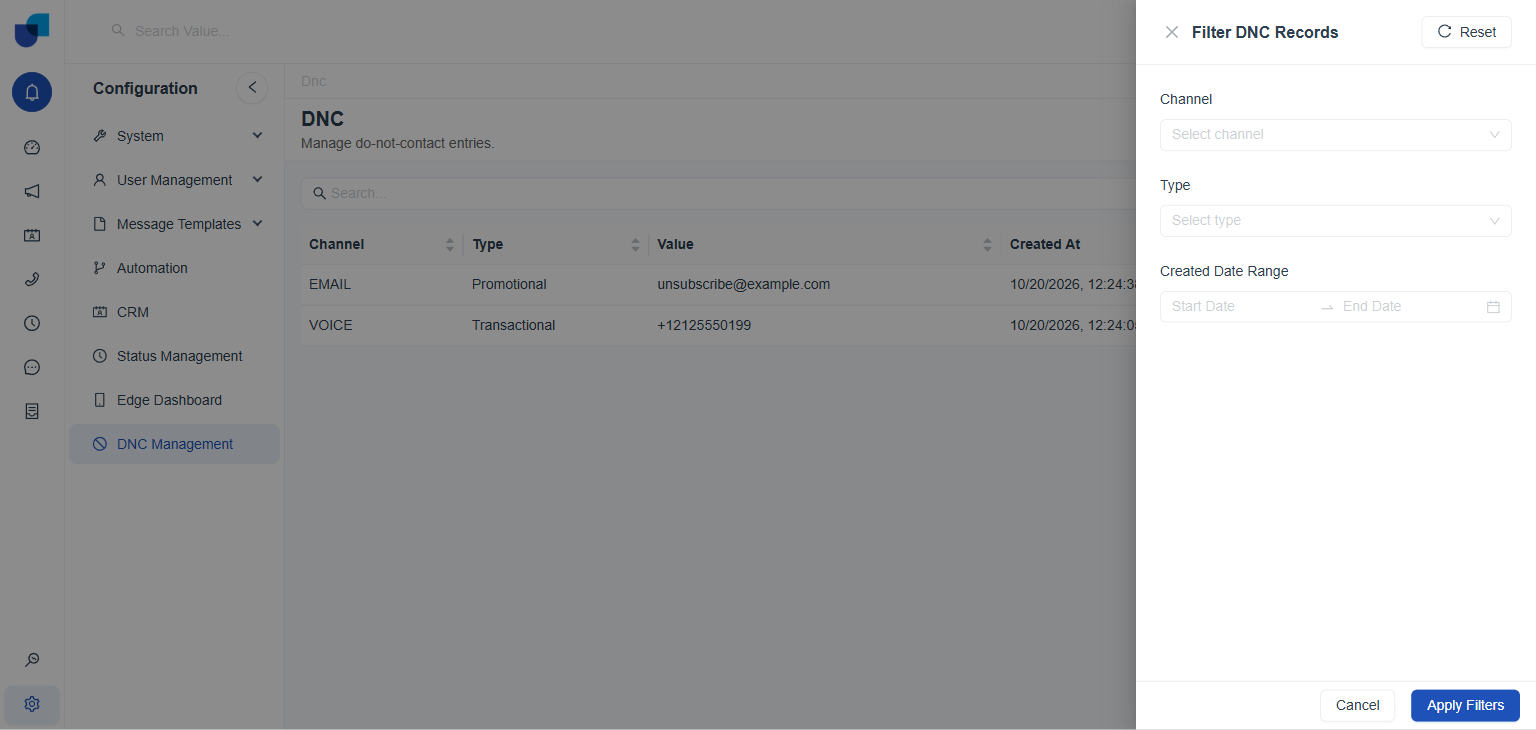
Figure 5. The Filter DNC Records panel, with its three conditions and the Apply Filters and Reset buttons.
Importing DNC Records by CSV
The Import button opens a dialog built around a single CSV upload.
- Click Import. Opens Import DNC Records with its CSV Import Instructions shown first.
- Prepare a CSV with three headers.
The headers are
channel,type, andvalue. Channel acceptsVOICE,EMAIL,SMS, orWHATSAPPin any case, and Type accepts Promotional or Transactional. - Upload the file. A File Preview table lists every valid row exactly as it will be imported.
- Choose what happens to a matching record. Skip Duplicates, the recommended default, leaves an existing record untouched. Update Existing overwrites it with the file's data.
- Click Import. A result message reports how many records were imported and how many rows had errors, for example a row that duplicated an existing record under Skip Duplicates. Imported rows appear in the list with their Channel in uppercase.
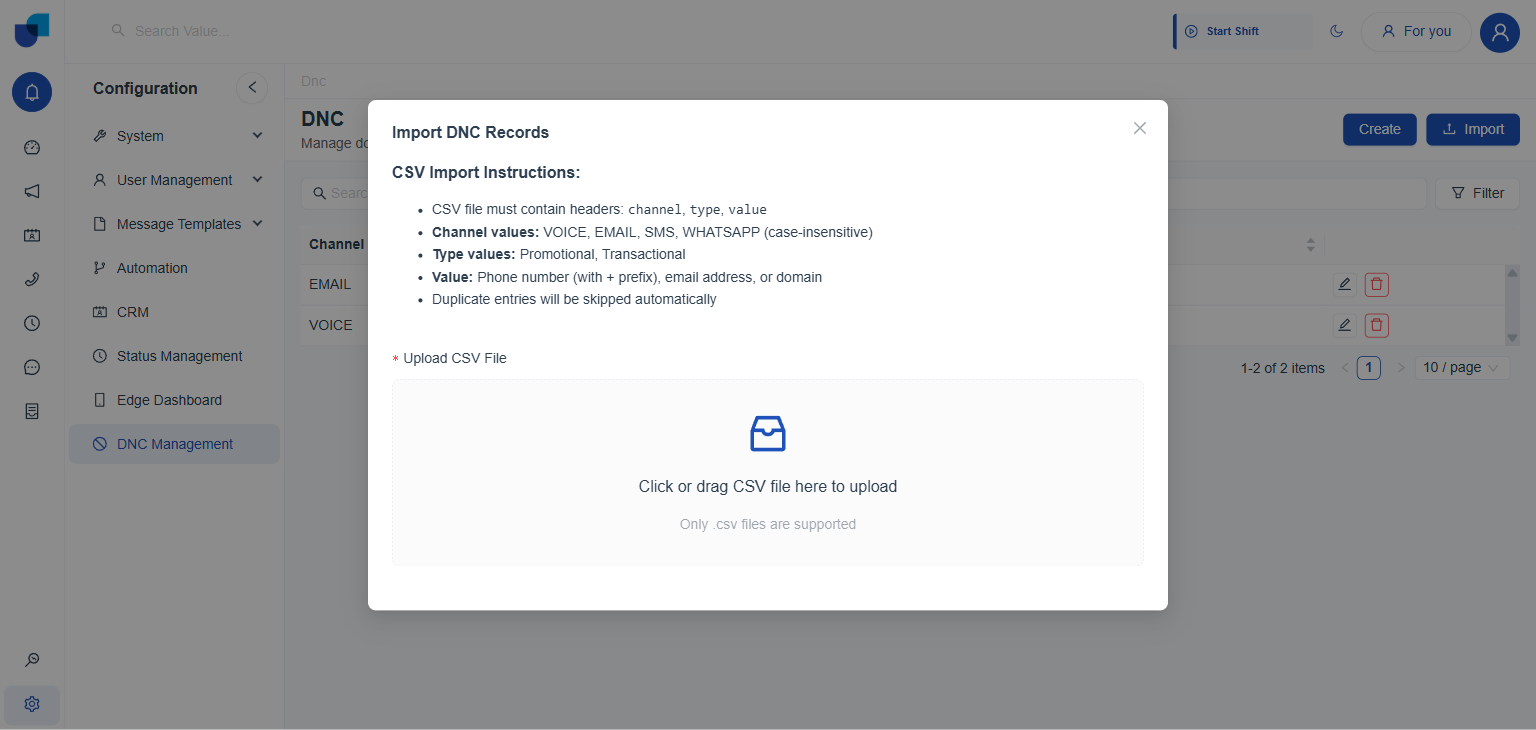
Figure 6. The Import DNC Records dialog before a file is chosen, with its CSV Import Instructions.
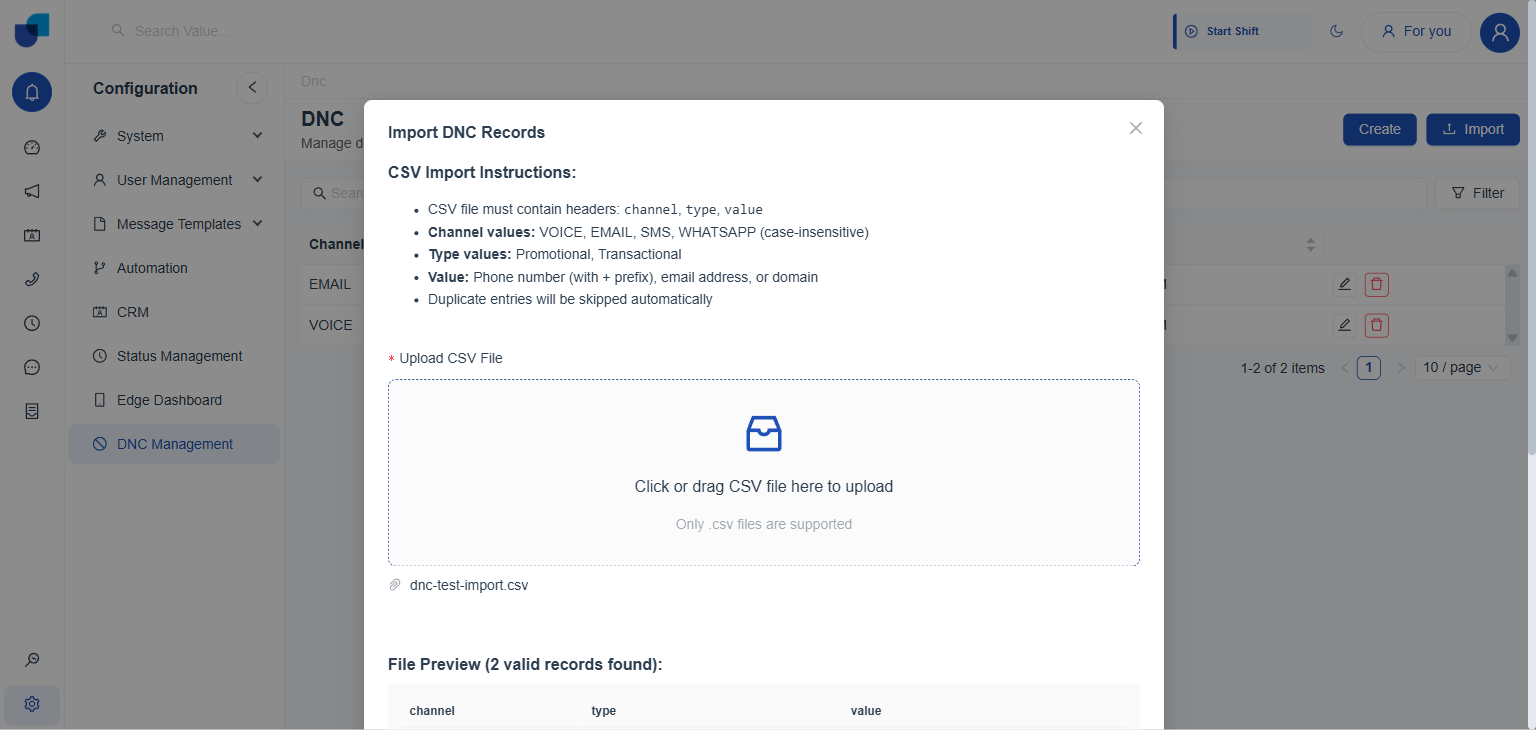
Figure 7. After a CSV is uploaded: the File Preview table and the choice between Skip Duplicates and Update Existing.
Where This Fits
DNC Management is a shared list rather than part of the Create Campaign wizard. A campaign lead can carry the DNC status, described in Campaign Monitoring, and the Outbound Campaigns Monitor dashboard counts DNC and Opt Out Leads, covered in Campaign Reports and Dashboards. Access to this screen is controlled by the Manage DNC List permission in Campaign Permissions.