Managing Live Campaigns
A campaign's own detail panel holds every action used to start, stop, and adjust it: running or pausing it, adding contacts with Topup, moving leads back into the dialing queue with Reschedule, and opening a lead's own page.
Detail Panel Actions
Selecting a campaign in the Campaigns list opens its detail panel. A row of icons in the panel header carries the actions below. Each icon shows its name as a tooltip on hover.
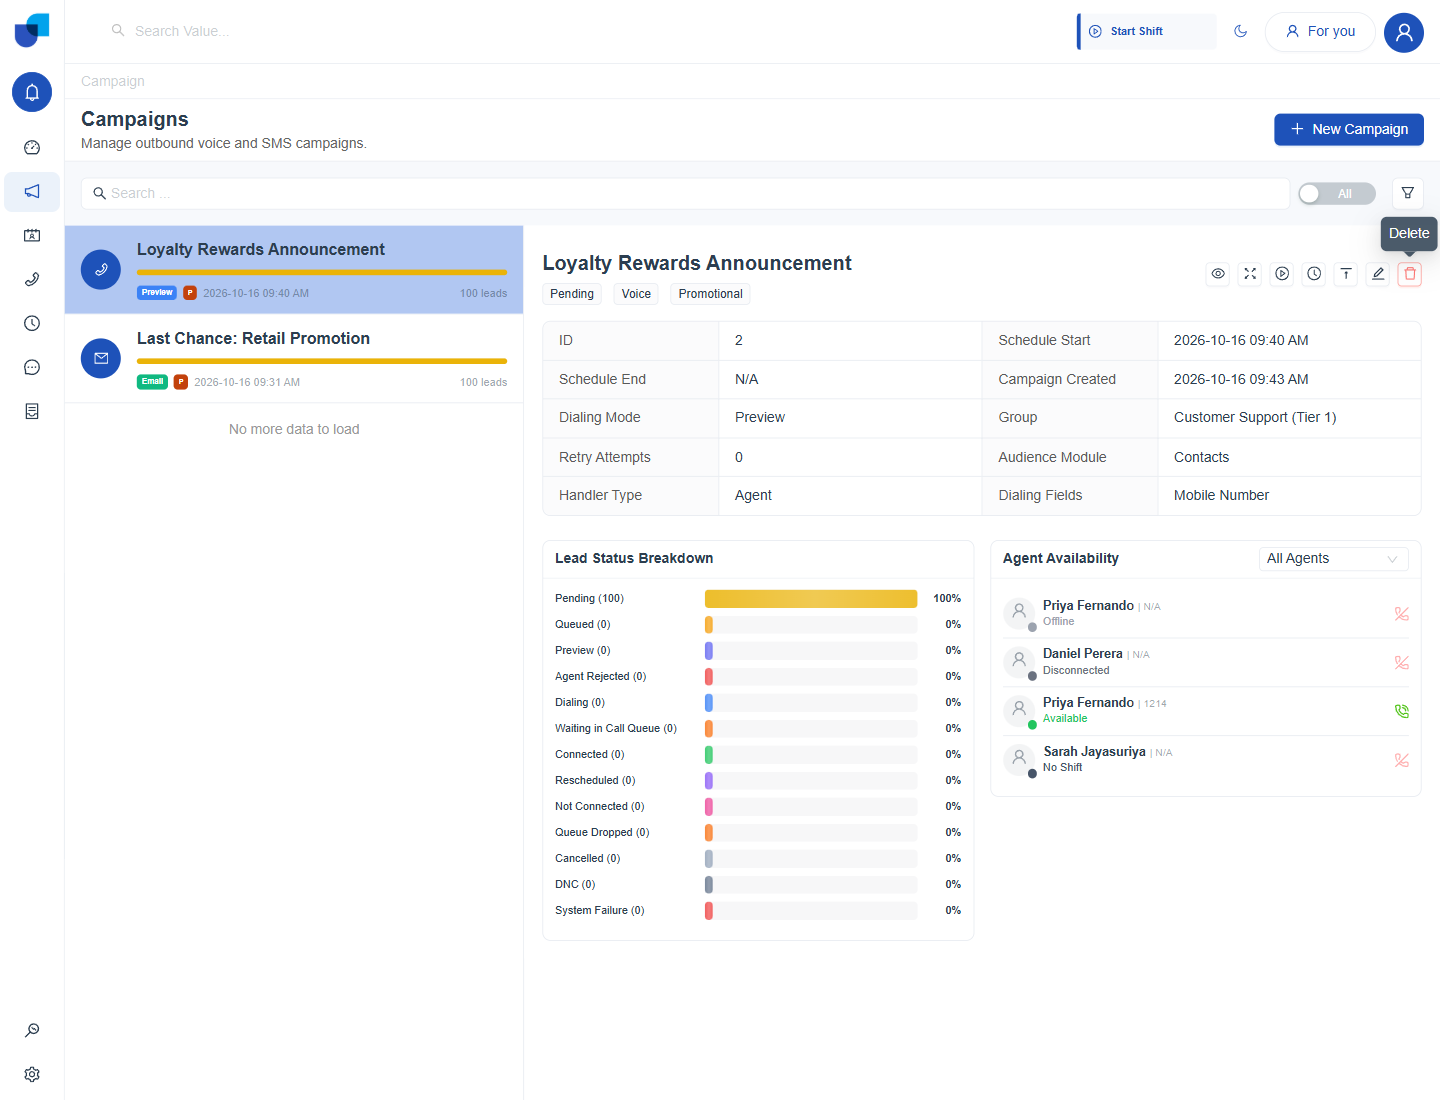
Figure 1. A Pending campaign's detail panel, with its row of action icons in the top right corner of the header.
| Icon tooltip | What it does |
|---|---|
| View Leads | Opens the Campaign Leads screen for the campaign. See Campaign Monitoring. |
| Fullscreen | Expands the detail panel to fill the screen. |
| Run, Pause, or Resume | Starts a Pending campaign. Once the campaign is Started the same icon pauses it, and on a Paused campaign it resumes it. The tooltip changes with the campaign's state. |
| Reschedule | Opens a dialog that moves leads in chosen statuses back into the dialing queue. It does not change the campaign's own Schedule Start Time. |
| Topup | Adds more contacts to the campaign's audience. |
| Edit | Reopens the campaign's configuration. |
| Delete | Deletes the campaign. |
Topup, Reschedule, Edit, and Delete are available only while a campaign is Pending or Paused. The moment a campaign is Started, those four icons are disabled, leaving only View Leads, Fullscreen, and Pause available. Pause a running campaign first when it needs to be adjusted.
Lead Topup
Topup adds contacts to a campaign that already exists. It uses the same Select from Module path as the Audience step of the wizard, with a richer set of choices for records that already exist.
- Click Topup in the campaign's detail panel. Opens the Campaign Topup dialog.
- Choose a Module and, optionally, a Filter. The Module is filled in from the campaign's audience, and the Filter works as it does in the Audience step.
- Choose what happens when a matching record is found. Five options, against only two at the original Audience step.
- Click Topup to confirm.
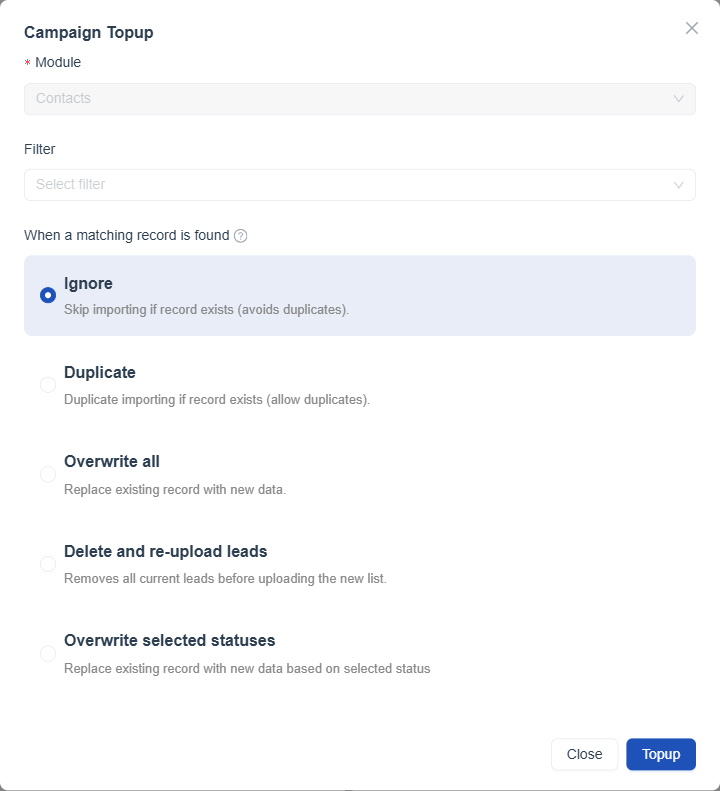
Figure 2. The Campaign Topup dialog opened from the Topup icon, with Ignore selected by default.
| When a matching record is found | Behavior |
|---|---|
| Ignore | Skip importing if the record exists, which avoids duplicates. Selected by default. |
| Duplicate | Import the record even if it exists, which allows duplicates. |
| Overwrite all | Replace the existing record with the new data. |
| Delete and re-upload leads | Removes all current leads before uploading the new list. |
| Overwrite selected statuses | Replace existing records with new data, but only for the Lead Statuses ticked in a checklist that appears once this option is selected. |
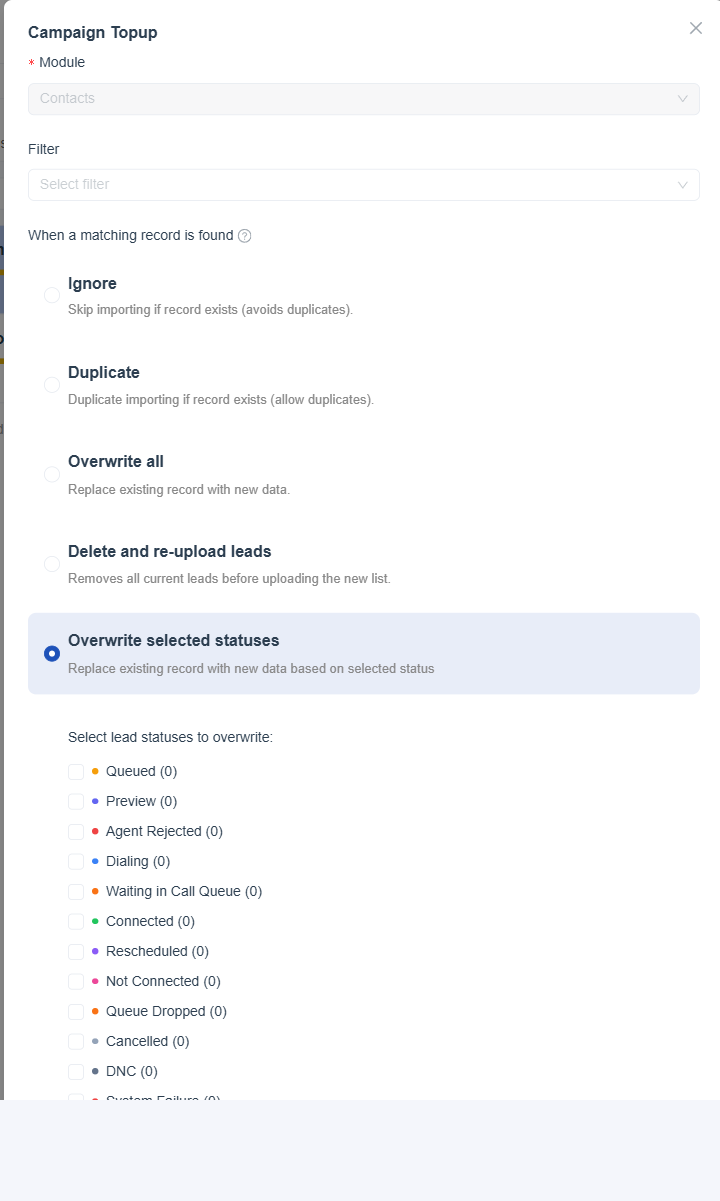
Figure 3. Overwrite selected statuses reveals a checklist of every Lead Status except Pending, each with its current count.
Delete and re-upload leads removes every current lead from the campaign before the new list is added. Use it only when the existing leads are no longer needed.
Reschedule
Reschedule works on individual leads, not on the campaign as a whole. It moves leads, grouped by their current Lead Status, back into the dialing queue for another attempt. The campaign's Schedule Start Time is set once in the wizard and is not changed from this icon.
- Click Reschedule in the campaign's detail panel. Opens the Select Lead Statuses to Reschedule dialog.
- Tick one or more statuses, or Select All. Each status shows its current lead count. The Reschedule button stays disabled until at least one is ticked.
- Click Reschedule. Every lead currently in a ticked status moves back into the dialing queue.
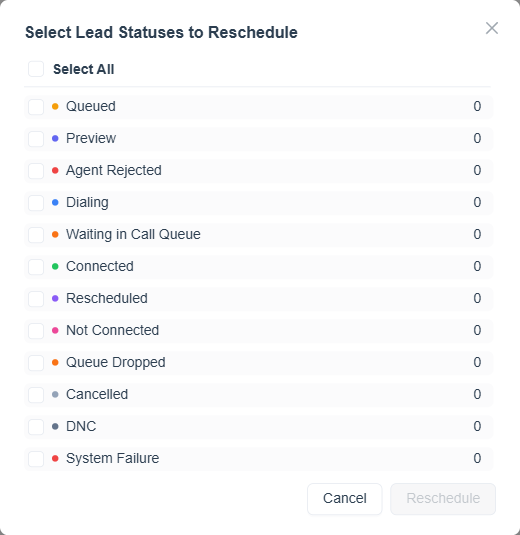
Figure 4. The Select Lead Statuses to Reschedule dialog. Pending is not offered, because a Pending lead has not been dialed yet and has nothing to reschedule from.
Rescheduling also resets the retry attempts of the leads it moves, as described in Scheduling and Retries.
Lead Detail Page
Clicking the document icon at the end of a row on the Campaign Leads screen opens that lead's own page. A summary sidebar on the left shows the lead's phone number, Lead Status, Attempt, Campaign, Channel, and creation details. The panels on the right depend on the CRM module the lead was drawn from. For a lead drawn from Contacts they are an Overview panel, a Tickets panel, and a collapsible History log.
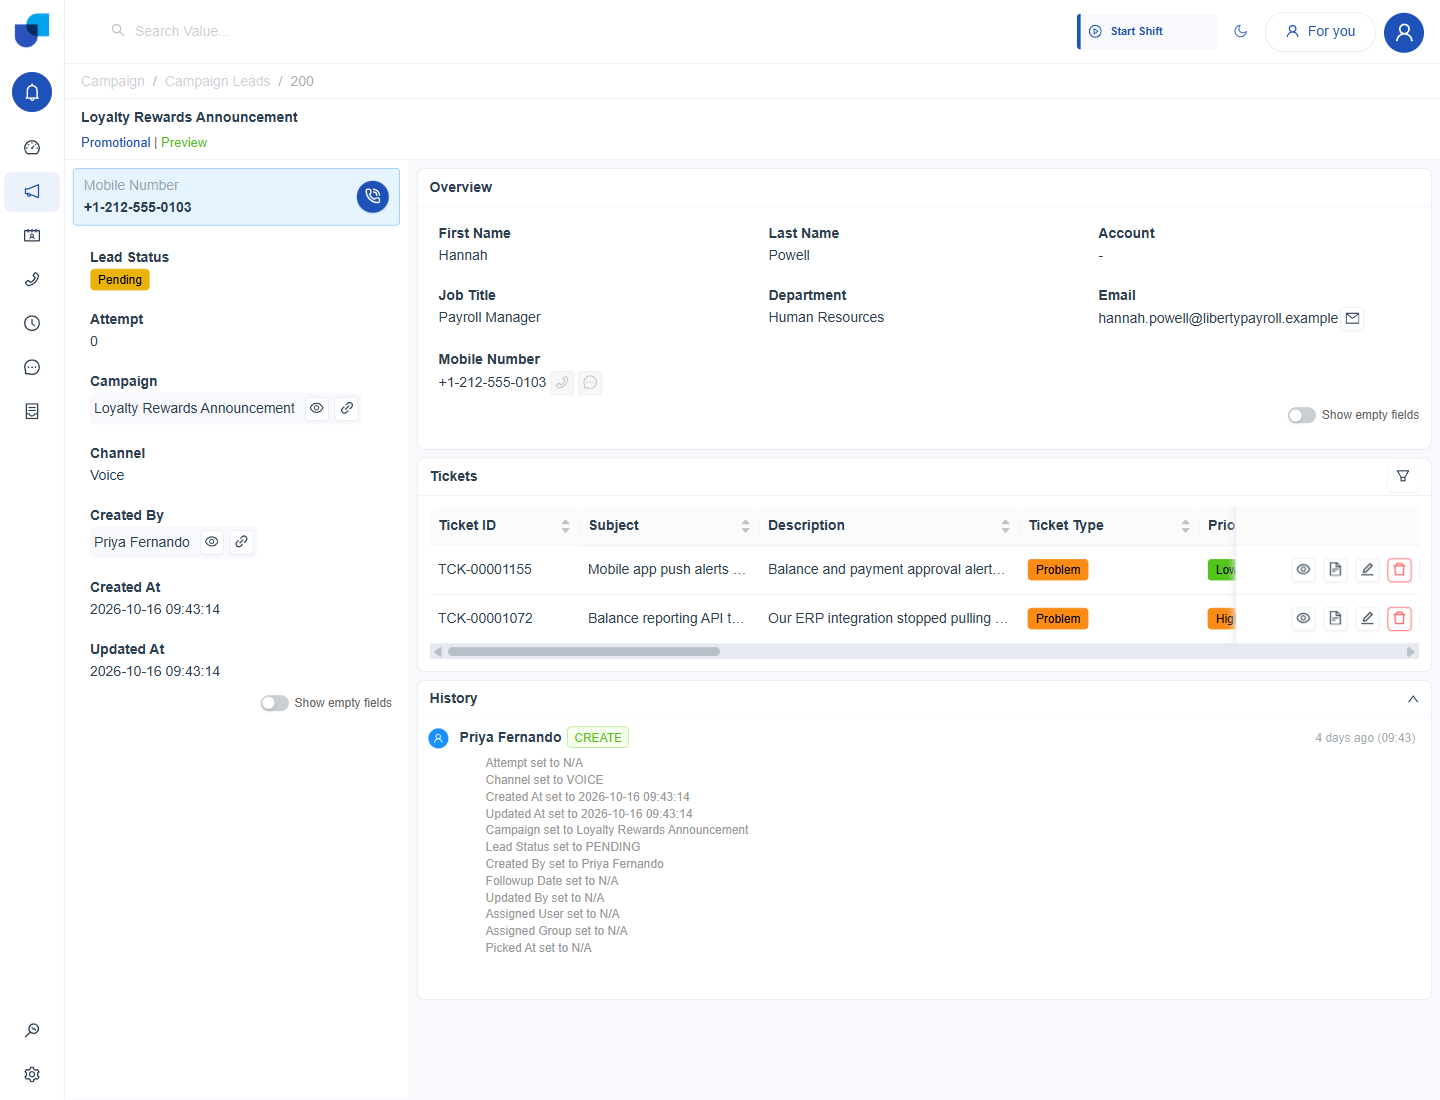
Figure 5. A lead's detail page, with the History log expanded to show the single CREATE entry written when the lead was first added to the campaign.
History
History is collapsed by default. Expanded, it is a field level audit log of every change made to the lead record, so a lead that has been dialed shows further entries recording its Lead Status moving between values such as Dialing, Waiting in Call Queue, and Queue Dropped.
The fields shown in Overview are not configured inside Campaign. They come from the same Layout Builder used for that CRM module's own records, which is also the layout offered by Select Layout in the Audience step and in the Campaign Topup dialog. Layout Builder is covered in the CRM documentation.