Service Account Configuration
A service account is a credential for a system, not a person. It lets a reporting tool, an automation or an AI client call UNICONNECT AI without using anyone's login. Each service account has a Client ID, a role that decides what it may do, and the groups it belongs to. The example here creates a service account for the bank's reporting team.
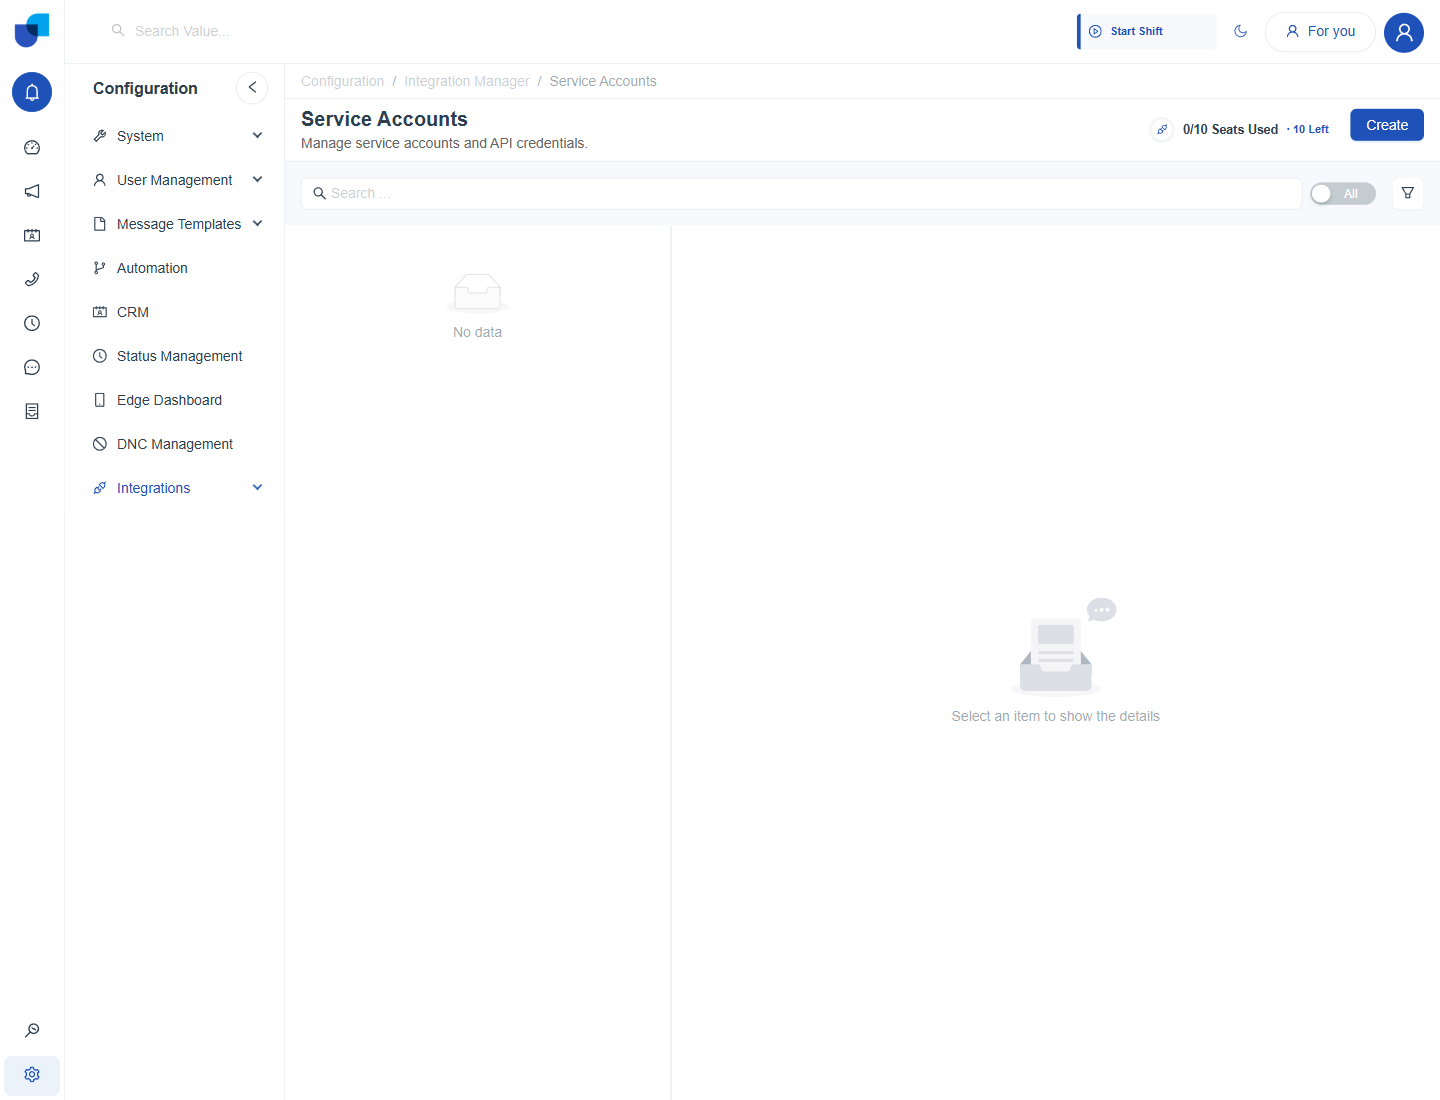
Figure 1. The Service Accounts screen. The counter at the top shows how many licensed seats are used.
Creating a Service Account
- Open Configuration → Integrations → Service Accounts.
- Click Create. The Create Service Account form opens beside the list.
- Enter a Client ID. Use a short name that says what the account is for, for example reporting tool.
- Choose a Role and one or more Groups. The role sets the permissions the account has, and the groups set which records it can reach.
- Click Generate Service Account. A Service Account Generated window shows the secret. Copy it and store it somewhere secure.
The service account secret is shown only once. You cannot view it again after you close the window. If it is lost, use Regenerate Secret on the account to create a new one.
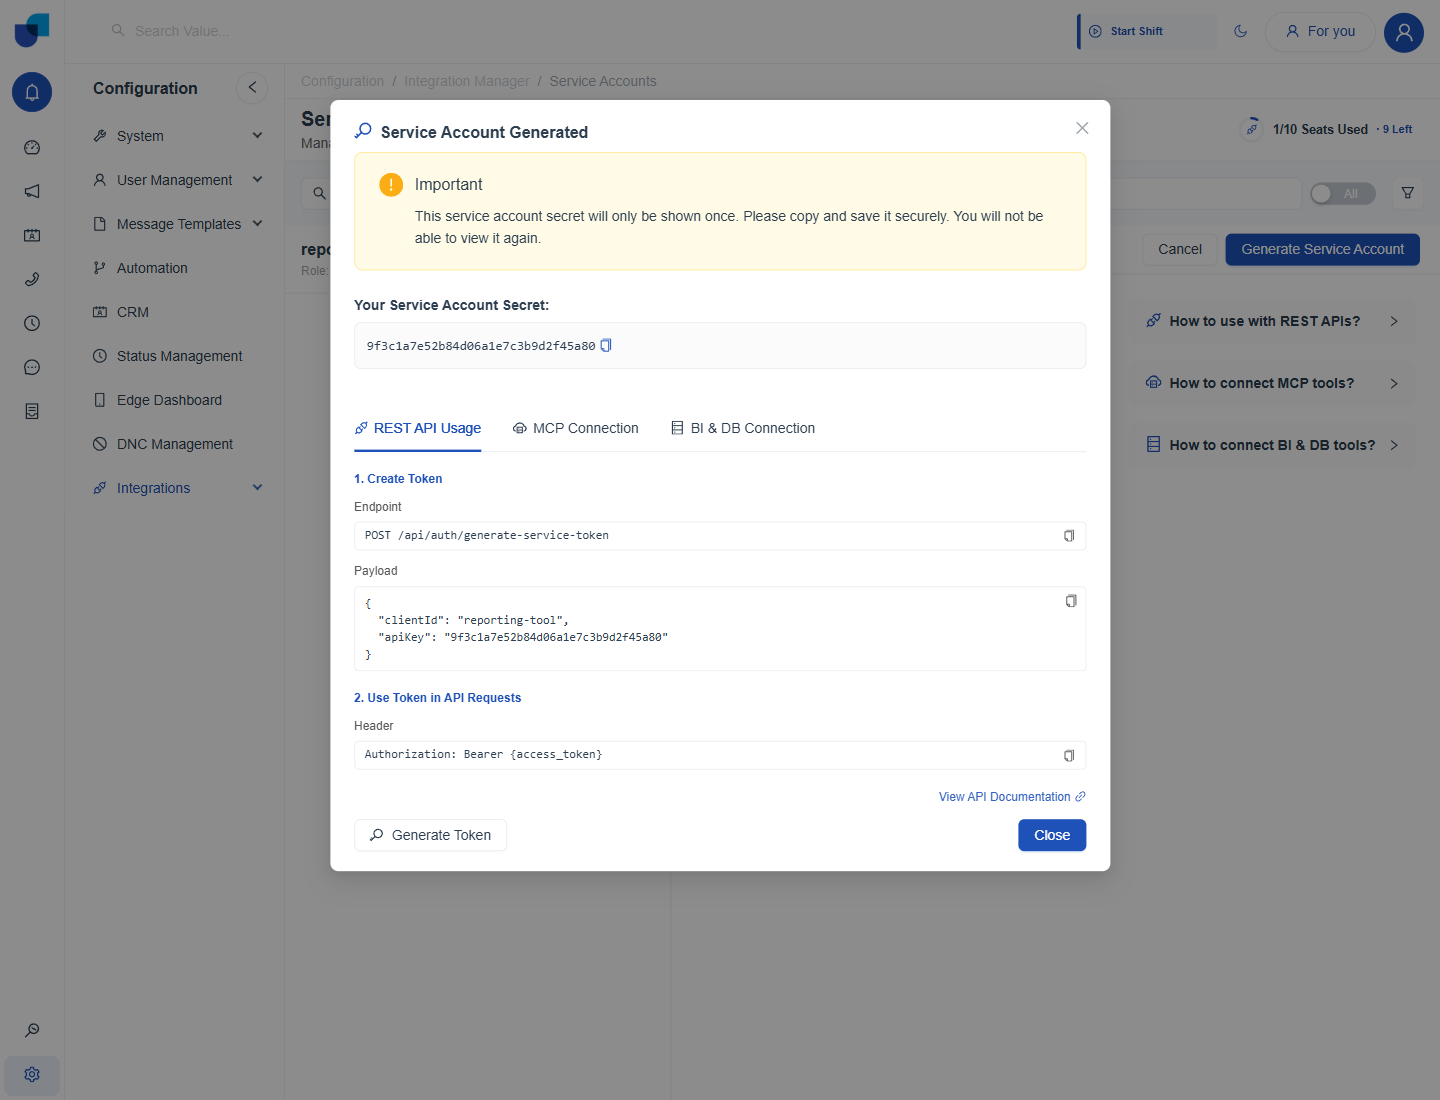
Figure 2. The Service Account Generated window. The secret is shown once, and the tabs repeat the connection details for REST, MCP and database tools.
The Generate Token button in the same window is for creating an access token for the new account, as described in the REST page.
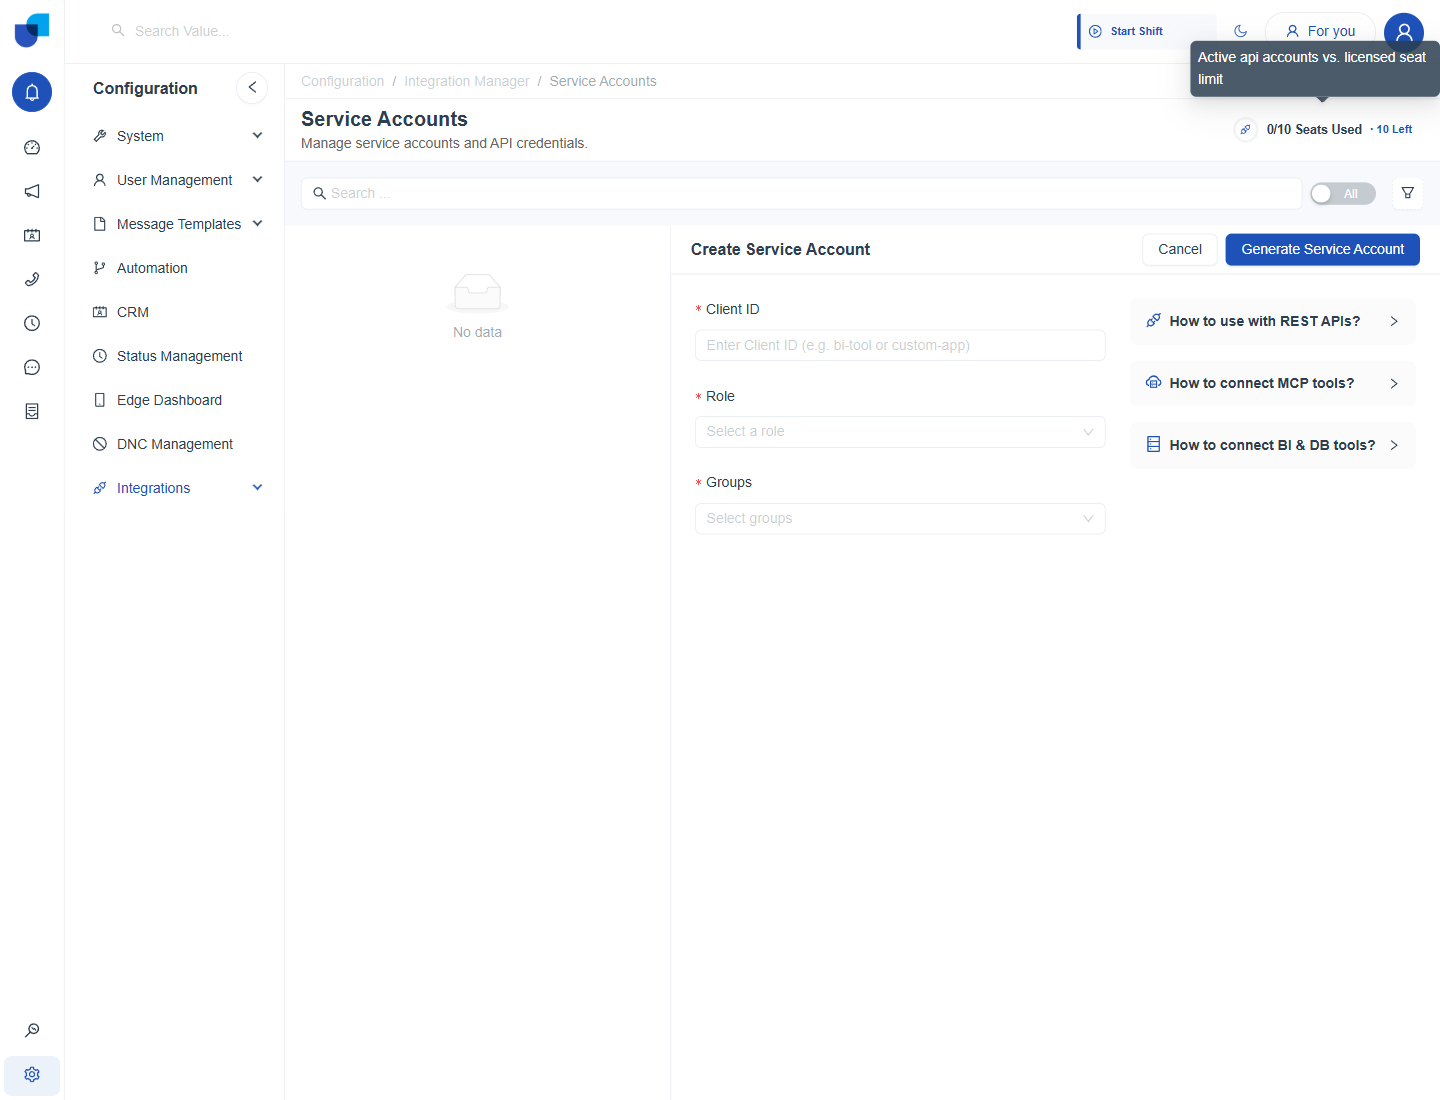
Figure 3. The Create Service Account form. Client ID, Role and Groups are required, and the help sections on the right explain how to connect each kind of client.
Field Reference
| Field | Purpose |
|---|---|
| Client ID | The name of the service account. REST clients send it together with the credential to get a token. |
| Role | The permissions the account has. Create a dedicated role if the account should do less than a normal user. |
| Groups | The groups the account belongs to, which limit the records it can reach. |
Managing a Service Account
Each account appears in the list with its role and groups. Click it to open the Edit Service Account panel. The Client ID cannot be changed. The Active switch above the list filters the list between active accounts and all accounts.
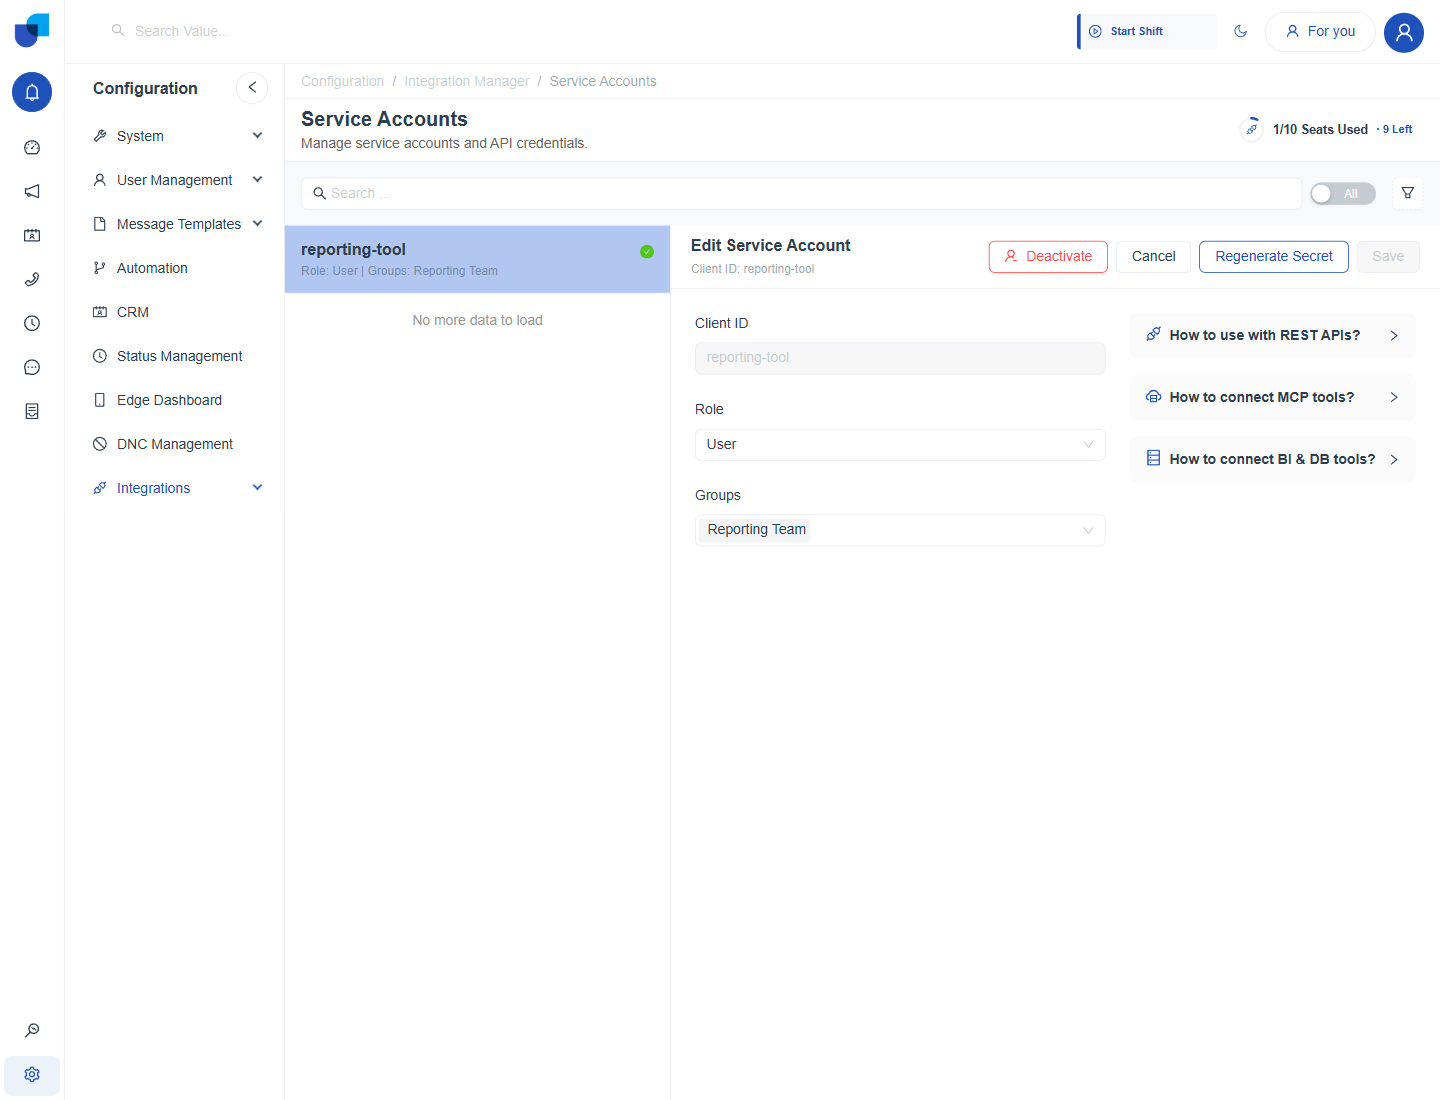
Figure 4. The Edit Service Account panel. The Client ID is read only, and the role and groups can be changed.
| Action | What it does |
|---|---|
| Save | Saves a change to the role or the groups. |
| Regenerate Secret | Creates a new secret. Tools that use the old secret stop working until they are updated. |
| Deactivate | Stops the account from being used and frees its license seat. A confirmation says the action can be reversed later. |
Each active service account uses one seat of the license. The counter on the screen reads, for example, 1/10 Seats Used, and it drops again when an account is deactivated.
Give a service account only the role it needs. A reporting tool that only reads data should not use a role that can change or delete records.
Where This Fits
The three help sections in the form describe the connection details for each kind of client. They are covered in Connecting with REST APIs, Connecting MCP Tools and Connecting BI and Database Tools.