3CX Plugin Configuration
Why a Plugin
3CX is the phone system behind Telephony. Every trunk, extension and queue a call travels through comes from a 3CX server, not from UNICONNECT AI itself. The 3CX plugin is where that server is connected to the account, and it takes three parts: install the connector on the 3CX server, create an API key in 3CX, then enter the connection details in UNICONNECT AI.
The 3CX Call Control API is a developer interface that lets external applications monitor and control phone calls in real time on a 3CX system. UNICONNECT AI needs this access for real time call data, call control, recording tracking and automation, and it acts as the integration backbone.
Part 1: Install the 3CX API Connector Plugin
- Log in to the 3CX server as the root user.
- Add the UNICONNECT Debian package source. Run the command below on the 3CX server.
echo 'deb [trusted=yes] http://package.uniconnect.io/uniconnect bookworm main' | sudo tee /etc/apt/sources.list.d/uniconnect.list && sudo apt update
- Add the Microsoft repository if .NET is not installed. Skip this step when .NET is already present.
sudo apt install -y apt-transport-https gpg
wget https://packages.microsoft.com/config/debian/10/prod.list -O /etc/apt/sources.list.d/microsoft-prod.list && wget https://packages.microsoft.com/keys/microsoft.asc -O- | sudo tee /etc/apt/trusted.gpg.d/microsoft.asc && sudo apt update
- Install the 3CX API Connector Plugin.
sudo apt install uniconnect-wrapper -y
During installation you are asked for two ports for the plugin. An HTTP port, for example 5000, and a TCP port, for example 5050.
Part 2: Create the 3CX API Access Key
- Log in to the 3CX Admin Console.
- Go to Integrations → API and click Add. The Service Principals list opens, and the Add Application Access form follows.
- Enter a suitable application name in the Client ID field.
For example,
uniconnect. Use a single word with no spaces, because 3CX rejects a Client ID containing a space as an invalid format. The same Client ID is entered in UNICONNECT AI later. - Enable the two permissions and click Save. Tick Enable access to the 3CX Configuration API (XAPI) for this application, and Enable access to the 3CX Call Control API for this application. Leave the Department as System Wide.
- Generate the API key and copy it somewhere secure. 3CX shows the key only once and it cannot be opened again in the 3CX interface.
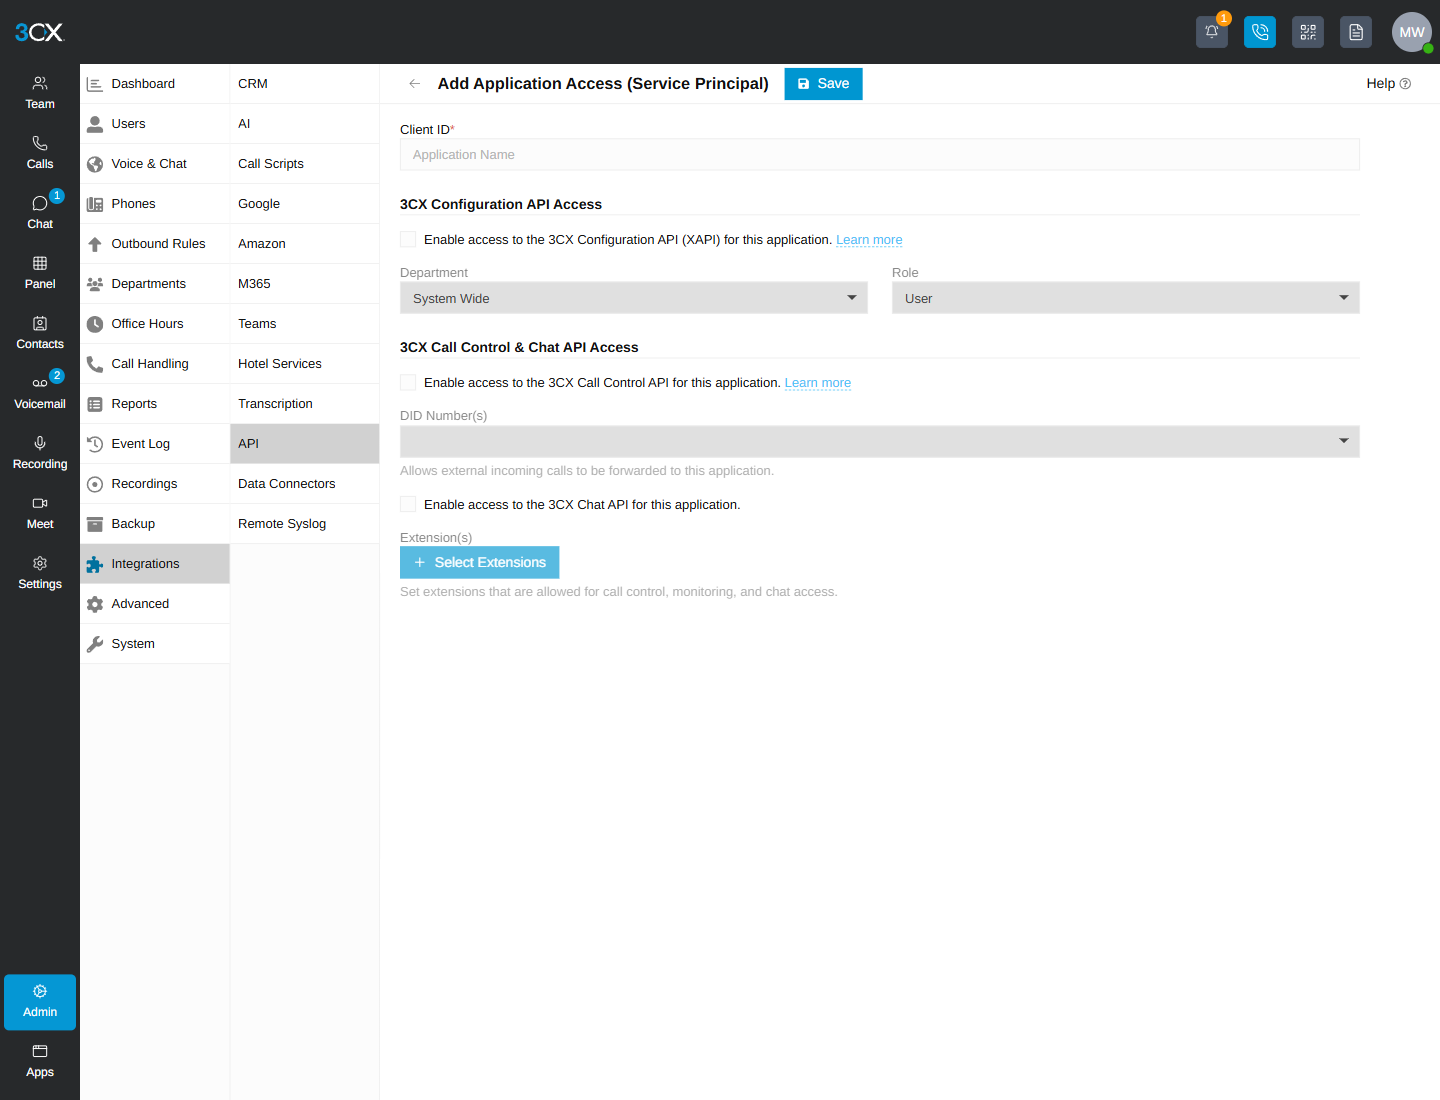
Figure 1. The Add Application Access form in the 3CX Admin Console, reached from Integrations, then API, then Add.
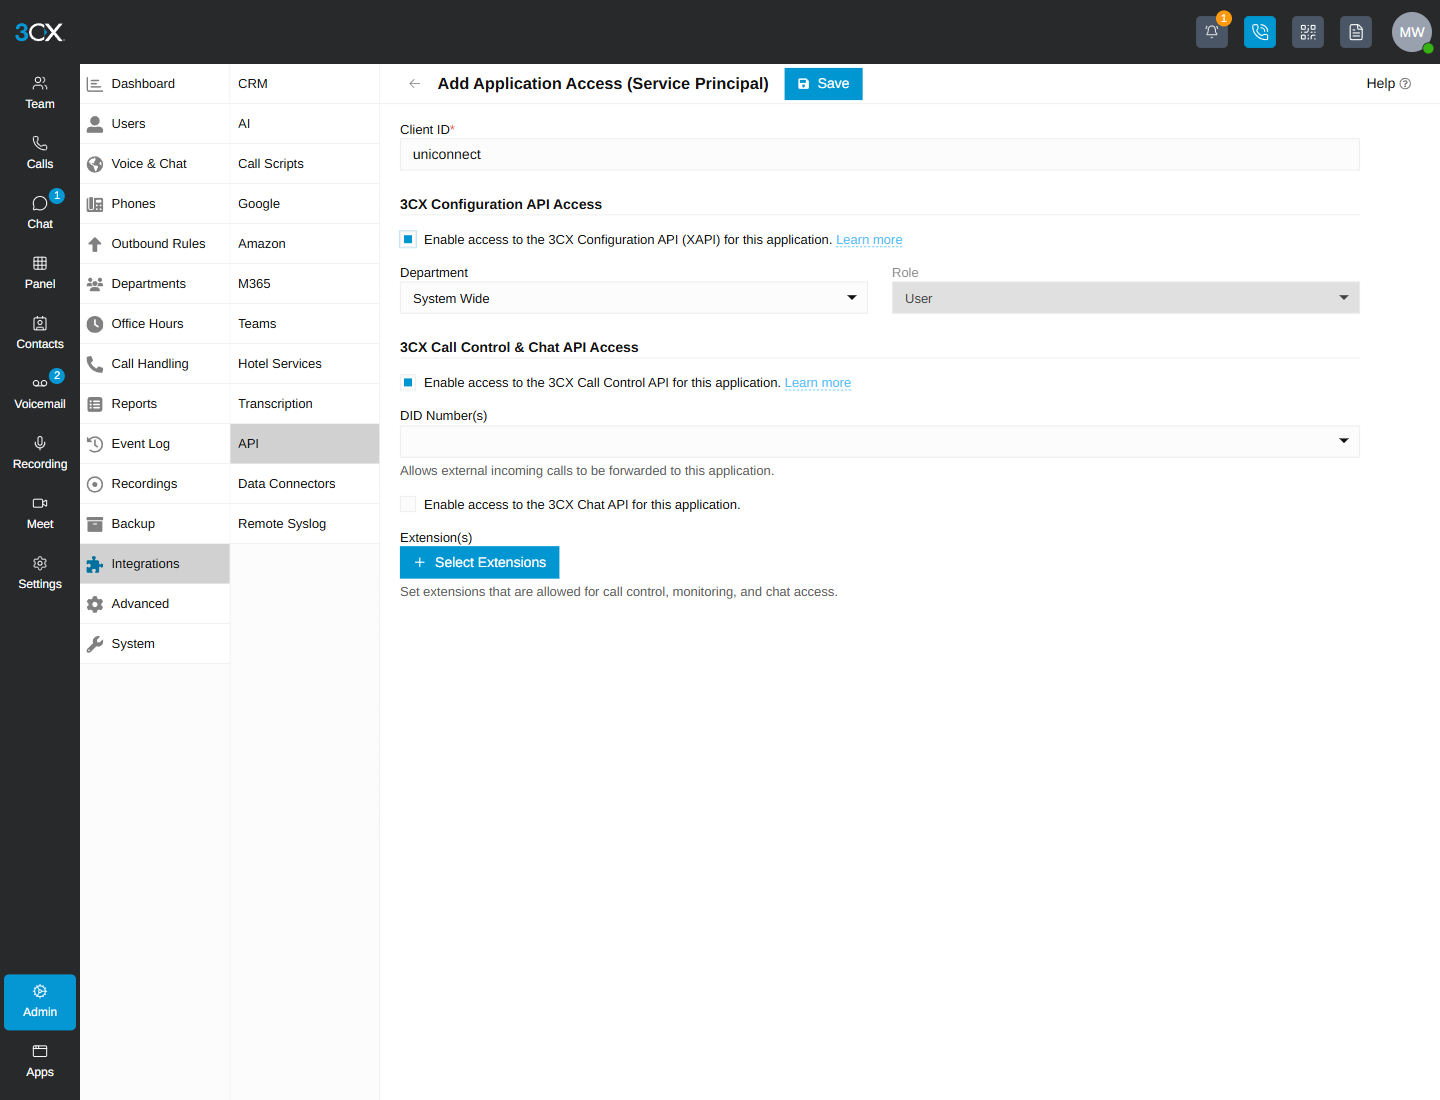
Figure 2. The form completed with a Client ID and the two required permissions ticked, ready to save.
Store the API key securely before closing the 3CX dialog. If it is lost, generate a new key for the application and update it in UNICONNECT AI.
Part 3: Configure UNICONNECT AI
- Sign in to UNICONNECT AI with administrator rights.
- Go to Configuration → System → Plugins and open 3CX. Each plugin is a card with an enabled badge. Click the 3CX card to open its form.
- Turn the plugin on and fill in the server settings. Enter the host, the Client ID created in 3CX and the API key, then choose the data sync interval.
- Choose the optional settings and click Save Configuration. Enable 3CX Login, Self Registration and Historical Data Import are optional, and are explained below.
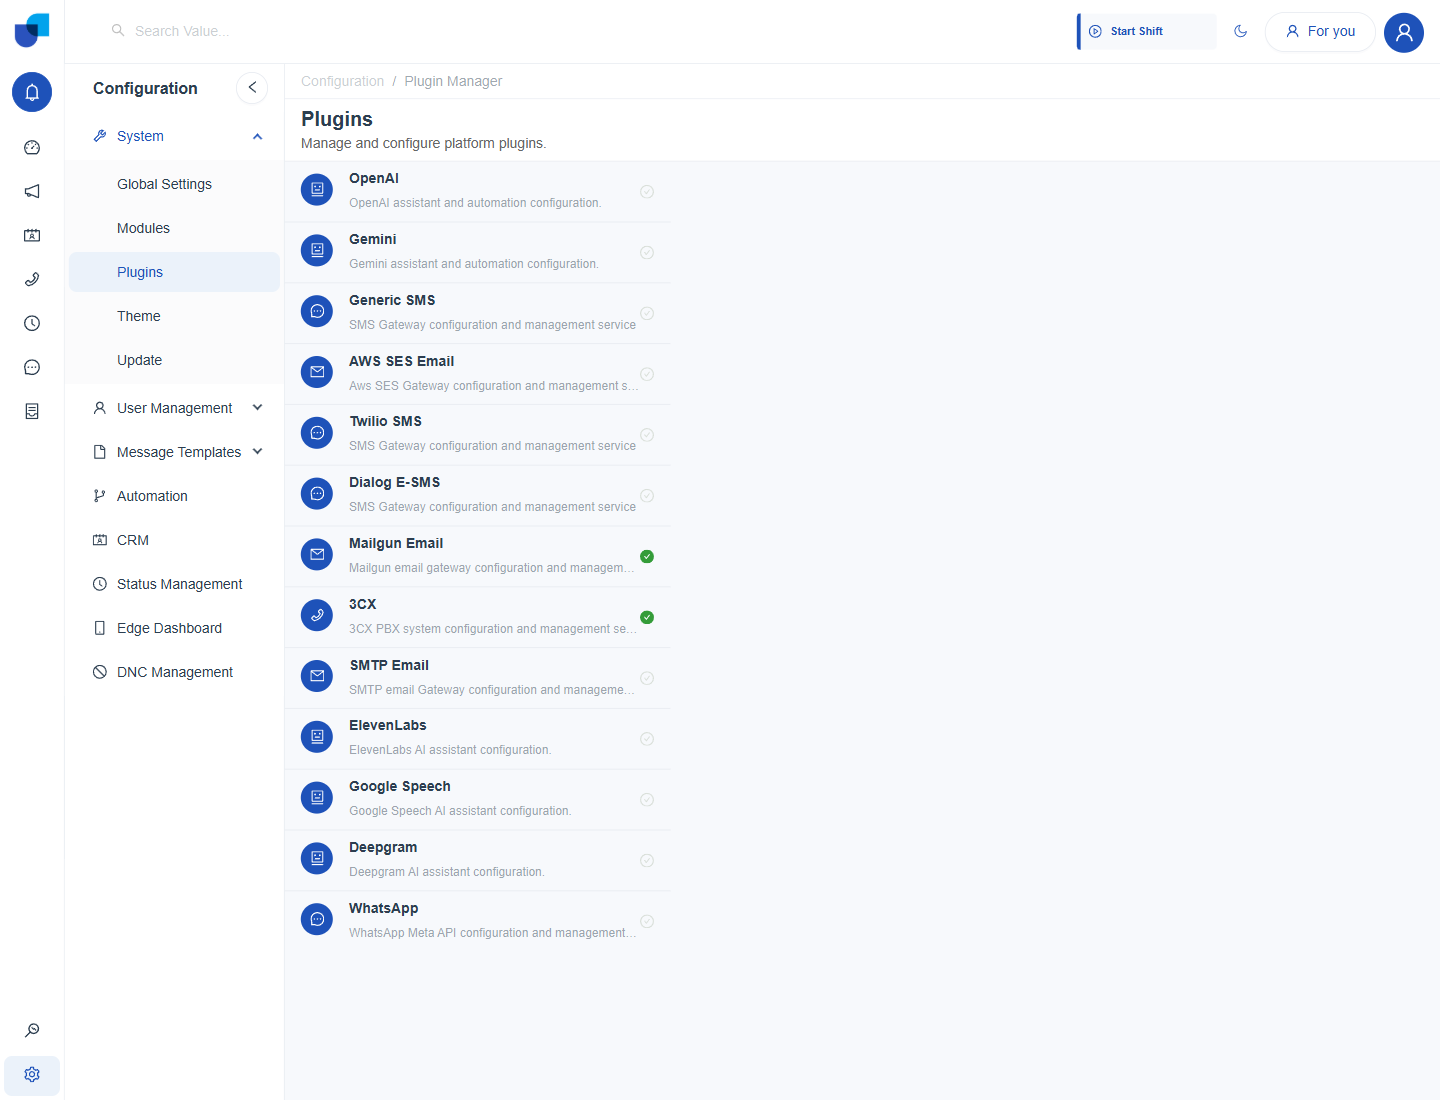
Figure 3. The Plugins screen, where each plugin is a card and an enabled plugin carries a green badge.
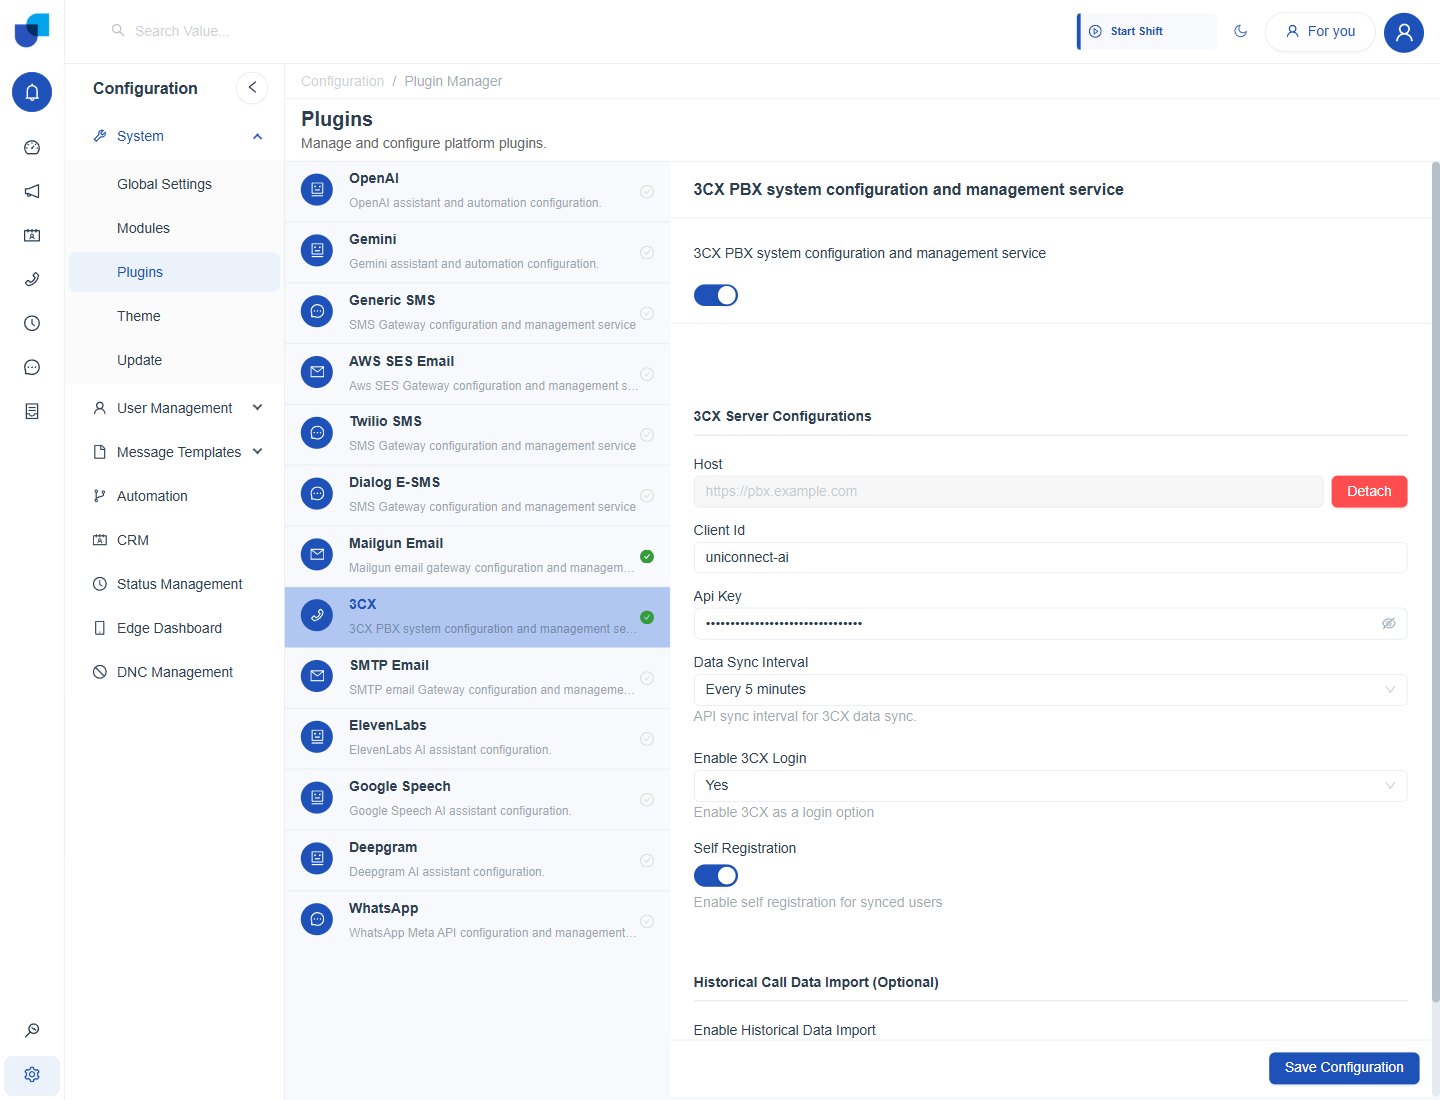
Figure 4. The 3CX plugin form, with the server settings, the account level options and the Save Configuration button.
Field Reference
3CX Server Configurations
| Field | Purpose |
|---|---|
| Host | The 3CX server address, for example https://pbx.example.com. Once saved it is read only, and a Detach control disconnects it. |
| Client Id | The client identifier created in 3CX for this integration. |
| Api Key | The key generated in 3CX. It is masked behind an eye icon, since it authenticates every request back to the 3CX server. |
| Data Sync Interval | How often extensions, queues and other 3CX data are pulled in. A dropdown of fixed intervals, such as every 5 minutes. |
Account Level Options
| Field | Meaning |
|---|---|
| Enable 3CX Login | Yes or No. Lets users sign in to UNICONNECT AI with their 3CX credentials, which is the single sign on option. |
| Self Registration | A switch that lets a synced 3CX user create their own UNICONNECT AI account the first time they sign in. |
| Enable Historical Data Import | A switch inside the optional Historical Call Data Import group. It imports past call data from the 3CX server, from a chosen date up to the moment the configuration is saved. |
Do not turn on Historical Data Import unless past calls are needed in reports. Choose the start date carefully, because everything between that date and the save moment is imported.
After Saving
Once saved, the plugin's top switch controls whether the whole 3CX integration is active for the account. The extensions, trunks and queues the plugin pulls in are what the rest of Telephony builds on: the 3CX User Sync, the Groups and Queues and the Calls screen.
Detach disconnects the 3CX server from the account. Moving to a different 3CX instance can reset the telephony data held in UNICONNECT AI, so plan it and take backups first. See the planning notes in Telephony Overview.