How to Configure the Use Case in UNICONNECT AI
This page is the technical companion to Use Case Scenario. The steps run in the order a person follows them, and each part names the need from the scenario that it meets. The scenario continues the AUS Bank story in CRM Use Case Scenario.
Part 1: Give Daniel and the Supervisors the Right Access
Need: an audit trail, and access that fits each person
See Permissions.
- Open Configuration → User Management → Roles and select the administrator role.
- Expand System Configuration and switch System Information, Manage License and Logs/Task Queues to Yes.
- Set Audit Logs and Active Session to All, and switch Log Purge to Yes. Click Save.
- Open the Contact Center Supervisor role that the supervisors hold. Set System Information to Yes, and Audit Logs and Active Session to Group. Leave Manage License, Logs/Task Queues and Log Purge off, and click Save.
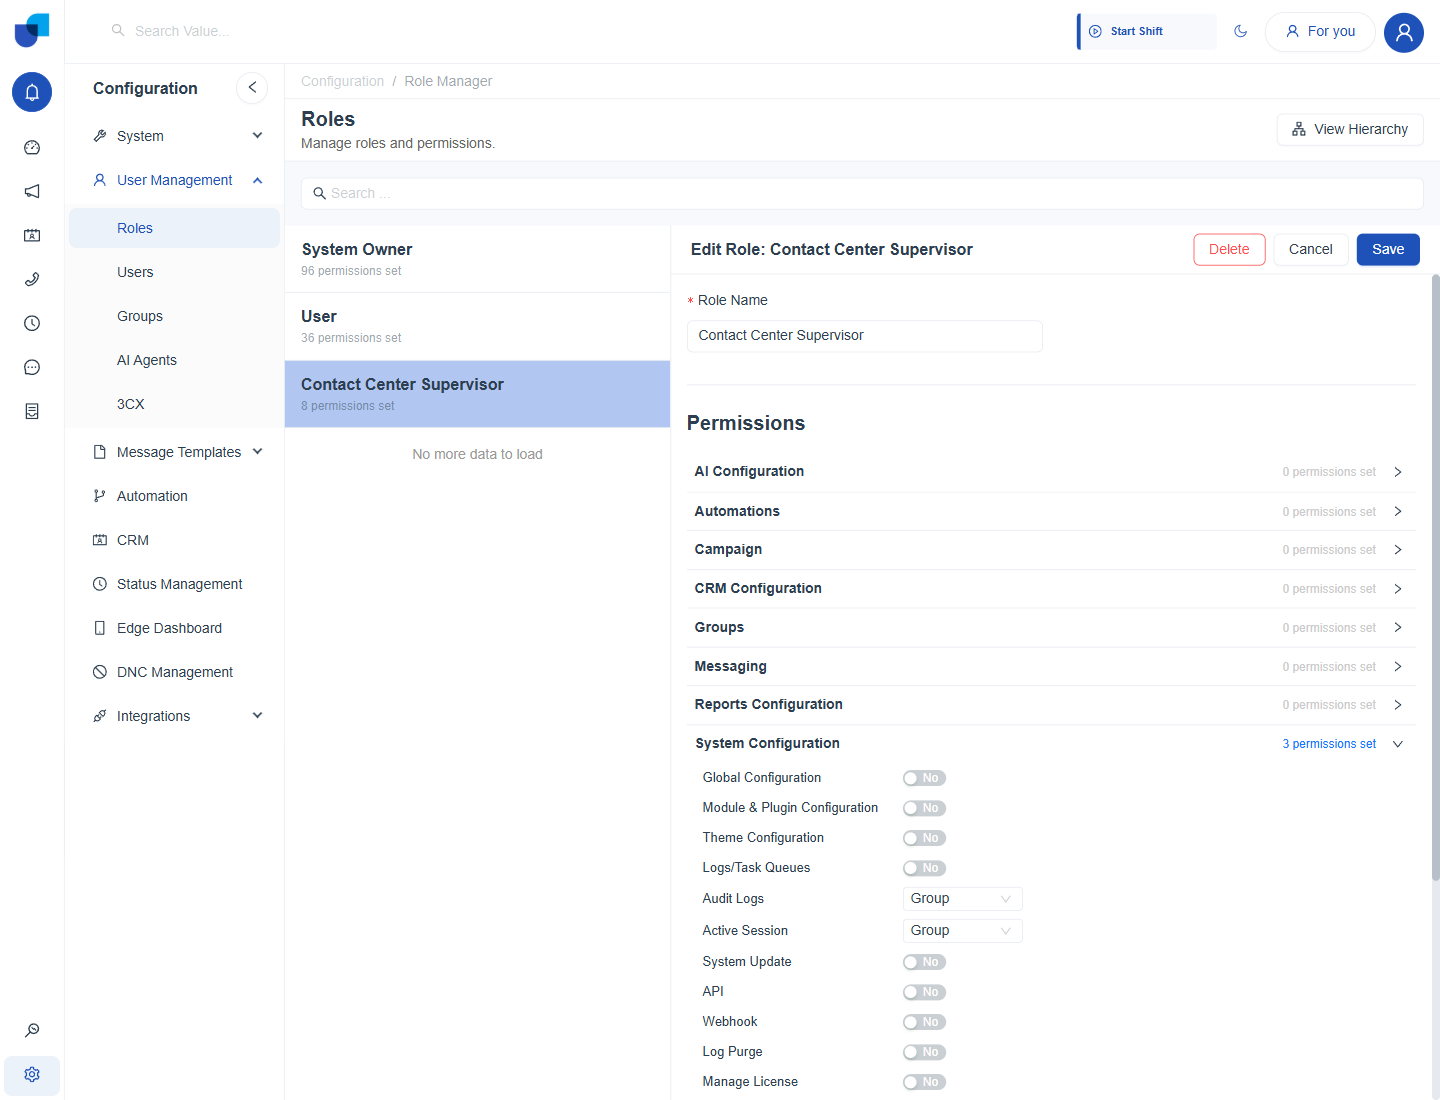
Figure 1. The System Configuration group of the Contact Center Supervisor role, where the Monitoring permissions are set.
Part 2: Check Platform Health
Need: a ready platform
- Open Monitoring → System Information.
- Read the summary cards. System Status should read Operational, and Containers should show every container running.
- Open the Services tab and confirm that each group is
ONLINE. - Read Disk Partitions on the Overview tab. Confirm that Logs Storage and Files Storage have room.
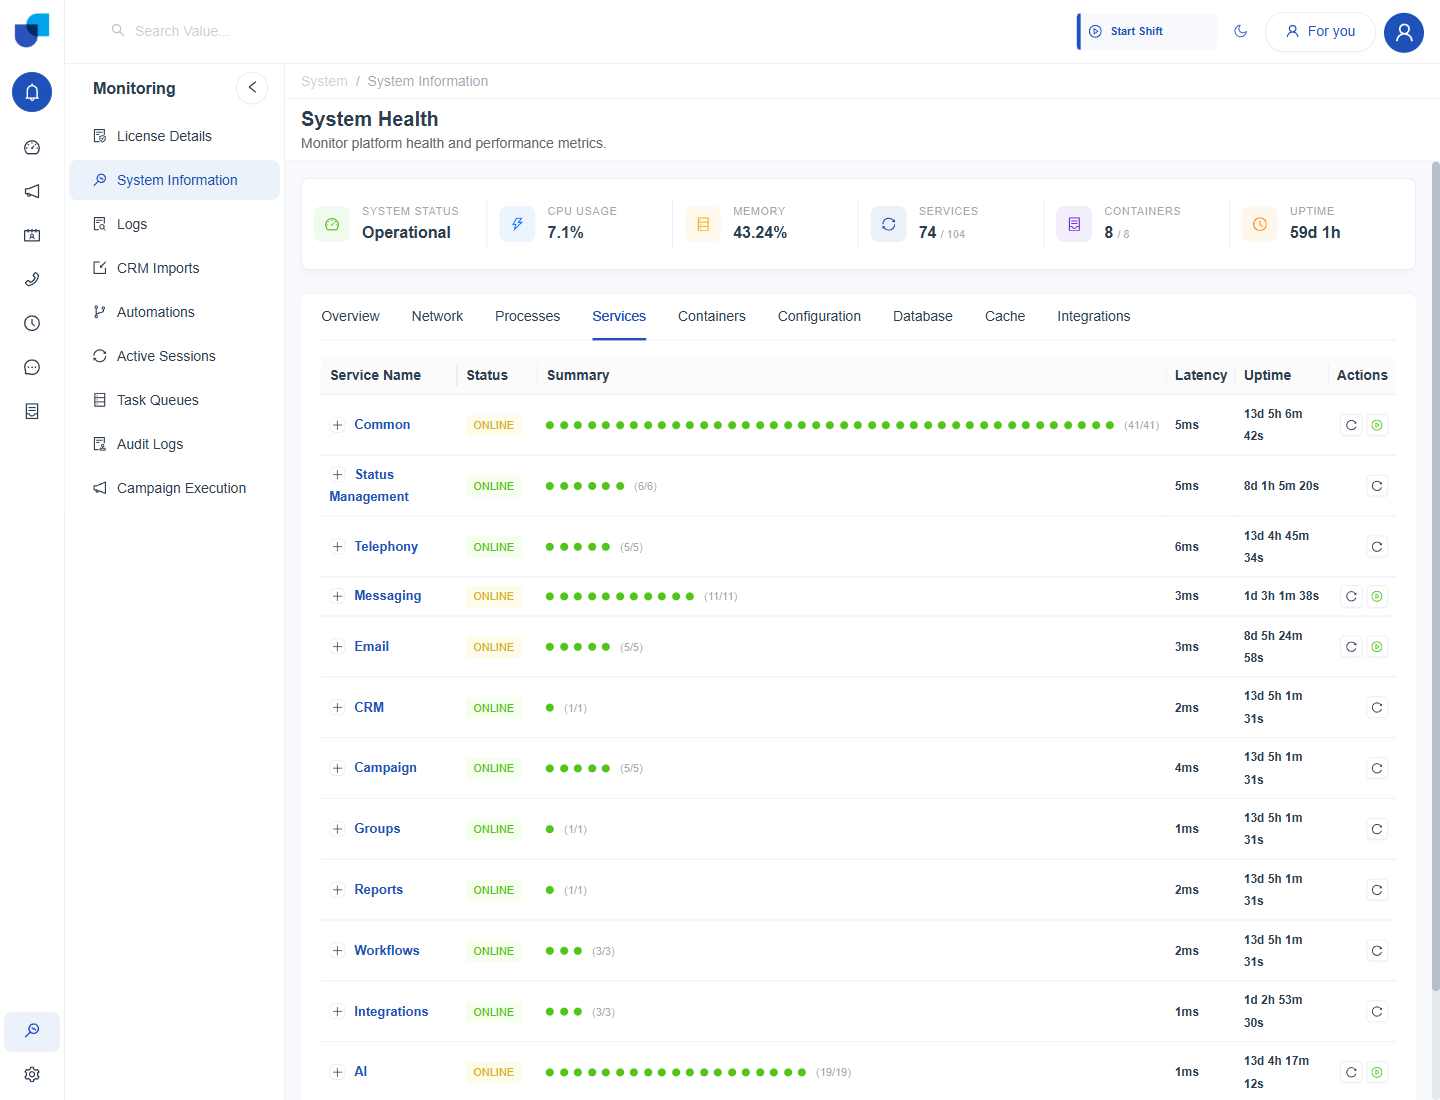
Figure 2. The Services tab, where each service group is confirmed as ONLINE before the launch.
Part 3: Check the License
Need: enough seats
See License Details.
- Open Monitoring → License Details.
- Read Active Users, and the days remaining on the license.
- Compare the remaining seats with the number of agents you plan to add.
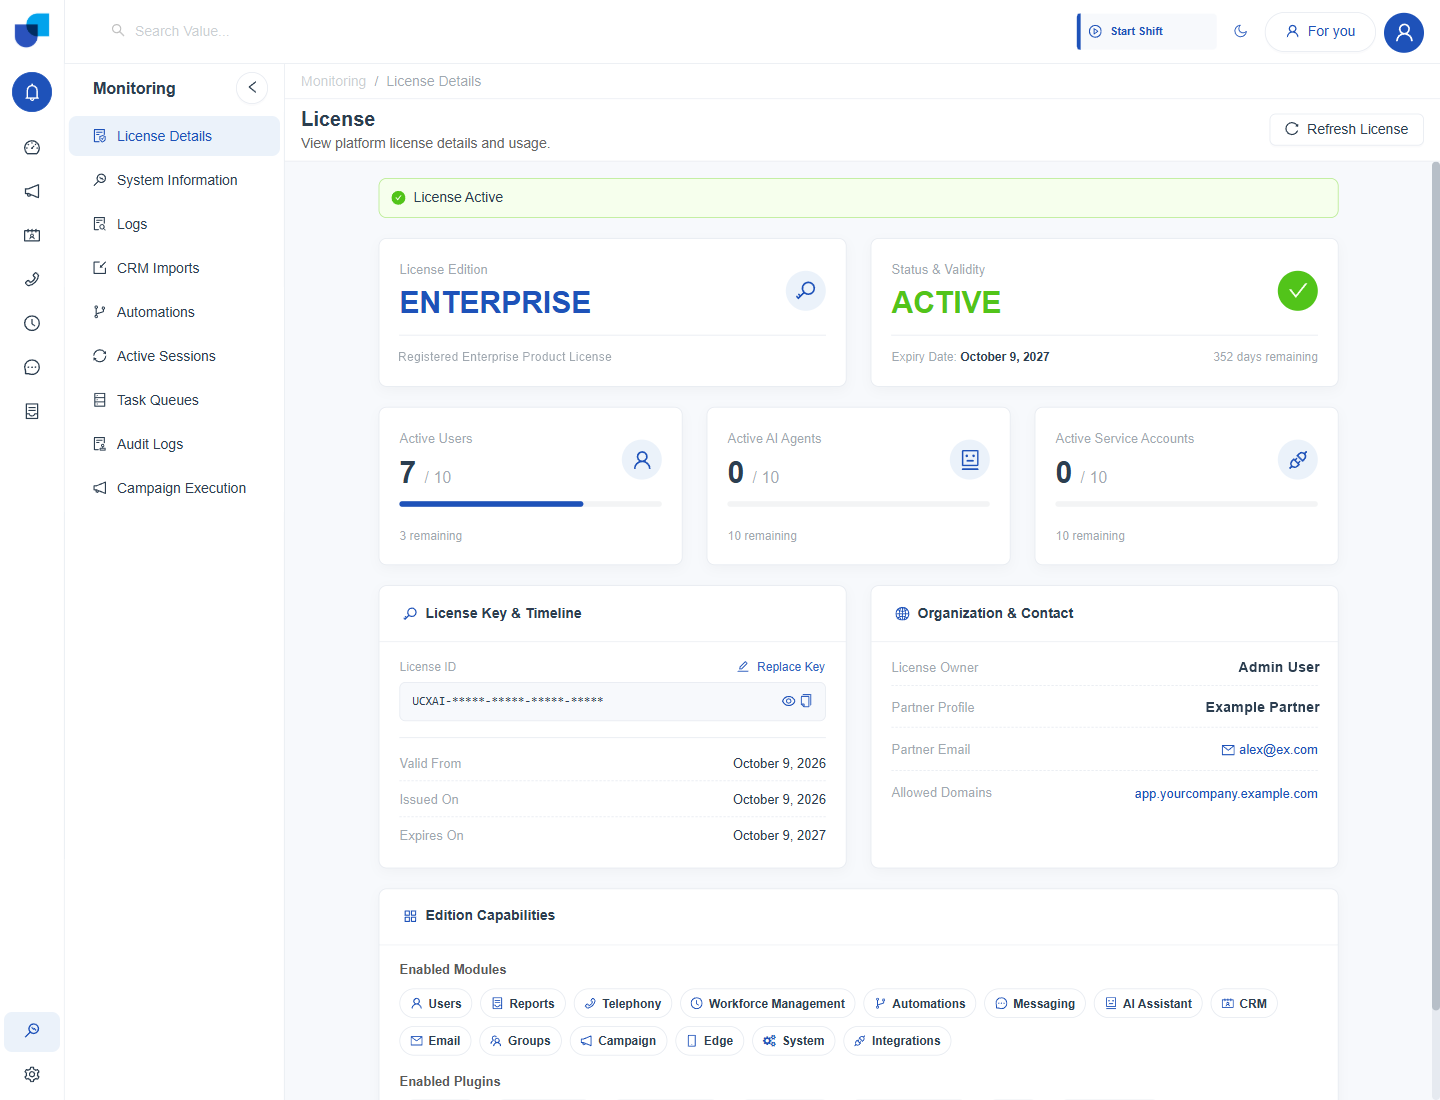
Figure 3. The License Details page, where the remaining seats are read.
Part 4: Confirm the Data and the Automations
Need: loaded data, and working automations
See CRM Imports and Automation Execution Monitor.
- Open Monitoring → CRM Imports and confirm that no import is active.
- Open Monitoring → Automations and search for Collections Disposition Routing.
- Open the Registry Health Check tab and confirm that the workflow shows
PASS. - Open Monitoring → Task Queues and read the workflow queue.
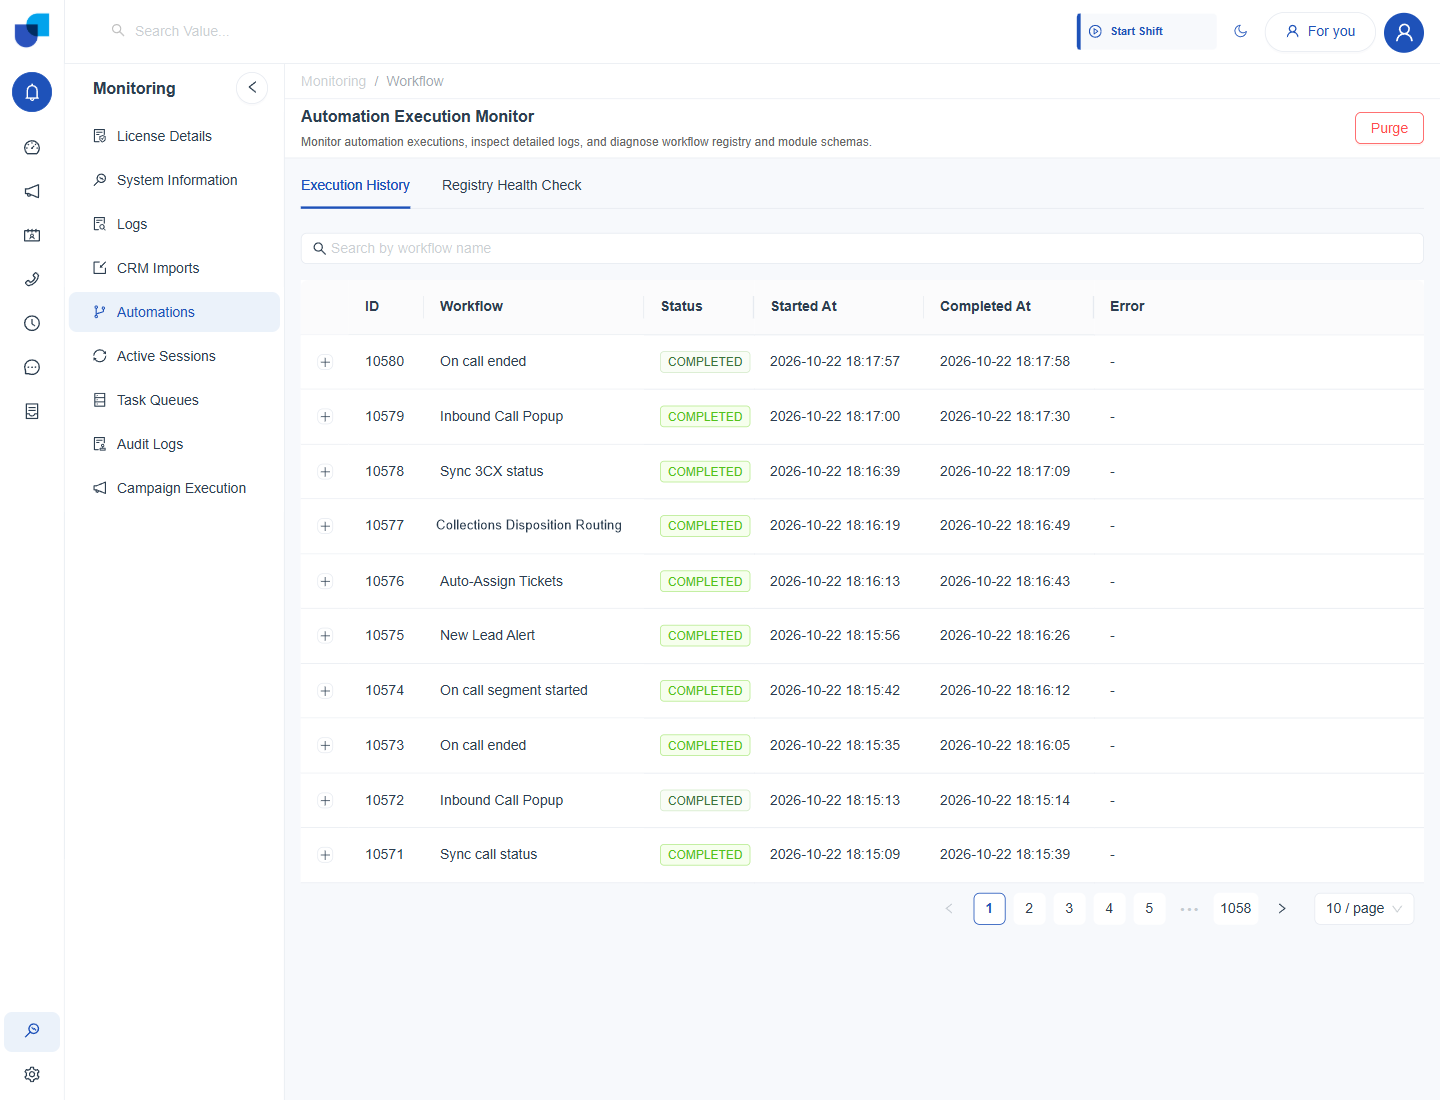
Figure 4. The Execution History tab, where the runs of the routing workflow are confirmed.
Part 5: Watch the Campaign
Need: proof of the result
See Campaign Execution.
- Start Overdue Payment Outreach from the Campaign area.
- Open Monitoring → Campaign Execution and click Refresh.
- Compare Total with Success and read Last Action.
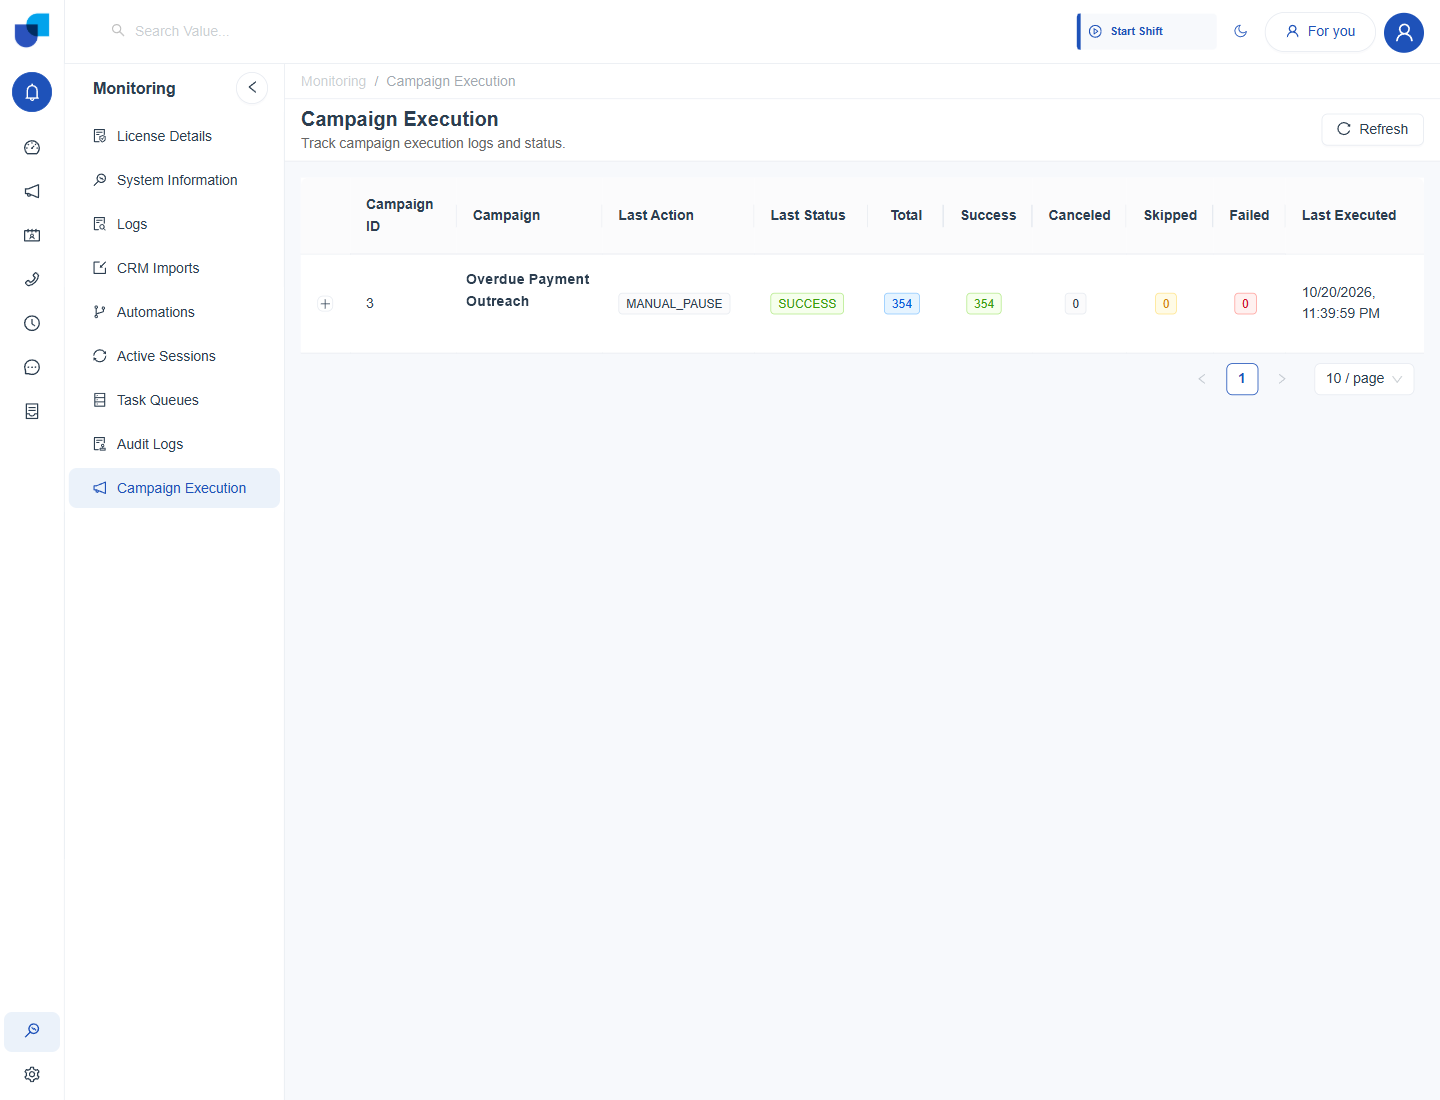
Figure 5. The Campaign Execution page for Overdue Payment Outreach.
Part 6: Follow Up in the Audit Trail
Need: an audit trail
See Audit Logs.
- Open Monitoring → Audit Logs.
- Type what you are looking for in the search box and press Enter. For example, type Lunch to find the change to the break limit, or Loan Servicing to find the group that was created.
- Read the User, Action and Activity columns.
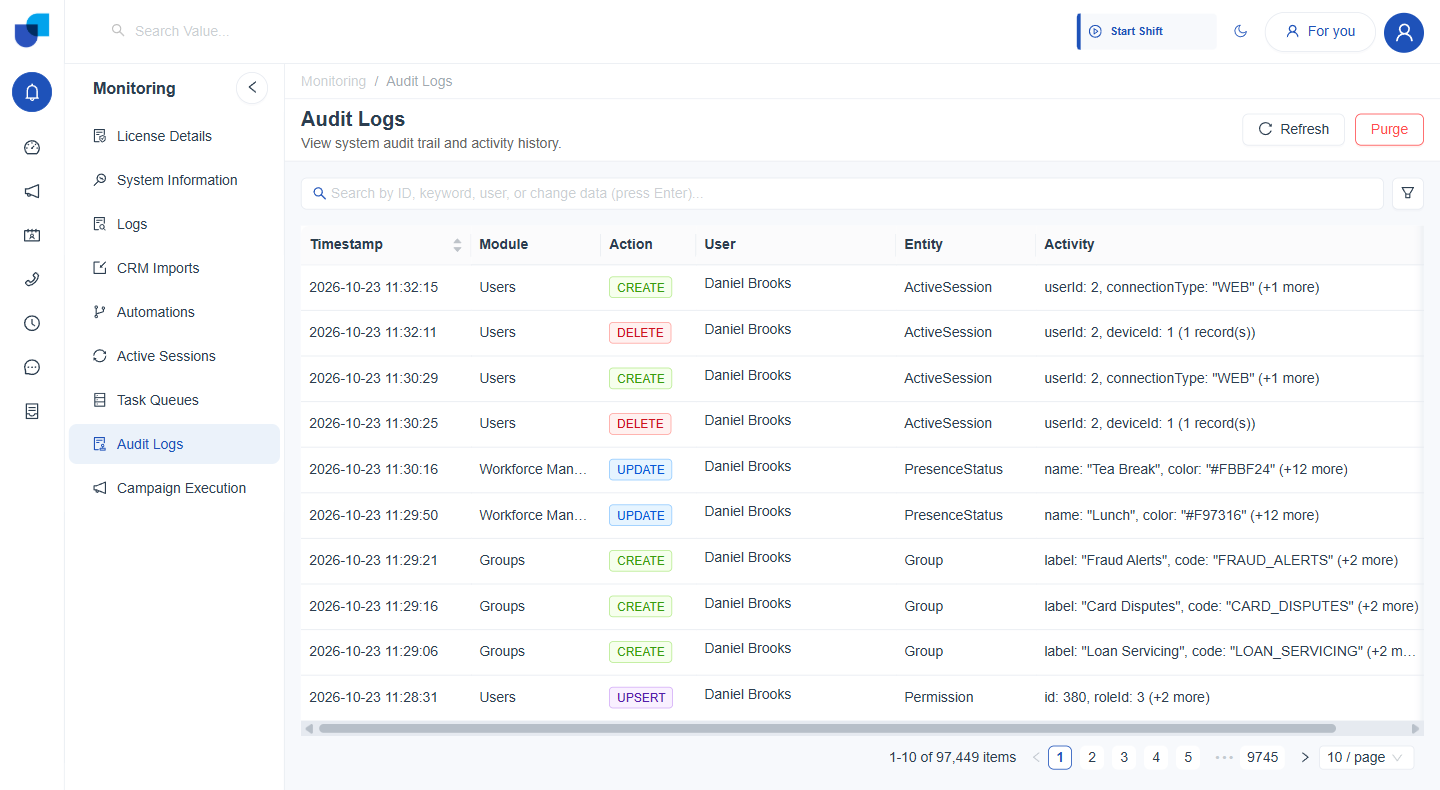
Figure 6. The Audit Logs page, where the new groups and the Lunch and Tea Break updates are traced to the person who made them.
Check the access with the Contact Center Supervisor role before you announce the setup. A supervisor should see Audit Logs and Active Sessions for their own groups only, and should not see the Purge buttons.