Condition
Path: Configuration → Automation → a workflow → Designer → Condition node
A Condition node branches a workflow in two directions based on a set of rules, evaluated against data the workflow already has from its Trigger or an earlier step. Where every other node in the Toolbox has a single path in and a single path out, a Condition node has two distinct outputs, one for when its rules match and one for when they do not, letting the rest of the workflow diverge from that point.
Adding a Condition Node
- Open a workflow's Designer. Configuration → Automation → a workflow.
- Drag the Condition card from the Toolbox onto the canvas. Condition sits third in the Toolbox, between Action and Delay, marked with a yellow question mark icon and the subtitle Branches based on rules.
- Connect an earlier node's output into the Condition node's top handle. The small dot at the top center of the node accepts one incoming connection, the same way every other node does.
- Connect each of its two bottom handles onward. Covered in full under True and False Branches below.
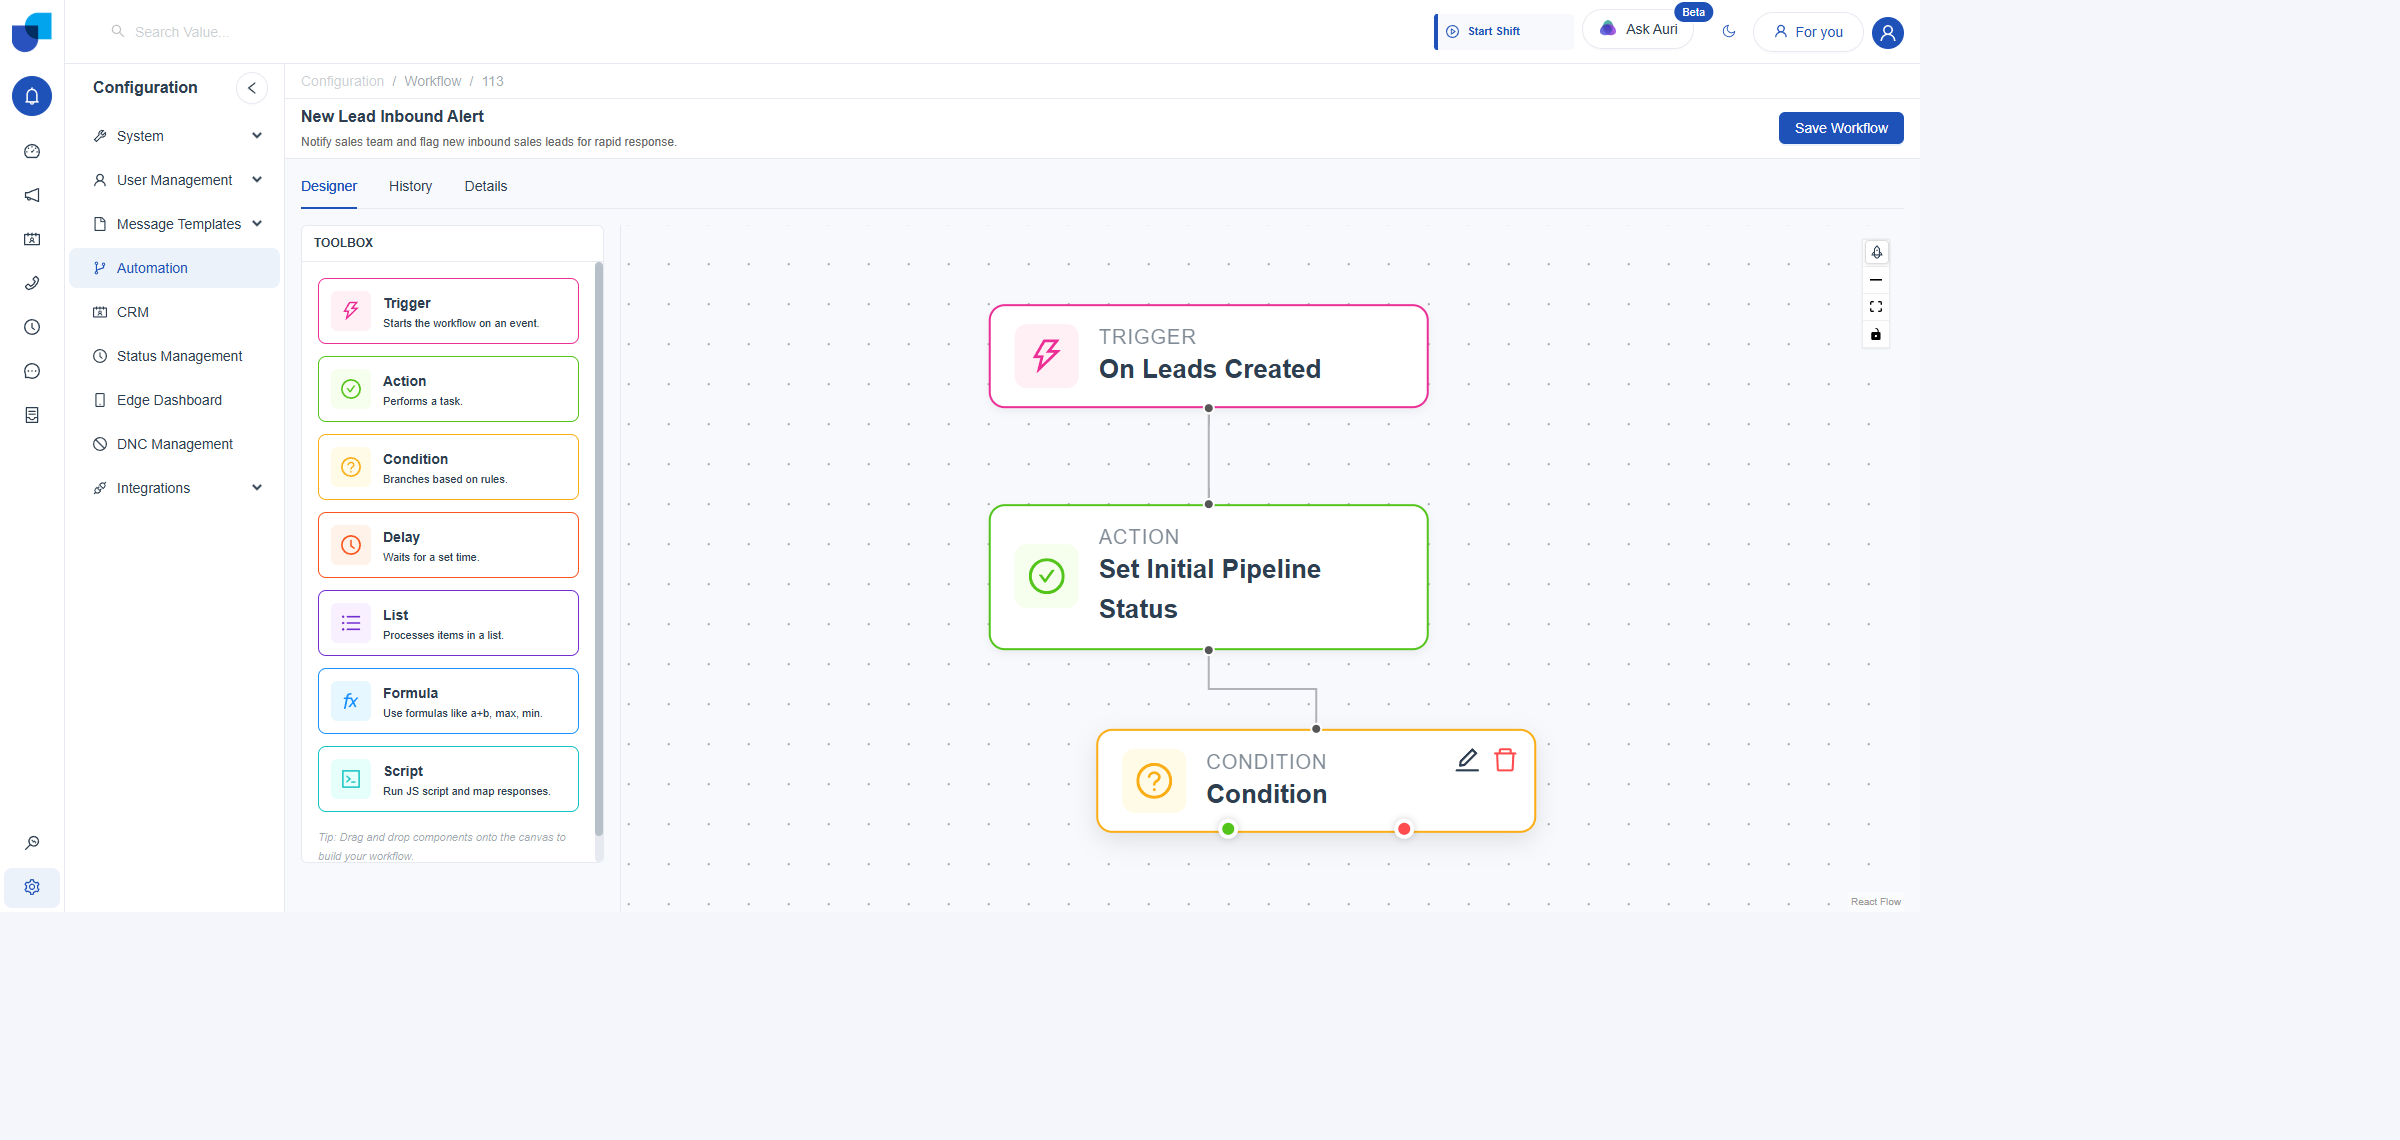
Figure 1. A Condition node connected into a real workflow, wired to the Action step ahead of it. The green dot and red dot at the bottom are its two separate outputs.
Opening the Condition Editor
- Click the Condition node to select it. Reveals its edit and delete icons.
- Click the edit icon. Opens the Edit condition Node panel on the right, with a Label field above a Conditions section.
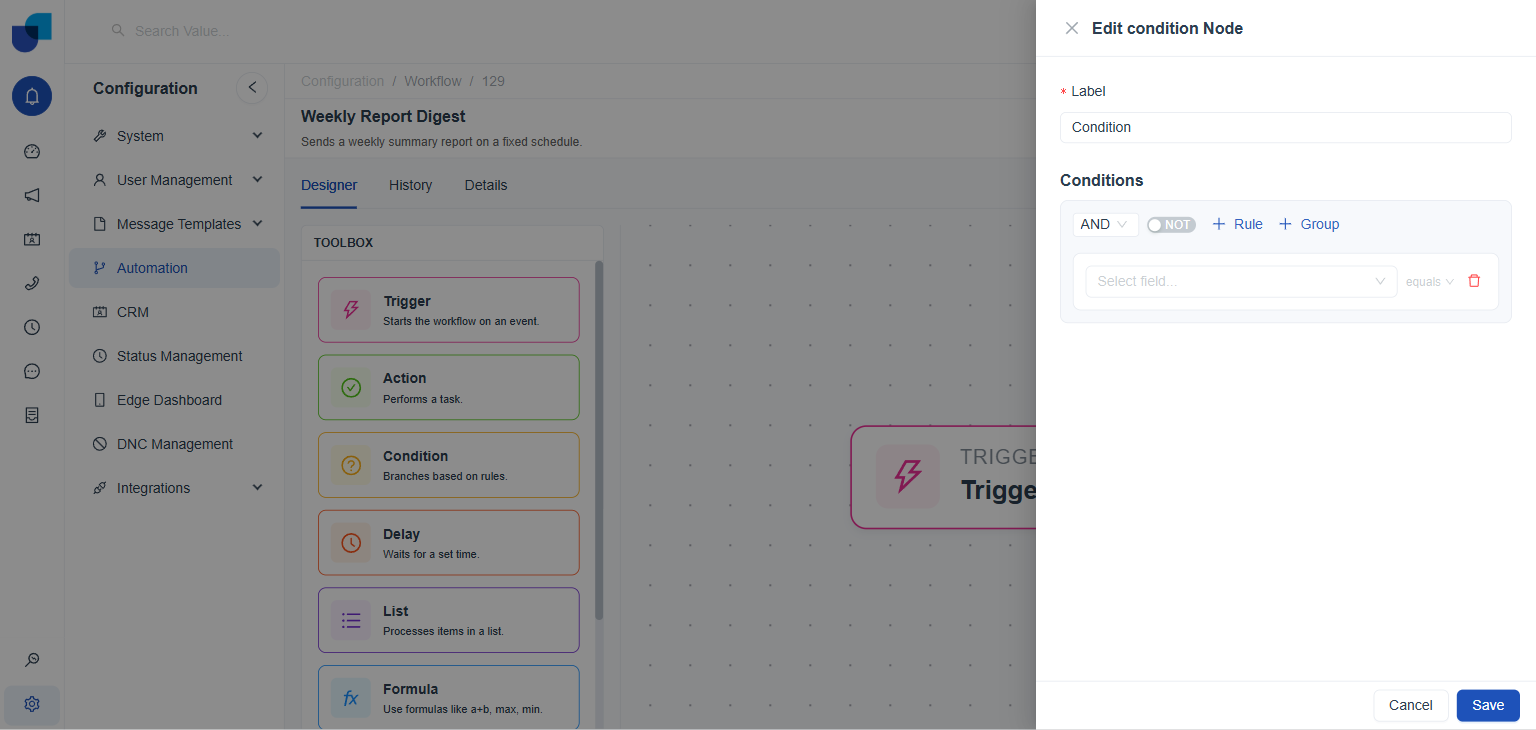
Figure 2. The Edit condition Node panel in its default state: one rule row, under a single AND group.
Building a Rule
Every rule row has the same three parts: a field to test, an operator, and the value to compare against. A new Condition node opens with exactly one empty rule row already in place.
| Part | What it does |
|---|---|
Select field... | Chooses the piece of data the rule tests, drawn from the workflow's own data such as the Trigger's output. |
equals | The operator, defaulting to equals, compared against the chosen field. |
| Delete icon | Removes that single rule row. Each rule row has its own delete icon, separate from the group's own delete icon. |
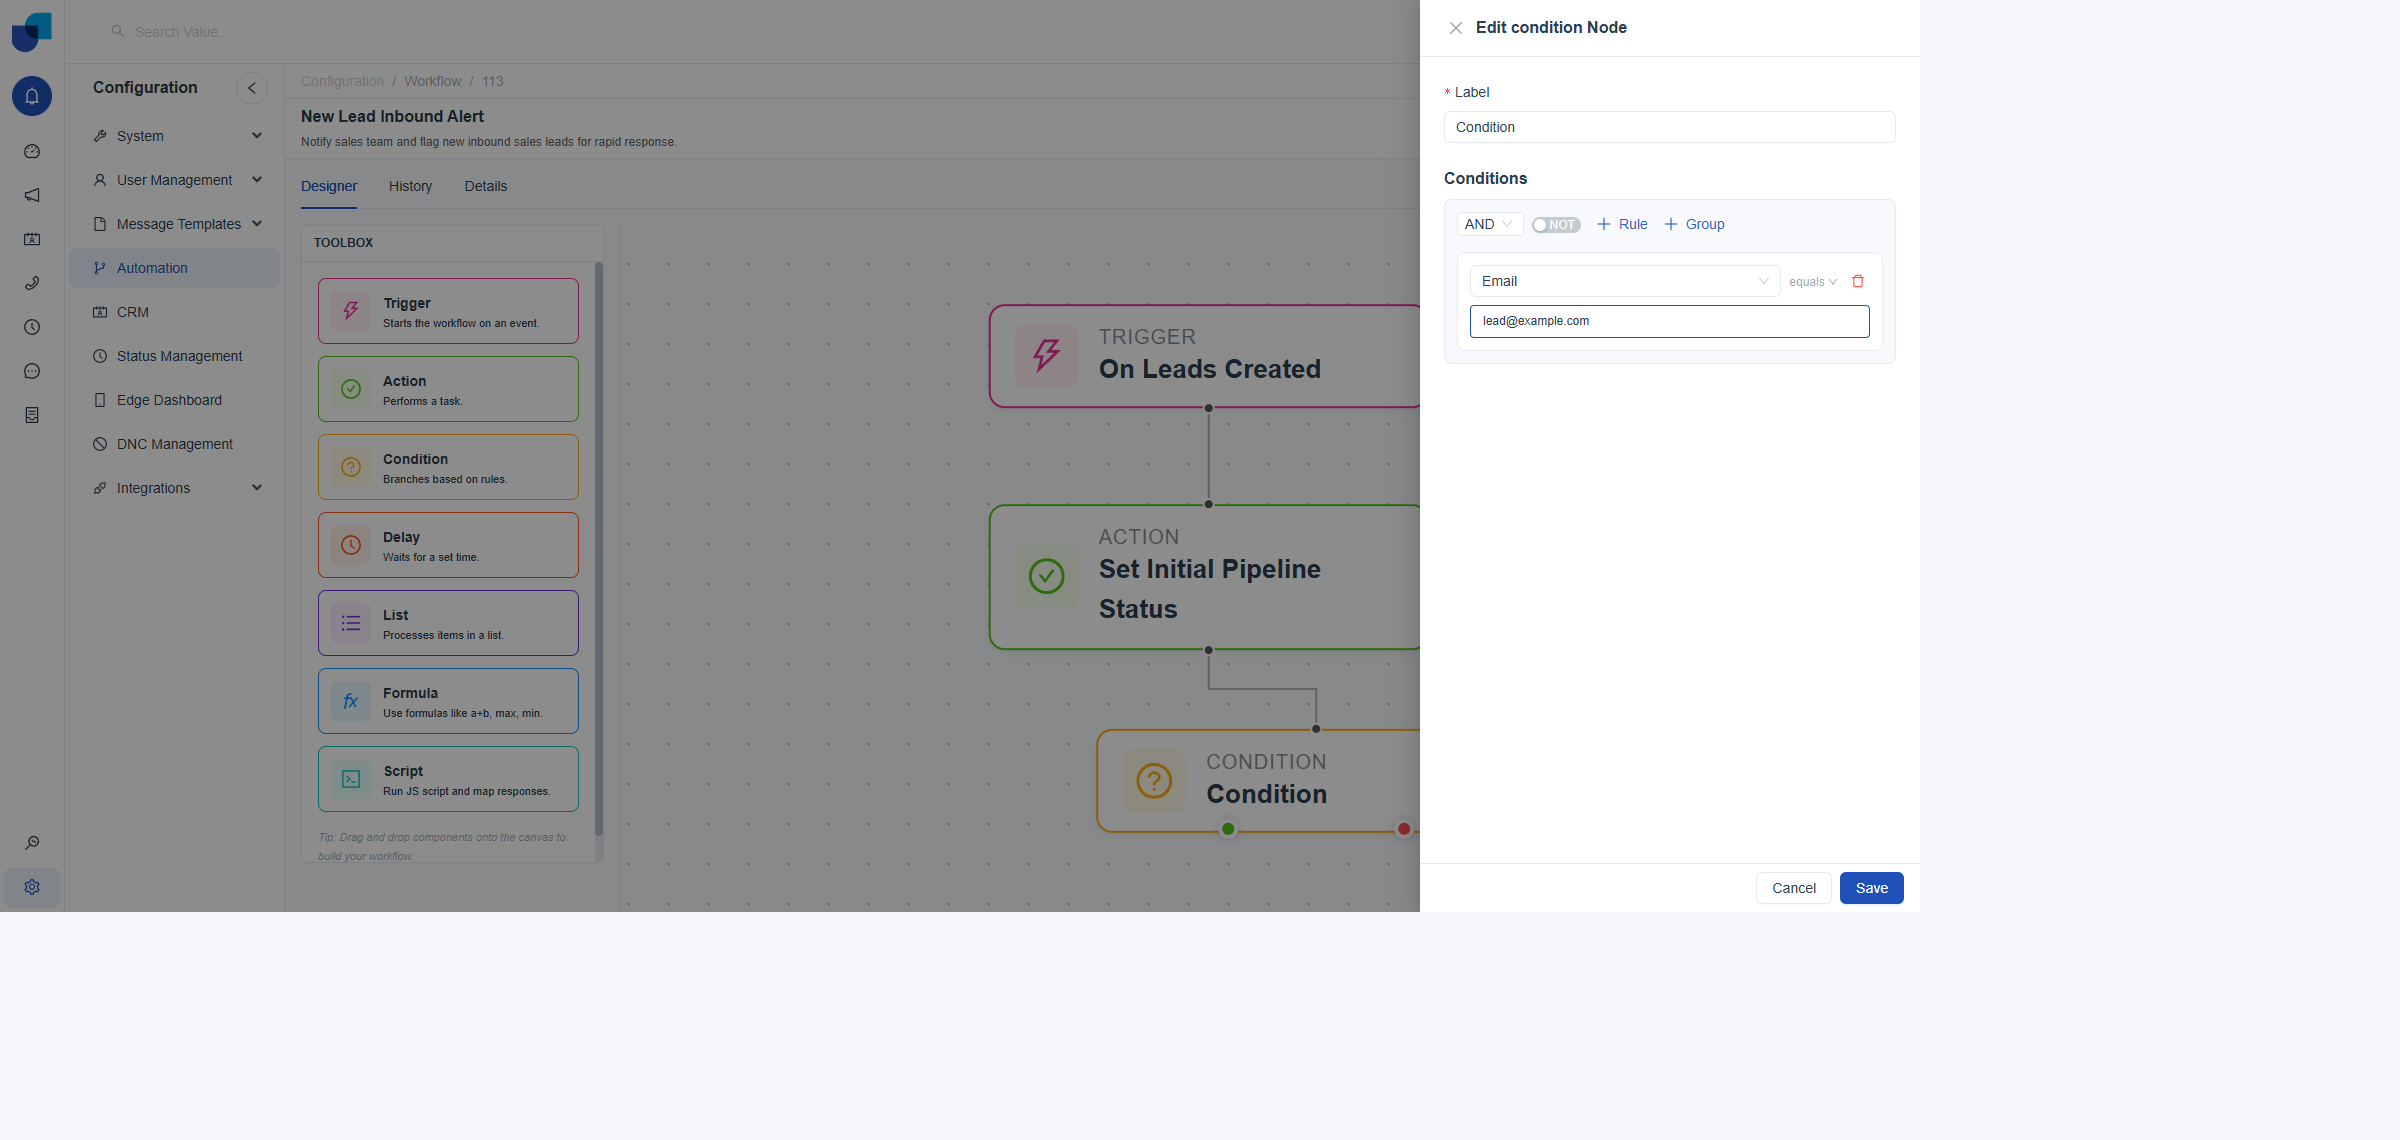
Figure 3. Select field populated live with Email, pulled from the connected Action node's own output.
Select field only lists data from a node this Condition node is actually connected to by a drawn connector line. A Condition node dropped onto the canvas but not yet wired to its predecessor shows no fields to pick from.
Combining Rules: AND and OR
The dropdown at the top left of each group, defaulting to AND, decides how its rules combine.
| Mode | Matches when |
|---|---|
AND | Every rule in the group is true at once. |
OR | Any single rule in the group is true. |
Adding More Rules and Nested Groups
- Click + Rule to add another rule row to the current group. Each new rule joins the same AND or OR logic already set for that group.
- Click + Group to nest an entirely separate group inside the current one. A nested group gets its own AND or OR dropdown, its own NOT toggle, and its own + Rule and + Group buttons, independent of the group that contains it.
- Click a group's delete icon to remove it entirely. Only a nested group shows this icon. The outermost group cannot be deleted on its own, since removing it would leave the node with no conditions at all.
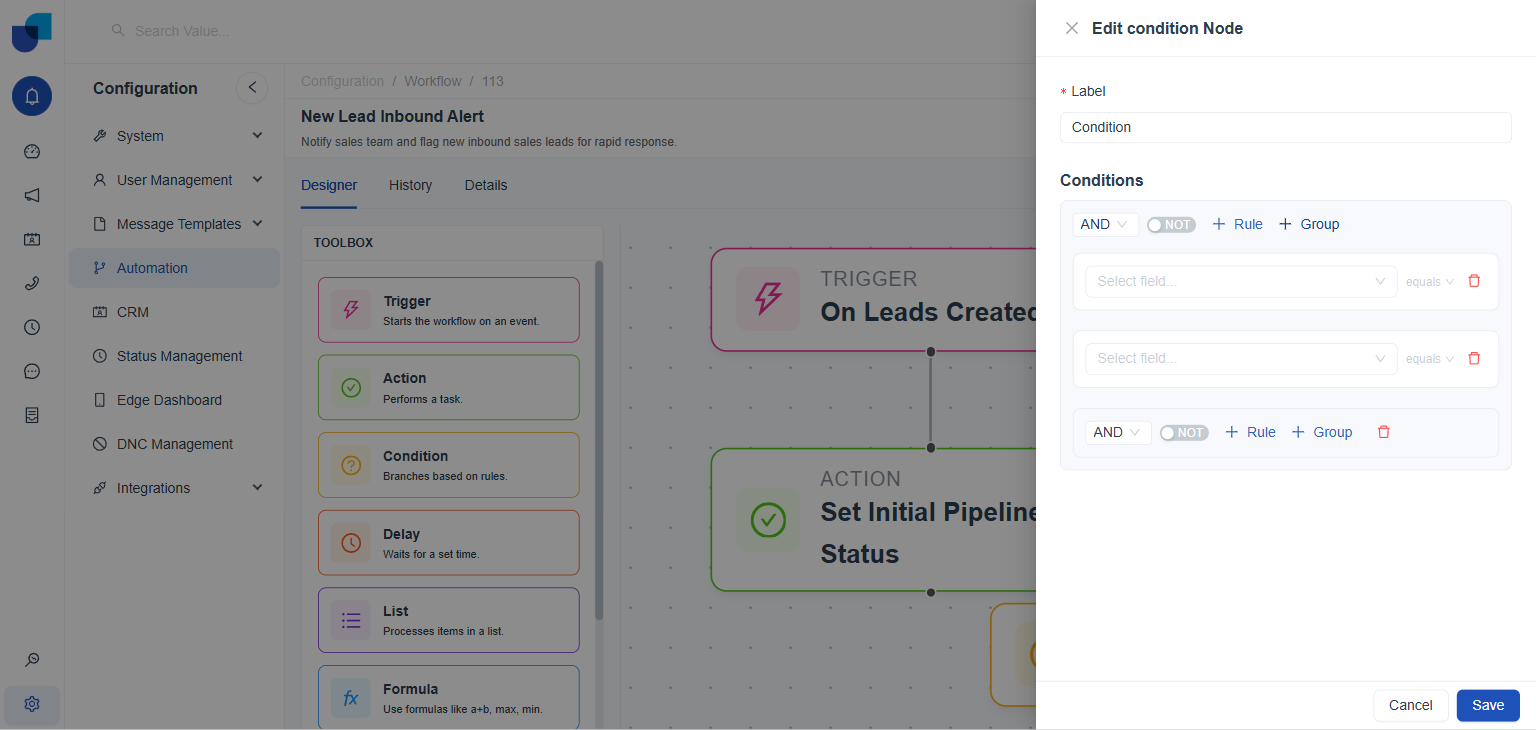
Figure 4. A Condition node after clicking + Rule once and + Group once: two rule rows, followed by a nested group ready for its own rules.
Excluding Matches: the NOT Toggle
Each group, top level or nested, has its own NOT toggle, switched off by default. Turning it on inverts that group's result: a group that would otherwise match now fails, and a group that would otherwise fail now matches.
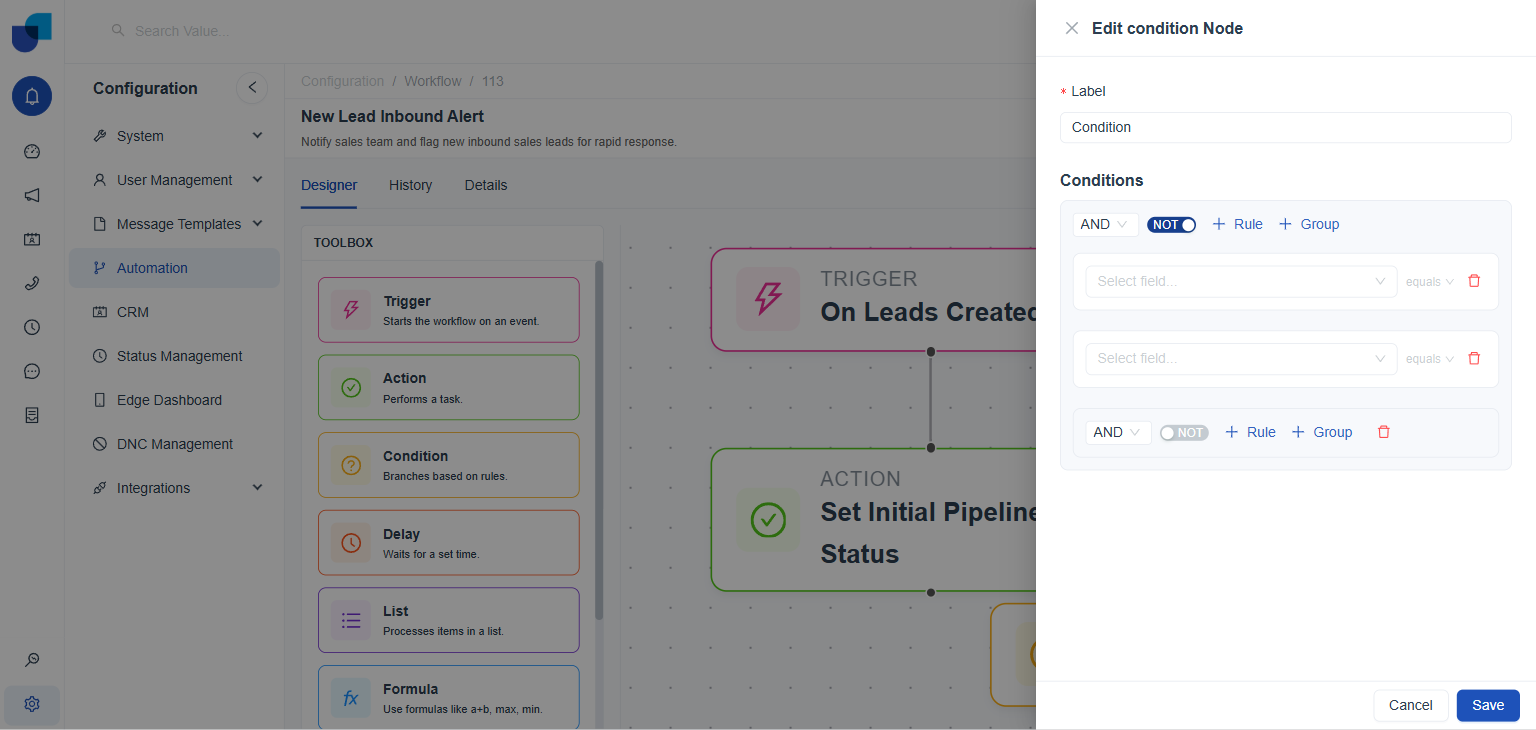
Figure 5. The NOT toggle switched on for the top level group, shown filled in solid blue instead of its default outline.
Because NOT applies per group rather than per rule, wrapping a single rule in its own nested group is the way to invert just that one rule without affecting the rest of the condition.
True and False Branches
A Condition node always has exactly two output handles at its bottom edge, visible on the canvas once the node is placed.
| Handle | Fires when |
|---|---|
| ● Green, left (True) | The condition's rules match, following AND, OR, and NOT exactly as configured. |
| ● Red, right (False) | The condition's rules do not match. |
Each handle can be connected to its own, separate chain of nodes, letting a single Condition node send a workflow down two genuinely different paths from one decision point.
Nesting groups with their own AND, OR, and NOT settings makes it possible to build logic such as A and either B or C, entirely inside a single Condition node, instead of chaining several Condition nodes together in series.