Script
Configuration → Automation → a workflow → Designer → Script node
A Script node runs a short piece of JavaScript and maps whatever it returns into fields the rest of the workflow can use. It is the most flexible node in the Toolbox, for transformations a Formula node's built-in functions cannot cover. Like Delay, List, and Formula, it has a single path in and a single path out.
Adding a Script Node
- Open a workflow's Designer. Configuration → Automation → a workflow. See Workflow Builder.
- Drag the Script card from the Toolbox onto the canvas. Script sits last in the Toolbox, marked with a teal code icon and the subtitle Run JS script and map responses.
- Connect an earlier node's output into the Script node's top handle, and its own output into whatever should run next.
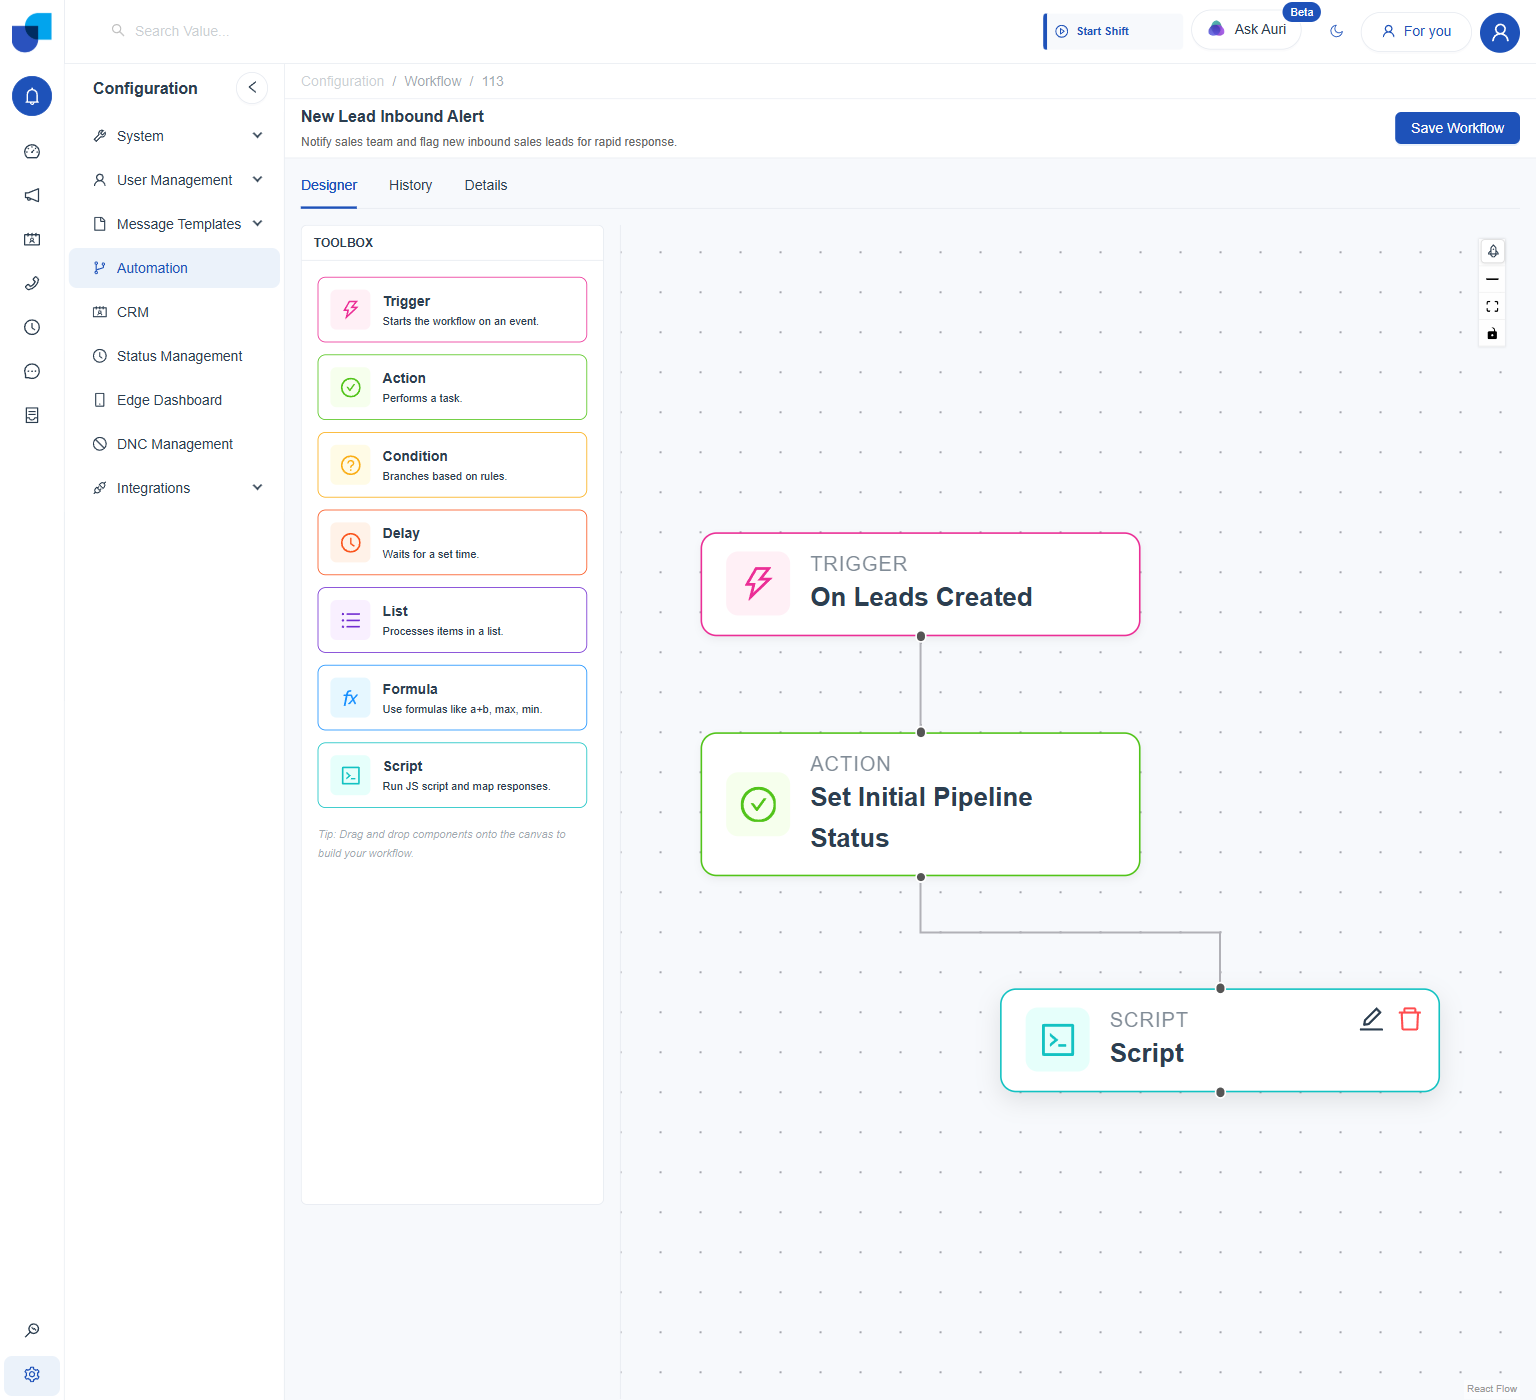
A Script node connected after an Action step, with a single top and bottom connection point.
Opening the Script Editor
- Click the Script node to select it. Reveals its edit and delete icons.
- Click the edit icon. Opens the Edit script Node panel, with a Label field above a Script Code section and a Response Mapping section below it.
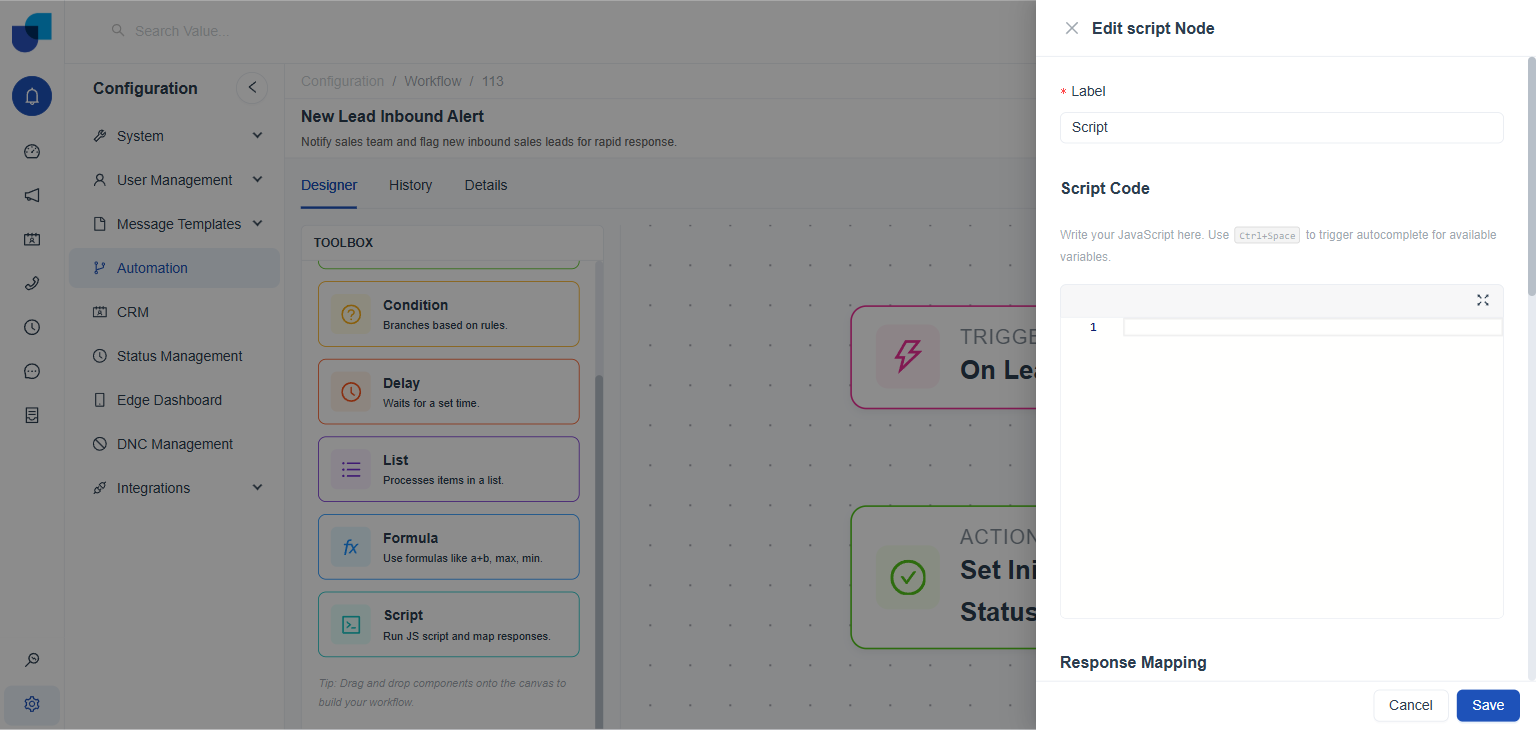
The Edit script Node panel in its default state: an empty Script Code editor above an empty Response Mapping section.
Writing the Script
Script Code is a full code editor, Monaco, the same editor that powers Visual Studio Code, not a plain text box. It accepts real JavaScript, including a return statement for whatever value the script should hand off.
- Write JavaScript directly into the editor. Standard syntax highlighting, line numbers, and bracket matching all work as expected.
- Type a few letters of an upstream field's name to reference it, then pick the matching suggestion.
For example, typing
casetypesurfaces entries like "Get Record Service Cases By ID - Case Type", each labeled by the node and field it comes from. - Accept the suggestion to insert the real reference syntax.
Inserts
(nodeId.fieldName), for example(action_3.caseType), wherefieldNameis the field's label converted to camelCase.
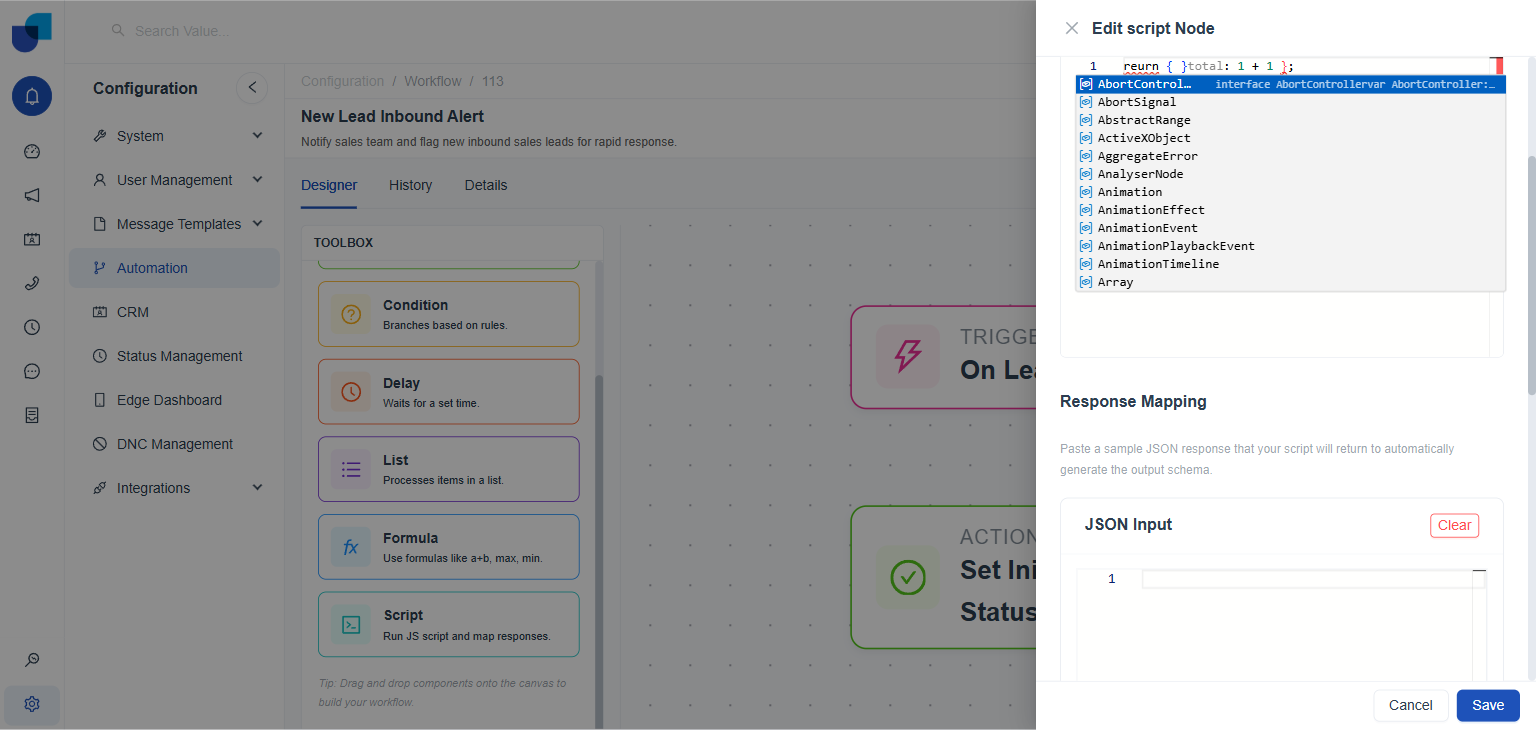
Ctrl+Space on an empty editor: generic JavaScript globals only, with nothing typed yet to match against.
Autocomplete does list real workflow fields, not just JavaScript globals. It only surfaces them once matching letters are typed first.
Mapping the Response
Response Mapping uses the same pattern seen elsewhere in the platform: paste a sample of the JSON the script will return, and a schema is generated automatically from it.
- Paste a sample JSON response into JSON Input, or save the script directly.
A sample can be pasted by hand, but it also auto-populates from the script's own
returnstatement once saved, with no manual step needed. - Review the generated Schema Editor below it. Lists each detected field, its Data Type, and an editable Field Type, with a delete action per field.
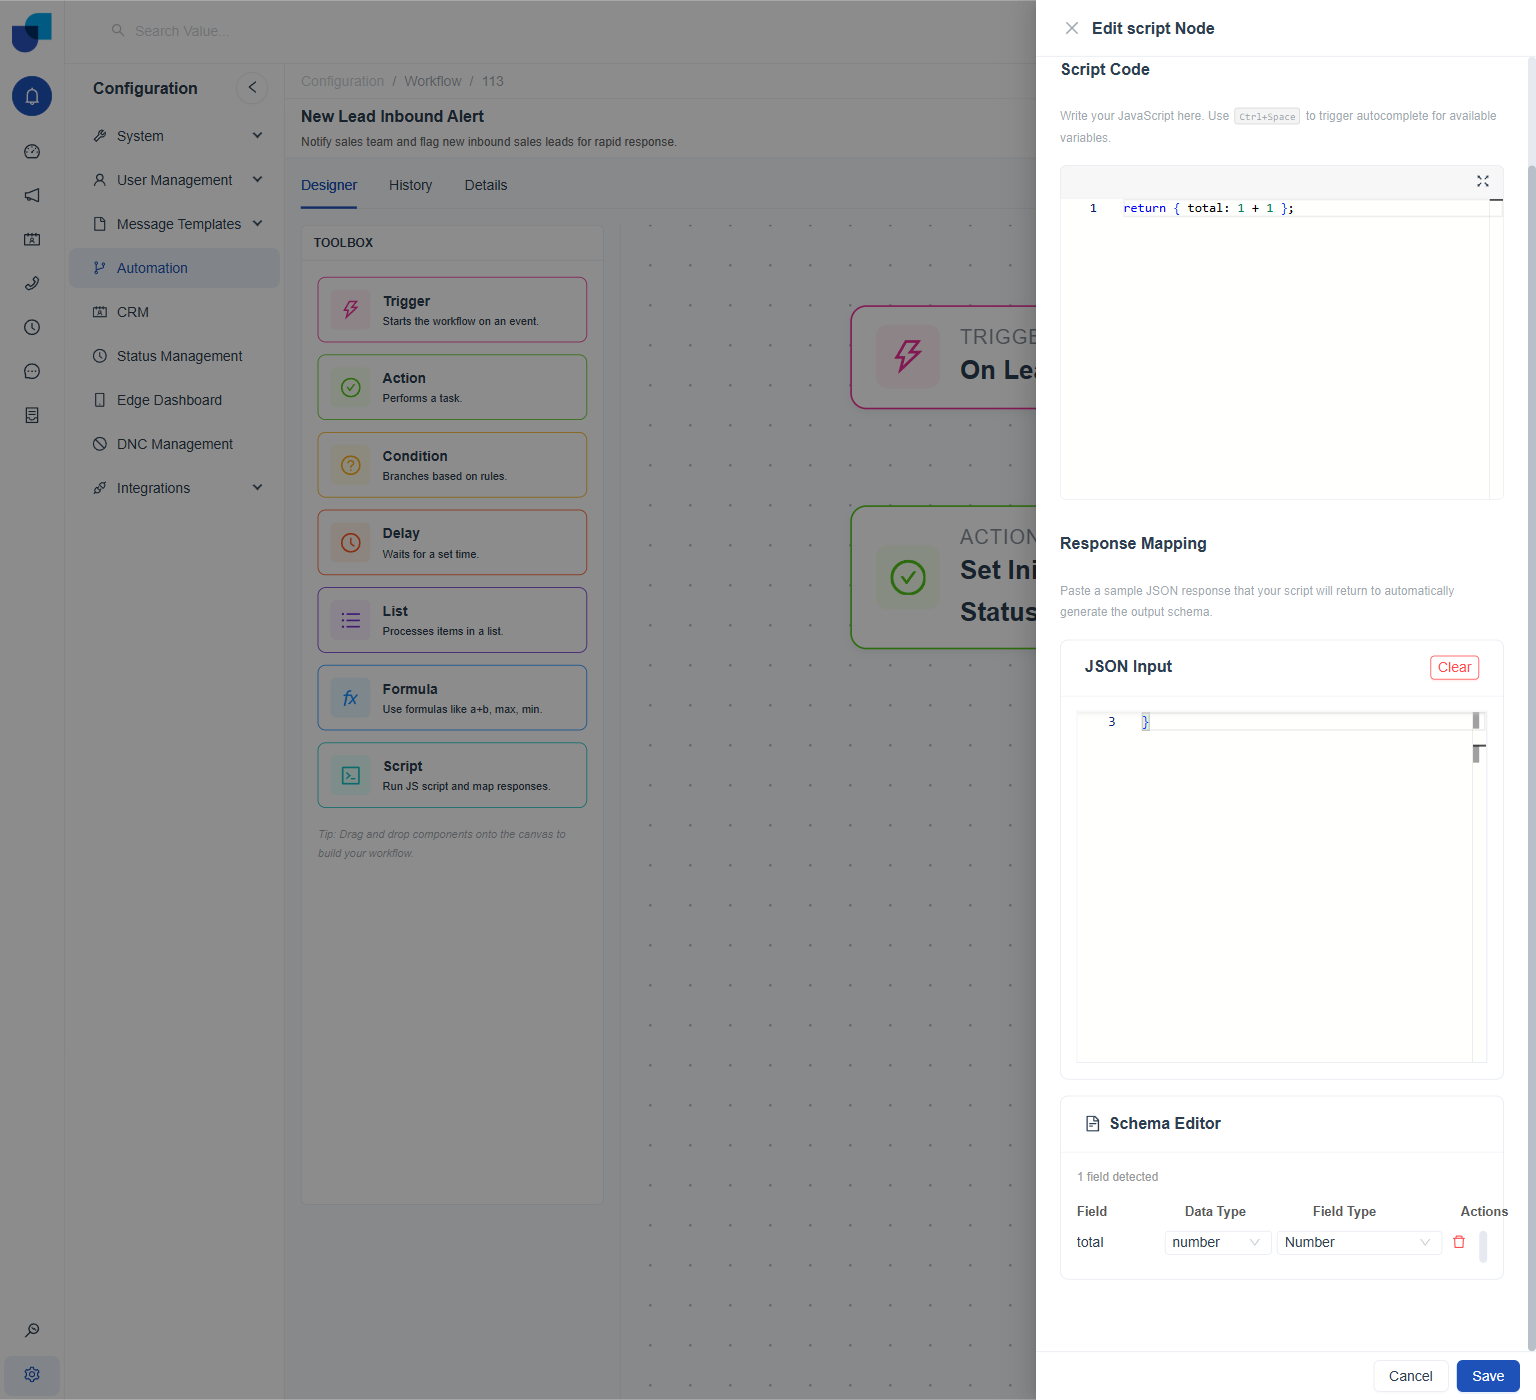
A complete example: the script returns total, the JSON Input sample confirms its shape, and Schema Editor detects one field, total, typed as a number.
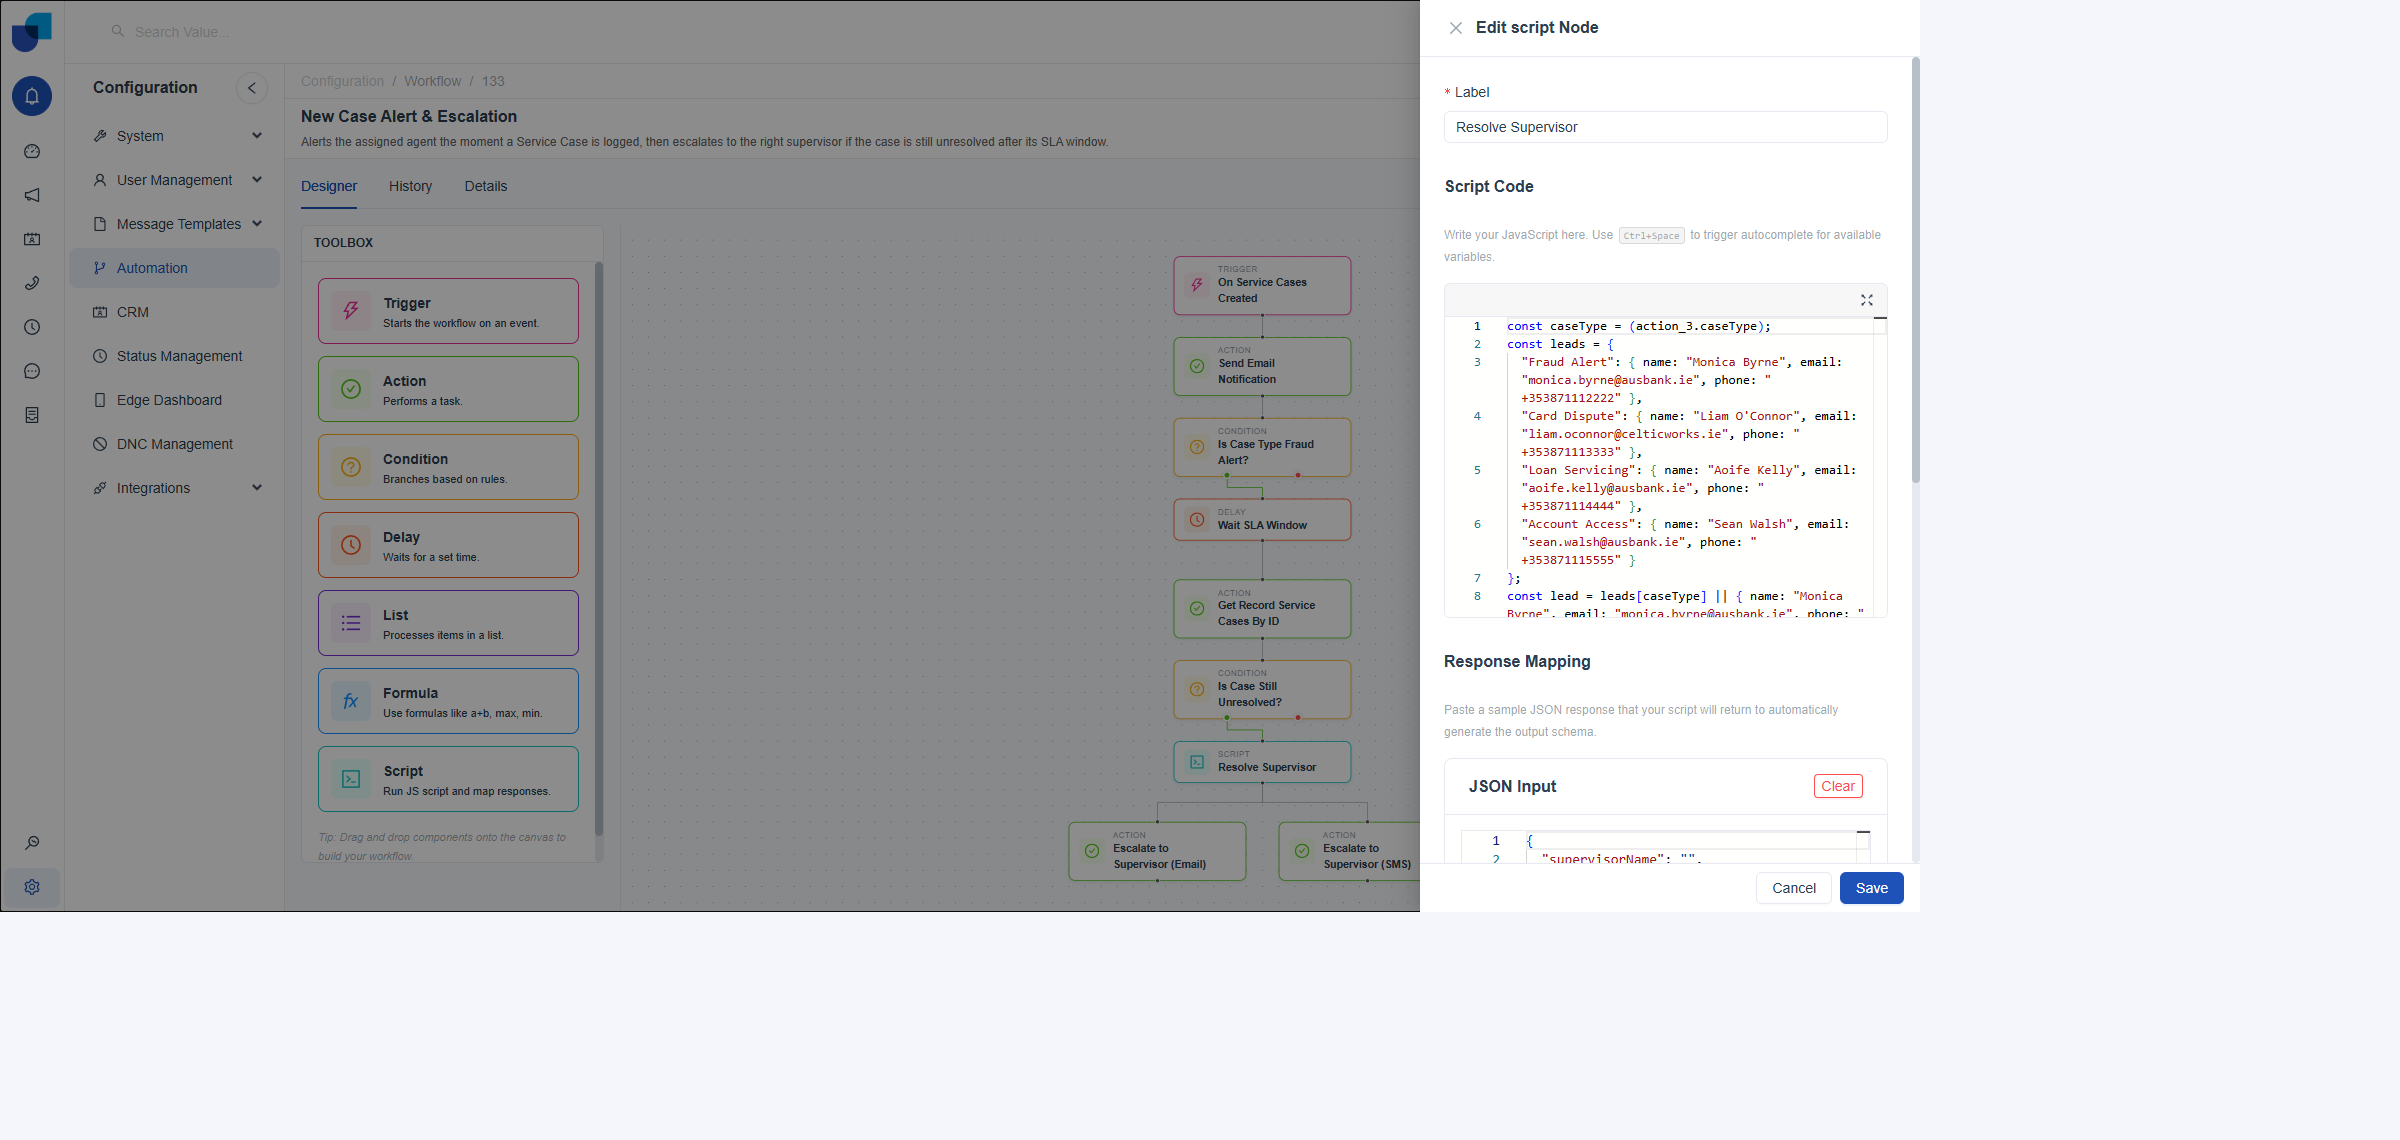
A real example from a live workflow: Case Type read via (action_3.caseType), and a 3-field schema generated automatically from the return statement, with no JSON pasted by hand.
Field Types also get inferred from field names, not just their JSON data type. supervisorEmail and supervisorPhone auto-typed as Email and PhoneNumber, not plain string.
Field Type Options
Each detected field's Field Type can be changed manually in the Schema Editor, independent of the data type the sample JSON implied.
| Field Type |
|---|
string |
number |
boolean |
This same "paste a sample, get a schema" pattern also appears on Webhook creation and on a CRM External Module's Res Schema; learning it once here carries over directly to both.