Delay
Configuration → Automation → a workflow → Designer → Delay node
A Delay node pauses a workflow for a set length of time before letting it continue to the next step. Unlike a Condition node, it has a single path in and a single path out; it never branches, it only waits.
Adding a Delay Node
- Open a workflow's Designer. Configuration → Automation → a workflow. See Workflow Builder.
- Drag the Delay card from the Toolbox onto the canvas. Delay sits fourth in the Toolbox, marked with an orange clock icon and the subtitle Waits for a set time.
- Connect an earlier node's output into the Delay node's top handle, and its own output into whatever should run next. A single dot at the top accepts the incoming connection; a single dot at the bottom carries the workflow forward once the wait ends.
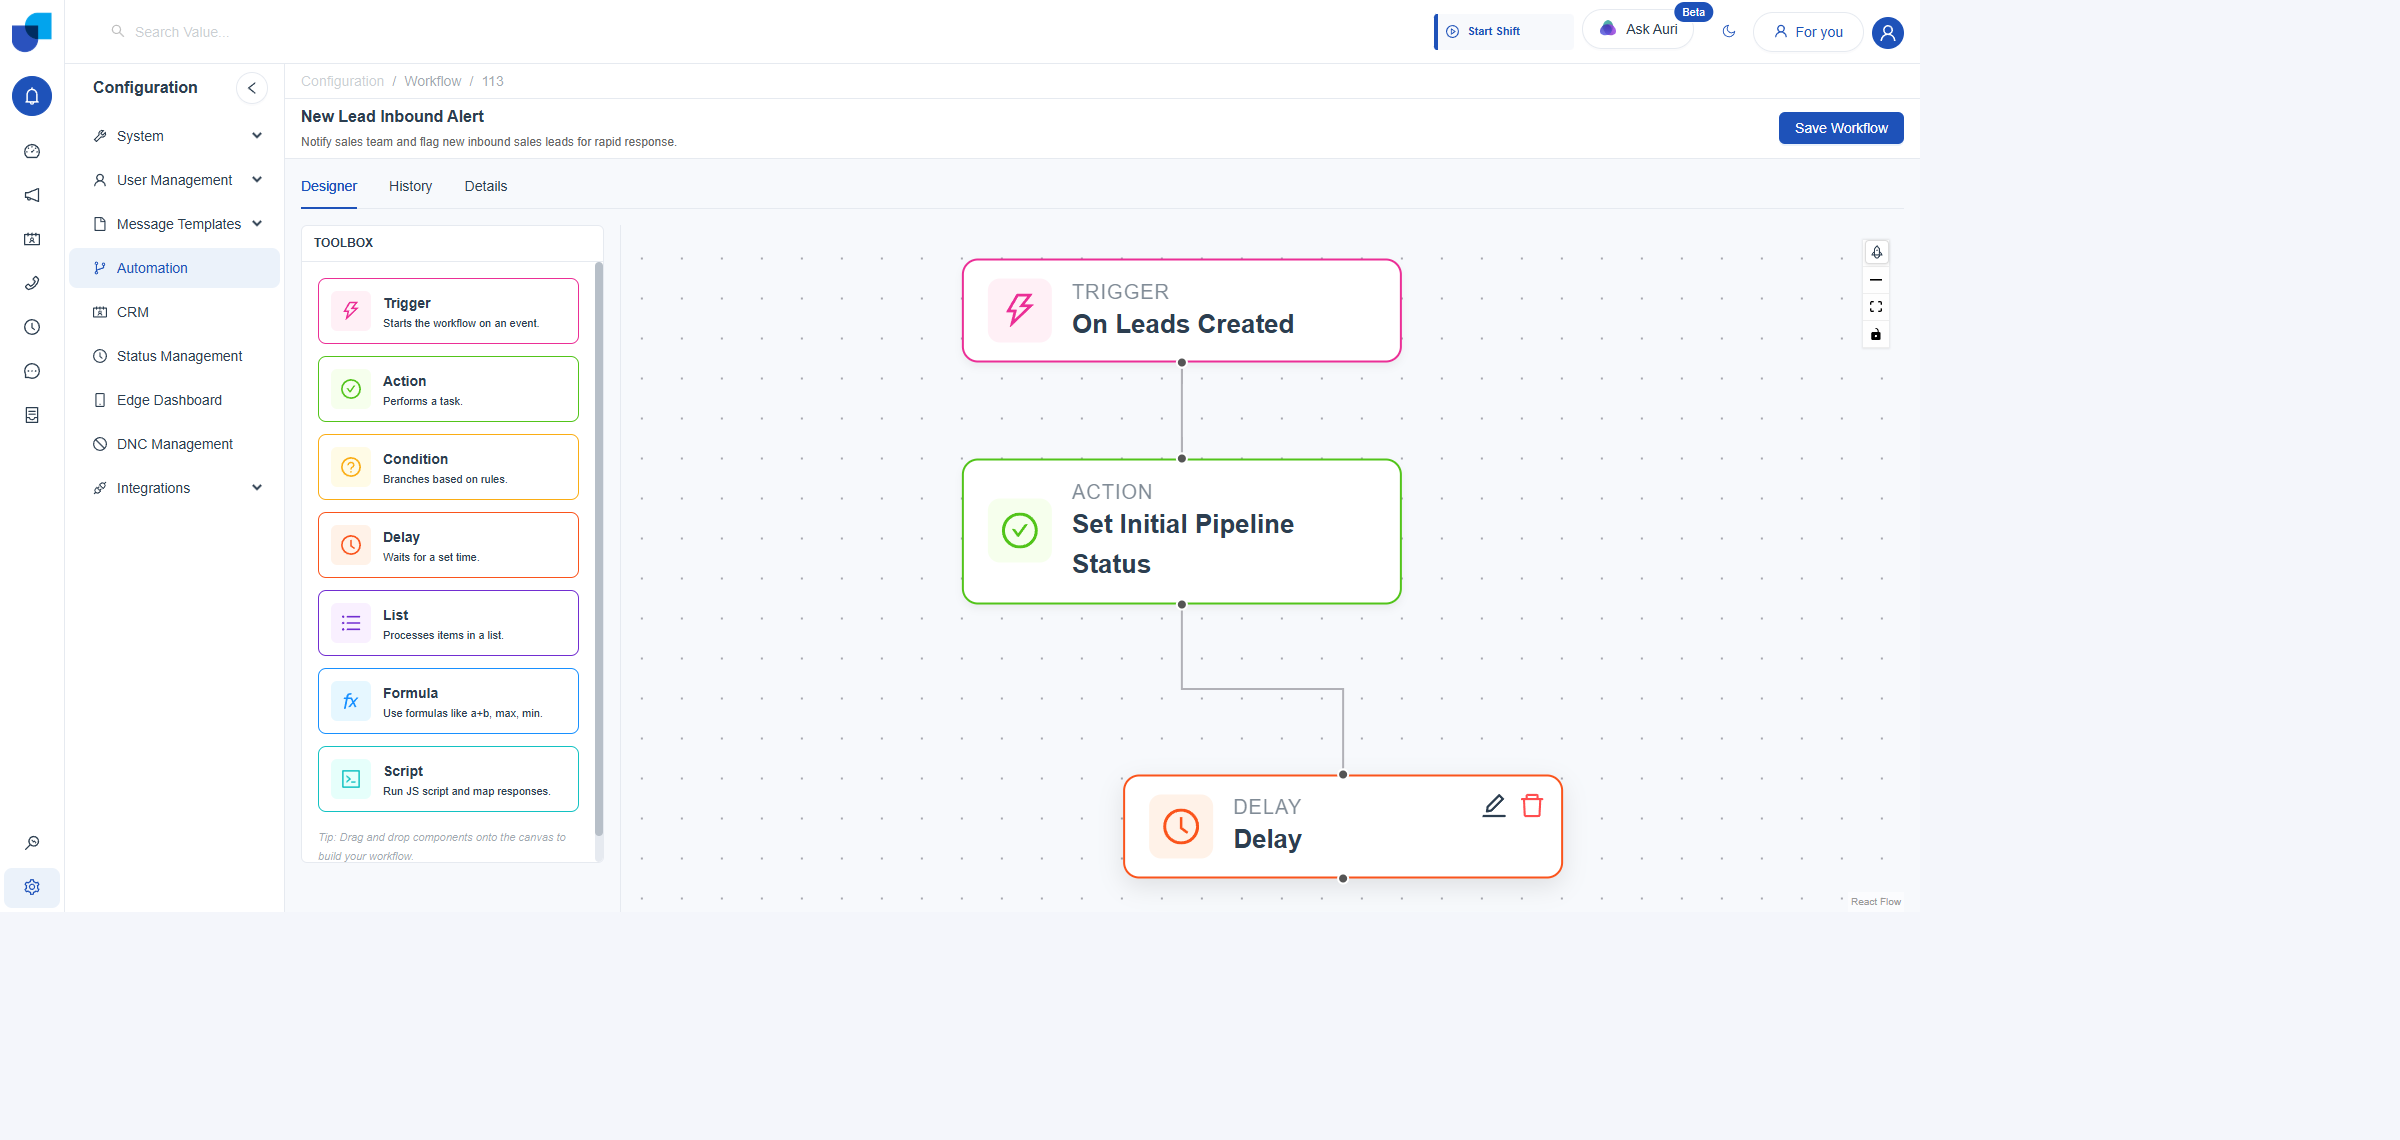
A Delay node placed on the canvas. Its single top and bottom connection points sit in line with the rest of the workflow, unlike a Condition node's two separate outputs.
Opening the Delay Editor
- Click the Delay node to select it. Reveals its edit and delete icons.
- Click the edit icon. Opens the Edit delay Node panel, with a Label field above a Delay Configuration section.
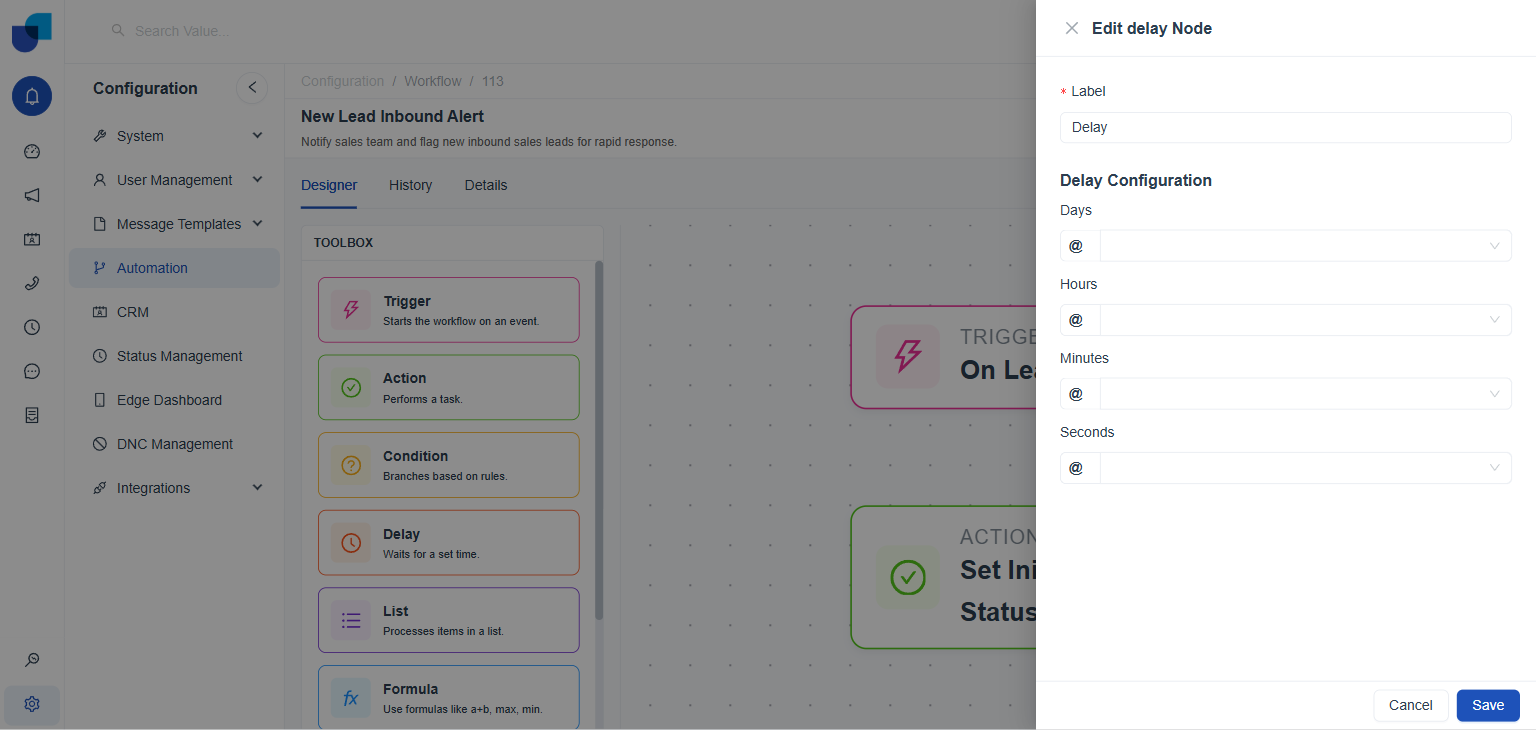
The Edit delay Node panel in its default state: Days, Hours, Minutes, and Seconds, each empty and set to its Dynamic Mention mode.
Setting the Wait Time
Delay Configuration has four fields, Days, Hours, Minutes, and Seconds, that combine into the total wait. All four can be used together, for example two days, three hours, and thirty minutes adds up to one single delay.
| Field | Unit it adds |
|---|---|
Days | Whole days. |
Hours | Whole hours. |
Minutes | Whole minutes. |
Seconds | Whole seconds. |
Since all four fields combine into one total wait, only the units a delay actually needs have to be set; a thirty minute delay only requires the Minutes field, leaving Days, Hours, and Seconds untouched.
Two Ways to Set Each Field
Every field has its own small icon on the left that switches it between two input modes, independent of the other three fields.
- List mode, the list icon.
Turns the field into a plain number box; type the value directly, for example
2for two days. - Dynamic Mention mode, the @ icon. Lets the field's value come from elsewhere in the workflow instead of a fixed number, the same Dynamic Mention mechanism used on fields like an Action node's Record ID.
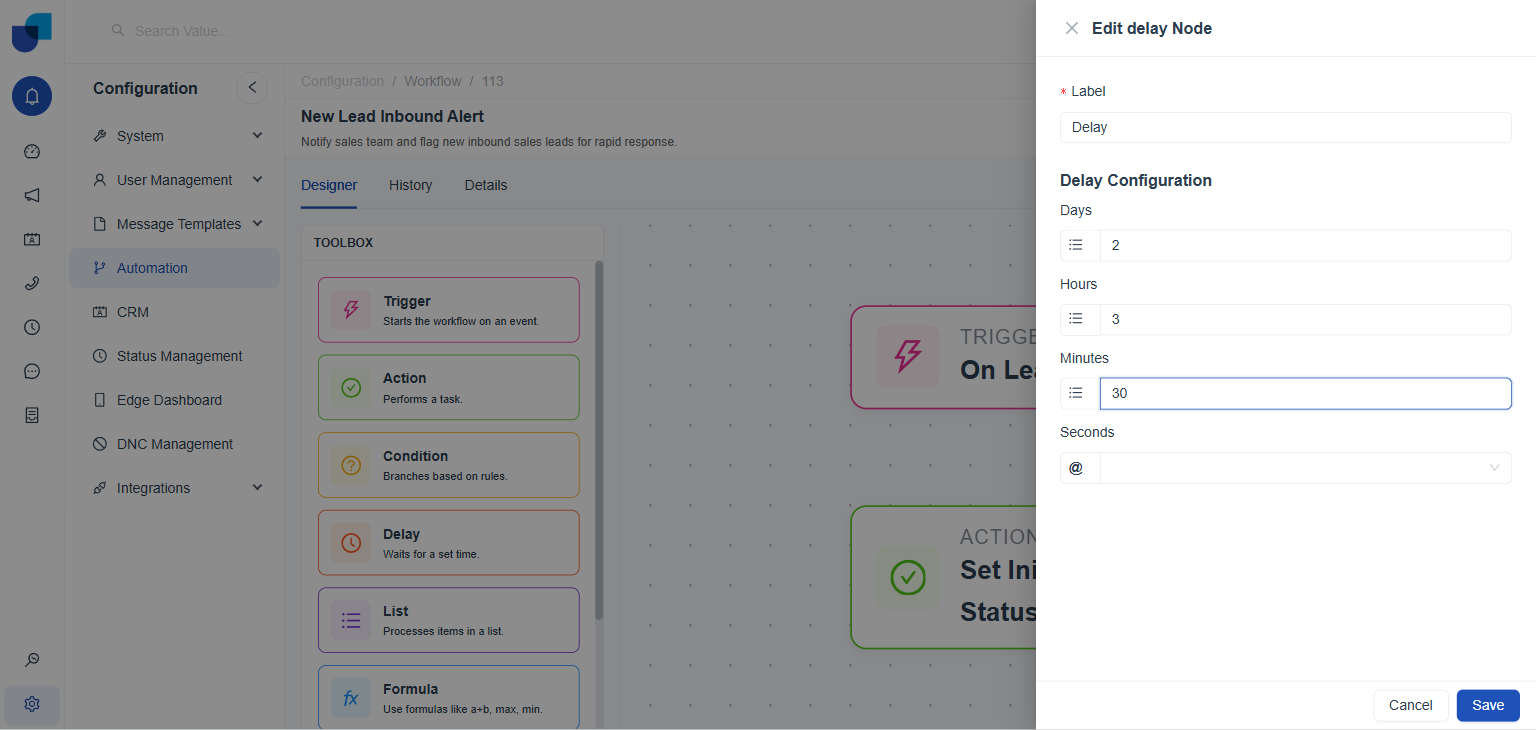
Days, Hours, and Minutes switched to list mode and filled in directly; Seconds left in its default Dynamic Mention mode.
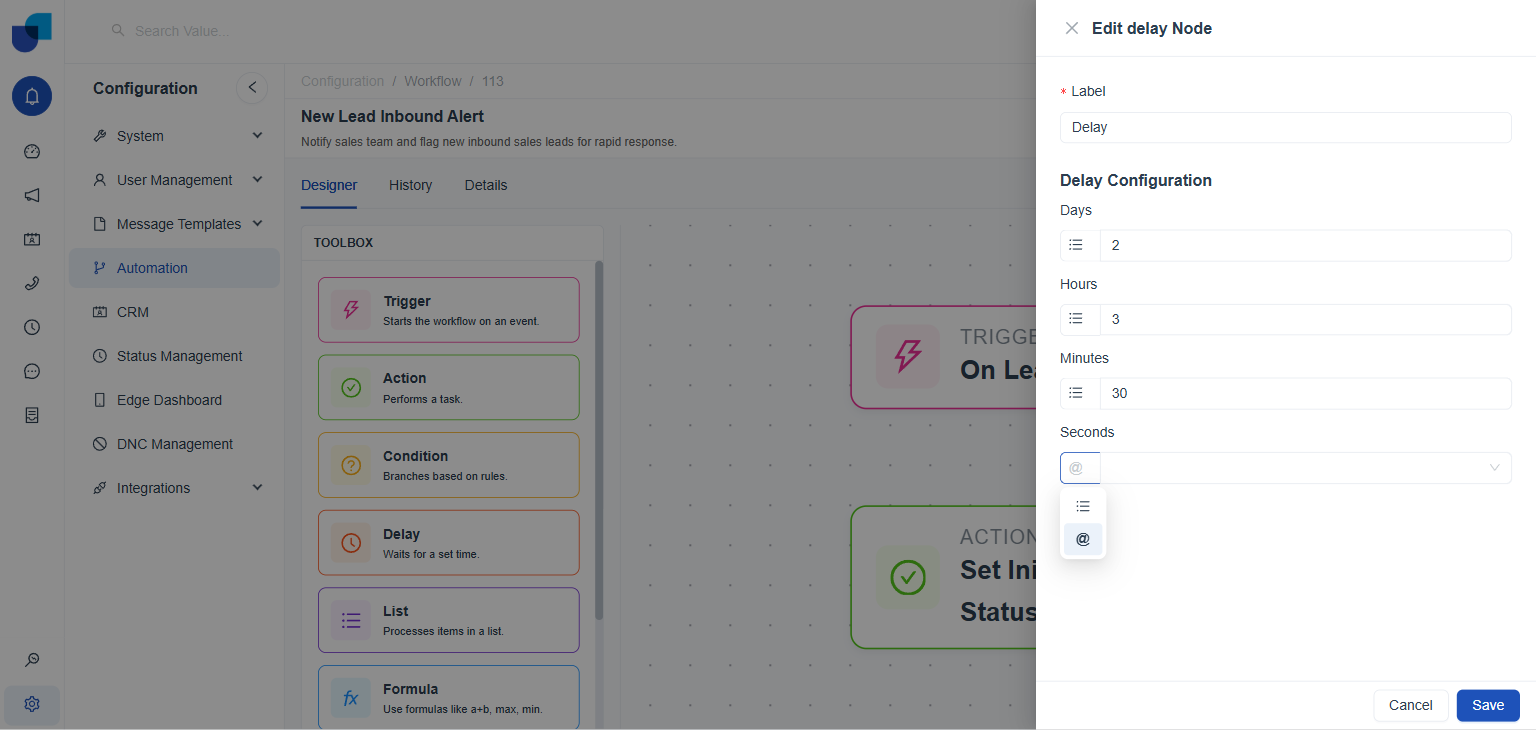
Clicking a field's left icon opens this small switcher: list mode on top, Dynamic Mention mode below.
Each field toggles between list mode and Dynamic Mention mode, and list mode accepts a typed number directly. What the Dynamic Mention mode actually lists as available values was not captured live; check directly, and remember it will only list data from a node this one is actually connected to.