How to Configure the Integrations Use Case in UNICONNECT AI
This page is the technical companion to Integrations Use Case Scenario. The steps run in the order a person follows them, and each part names the requirement from the scenario that it meets.
Part 1: Create the Collection
Requirement: no custom development, and a safe connection
The collection holds everything shared by the PolicyHub APIs. See Collections.
- Open Configuration → Integrations → API Integrations and click Create.
- Enter PolicyHub KYC as the Collection Name.
- Enter
https://api.policyhub.example.comas the Base URL. - Add a default header
Content-Typewith the valueapplication/json. - Set Auth Type to Bearer Token and enter the token.
- Click Save.
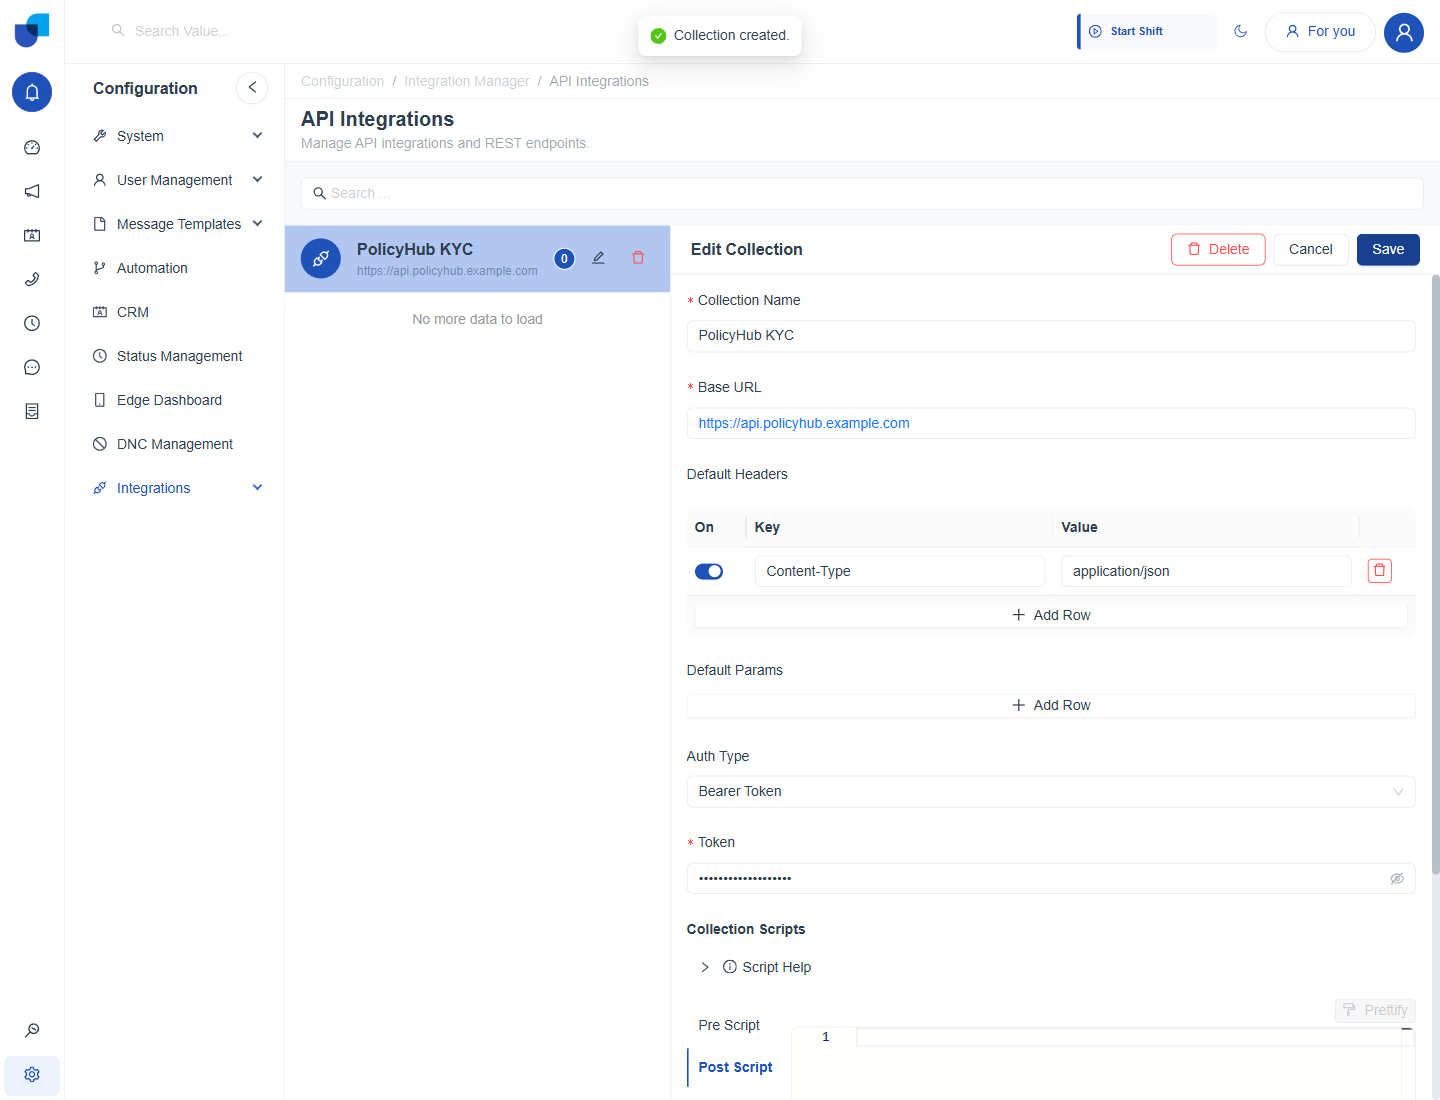
Figure 1. The PolicyHub KYC collection after it is saved.
Part 2: Create the APIs
Requirement: PolicyHub data inside the CRM
Two APIs read customers from PolicyHub. See Creating an API and Variables.
- Open the PolicyHub KYC collection and click Create.
- Name the request List Customers and set its path to
/v2/customers. Use the GET method. - Save it, then create a second request named Get Customer.
- Set its path to
/v2/customers/{{customerId}}and save. The customerId variable appears on the Variables tab automatically.
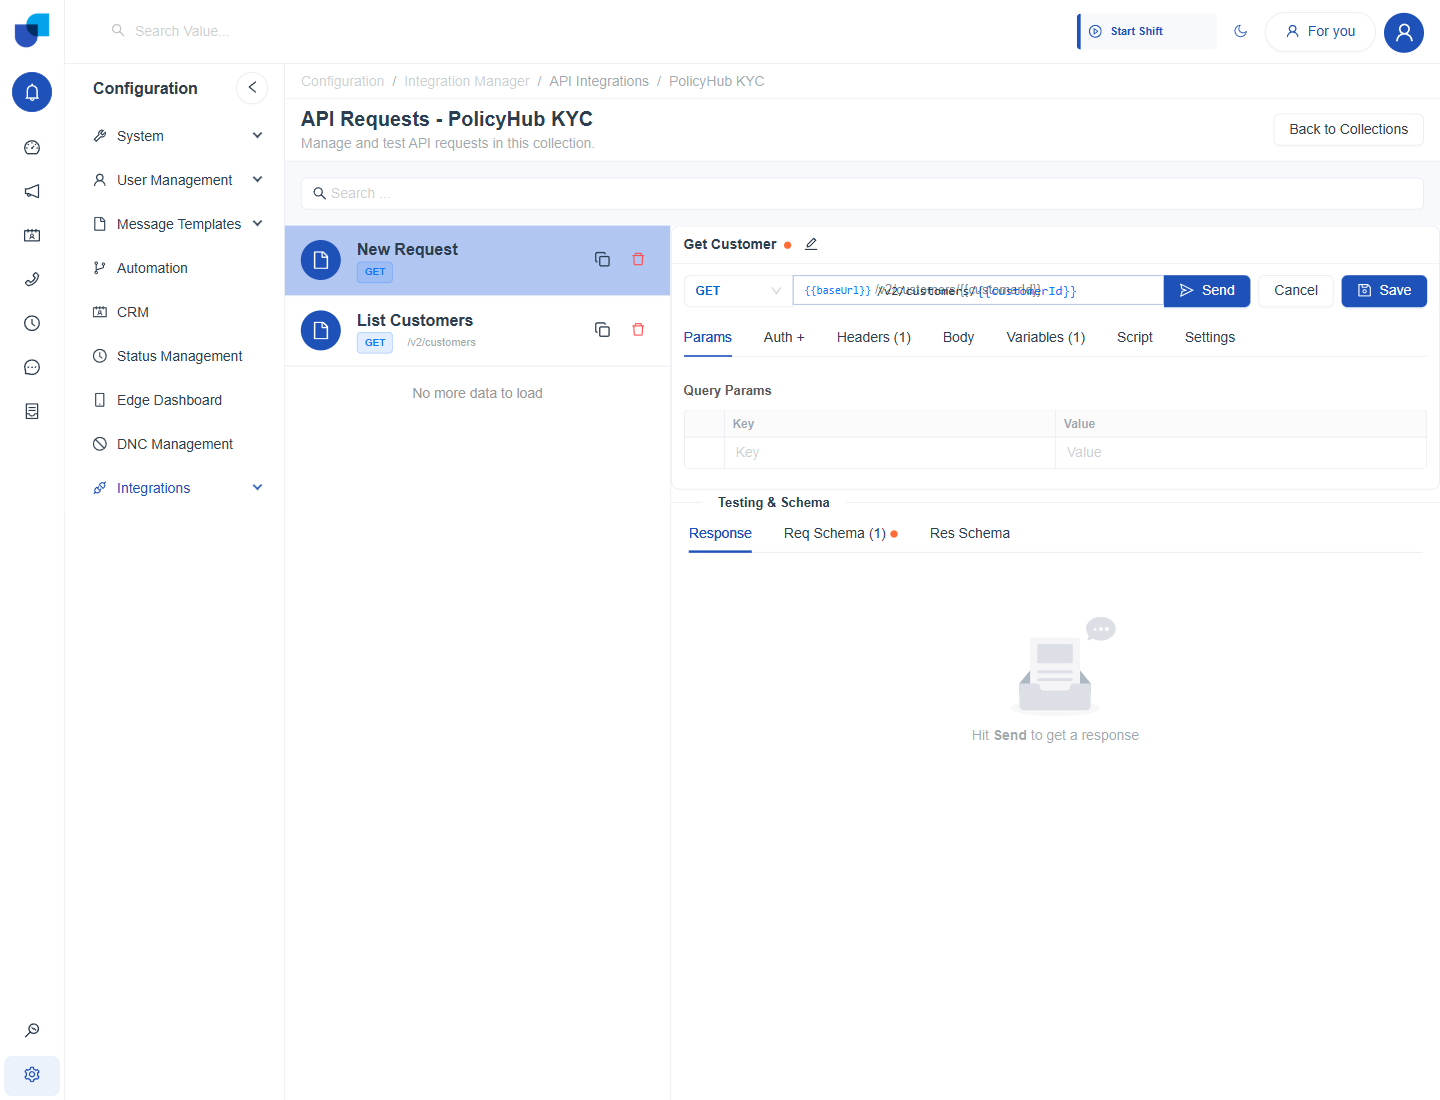
Figure 2. The Get Customer request with the customerId variable in its path.
Part 3: Reshape the Responses
Requirement: PolicyHub data inside the CRM
PolicyHub replies in its own format, so each API gets a Post Script. See Response Format the CRM Requires and Pre and Post Scripts.
- Open List Customers and the Script tab, then the Post Script tab.
- Enter the script that returns data and pagination.
- Save the API, click Send, then save again so the response schema is recorded.
- Repeat for Get Customer with the single record format.
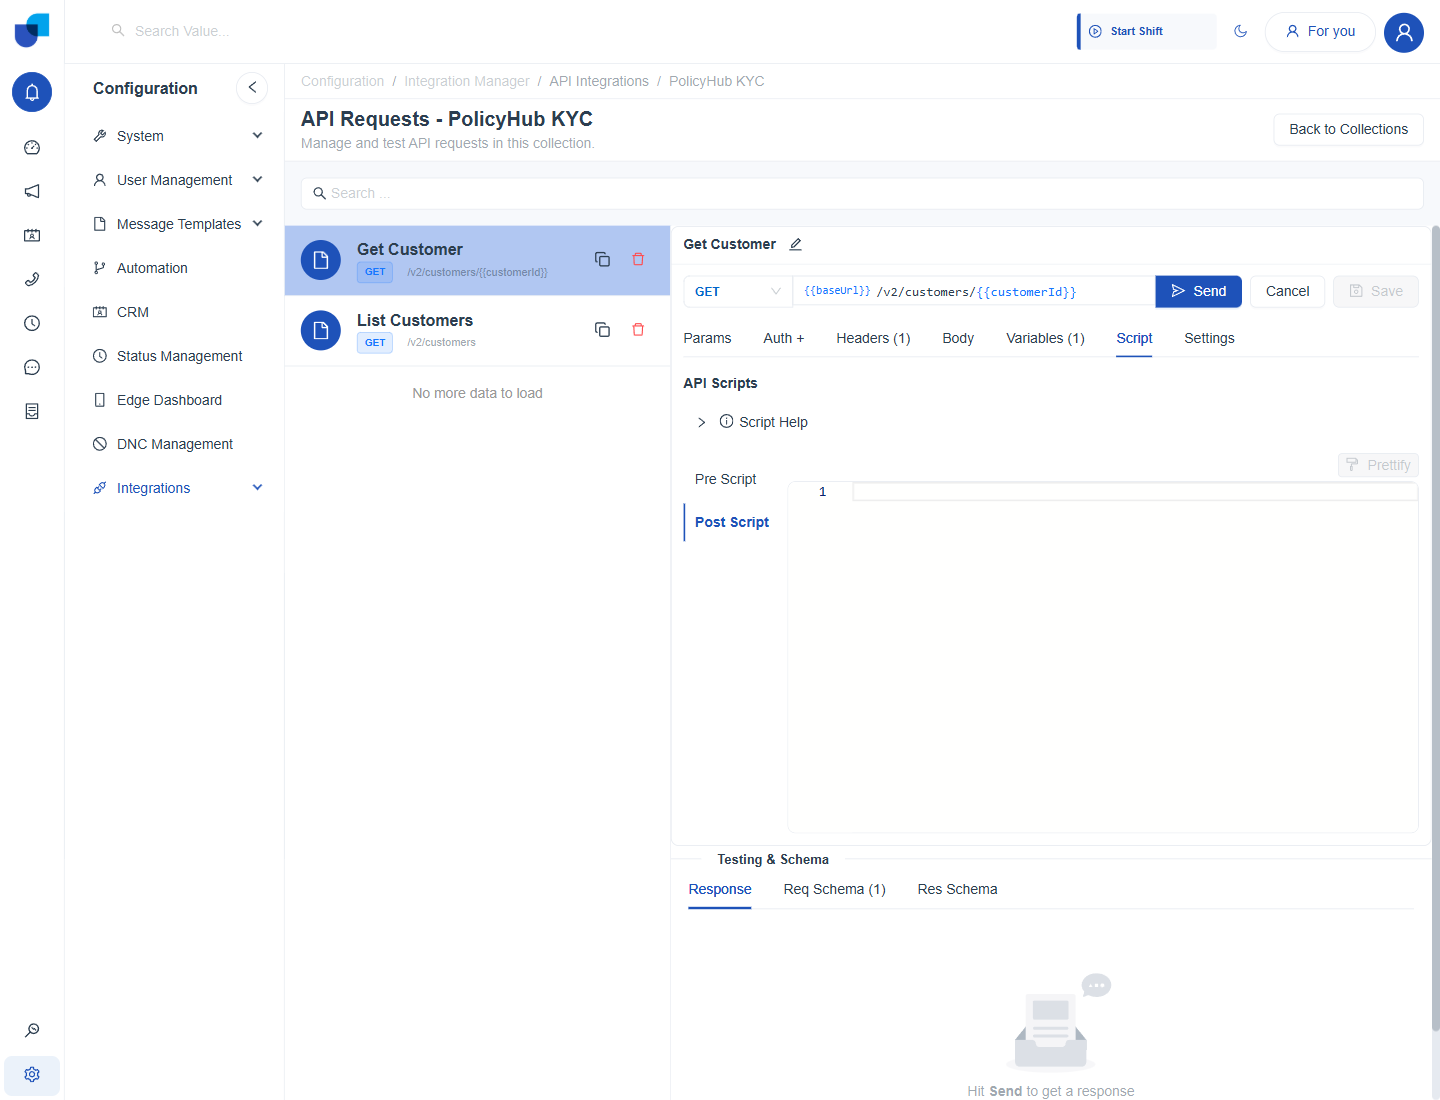
Figure 3. The Script tab, where the Post Script that reshapes the response is entered.
Part 4: Renew the Token Automatically
Requirement: a safe connection
A login API and a collection script keep the token current. See Collection Scripts and Authentication.
- Create an API named Auth for PolicyHub's login endpoint.
- Open the collection's Pre Script and use
@to insert@Auth. - Enter the token pattern script. It reuses the saved token, or runs Auth and saves the result.
- Add a Post Script that refreshes the token and retries when it expires.
Part 5: Create the External Module
Requirement: PolicyHub data inside the CRM
The Policy Customers module reads from the two APIs. See Creating an External Module and Assigning APIs to a Module.
- Open Configuration → CRM and click Create.
- Enter Policy Customers as the name and a description.
- Set Source Type to External and choose PolicyHub KYC under Select Collection.
- Assign List Customers as the Get All API and Get Customer as the Get API. Leave the Post, Update and Delete slots empty.
- Click Save, then open the module's Fields tab and click Fetch Schema Response. The fields id, name, phone and status are created from the saved response.
- Click the star on the id field to mark it as the primary key, and confirm.
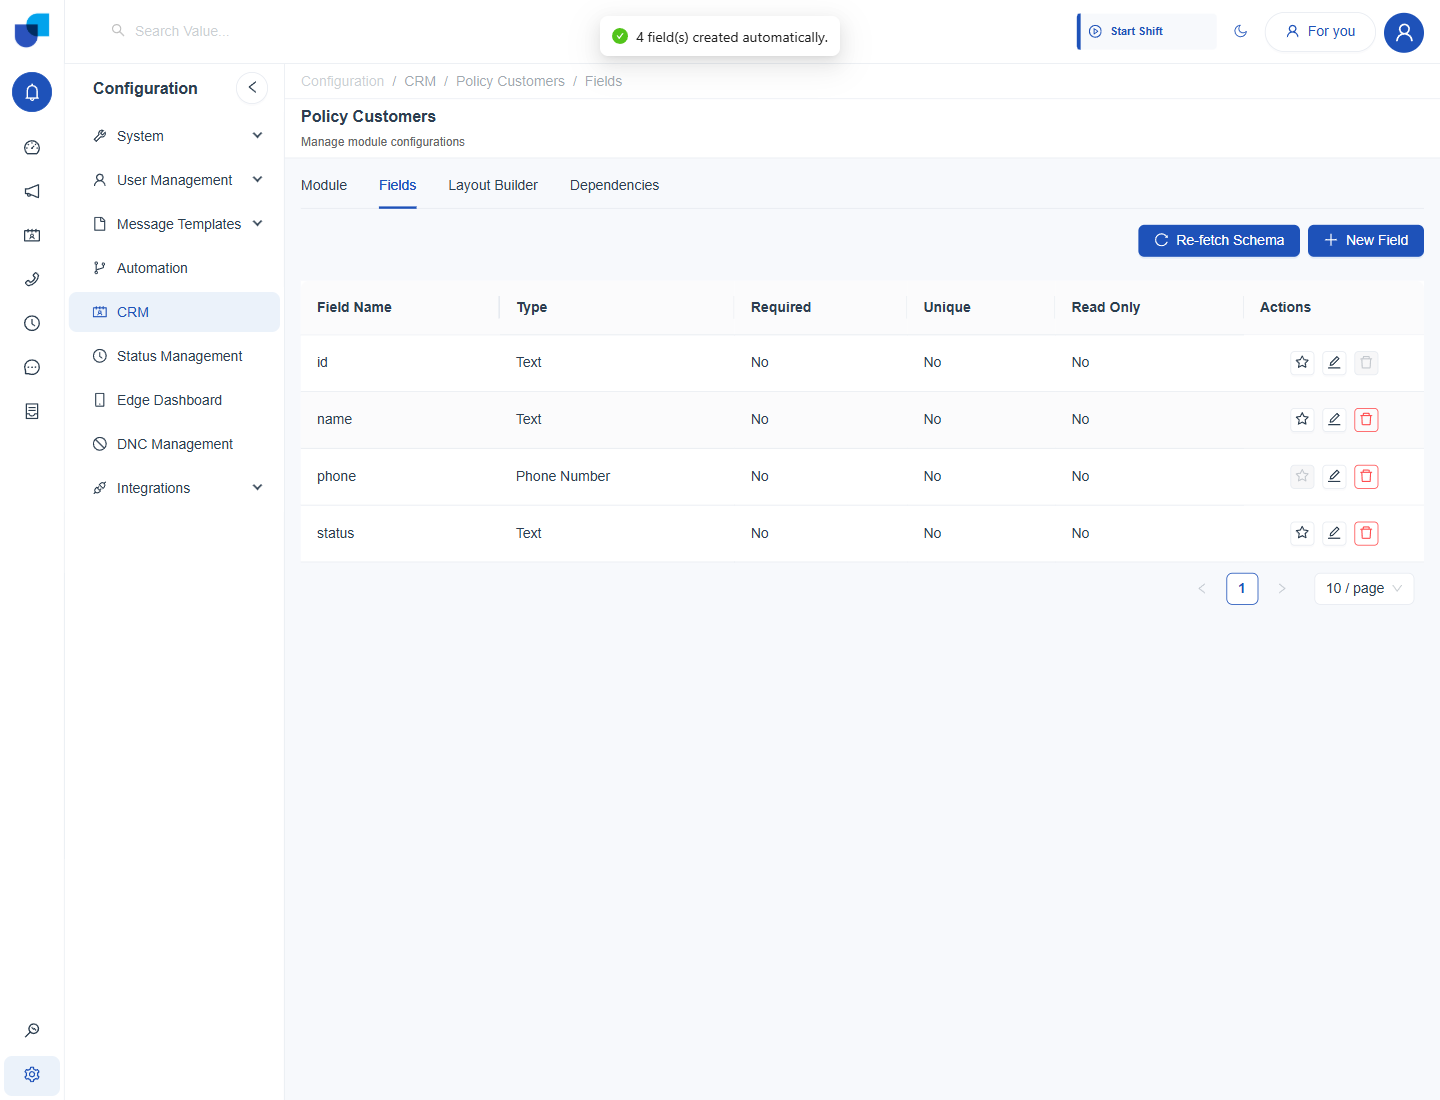
Figure 4. The fields created from the API response, ready for the primary key to be marked.
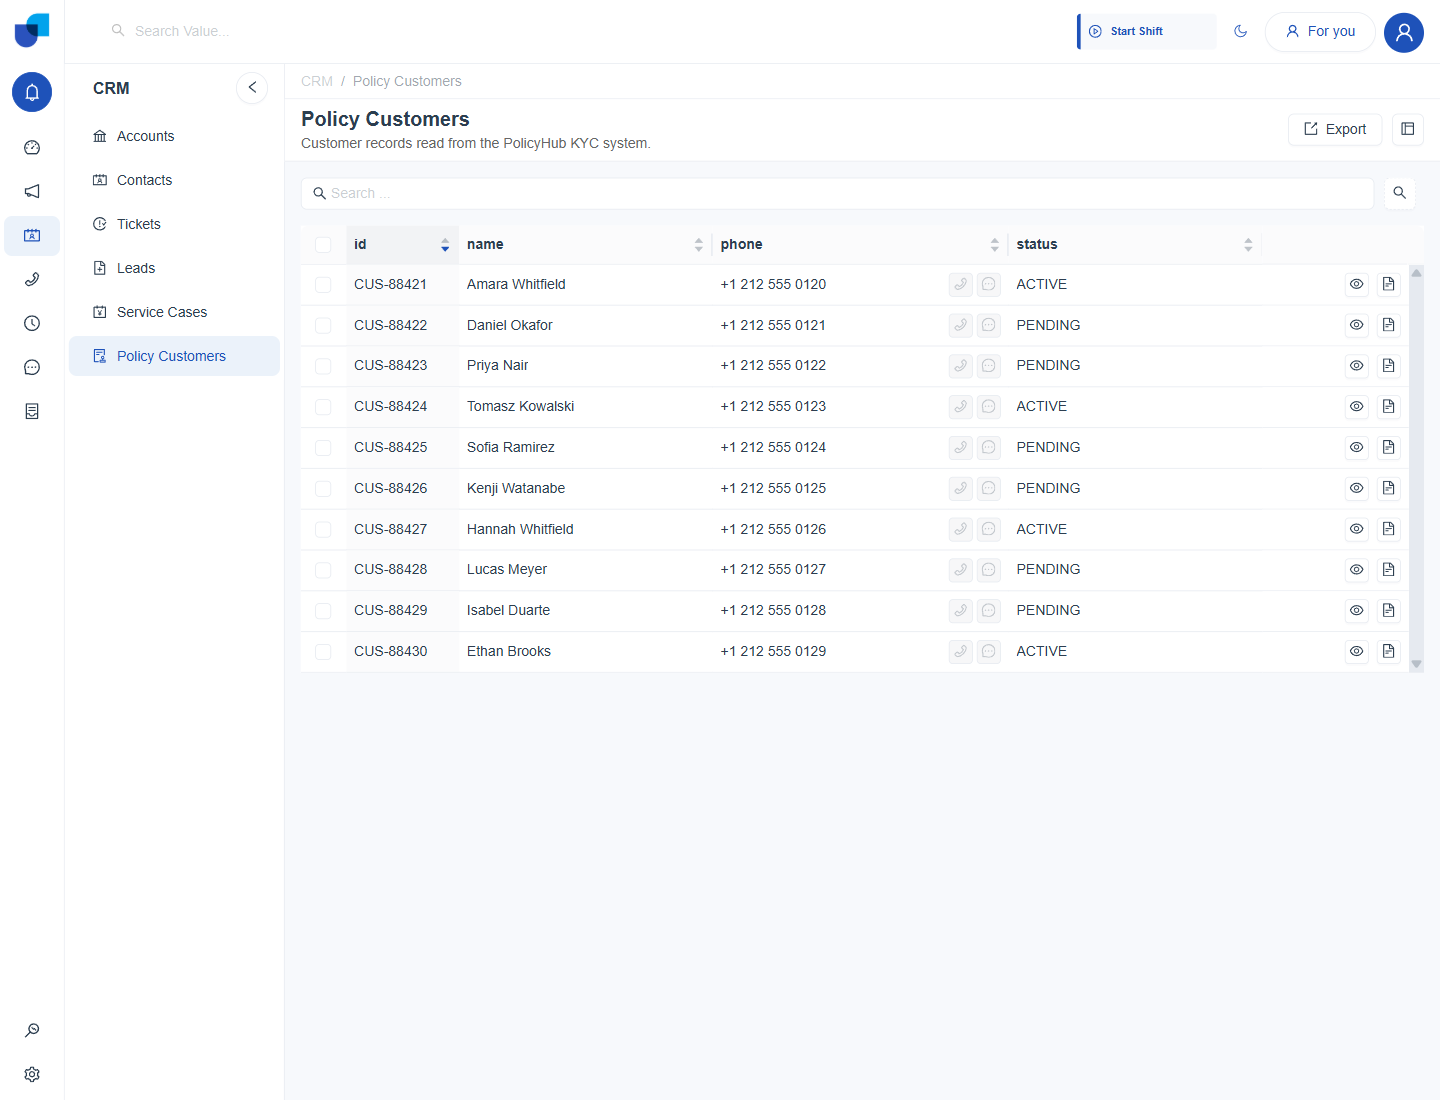
Figure 5. The finished Policy Customers module, listing customers read through the List Customers API.
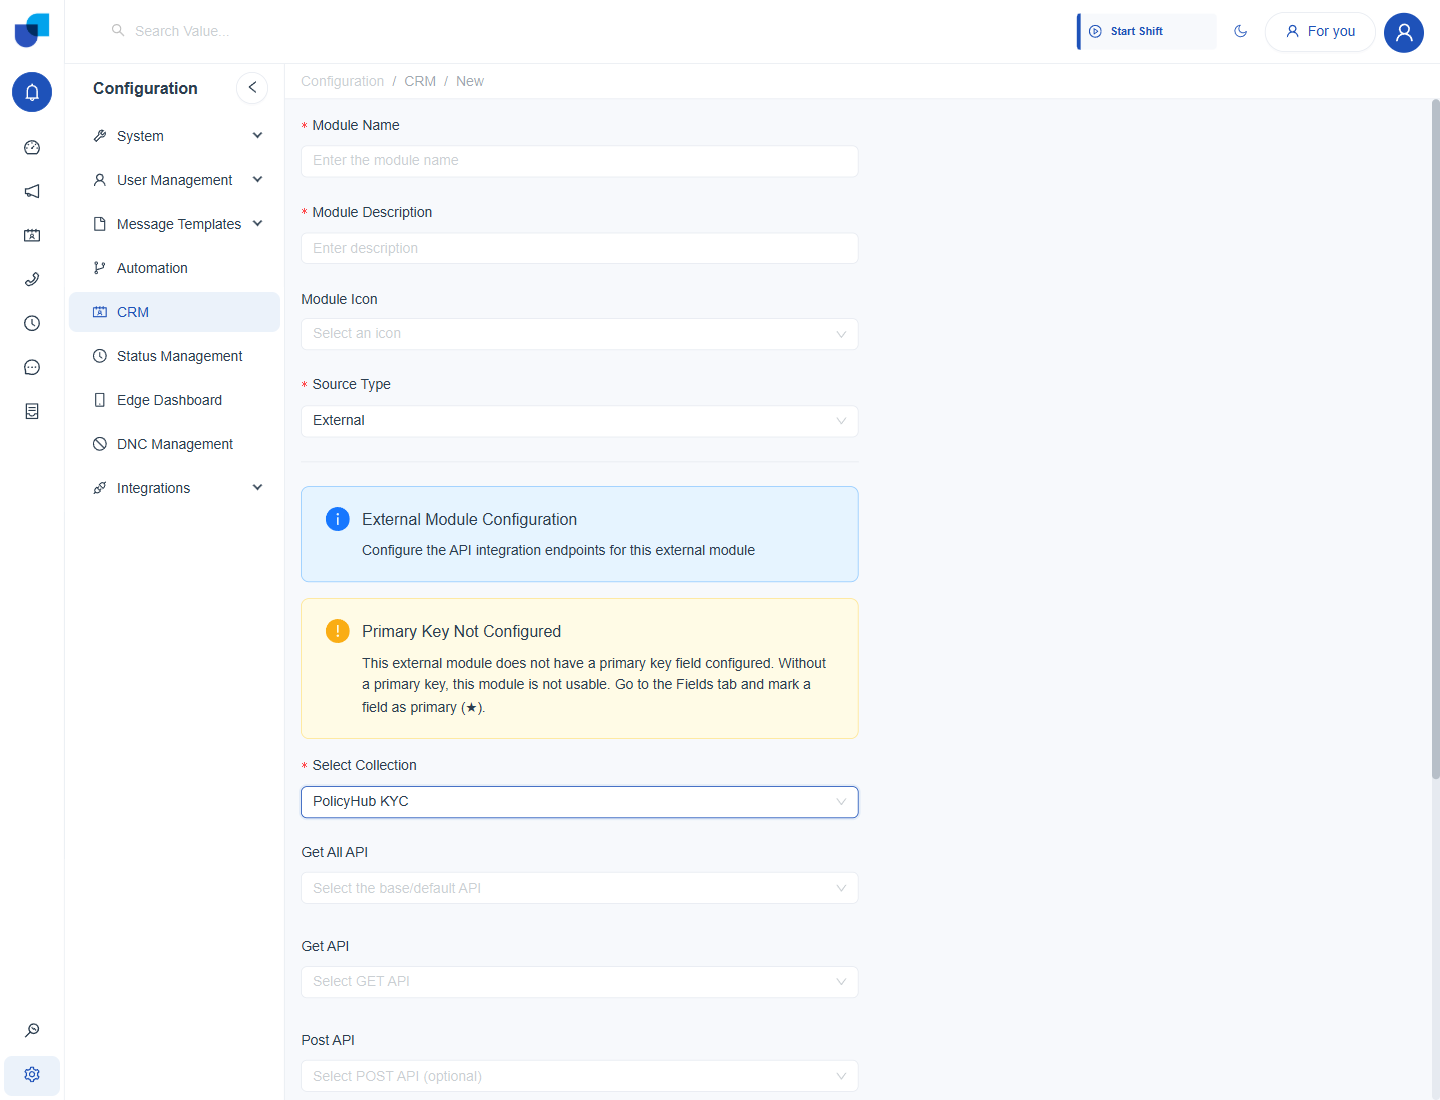
Figure 6. The external module form with the PolicyHub KYC collection chosen and the API slots ready to assign.
Part 6: Connect the BI Tool
Requirement: data for the analysts
The analysts get a service account of their own. See Service Account Configuration and Connecting BI and Database Tools.
- Open Configuration → Integrations → Service Accounts and click Create.
- Enter a Client ID such as bi tool, and choose a limited role and the analysts' group.
- Click Generate Service Account and store the secret securely. It is shown only once.
- Give the analysts the PostgreSQL connection settings.
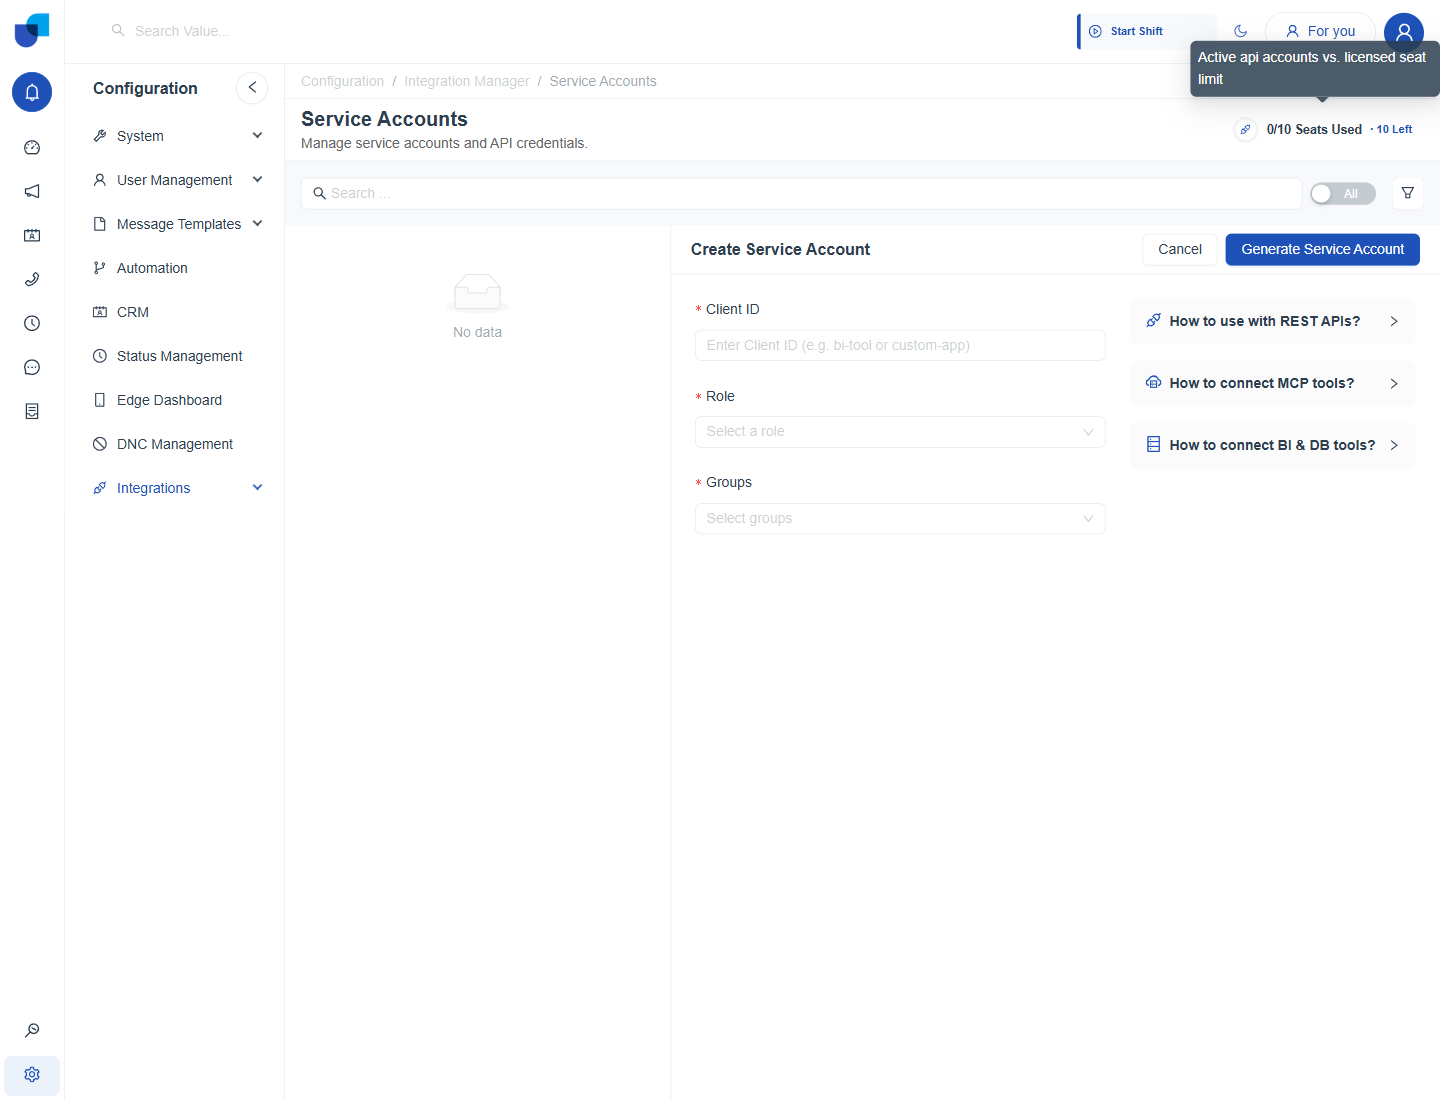
Figure 7. The Create Service Account form used for the analysts' BI tool.
Part 7: Receive Renewal Notices
Requirement: events pushed in
A webhook gives PolicyHub an address to post to. See Webhooks.
- Open Configuration → Integrations → Webhook and click Create.
- Enter Policy Renewal Notice as the name.
- Paste a sample renewal notice into JSON Input and check the schema.
- Click Create Webhook and give the generated address to PolicyHub.
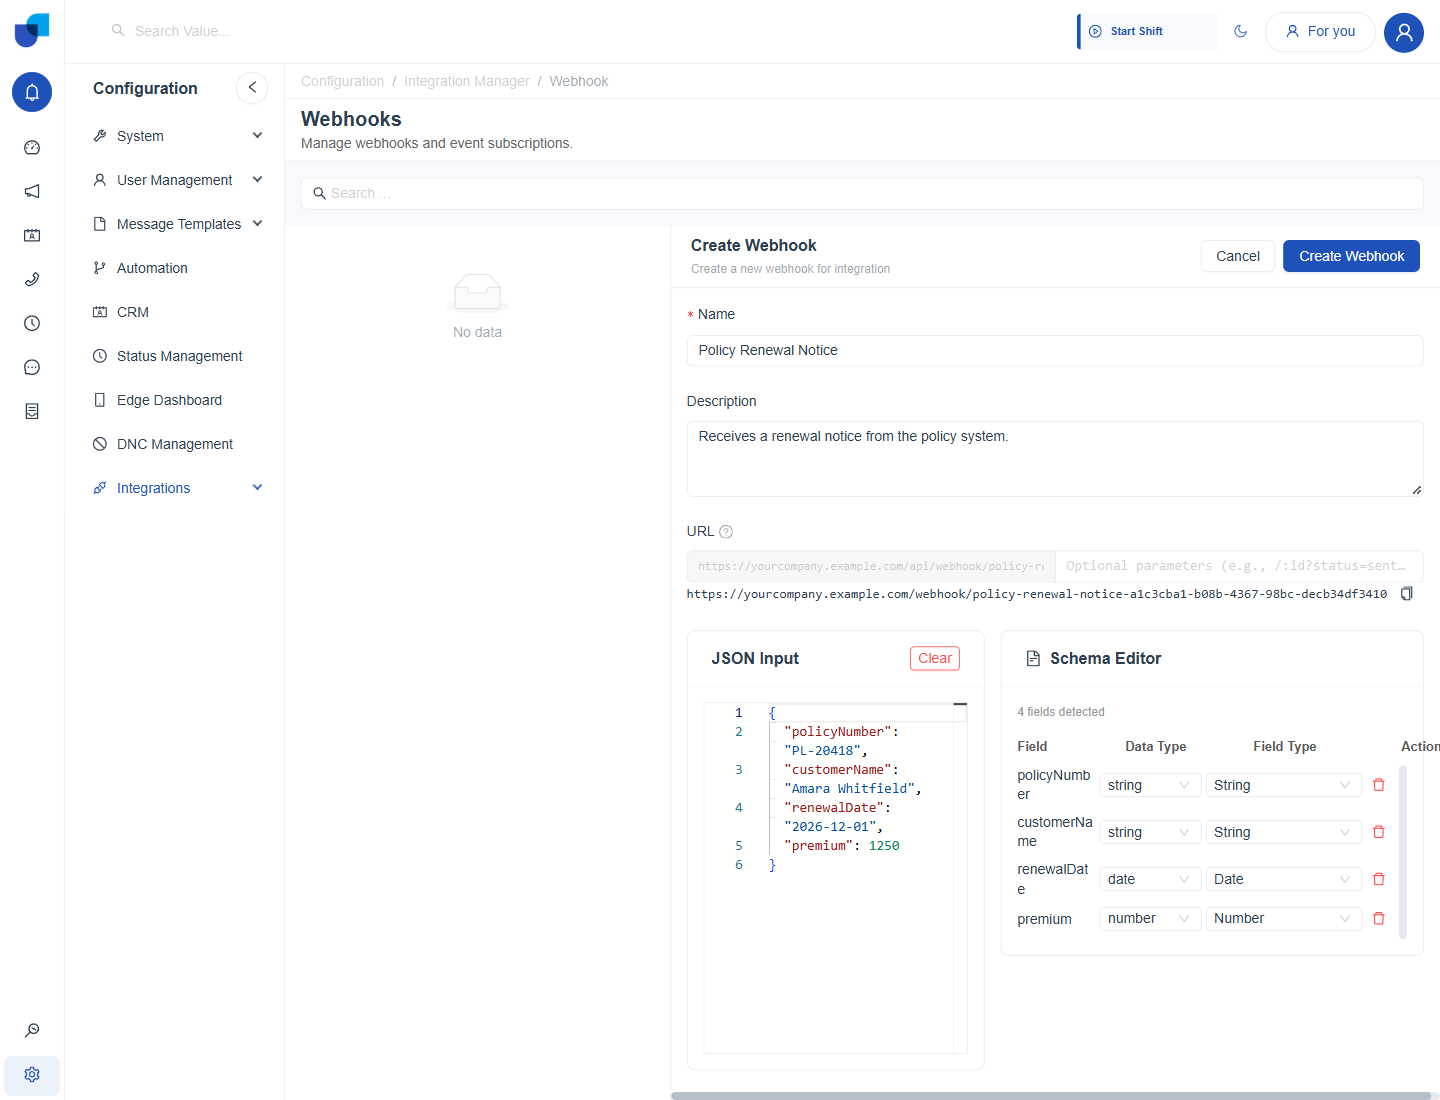
Figure 8. The Policy Renewal Notice webhook with its sample payload and detected schema.
Part 8: Limit Who Manages Connections
Requirement: clear limits
- Open Configuration → User Management → Roles.
- Open the administrators' role and expand System Configuration.
- Switch API and Webhook on.
- Leave both off in the role agents use.
Check the Policy Customers module with an agent's role before announcing it. The agent needs permission to view the module, but not the Integrations permissions.